
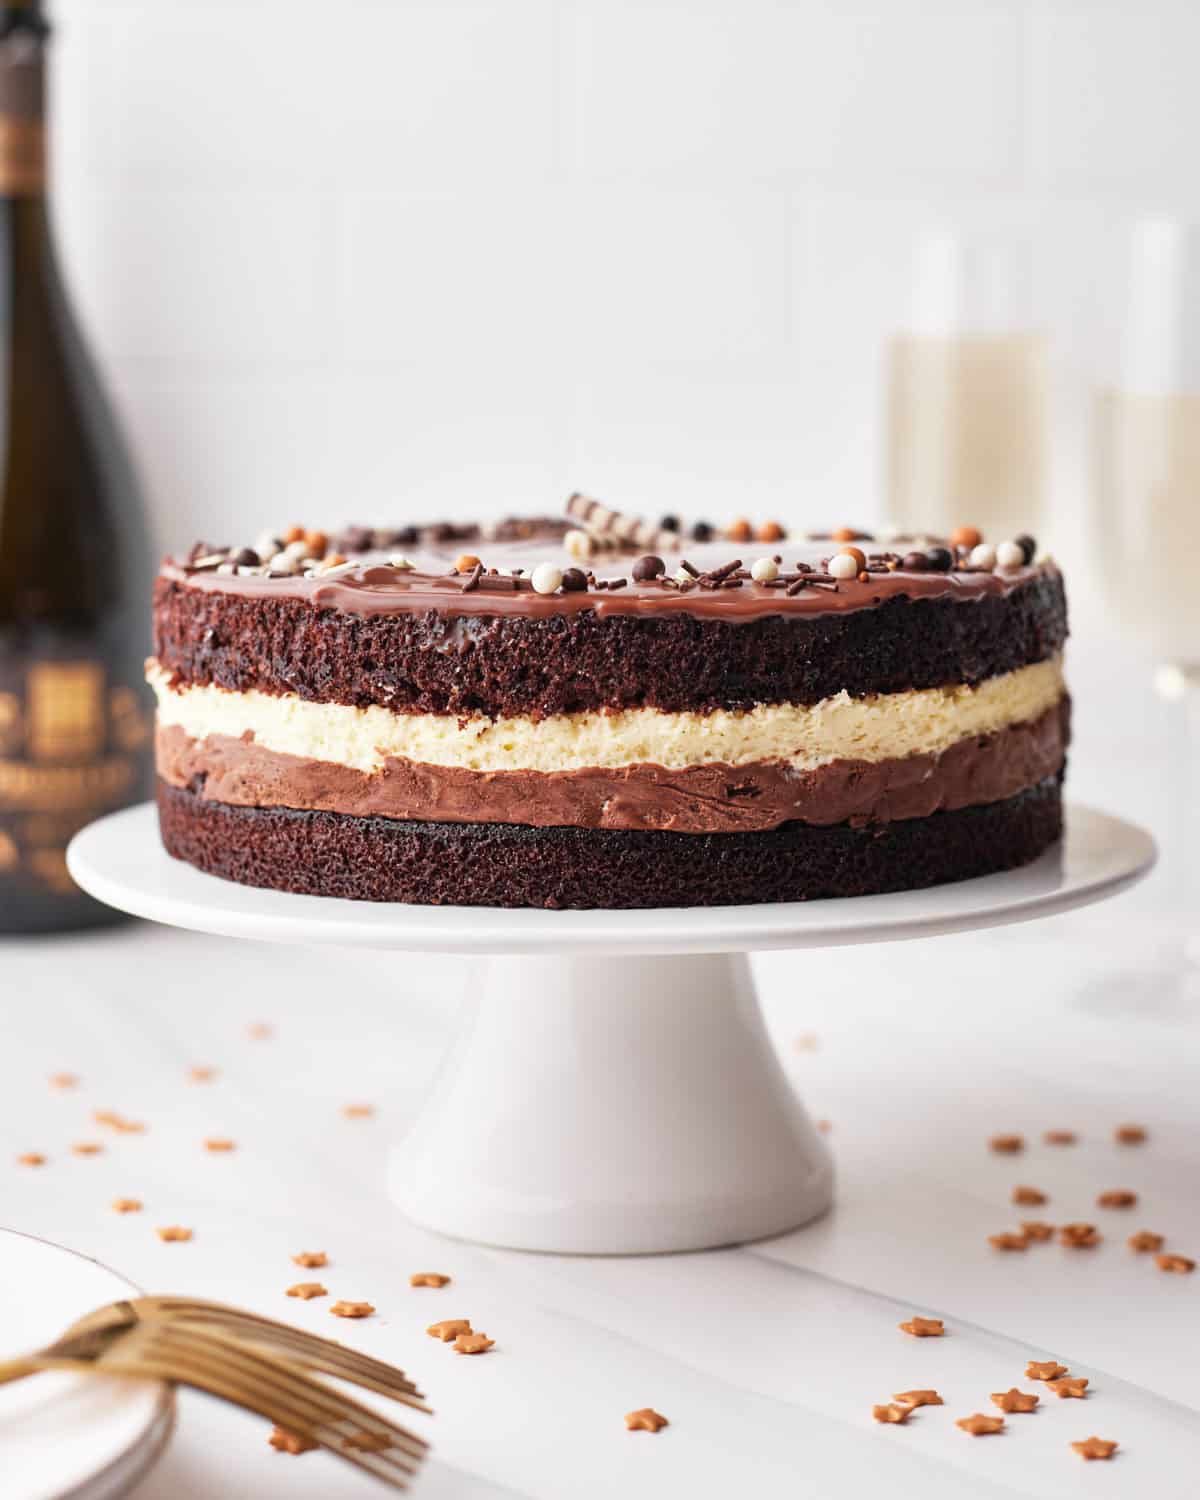
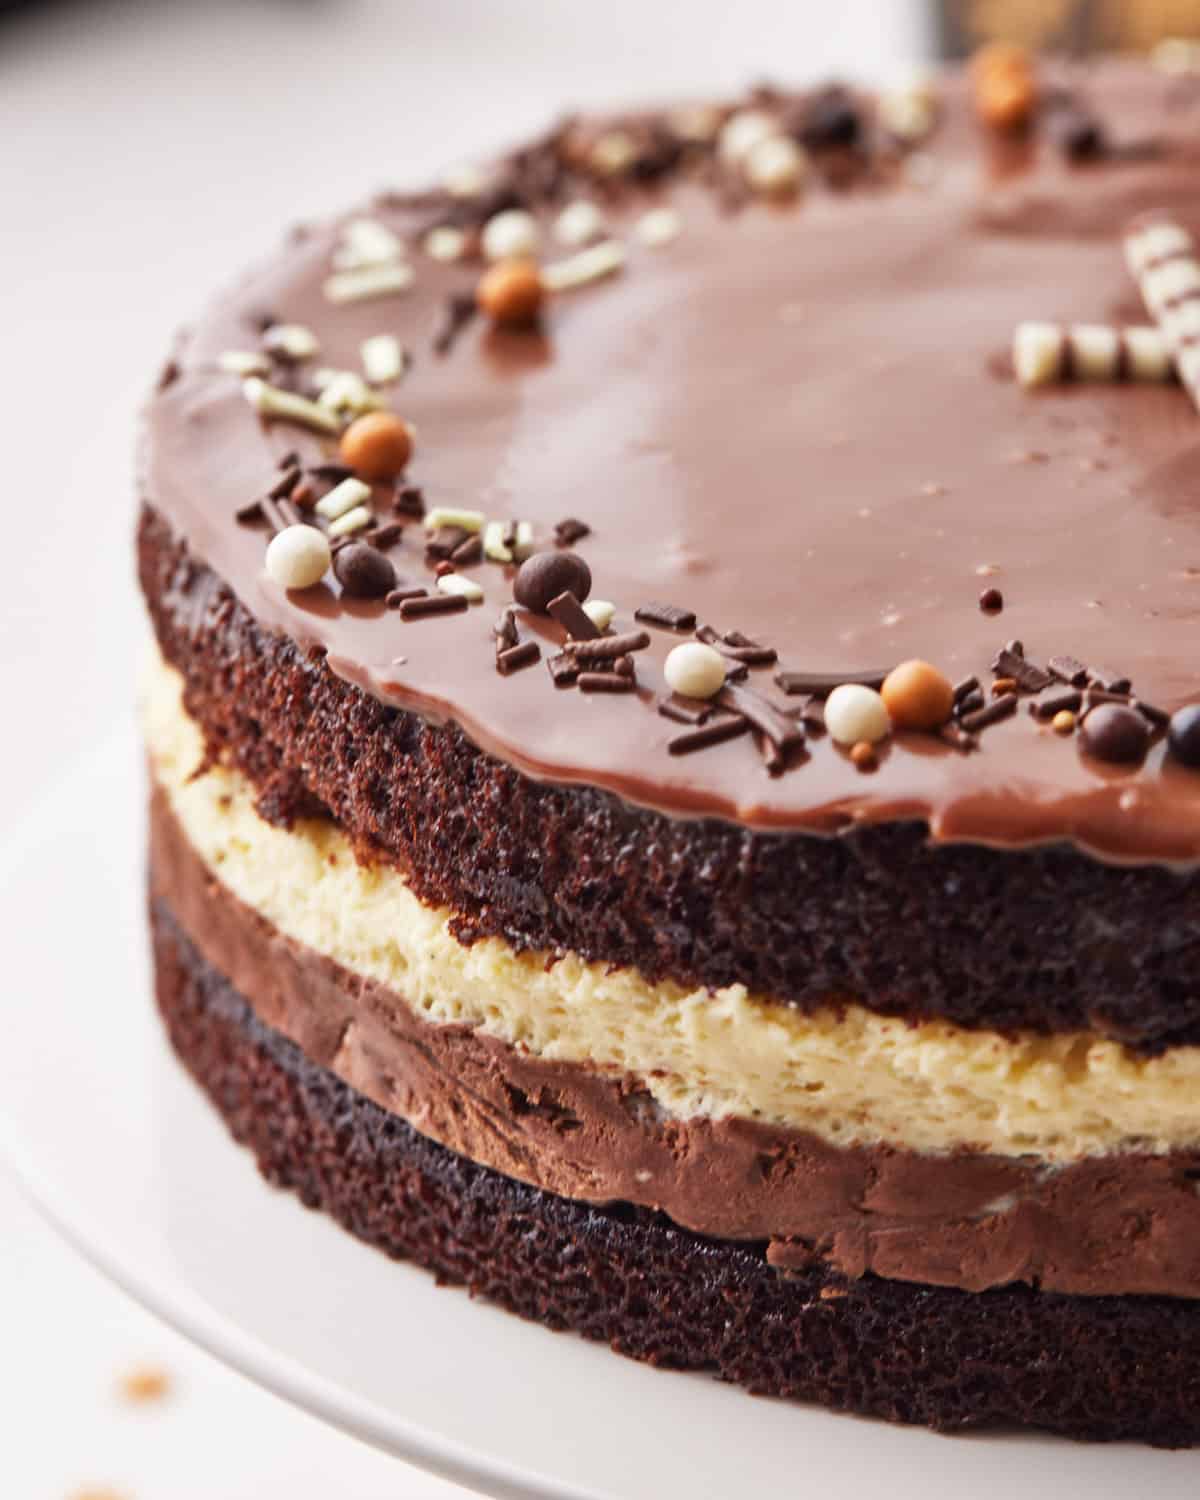
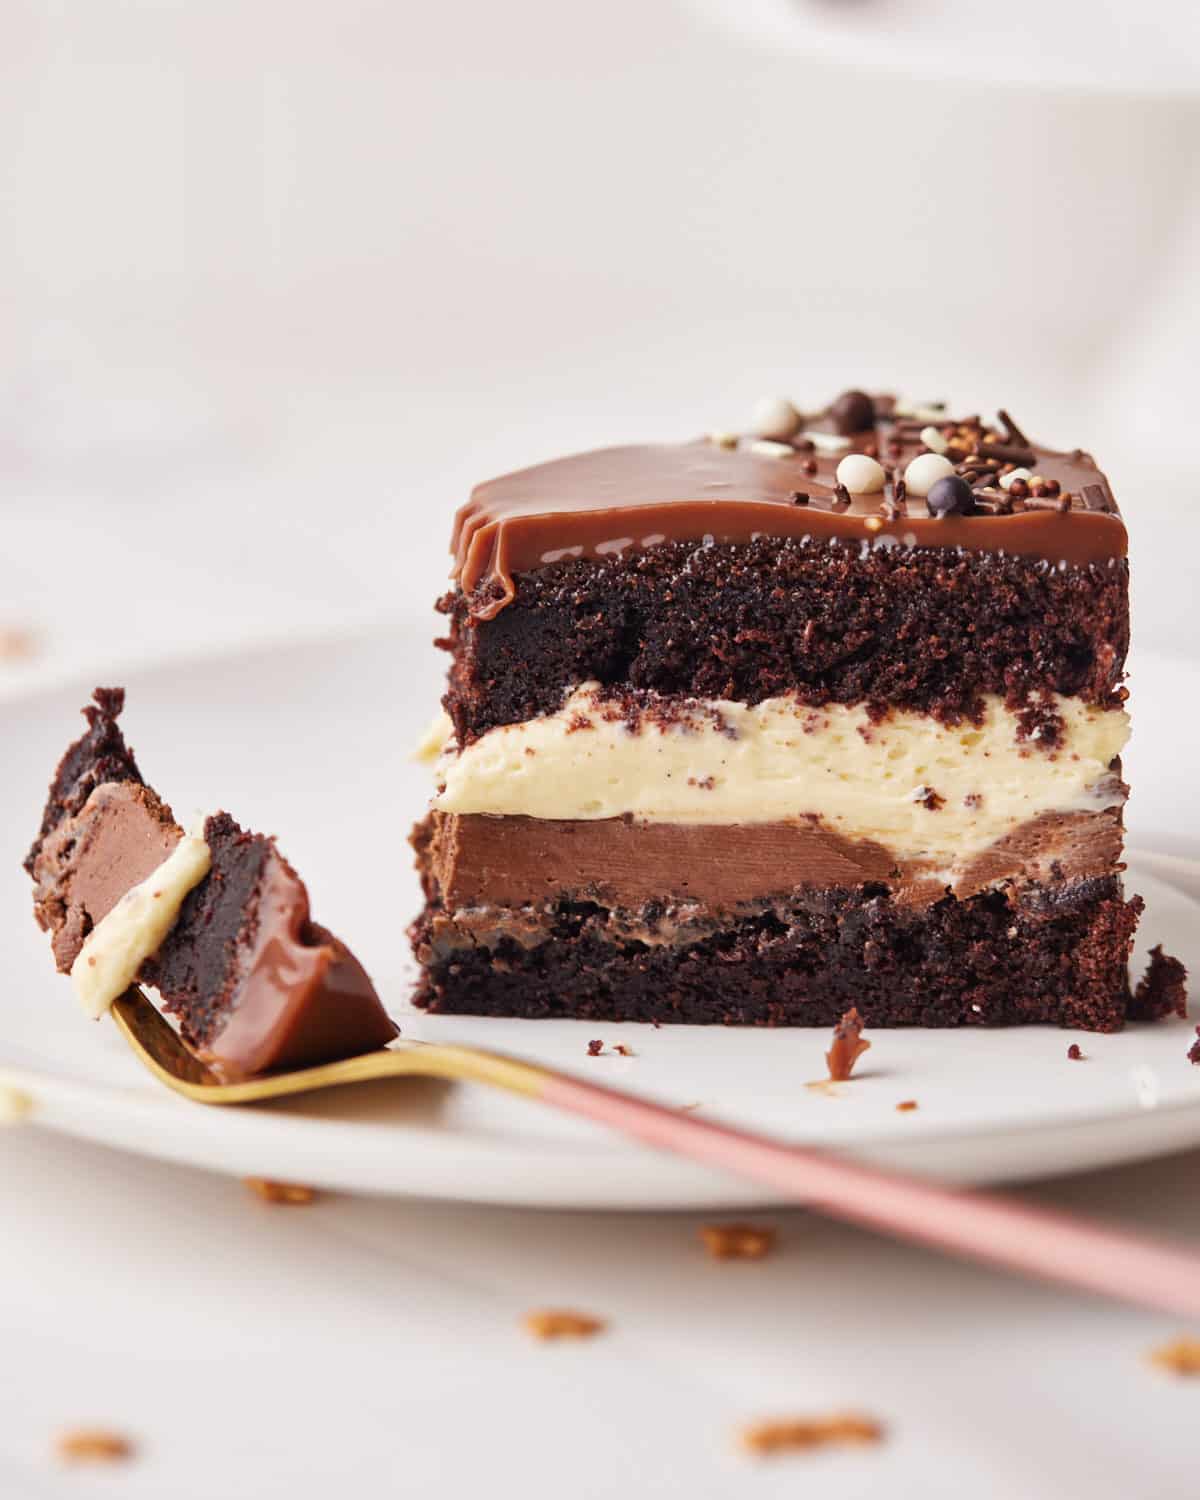
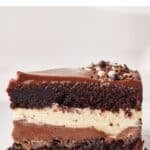
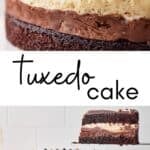
If you're looking for a showstopping dessert for a special occasion, look no further than this incredible Tuxedo Cake. Layers of rich chocolate cake, creamy chocolate mousse, white chocolate mousse, more chocolate cake, and then delicious chocolate ganache to top it all off - this cake is a chocolate lover's dream.
Reader Review:
"This cake is unbelievably delicious and surprisingly simple to put together!! The rich custard in the filling makes it so luxurious as compared to a standard ganache, and the CAKE!!! My god woman it's the moistest cake I've ever made, I'm obsessed. Thanks for a great recipe!"
⭐⭐⭐⭐⭐ - Leah
I'm not usually one for a Costco cake (or any grocery store cake for that matter), but I've heard people talking about this tuxedo cake and had to see what the hype was all about. Homemade is always better in my opinion, so I wanted to create a delicious, natural homemade version of the Costco Tuxedo cake for you to make and enjoy at home.
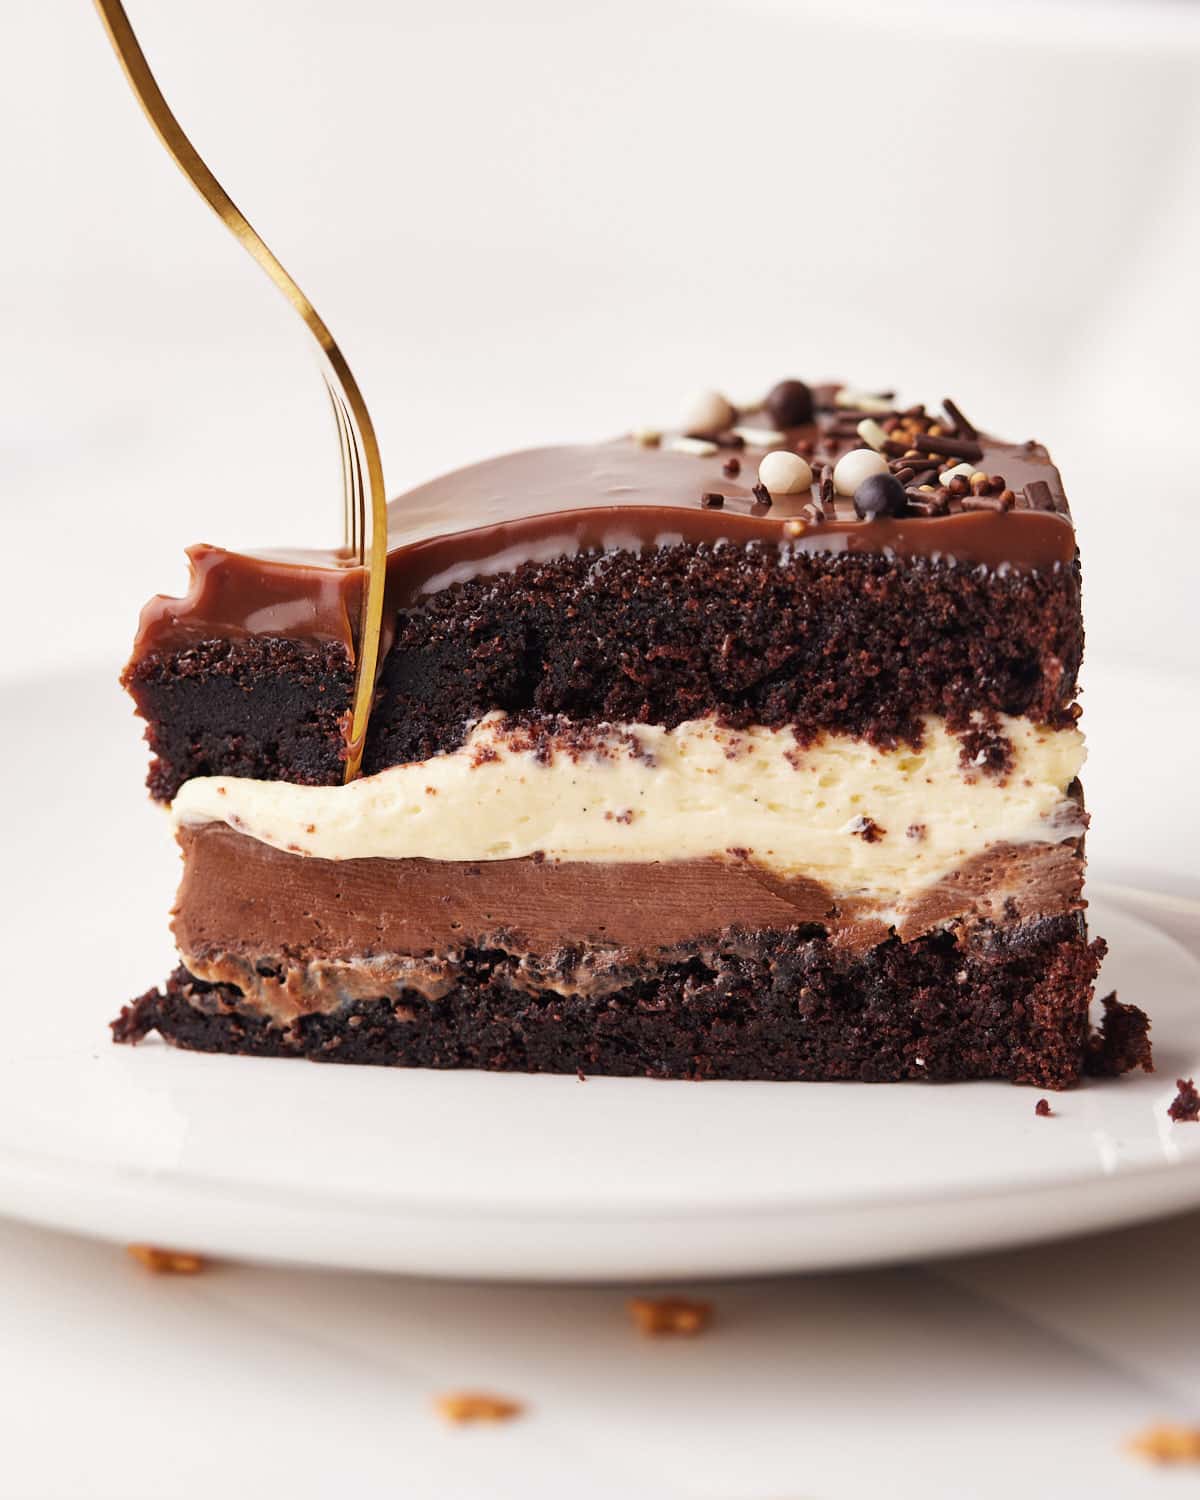
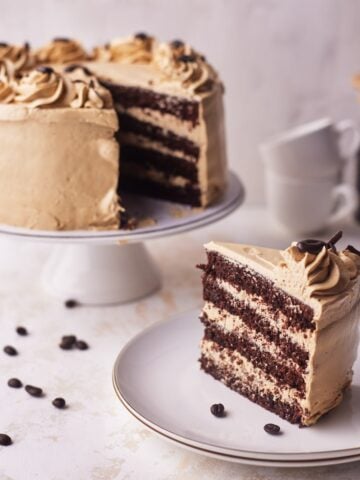
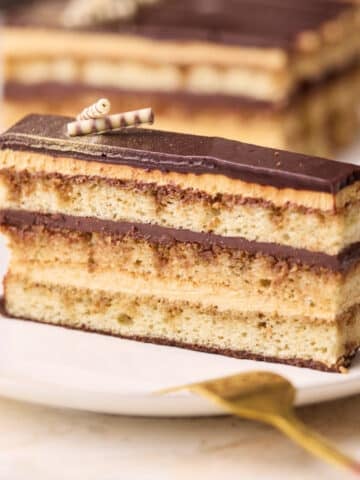
I am no stranger to baking up layers upon layers of chocolate - just like in my Opera Cake or Chocolate Fudge Cake recipes. But this Tuxedo cake is really something special. The textures and flavors of each of the different layers just complement each other so beautifully and create an explosion of chocolate flavor in your mouth. My husband even says it's his new favorite cake - which is quite a feat considering the number of baked goods that man eats on a weekly basis.
Even though it looks incredibly impressive and quite complex, I have broken down this recipe into really easy-to-follow steps so it's super simple to make at home - I promise! You'll be labeled a certified pastry queen after presenting this at your next family gathering!
Jump to:

Why You'll Love This Tuxedo Cake Recipe
- It is the best cake chocolate lovers could hope for, with multiple layers of chocolatey goodness.
- It looks stunning and impressive but is deceptively easy to make.
- You can make the entire recipe ahead of time and let it sit in the fridge until you are ready to serve up your masterpiece.
Tuxedo Cake Ingredients

- Flour - Use all-purpose flour for this tuxedo cake, it will help give our chocolate cake layers enough structure to support the mousses.
- Sugar - Regular granulated sugar is best, make sure it's extra-fine (caster sugar in the UK).
- Cocoa Powder - Make sure you use dutch processed cocoa powder in this recipe - natural cocoa powder may make the chocolate cake too dense and throw off the texture.
- Milk - Whole milk is best, but you can use whatever milk you have.
- Eggs - We need whole eggs for the cake and egg yolks for the chocolate mousses. Use large eggs and always free-range if you can.
- Sour Cream - This will help to make the chocolate cake really nice and soft so it won't smoosh your mousse as you put your fork into it. It will give a beautifully soft texture that cuts like butter.
- Oil - I use vegetable oil but you can use any kind of flavorless oil like canola. The oil helps to keep the chocolate cake moist.
- Espresso Powder - You can skip this if you want to, but I find the espresso powder just helps to bring out the flavor of the chocolate. It won't taste like coffee at all, it just enhances the chocolate flavor.
- Vanilla - We will be using the vanilla in the cake and the mousses, so try to use a high-quality vanilla extract or vanilla bean paste if you can get your hands on one.
- Heavy Cream - It's very important that you use heavy cream, heavy whipping cream, or double cream, the fat content should be at least 35%. If the fat content is lower than this the mousse may not hold its shape properly.
- Chocolate - You'll need dark chocolate and white chocolate to make the two different mousse layers. I also used milk chocolate to make the ganache on top, but you can make a dark chocolate ganache if you prefer.
See recipe card for quantities.
Equipment
- Whisk - The majority of this recipe requires only a regular hand whisk and a bowl.
- 8-inch Round Cake Pans
- Dessert Ring - Also known as a cake ring, I like to use this expandable dessert ring so I can adjust it to whatever size I need. If you don't have a dessert ring, see my section above about how to make a chocolate mousse cake without one.
- Saucepan - A small saucepan will be used for both the chocolate mousse base and the ganache.
- Electric whisk - You'll need an electric whisk or something similar in order to whip up the cream.
How to Make Tuxedo Cake Recipe
There are a few components to a Tuxedo cake, but I'll break each one down into easy-to-follow steps.
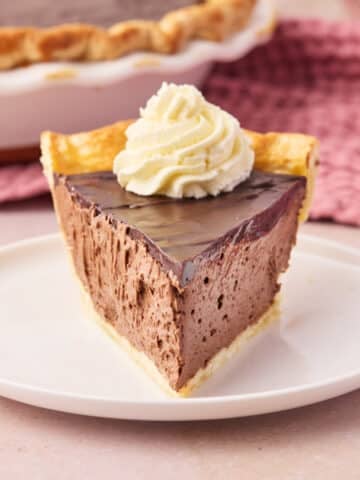
If you want all of the indulgence but not quite so much effort, check out my flourless chocolate torte recipe.
Make the Chocolate Cake Layer
This chocolate cake recipe is super basic, I adapted it from my regular chocolate cake to be softer so it would work better with the mousse layers, but I loved it so much I might just keep using it in chocolate cake recipes from now on!
You really don't need any special equipment for this cake, you can just use a regular whisk. You could use a stand mixer with a whisk attachment on low speed if you really wanted to - but it's totally not necessary as the cake batter comes together so easily and isn't difficult to mix.
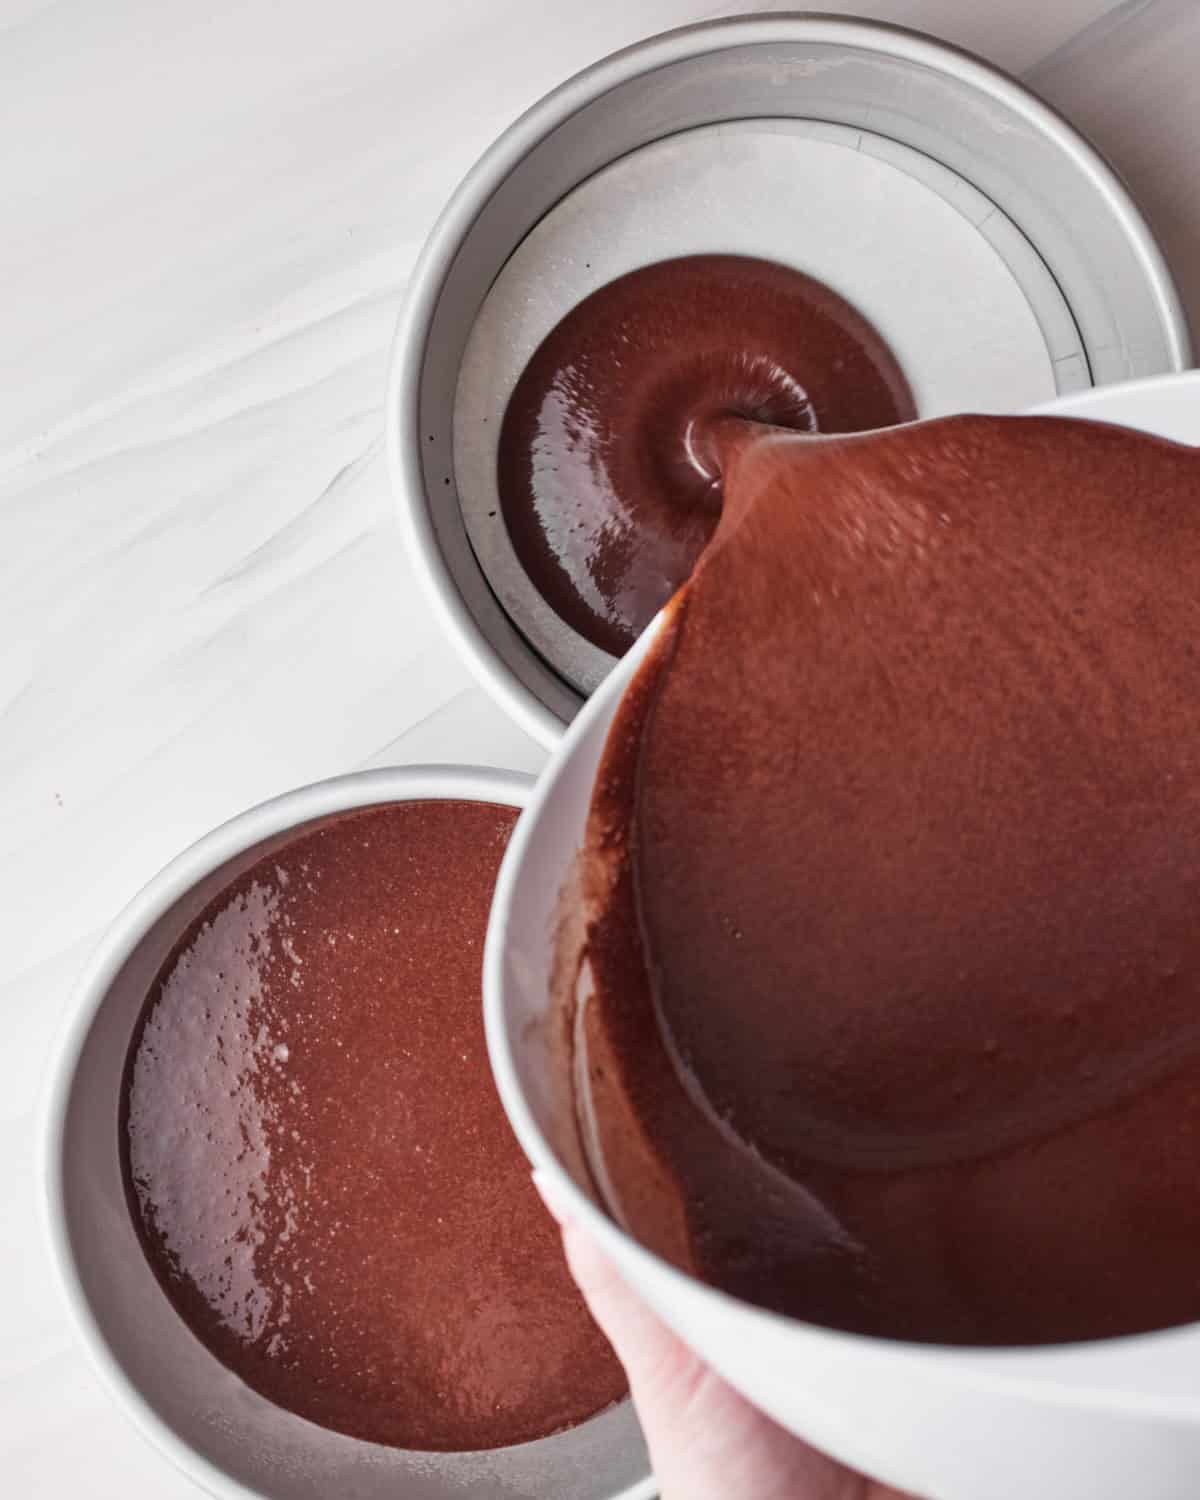
- Preheat your oven to 350°F / 180°C and line two 8-inch cake pans. I like to put parchment paper rounds on the base of each round cake pan and then spray all over with a cake release spray. But you can use butter or whatever method works best for you.
- In a large bowl, sift together all the dry ingredients except the espresso powder - this includes the flour, sugar, cocoa powder, baking powder, baking soda, and salt. Whisk everything together.
- In a medium bowl, combine all the wet ingredients, except the hot water, this includes the eggs, milk, sour cream, vegetable oil, and, vanilla. Whisk together lightly until it makes a homogenous mixture. Make sure the eggs, milk, and sour cream are all at room temperature to help them incorporate easily.


- Pour the wet ingredients into the dry ingredients and whisk until everything is combined and there are no more lumps, make sure you are scraping the bottom of the bowl in case there is any flour down there.
You don't want to use the whisk to incorporate a bunch of air into the mixture, you just want to mix slowly until it's all smooth. - In a small bowl or a glass, combine the hot water with the espresso powder and mix until the espresso powder has completely dissolved. Pour into the cake batter and whisk gently until combined.
- Divide the chocolate cake batter between your two prepared cake pans and bake for 35 minutes or until a skewer inserted comes out clean.

- Let the cakes cool completely for at least an hour before transferring them to a wire rack to cool completely.
Make the Chocolate Mousse Layers
The base recipe for both of the chocolate mousses is the same, so for efficiency, I have made the recipe so you make a big batch of the mousse and then split it into two at the end to mix with the different chocolates and make one dark chocolate mousse and one white chocolate mousse.
This chocolate mousse has a custard base, unlike my chocolate mousse pie filling which is a meringue-based mousse. A custard base makes for a thicker, creamier mousse which is perfect in this dessert.
- Chop the dark chocolate and white chocolate finely and set aside in two separate bowls.
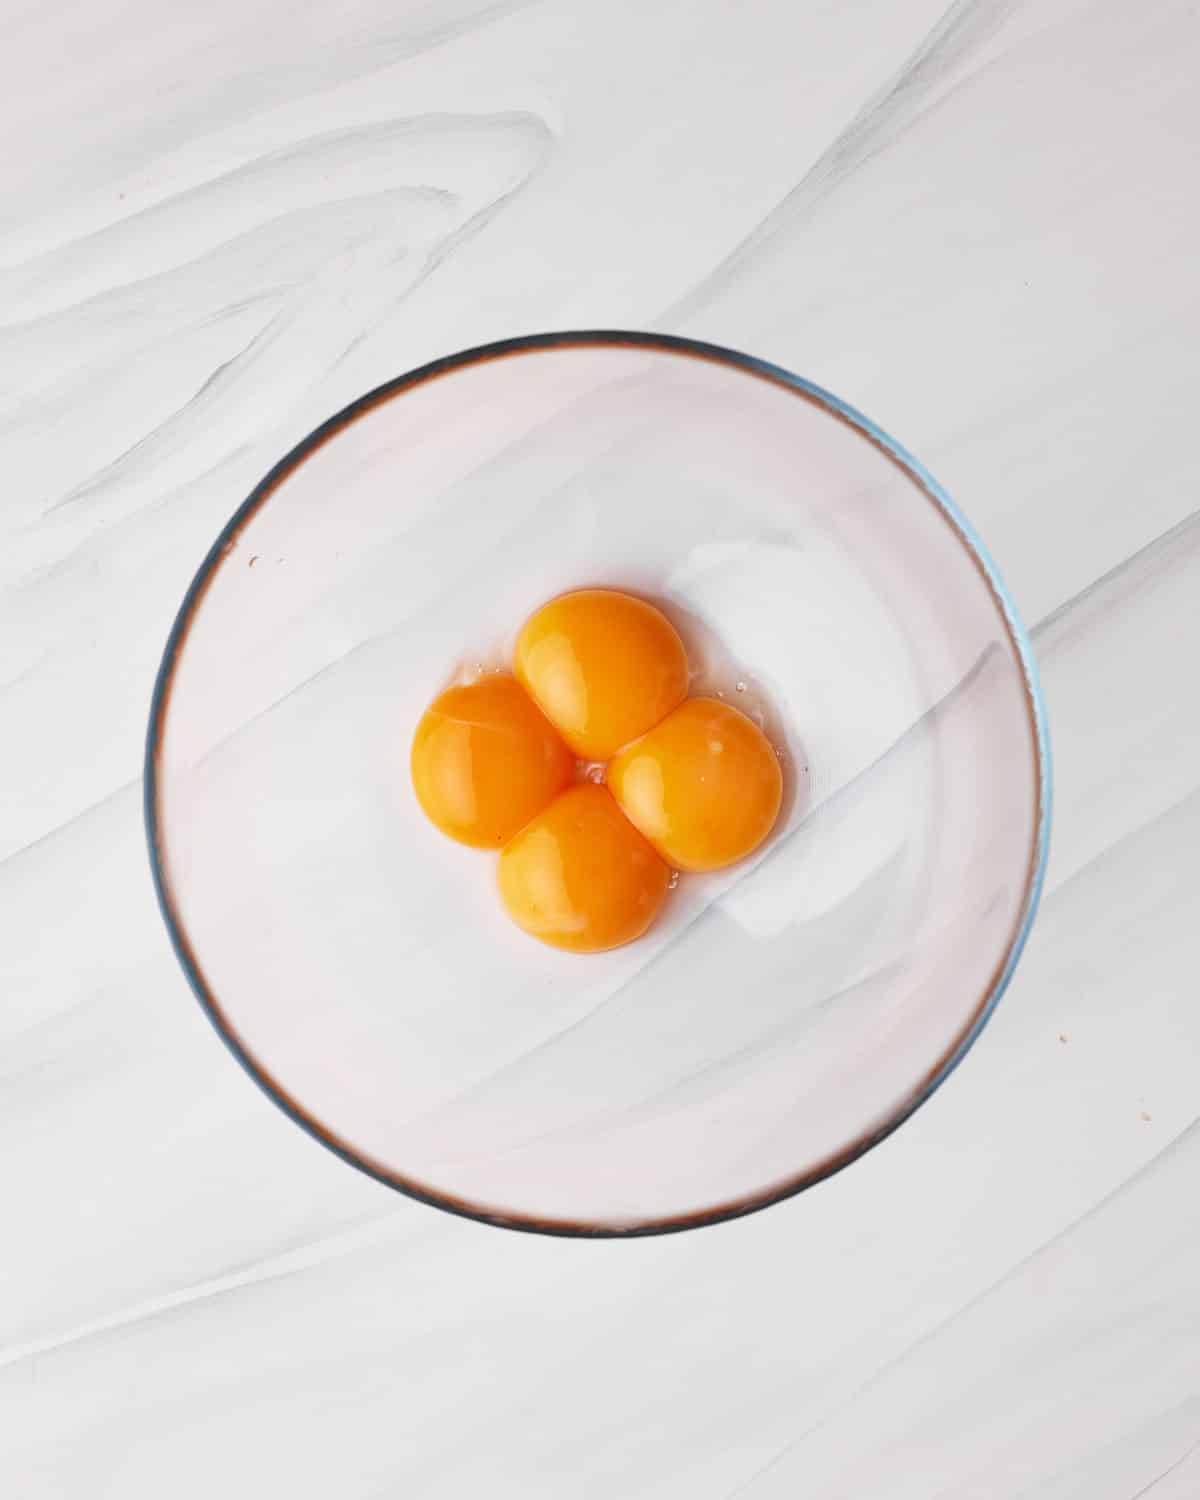
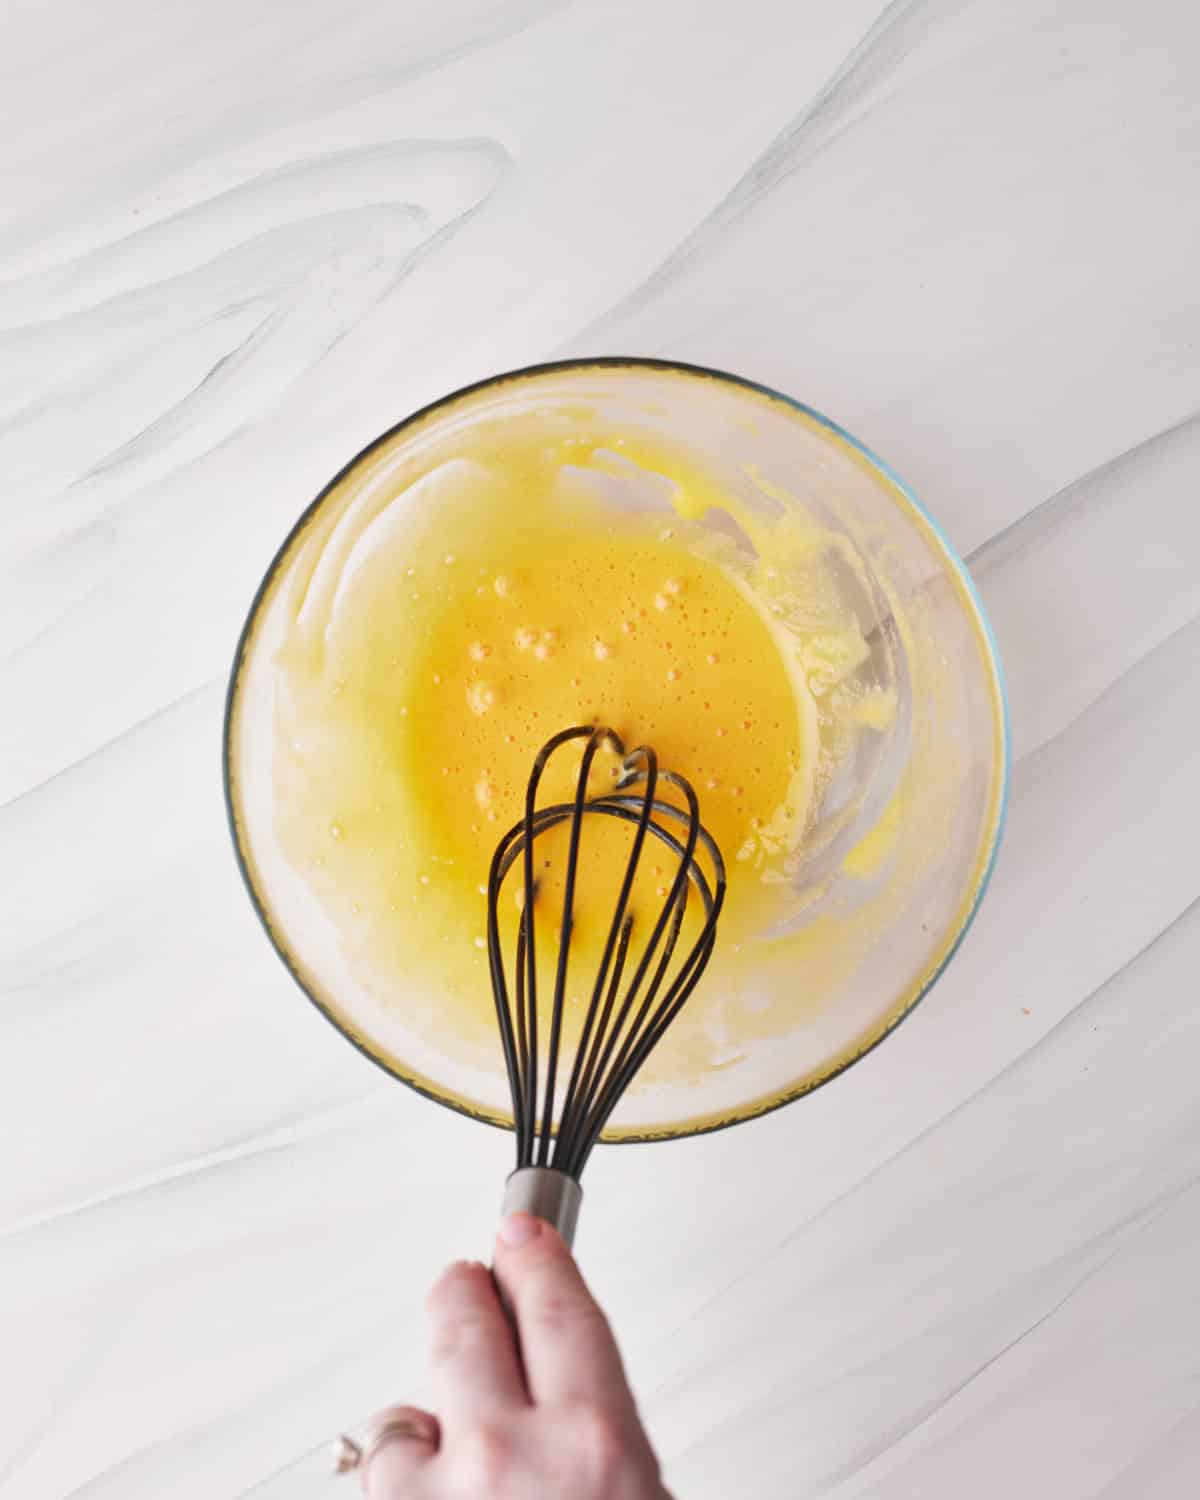
- Put the egg yolks, sugar, and cornstarch in a small bowl and whisk until they become slightly thick and pale (about 40 seconds). Don't throw your egg whites away, you can use them in another scrumptious recipe, such as Baileys Chocolate Mousse.
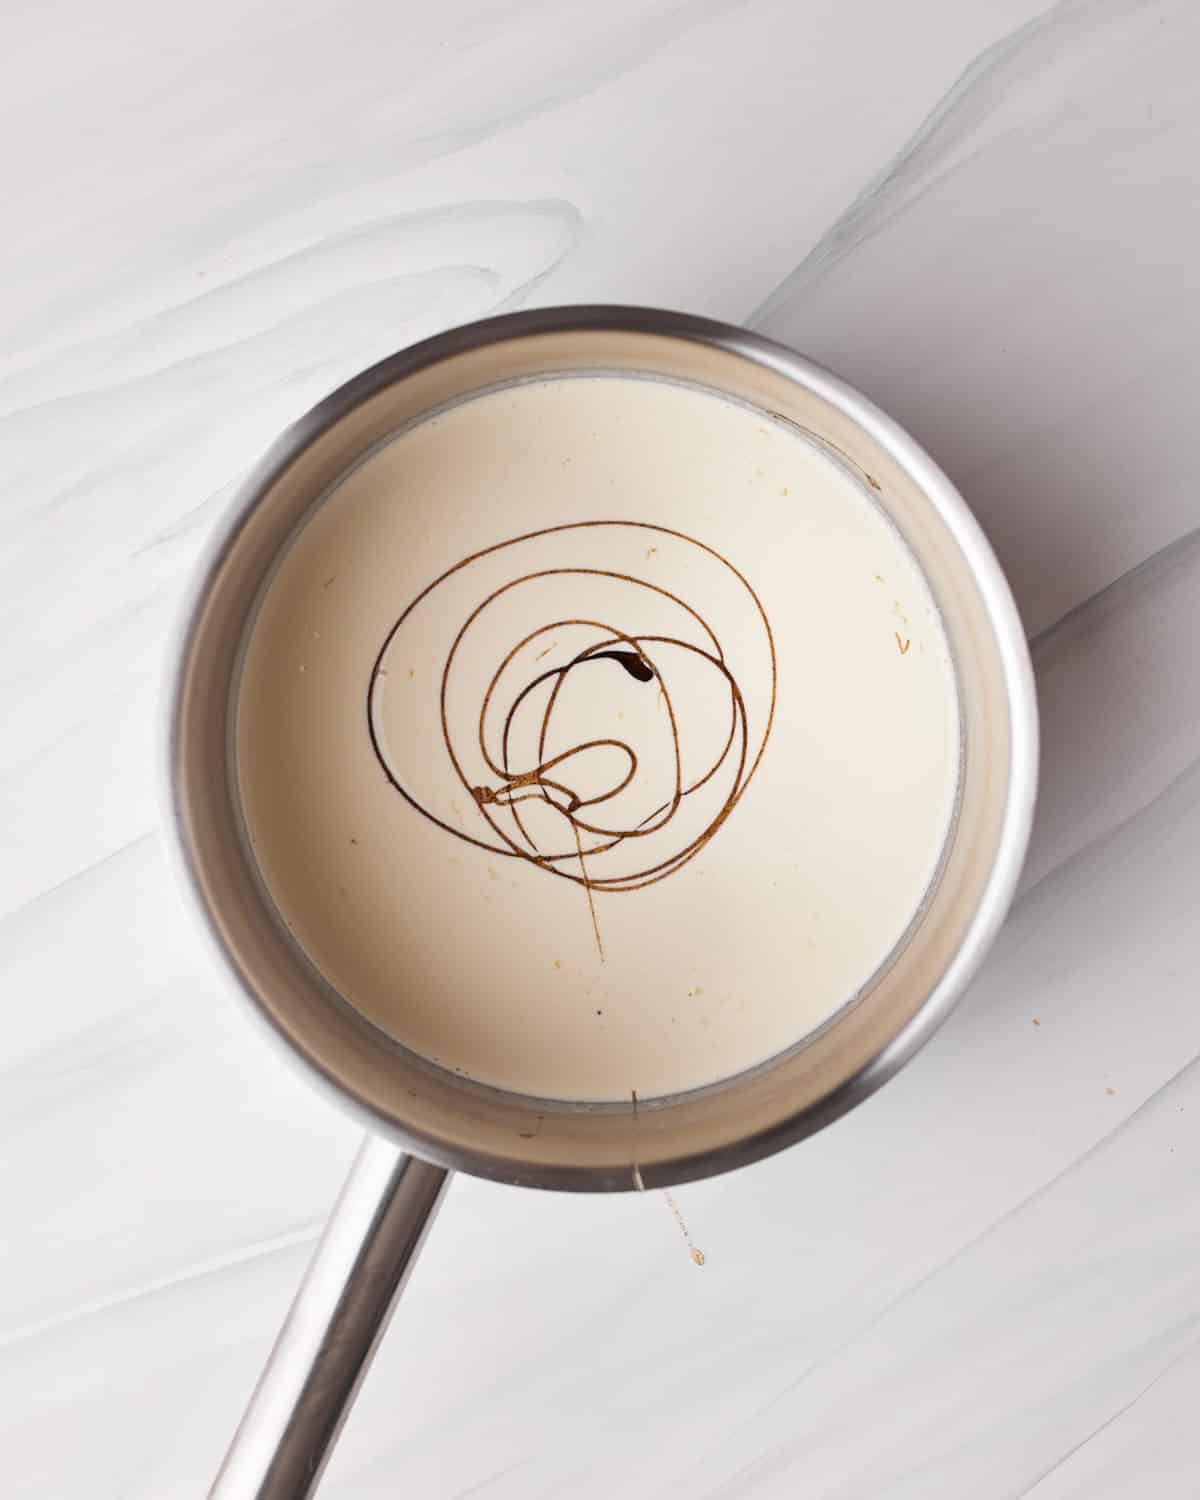
- In a saucepan over medium-low heat, warm half of the cream and vanilla gently until they just start to heat up. Once it is warm, drizzle a little of the cream mixture into the beaten egg yolks and whisk it in.

- Drizzle a little more and keep drizzling and whisking until all of the cream has been added to the egg yolks. This is tempering the eggs - bringing them up to temperature slowly so they don't scramble. It's important not to add the cream too quickly, or when it has become too hot, or you'll get lumps of cooked egg in your mousse.
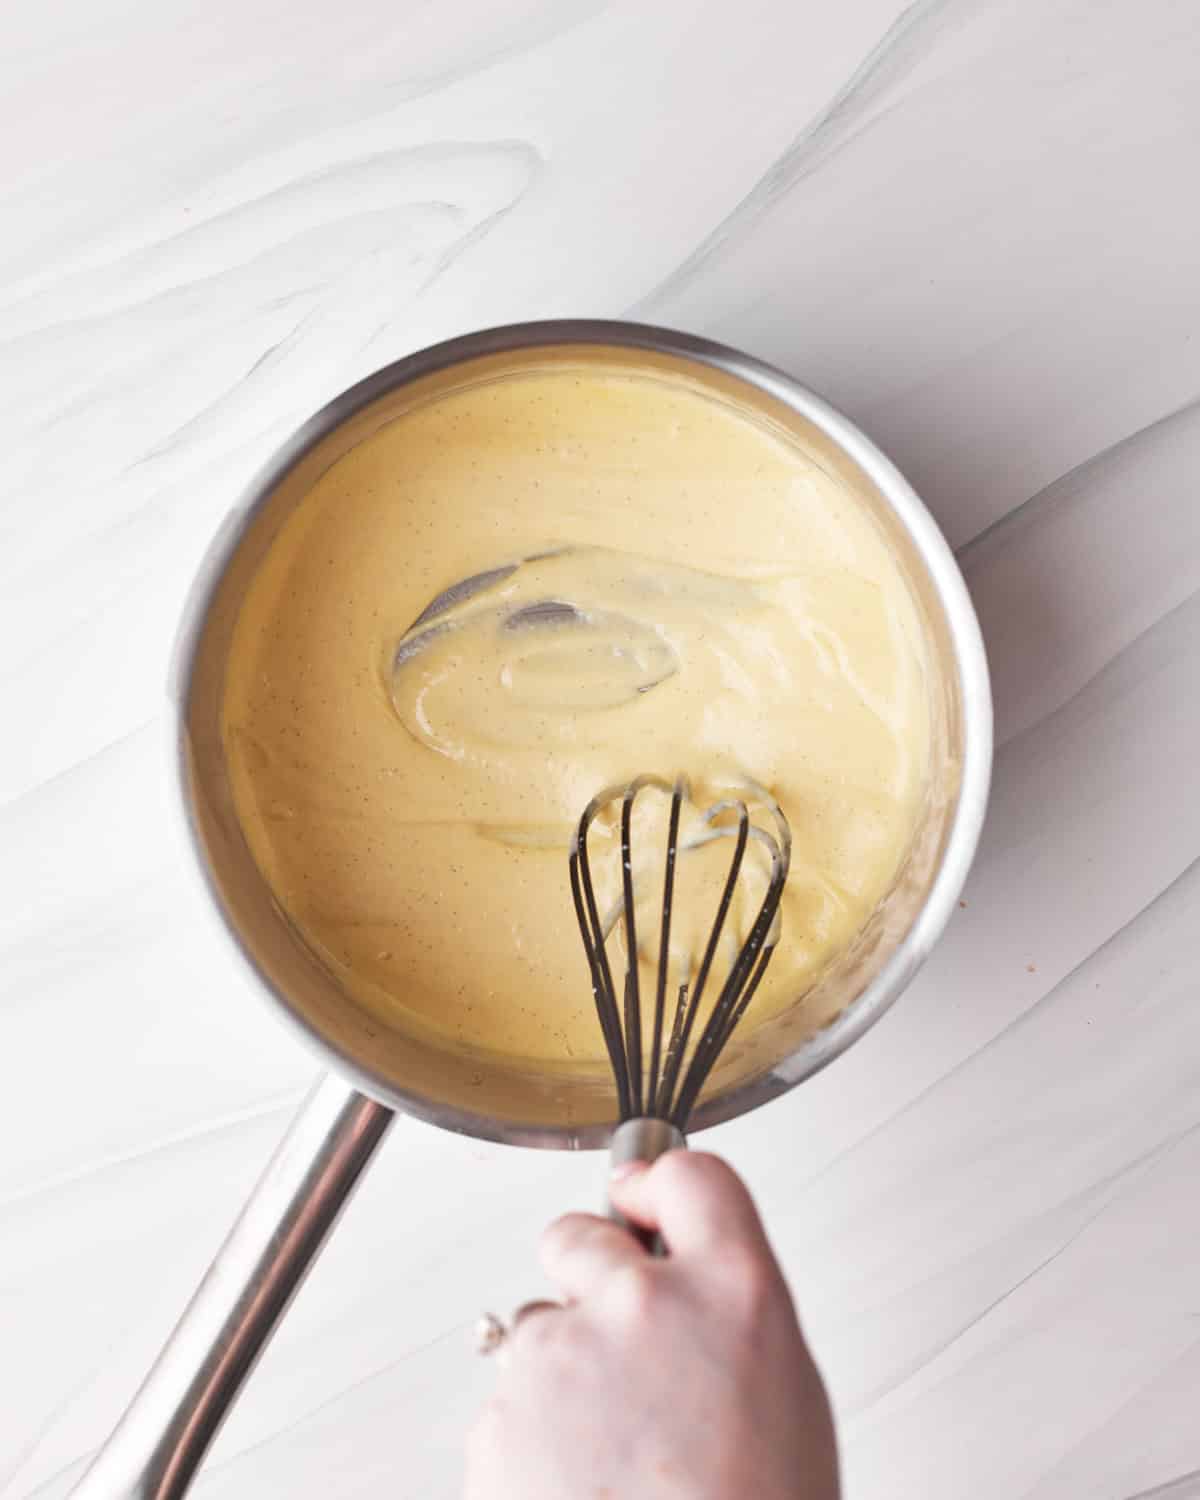
- Once all the cream has been incorporated into the egg yolks, pour the whole thing back into the saucepan and continue to heat. Stir the mixture constantly - not to incorporate air, but just moving it enough to keep it moving so the bottom doesn't burn.
- Keep going until the mixture thickens slightly, then remove from the heat.

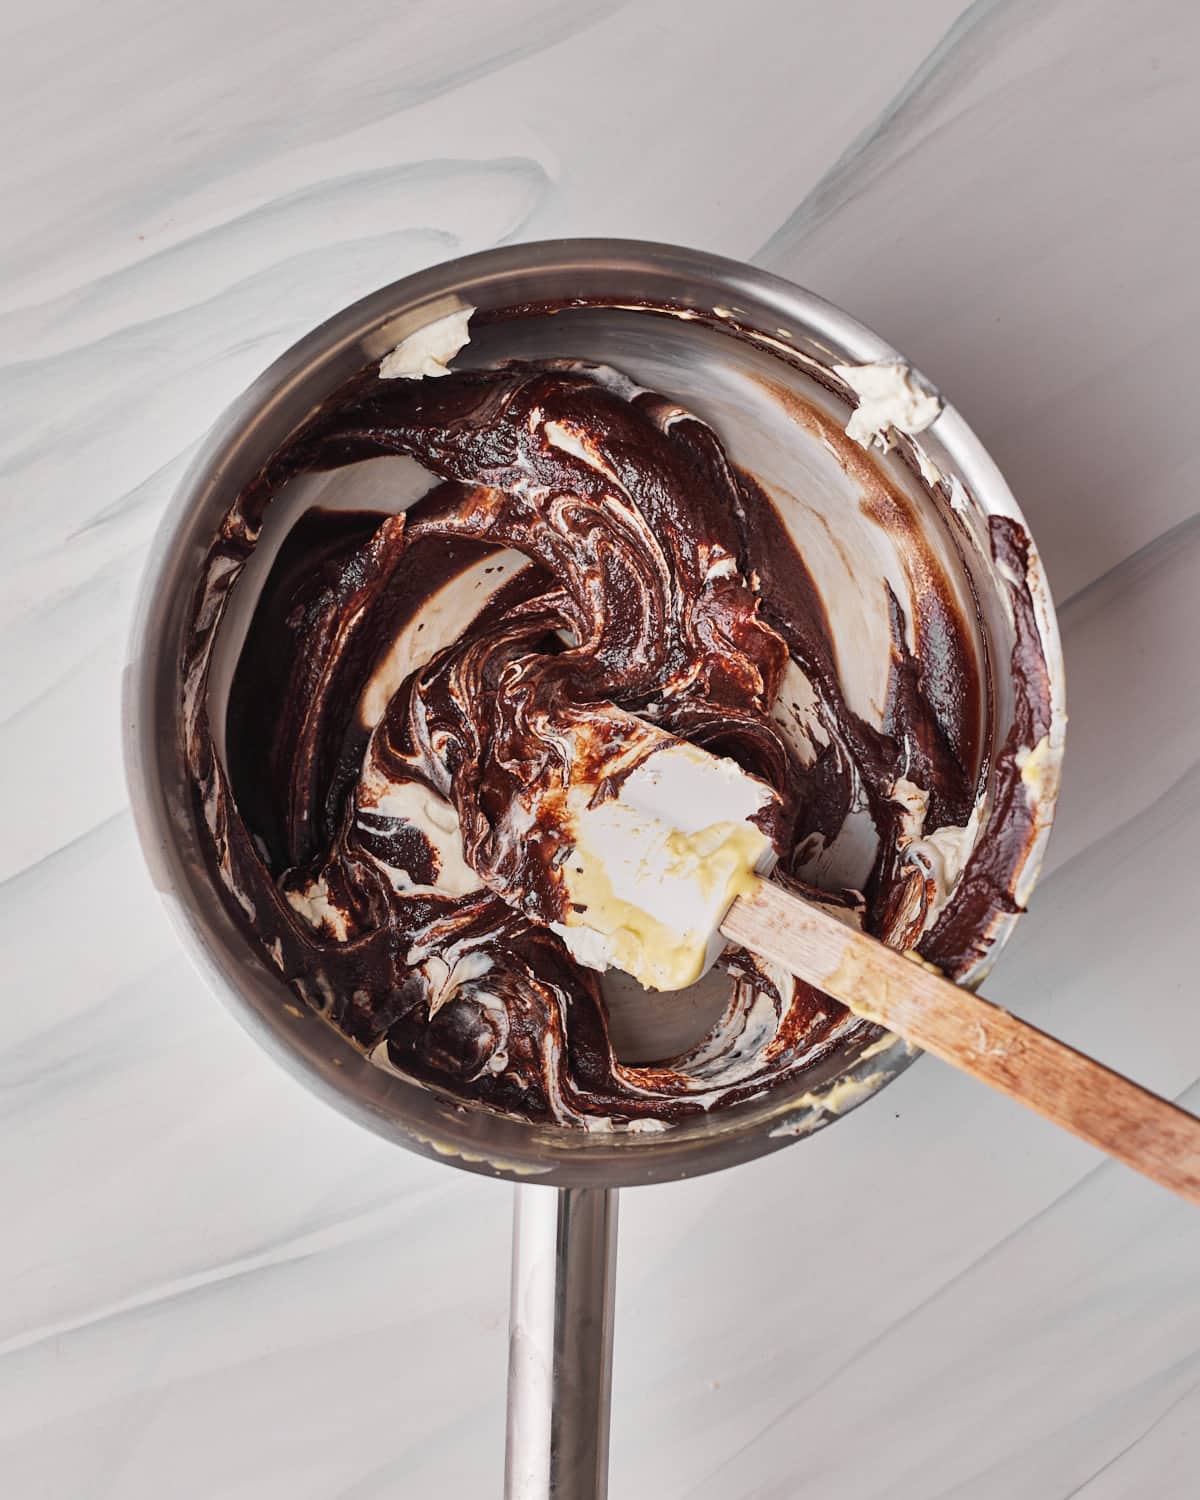
- Pour half of the mixture into the bowl with the dark chocolate, and half into the bowl with the white chocolate. I did this by eye, but if you prefer to be completely accurate you can pour the entire mixture into a bowl so you can weigh it, then measure out half to add to each chocolate bowl.

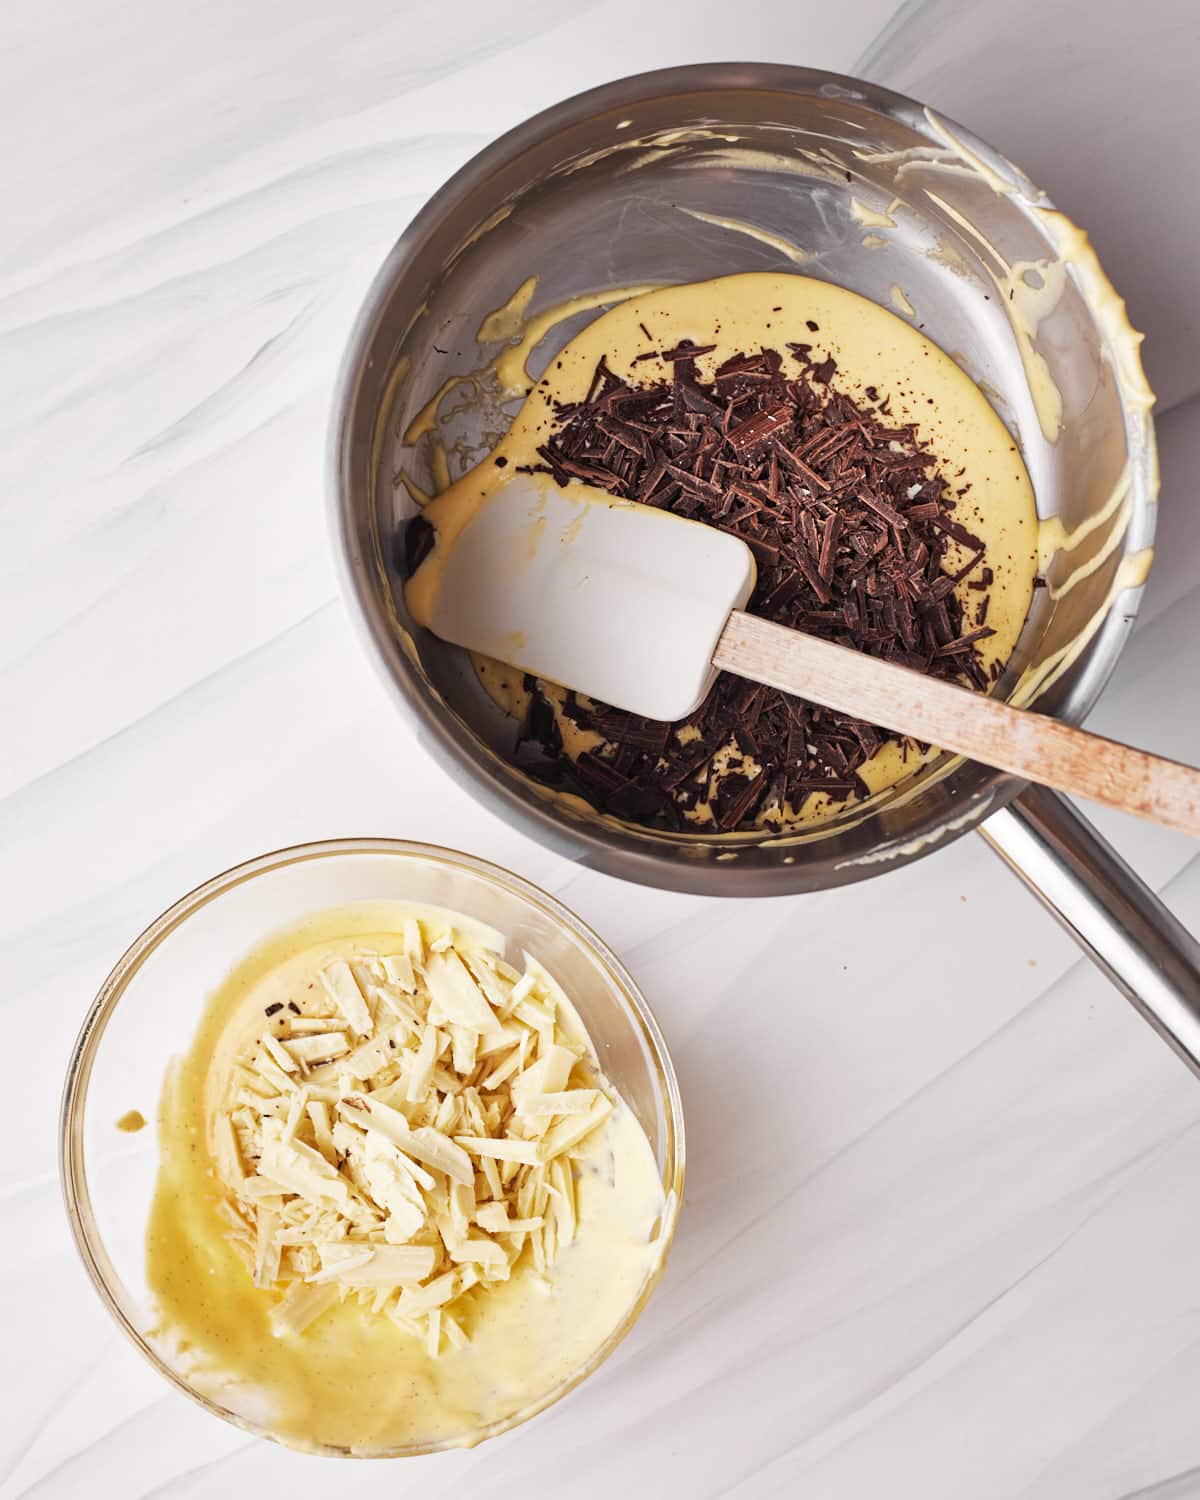
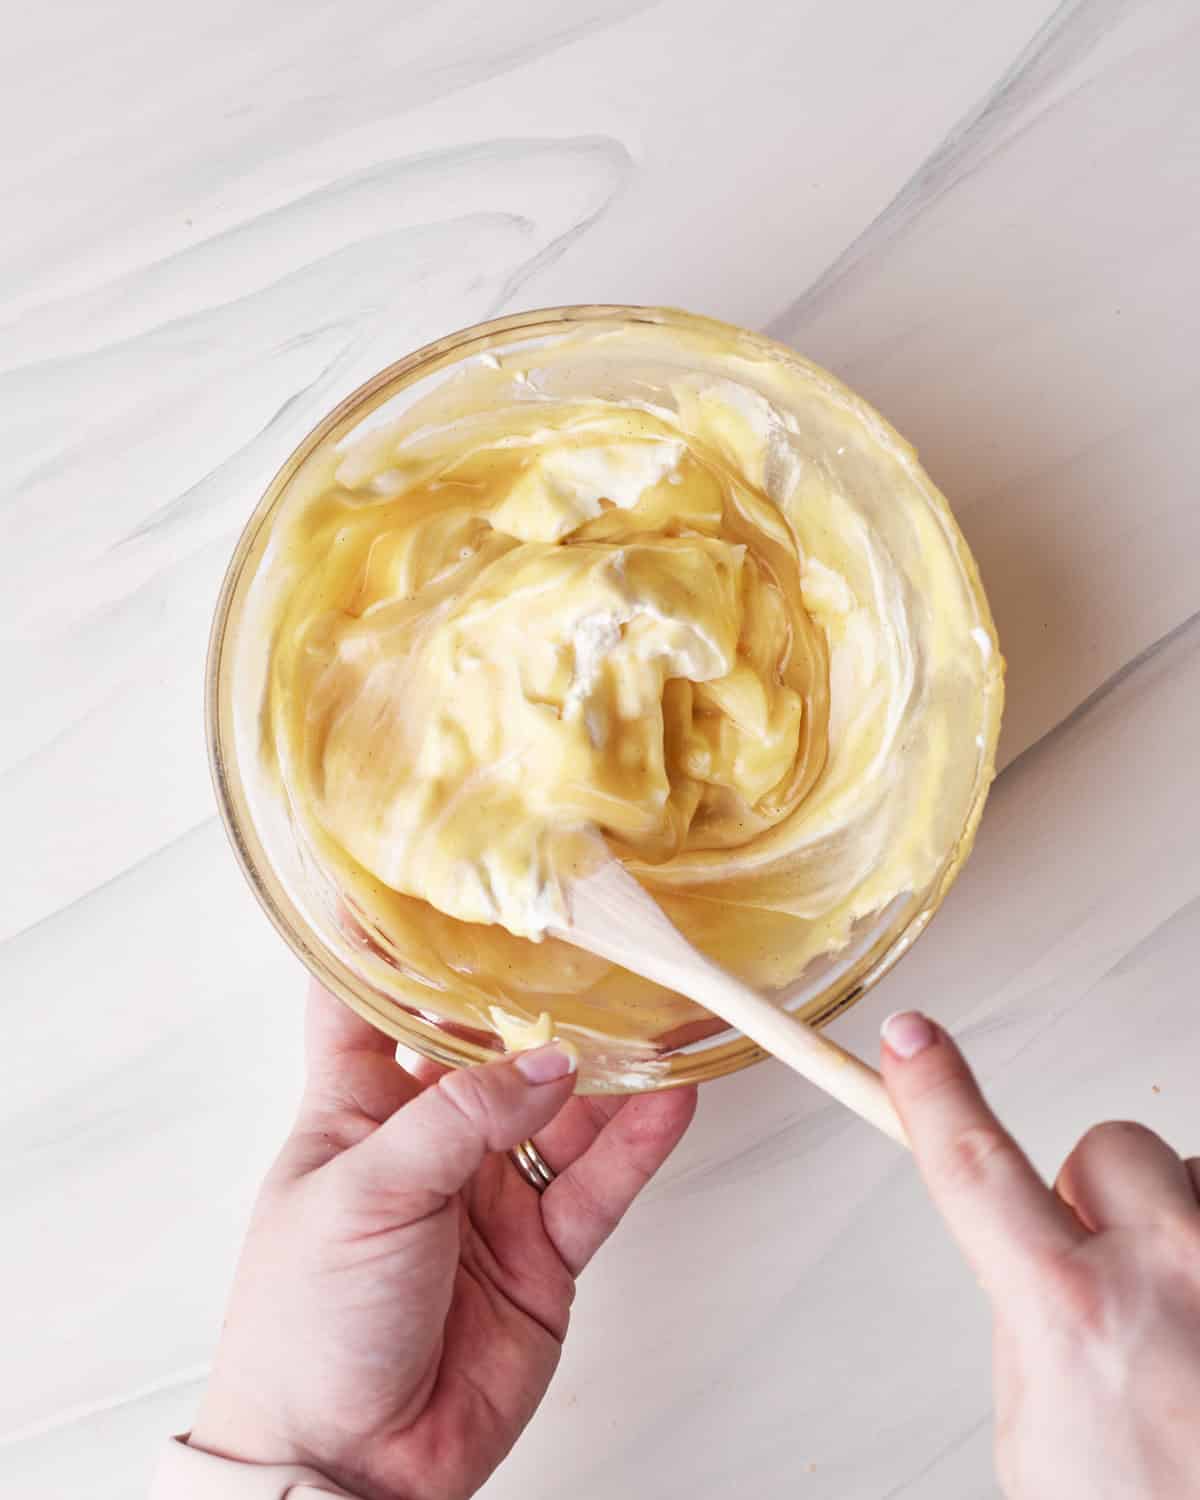
- Mix the dark chocolate bowl together until the chocolate has completely melted and incorporated. Then do the same with the white chocolate.
- In a separate bowl, whip up the remaining heavy cream until stiff peaks form. Divide the whipped cream evenly between the two chocolate mousses and fold it in gently until completely combined.


Assemble the Tuxedo Cake
I recommend doing the first three steps of this assembly before you start making your chocolate mousses - this is because you don't want to wait too long after the mousse is ready to pour it into the cake ring, or it might start to set already and won't be lovely and smooth.
- Place a dessert ring on top of a cake board or serving plate. I use an expandable cake ring so I can adjust the size to my cake, but if yours isn't adjustable, make sure it is the same size as the cake pan you baked your chocolate cakes in. if you don't have a dessert ring, see the section below on how to make this recipe without one.
- Cut any dome off of your cooled chocolate cake layers so they are nice and flat. I like to do this with any layer cake, but it's especially effective with this tuxedo cake, as it's all about those pretty layers.
- Depending on how much your chocolate cake rose in the oven, you may end up with a pretty thick layer for the chocolate cakes. Ain't nothing wrong with a thick layer of cake, but if you'd like a thinner layer, for aesthetics or elegance, simply trim the chocolate cake down to the thickness you'd like it to be. Make sure both layers of chocolate cake are the same thickness though.
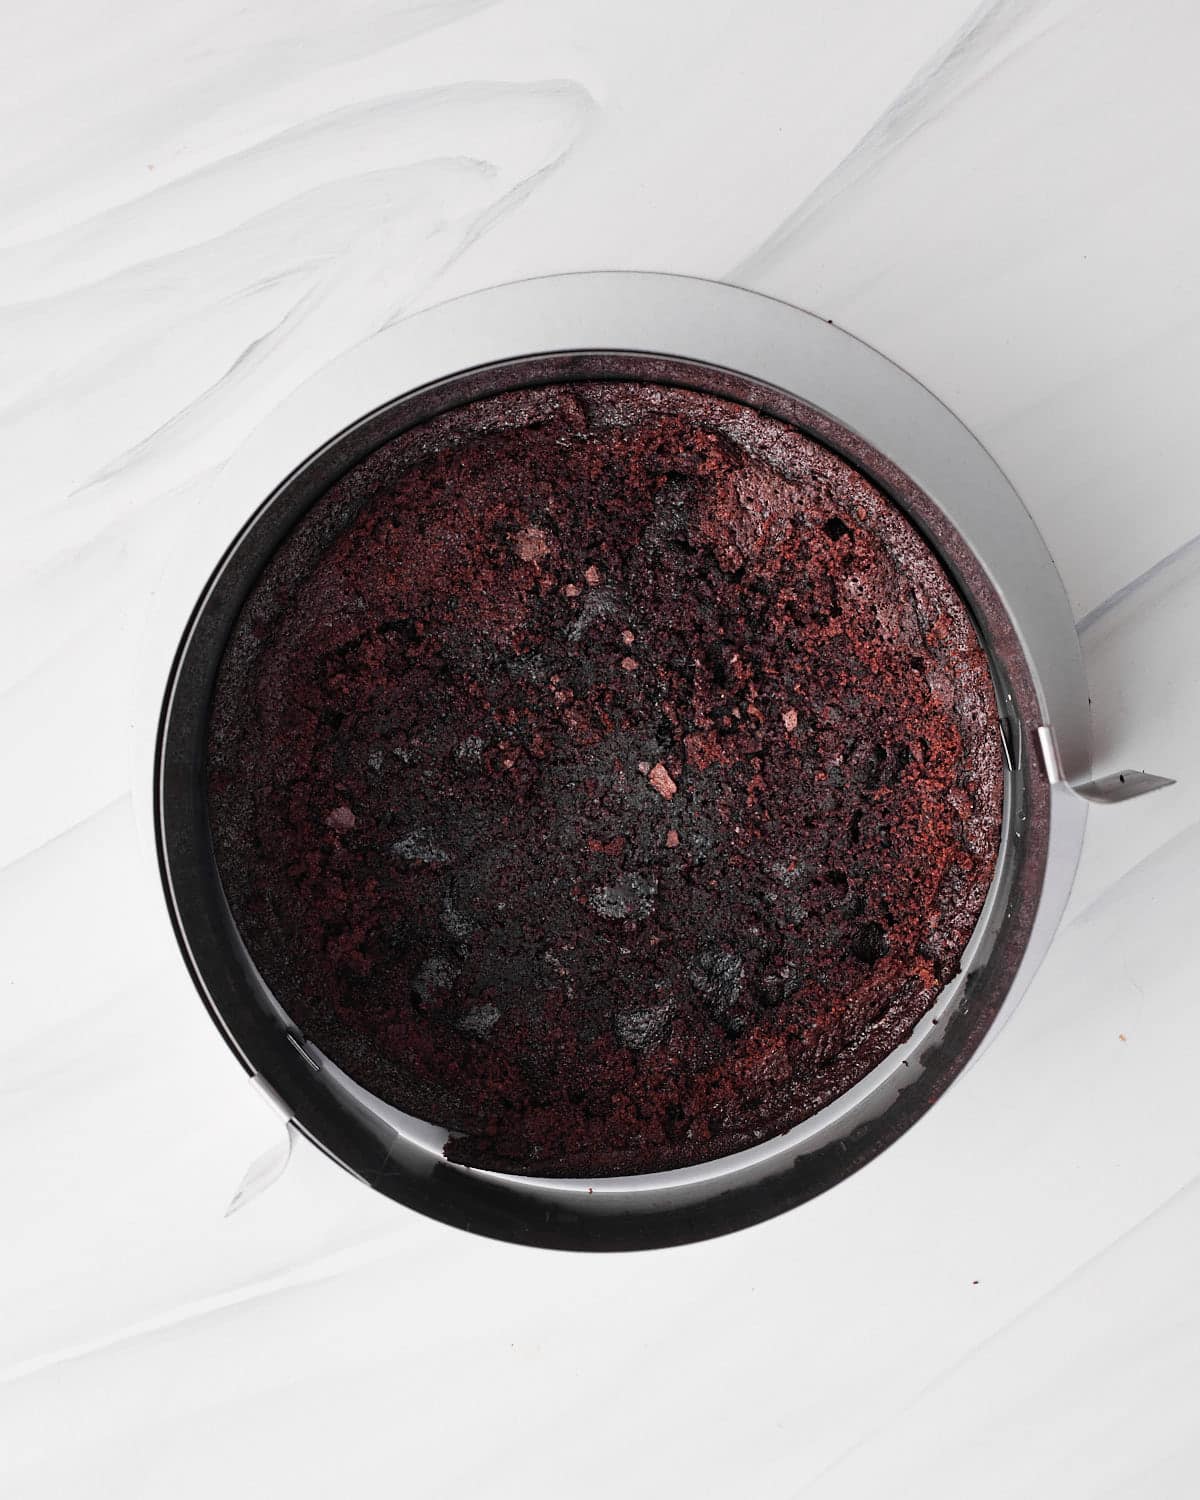
- To form the first layer of the tuxedo cake, take one of the layers of chocolate cake and place it inside the dessert ring. There is no need to line or grease the dessert ring with anything.
- I would do these things first, and at this point, I would start making the chocolate mousses, so the cake ring and first layer are ready to go when your mousses are done.
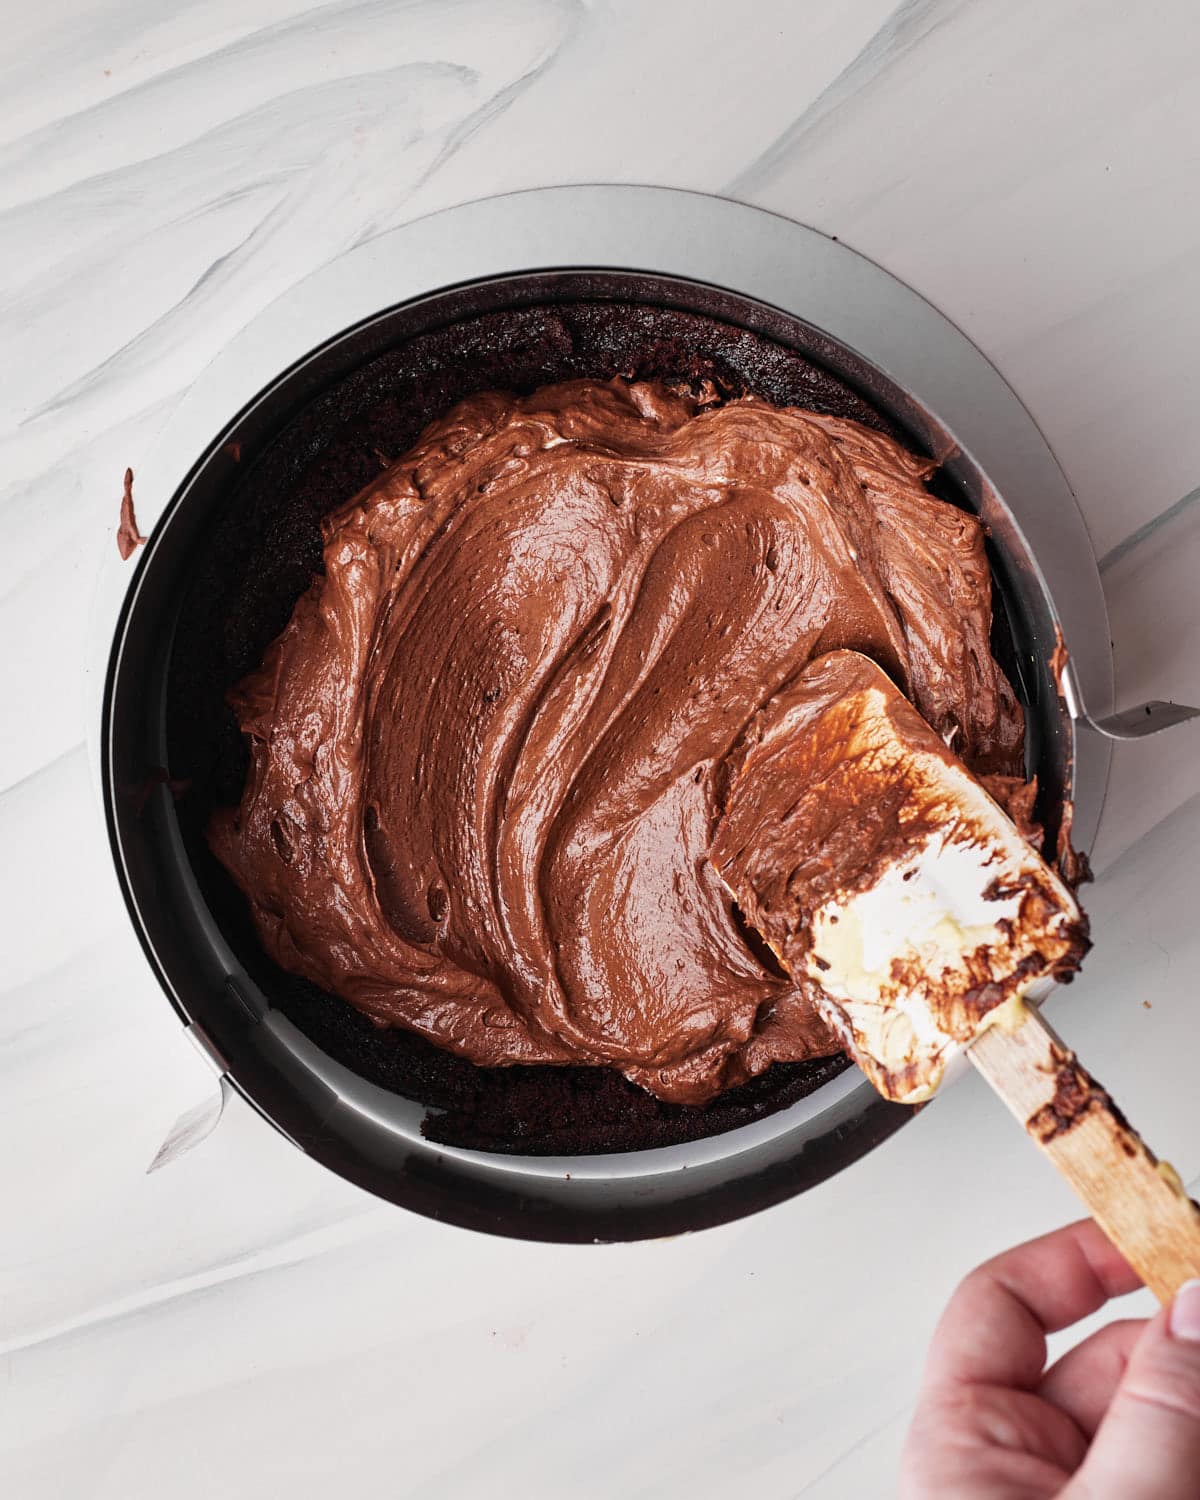
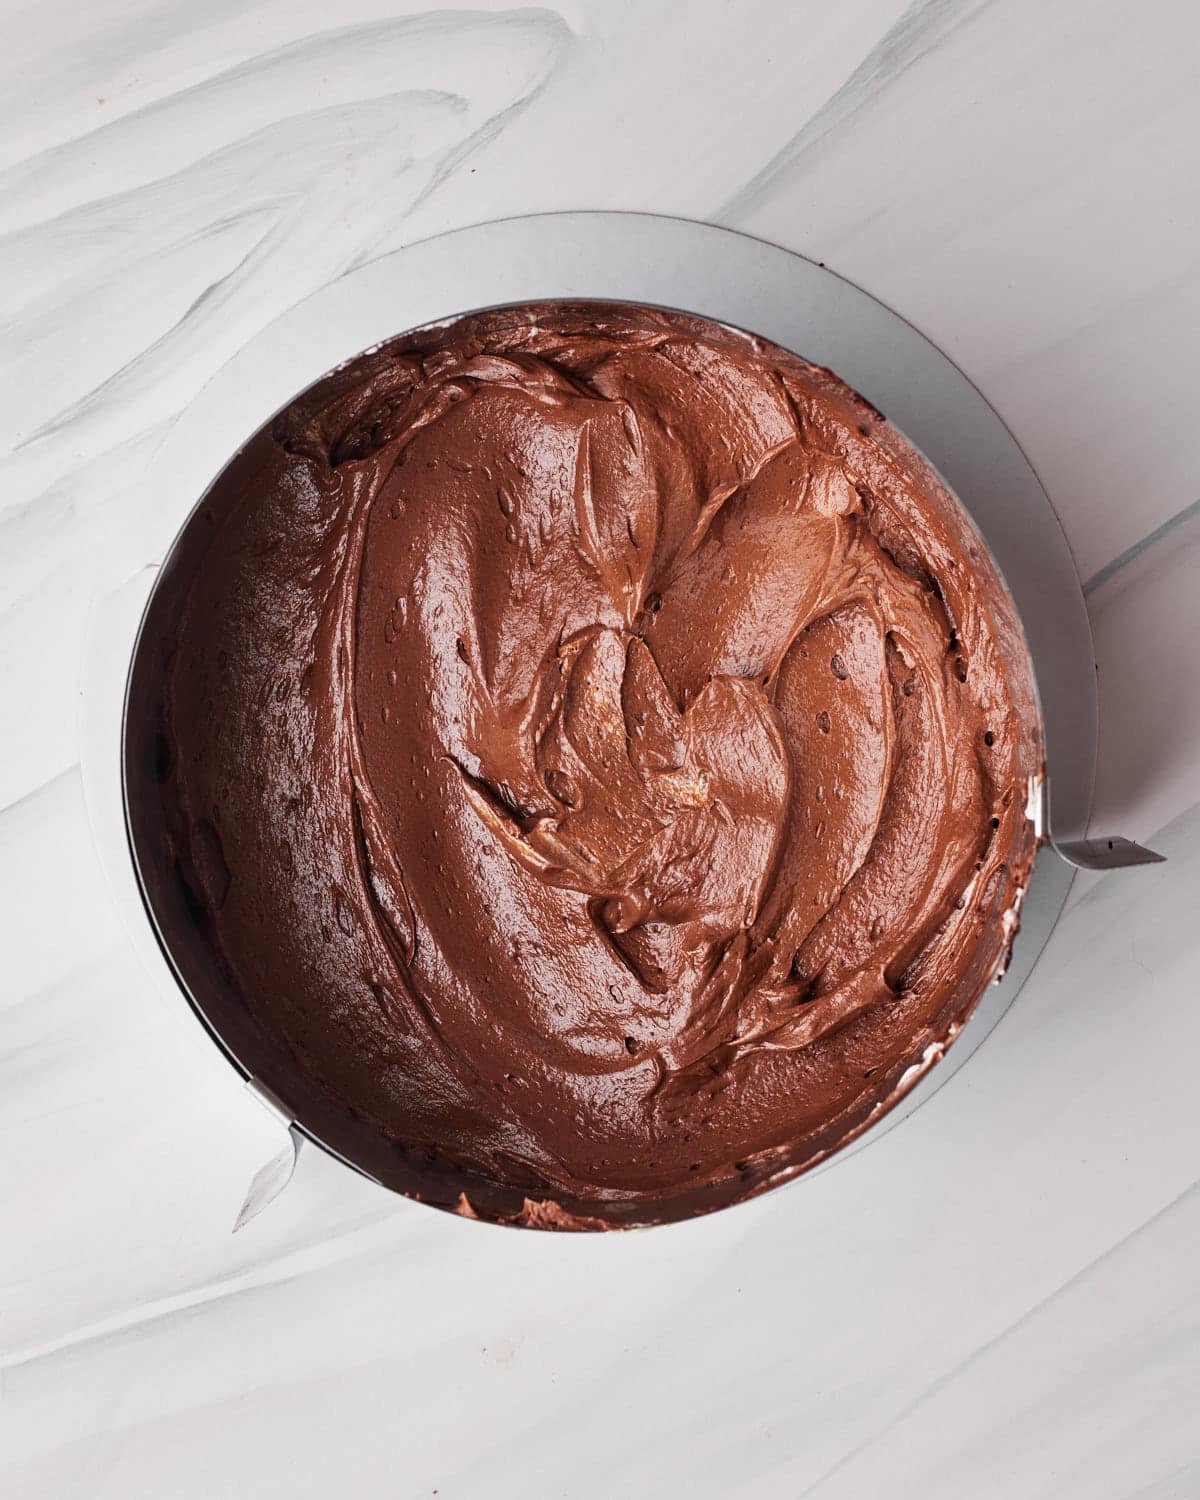
- Once your mousses are ready, pour the dark chocolate mousse on top of the chocolate cake layer and spread it out evenly to form the 2nd layer.
- As the dark chocolate mousse is likely to be thicker and sturdier than the white chocolate mousse, you should be able to pour the white chocolate mixture right on top without the two mixing together, but if the dark chocolate mousse still seems super liquid, let it sit in the fridge for 5 minutes before pouring the white chocolate mousse on top.

- Place the three-layered cake in the fridge for 30 minutes, then add the second cake layer of chocolate cake on top of the white chocolate mousse. Place the whole cake back in the fridge and leave to set for at least 4 hours.
Decorate the Tuxedo Cake
Once your tuxedo cake is completely set, it's time to decorate! The top layer is made of delicious chocolate ganache.
- Chop the chocolate into fine pieces. I used milk chocolate but you can use dark chocolate or semi-sweet - whatever you like.
- Heat the cream in a small saucepan over medium heat, just until scalding (tiny little bubbles just starting to form on the surface).
- Remove the cream from the heat and pour it over the chopped chocolate - let it sit for a minute then use a spoon to stir together until the chocolate has completely melted and the ganache is glossy and smooth.
- Let the ganache cool and thicken slightly, just until it is thick enough not to run off the side of the cake, but still thin enough that it will settle into a beautiful smooth surface. Timings on this can vary but it takes my ganache about 30 minutes, just keep checking until it seems right.
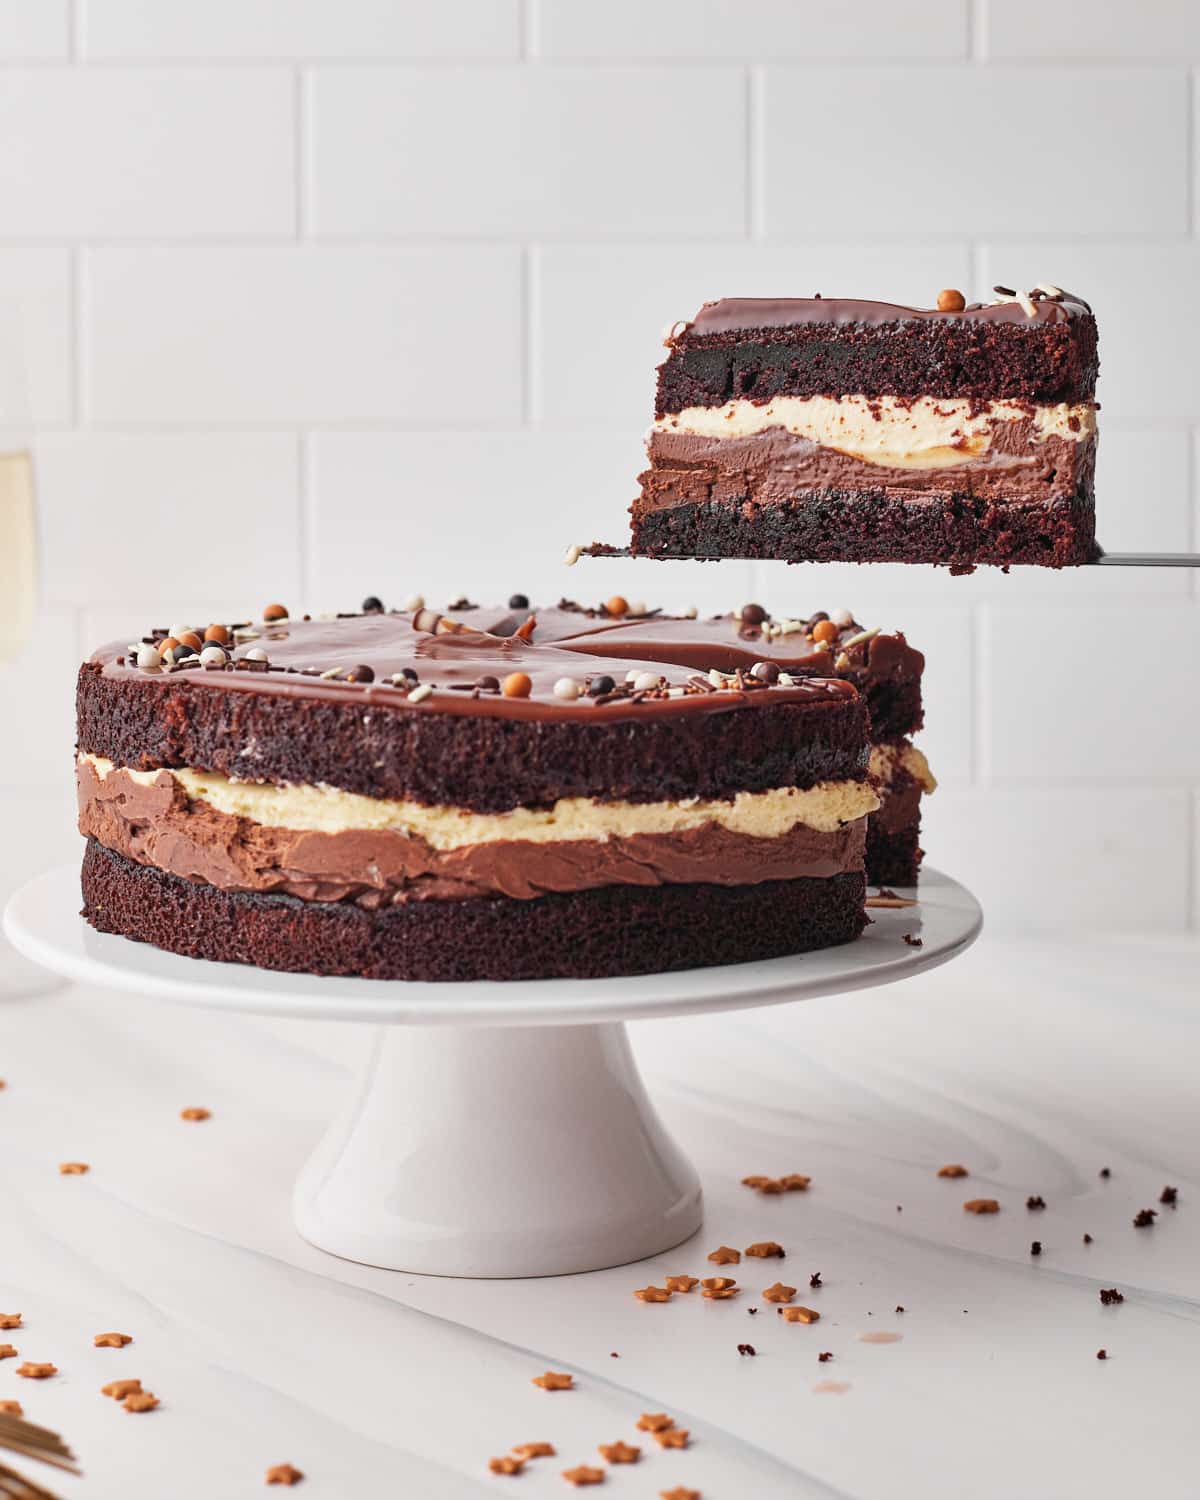
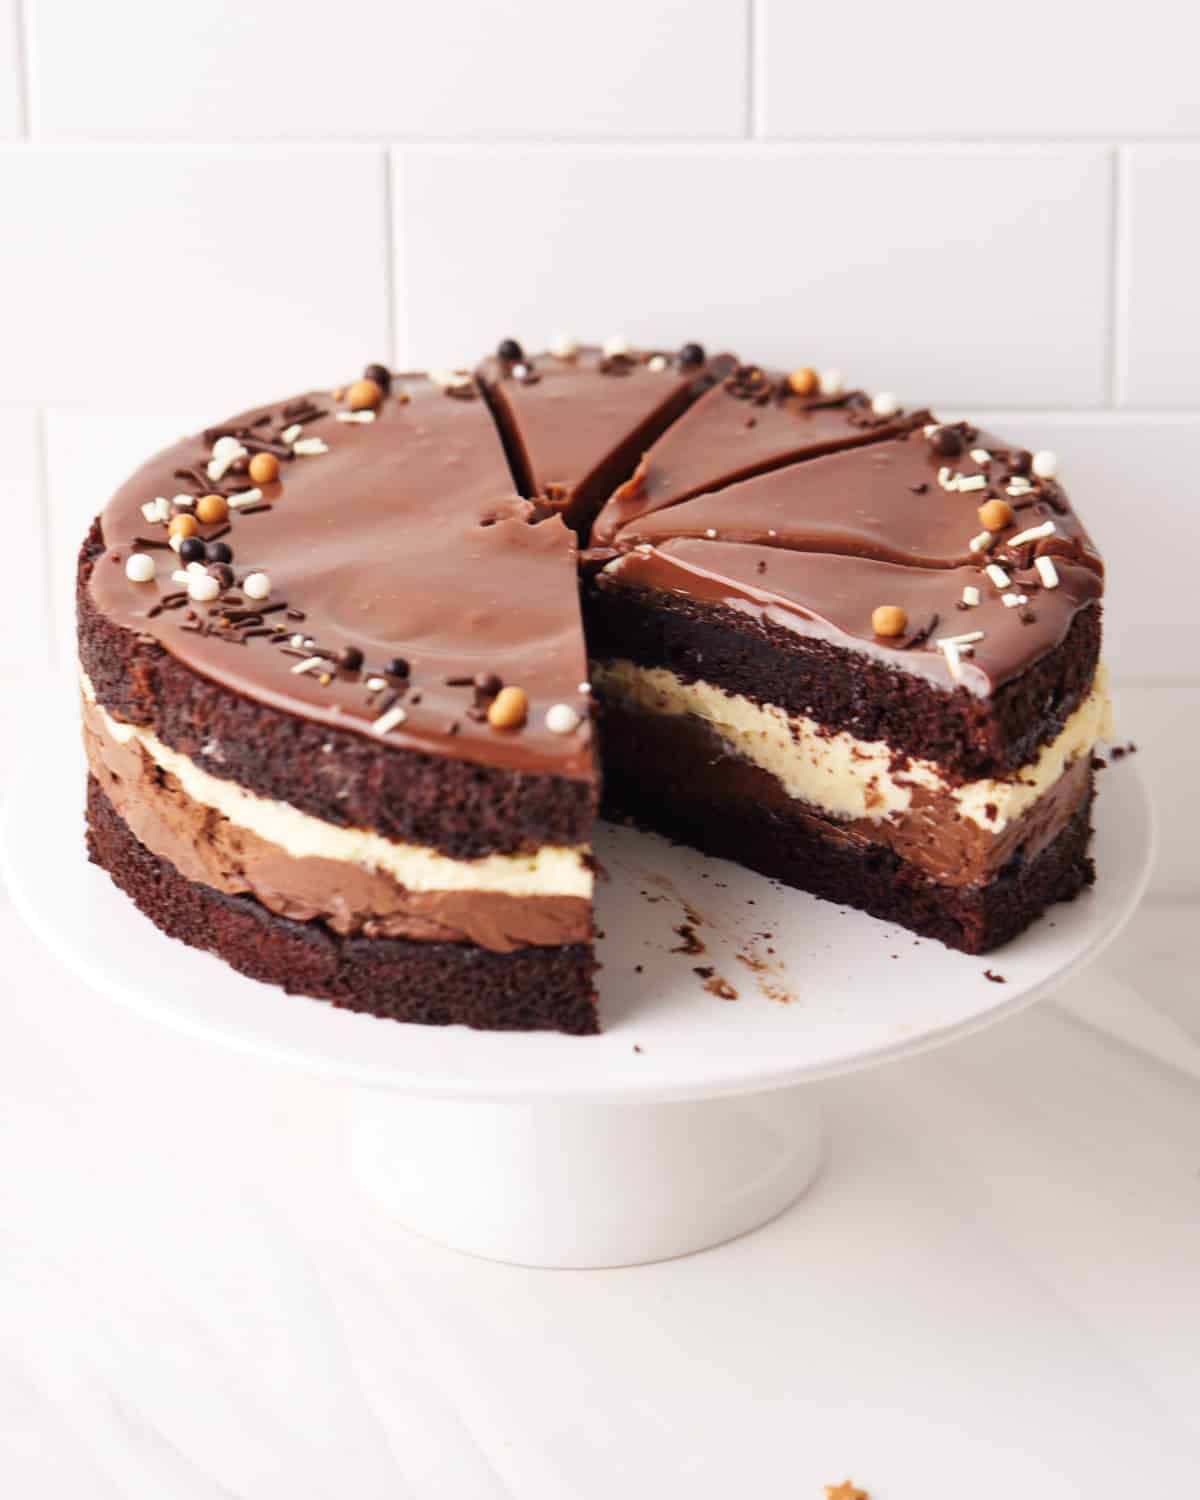
- Remove your delicious chocolate mousse cake from the fridge and unmold it from the cake ring. This should reveal the very pretty sides of the cake with gorgeous contrasting layers.
- Use a spoon or spatula to spread the chocolate ganache on top of the cake. Spread it out all the way to the edge of the cake, but be careful not to let it run down the sides and ruin that pretty profile view!
- Top with whatever you like, you could use sprinkles, white chocolate curls, or maybe some chocolate shavings. You could even pipe some swirls of chocolate whipped cream on top.
- Voila! You have created a showstopping masterpiece of a dessert! Now dig in and enjoy all your hard work.
Tuxedo Cake Recipe Variations
Mix up the Chocolate - The fun thing about this tuxedo cake is you can make it with any variation of chocolate that you like, mix up the dark, milk, and white chocolate however you like.
Vanilla Version - You could flip this recipe on its head entirely with vanilla cake and white chocolate ganache, with the white cake layers contrasting still with dark chocolate mousse.
Cheesecake Layer - For an extra element, you could add an additional layer of white chocolate cream cheese filling to make a cheesecake layer.
How To Store Tuxedo Cake
Once your tuxedo cake is assembled, you need to store it in the fridge to keep the chocolate mousse layers nice and fresh. It will be good in the fridge for up to 5 days, but I highly doubt it will last that long before being gobbled up! If you have a small airtight container that fits in your fridge, this is the best way to keep it as fresh as possible.
If you make the chocolate cake layers ahead of time, wrap them in plastic wrap, or in an airtight container and store them at room temperature for up to 5 days.
Tuxedo Cake FAQs
A dessert ring, or cake ring, is a handy tool for making mousse cakes and entremets. It is basically just a ring, usually made of stainless steel, without a base that will allow you to build your layers up inside of it, and then lift it off again when it is set.
I used an expandable dessert ring to make my tuxedo cake, as it lets me adjust the size to fit whatever size of cake I am making. But you also get fixed-sized dessert rings - if your cake ring is fixed, just make sure it is the same size as the cake pan you baked your chocolate cakes in.
If you don't have a dessert ring, or it isn't the right size, you can still make this recipe, there are a few options:
If you have a cake ring but the sides aren't high enough for all the layers - you can still use the cake ring but try lining the inside with an acetate sheet to expand the height of the ring. It's just a sheet of plastic that tapes together to form a higher ring. Once your cake is set you can just remove the tape and peel the acetate away.
If you don't have a cake ring - Use a loose-bottomed cake pan. You could technically make this in a loose-bottomed cake pan, just make sure that the edges are high enough to hold all the layers. Also, you will have to be a little more careful when you are removing the tuxedo cake from the pan, as you'll need to push it up from the bottom, rather than lifting the ring off from the top.
If you have a cake ring but it's not the same size as your cake pan - If you have a cake ring but it's too small for your cake layers, you can use it like a cookie cutter to cut the cake down to the right size. If your cake ring is bigger than your cake layers, try one of the other methods instead.
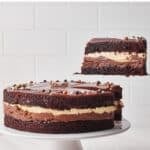
Tuxedo cake gets its name from the contrasting layers of dark and white chocolate, representing the black and white layers of a tuxedo. That's why we have dark chocolate cake layers right next to the white chocolate filling - to make it pop and show off the pretty layers of mousse inside the cake.

More Chocolate Dessert Recipes:


Tuxedo Cake
Ingredients
- 240 g (2 cups) All-purpose Flour
- 400 g (2 cups) Granulated Sugar
- 50 g (½ cup) Cocoa Powder
- 1 ½ teaspoon (1½ teaspoon) Baking Powder
- ½ teaspoon Baking Soda
- 120 g (½ cup) Whole Milk (room temperature)
- 2 Large Eggs (room temperature)
- 128 g (½ cup) Sour Cream (room temperature)
- 120 ml (½ cup) Vegetable Oil
- 1 teaspoon Espresso Powder
- 1 teaspoon Vanilla Extract
- ½ teaspoon Salt
- 60 ml (¼ cup) Hot Water
- 4 Large Egg Yolks
- 480 g (2 cups) Heavy Cream
- 2 tablespoon Granulated Sugar
- 2 tablespoon Cornstarch
- 1 teaspoon Vanilla
- 100 g (3½ oz) Dark Chocolate
- 170 g (6 oz) White Chocolate
- 140 g (5 oz) Milk Chocolate
- 80 ml (⅓ cup) Heavy Cream
Equipment
Instructions
- Preheat your oven to 350°F / 180°C (160°C fan-assisted) and grease two 8-inch cake pans.
- In a large bowl, sift the dry ingredients, including the flour, sugar, cocoa powder, baking powder, baking soda, and salt. Whisk everything together.240 g (2 cups) All-purpose Flour, 400 g (2 cups) Granulated Sugar, 50 g (½ cup) Cocoa Powder, 1 ½ tsp (1½ teaspoon) Baking Powder, ½ tsp Baking Soda, ½ tsp Salt
- In a separate bowl, combine all the wet ingredients, except the hot water, which includes the eggs, milk, sour cream, vegetable oil and vanilla. Whisk together lightly until it makes a homogeneous mixture.120 g (½ cup) Whole Milk, 2 Large Eggs, 128 g (½ cup) Sour Cream, 120 ml (½ cup) Vegetable Oil, 1 tsp Vanilla Extract
- Pour the wet ingredients into the dry and whisk until everything is combined and there are no lumps.
- In a small bowl or a glass, combine the hot water with the espresso powder and mix until completely dissolved. Pour into the cake batter and mix until combined.1 tsp Espresso Powder, 60 ml (¼ cup) Hot Water
- Divide the batter evenly between your two cake pans and bake for 35 minutes, or until a skewer inserted comes out clean.
- Let the cakes cool completely before removing them from the pans. Level off the tops of the cakes with a serrated knife or cake leveler, so they are completely flat. You may also want to cut the layers down to a thinner size if you want a thinner layer of cake.
- Place a cake ring on top of a cake board or serving plate and place one of the layers of cake on the bottom. Set aside until the mousse is ready.
- Chop up the dark chocolate and white chocolate finely and put them into two separate bowls. Set aside.100 g (3½ oz) Dark Chocolate, 170 g (6 oz) White Chocolate
- Put egg yolks in a bowl with the sugar and cornstarch and whisk until they become slightly thick and pale.4 Large Egg Yolks, 2 tbsp Granulated Sugar, 2 tbsp Cornstarch
- Divide the heavy cream in half so you have two bowls containing 1 cup / 240ml each. Set one of the bowls aside - we will whip this up later.480 g (2 cups) Heavy Cream, 1 tsp Vanilla
- Pour the other bowl of cream into a saucepan with the vanilla and warm over medium-low heat until it is scalding hot. This means it is giving off steam and there are tiny bubbles appearing on the surface. Don't let it boil.
- Drizzle a little of the hot cream into the egg yolks and whisk it in. Keep drizzling a little more, whisking the whole time, until all the cream is added. Then pour the entire mixture back into the saucepan and return to the heat.
- Heat the mixture, whisking constantly (but not vigorously - just enough to keep it moving and avoid burning) until it begins to boil. Boil for 1-2 minutes until it begins to thicken.
- Remove from the heat and put half of the mixture into the bowl with dark chocolate and half in with the white chocolate. Mix each bowl until the chocolate has completely melted.
- In a separate bowl, whip up the reserved heavy cream until stiff peaks form. By the time you have whipped the cream, the custard mousses should have cooled to room temperature. If they are still warm, let them cool completely, then split the whipped cream evenly between the two chocolate mousse mixtures and fold it in gently until completely combined.
- Pour the dark chocolate mousse on top of the cake layer in your dessert ring and smooth it out with a spatula.
- Pour the white chocolate mousse on top and smooth it out in the same way. The dark chocolate will be a lot firmer than the white chocolate, so you should be able to pour the white chocolate mousse on top without them mixing together. If your dark chocolate is still very liquid, put it in the fridge for a few minutes after pouring it onto the cake before adding the white chocolate layer.
- Put the entire cake in the fridge for 30 minutes. After 30 minutes, add the second cake layer on top, then return to the fridge to set for at least 4 hours.
- Once the cake has been chilling for at least 4 hours, remove it from the fridge and release it from the cake ring. Return to the fridge while you make your ganache.
- Chop your chocolate finely and place it in a bowl.140 g (5 oz) Milk Chocolate
- Heat the cream on medium heat, just until scalding (tiny bubbles just starting to form). Don't let it boil. Remove from the heat and pour the cream over the chocolate. Let it sit for a minute.80 ml (⅓ cup) Heavy Cream
- Mix the cream and the chocolate together until completely melted, glossy and smooth. Let it cool completely to room temperature. It should be thick enough that it won't just run off the side of the cake, but thin enough to spread out into a nice smooth layer on top of the cake.
- Spread the ganache on top of the cake and use a spatula or knife to spread it out to the edges.
- Decorate with sprinkles or chocolate shavings.
Nutrition
Notes
EDIT - 8th November 2024:
After feedback from readers, I have made a few small tweaks to this recipe to help everyone have the best chance of success. The changes made were:- Increased the amount of white chocolate in the white chocolate mousse so it sets up better.
- Adjusted the ratio of cream to chocolate in the chocolate ganache so it is less runny
- Improved instructions to clarify how the cream is divided and used.
- Improved the instructions for heating the cream properly so that the mousse thickens.
Tried this recipe?
Could you please do me a huge favor and let me know in the comments how it was? I love hearing your feedback to make my recipes the best they can be!FAQ
Tuxedo cake gets its name from the contrasting layers of dark and white chocolate, resembling the black and white of a tuxedo.
Tuxedo cake consists of a layer of chocolate cake, topped with dark chocolate mousse, white chocolate mousse, more chocolate cake and then chocolate ganache.


Suzanne West says
I'm a decent baker, and prefer traditional methods. But mousse is not my strongest dish. I learned a slightly different method and haven't had any issues. You may at first balk at this - I know I did - but please trust me when I say no one will know the difference.
In a double broiler combine chocolate, 1/2c of whole milk, the sugar and (stick with me here) 12 large marshmallows. Once melted, set aside to cool and whip the heavy cream, very stiff. Fold cooled chocolate mix into the whip, and chill. That's it. It eliminates the risk of curdling eggs or finishing with a flat mousse. Simply not stressful to make. I haven't tried it with white chocolate but assume similar results.
Suzanne West says
NOTE: I forgot to mention that I use 2oz baking chocolate, 2 Tbs sugar, 1/2 c. milk, 12 large marshmallows, and 1-1/2 c. of heavy cream.
Carly says
I’m only on the cake section right now, but 240gr of flour is only one cup, 480gr would be two cups
Jules Grasekamp says
Hi Carly, 1 cup of all purpose flour is 120g (or 125g depending on how you measure).
1 cup holds 240ml in terms of volume, which is what you might be thinking of? But while the volume stays the same, the weight changes depending on what ingredient you are measuring - e.g 1 cup of sugar is 200g.
In any case I always recommend weighing with a scale rather than with cups as it’s a much more accurate way to measure.
Hope this helps!
Jules
Sherre says
Thank you for responding, by “fallen”a 1/3 of the cakes center is inverted. At first I thought I could correct by adding & leveling with mousse but as time passed it became worse.
I do feel confident to give it another go do to your response, knowing the batter should be thinner than normal & the espresso very weak helps. In addition I did NOT take your suggestion & use a scale, I will on my go around. Thank you again.. Sherre’
Jules Grasekamp says
I'm happy to hear you will give it another try! It's so frustrating when cakes don't turn out. I would definitely suggest trying it with a kitchen scale next time - measuring with cups is rarely accurate, and as this is such a wet batter, if the flour is not measured accurately it can throw the whole bake off.
Some other things that it could be:
- Make sure that you level off the spoon when measuring the baking powder and baking soda - too much leavening agent can cause cakes to rise too quickly and then collapse.
- Using pans that are too small. If your pan is overfilled it won't bake properly and is likely to either dome up or collapse. This recipe divides the batter into two 8-inch pans. You could also use two 9-inch pans for thinner layers, but don't go smaller or try to fit it all into one pan.
- Overmixing the batter - you don't need to mix this recipe much as you don't want to incorporate air into the batter. Just mix it until smooth. I usually do it by hand, but if you use a stand mixer make sure to only mix until combined.
- If the oven temperature is not accurate it can cause the cake to collapse. Many ovens run a little too hot or a little too cool, if you think that might be the case you can use an oven thermometer to calibrate it.
I hope this helps! Do let me know how your cake turns out next time around!
Happy baking!
Jules
Sherre says
Thank you my oven is very sketchy & small which affects the length of time therefore I start checking doneness early. You mentioned the hot water allows cocoa to bloom .. by hot water do you mean hot tap water? Or boiled water? I also made the espresso before adding to the batter obviously it would have cooled .. mistake?? .. I will let you know how successful I am!! And by the way I am going to punch out biscuit size cakes & frost with your chocolate buttercream frosting (i detest waste).
Thank you again
Sherre’
Jules Grasekamp says
That sounds delicious!
It can be hot water from the tap or a recently boiled kettle, I usually use the kettle.
If you are brewing fresh espresso instead of using espresso powder, you should use less water. The amount of hot liquid going into the batter should be 1 cup in total.
Also make sure you are not opening the oven door too soon or too often - opening the oven door lets all the hot air out and lowers the oven temperature, so if you do that too early in the baking process the cake will collapse.
Good luck!
Jules
Sherre says
I just finished with the cake portion & when adding the 1tsp espresso powder & full cup water I thought made the batter too thin, when the cake was finished in 20 minutes (small oven) clean toothpick it looked as though cake had fallen (first ever & i am 70).I know you stated Espresso not necessary I assume I still need the full cup of water?? Idk what I did wrong, any clue?? I will try again but concerned.
Jules Grasekamp says
HI Sherre,
I'm sorry to hear your cake didn't turn out. I'm happy to help you troubleshoot. The batter should be quite runny once the hot water is added. Yes the water is still necessary even without the espresso powder as it adds moisture and blooms the cocoa powder.
Can you please explain what you mean by 'it looked as though the cake had fallen'? What was wrong with it? Just so I can help figure out what went wrong.
Also can you clarify if you measured your ingredients with cups or with a kitchen scale?
Thank you!
Jules
DC Pear says
Could you use a chocolate simple syrup on this cake to make sure it's moist? Or is it already moist enough, and the syrup would make it soggy?
Thanks.
D. Flynn says
Ok - this was a pretty good recipe, but there are some things I changed. The instructions for the cream in the mousses was a bit vague. Please be aware that the total amount of cream is 2 cups, not 2 cups heated. Also, the white chocolate mousse needed an extra boost. I added a teaspoon of prepared gelatin to the whipped cream, and the white chocolate mousse was still pretty soft. If I make this again, I will increase the amount of gelatin to two teaspoons. The melted chocolates MUST be cool, or folding whipped cream into them doesn't work. This may be why some people are saying that their mousses were runny. I chilled my chocolate mixtures before folding in the whipped cream. It's frustrating to go to the effort to have a recipe not work. (Mine worked ok, but I've been baking for 60 years and can tell when something is off.)
Kimberlee says
Hi. I came across your recipe and sounds like it would taste amazing. I read the variations of making a cheesecake chocolate mousse it there isn’t a recipe for that. Would you mind sharing the cheesecake chocolate mousse? Thank you so much.
Jules Grasekamp says
Hi Kimberlee,
Absolutely, check out the 'chocolate cheesecake' section in the recipe for my Black Tie Mousse Cake (similar to the Tuxedo cake but different layers).
You can make this cheesecake layer with dark, milk or white chocolate.
Hope this helps!
Jules
Kimberlee says
Thank you so much for the quick response. As soon as I can get to the store and make this beautiful cake, I will let you know how it turns out. Thank you for sharing !!!
Leah says
Ha, I guess I need to use store bought eggs. My free range chickens basically have bright orange yolks so my white layer is more like major pit stained tuxedo cake lol. It's for my hubbies birthday so hopefully he won't mind.
Jules Grasekamp says
Haha oh no! Sounds like you have some super healthy chickens at least! 😀 I'm sure it still tasted great and I hope he loved it!
Jules
Leah says
Your right it still tasted great and we all very much enjoyed it. Thank you for the recipe!
Kim says
Hi!
So I made this cake already, super delicious! The white choco mousse never really set but would just ooze out slightly, no big deal.
I was wondering if I could freeze the cake in a cake ring to help the mousses set and stay in place? N then apply the chocolate ganache over it afterwards?
Also, have you tried this cake but multiple layers? I.e. from bottom to top : cake, choco mousse, white choco mousse, cake, choco mousse, white choco mousse, cake, choco ganache.
Thank you so much for sharing your recipe!!
Jules Grasekamp says
Hi Kim,
Sorry for the late reply, I've been a little slow on responding to comments this week as busy in the kitchen!
I have had a few people comment that their white chocolate layer was a little loose, so I think I will tweak the recipe slightly to add more white chocolate to help it firm up better.
You could freeze it in a cake ring to help it set but it shouldn't be necessary. It wouldn't cause any harm though. Just let defrost before you pouor on the ganache as it could mess it up as it thaws.
I haven't made it in multiple layers but i don't see any reason why it wouldn't work - it sounds wonderful! If you do try it I'd love to see how it turns out!
Thanks for trying my recipe!
Jules
Charlotte says
I made this for my nephew’s 1st birthday party, and everyone loved the cake! I ended up just using one of the cake layers and cutting it lengthwise in half. I was worried about too much cake to mousse ratio. This mod was perfect for my taste. I will definitely make this again!
Jules Grasekamp says
Hi Charlotte,
I totally get it, I prefer more mousse to cake ratio myself as well! I'm so glad you enjoyed the recipe, thank you for taking the time to let me know!
JoAnne says
When cooking the custard until it begins to thicken, how do you know when it is thickened enough. Should it coat the back of the spoon. Cook till bubbles form around the edge? A certain temp? I could use some more specific guidance.
Joanne says
Could you use buttermilk instead of milk?
Jules Grasekamp says
Yes absolutely, you can use buttermilk in equal measurements to the milk.
Happy baking!
Jules
Valerie says
My cake has been in the oven for 40 minutes and it’s still runny in the centre.. I read the instructions several times and not sure where I’m going wrong
Linda Carter says
A little confusing fir the mousse recipe concerning the whip cream. You say to put one cup aside to whip Katerina yet at the middle of the directions there looks to be 2 cups of whipping cream added to the egg mix but no info when to do it??? Is it just one cup in the hit mix and one whipped up???
Vanessa says
Hello! Instead of using hot water and espresso powder, can I just use a cup of coffee?
Jules Grasekamp says
Hi Vanessa, yes that will work fine!