
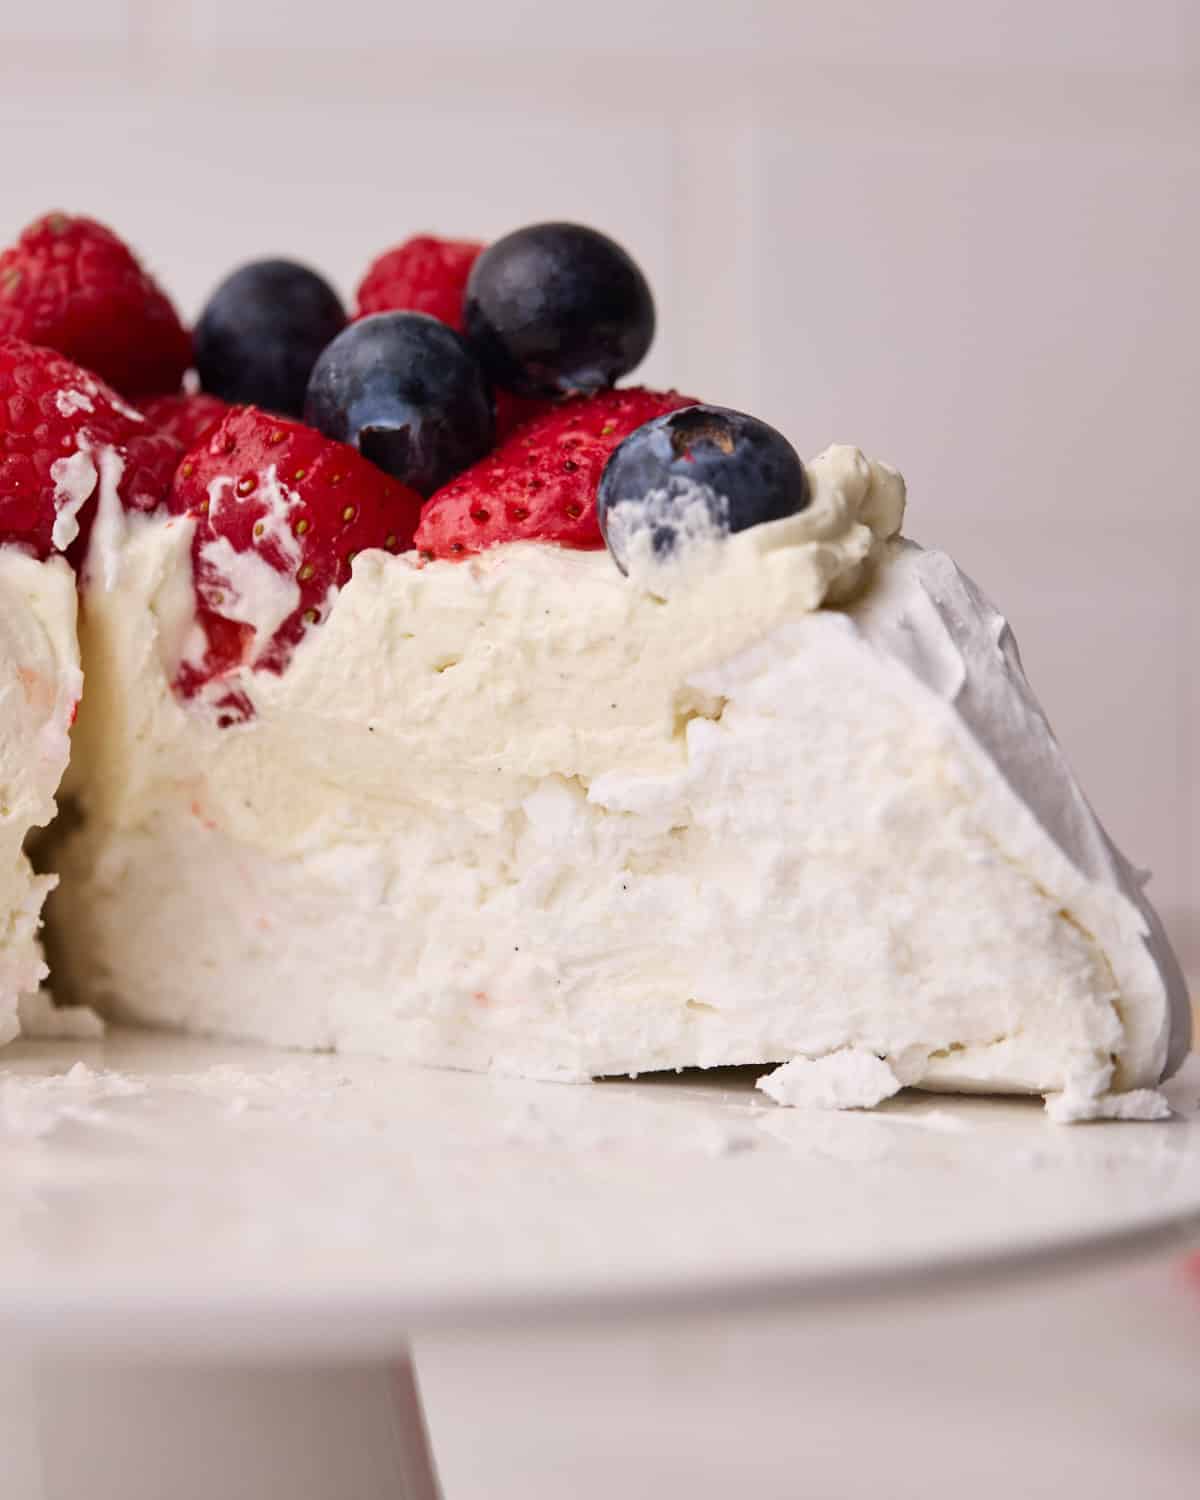
Pavlova is the centerpiece summer dessert of dreams! Snow-white meringue with a delicate, crisp shell and a soft, marshmallowy middle. Piled high with whipped cream and fresh berries, it's as beautiful as it is delicious.

Pavlova Recipe Snapshot
What it is: A crispy, sweet meringue shell baked just enough to make a soft, marshmallowy centre.
Why you'll love it: Only 4 ingredients to make an impressive dessert. This recipe includes a foolproof whipping method for flawless meringue and expert tips for success.
How to make it: Whip the egg whites and gradually add the sugar to make a meringue. Shape, then bake it low and slow.
I've tested more pavlova recipes than I can count - some turned out perfectly crisp and marshmallowy, others… cracked, wept, or collapsed in dramatic fashion (occasionally all at once). After a lot of trial and error (and sugar), I've finally cracked the formula for turning this delicate little diva into a reliably show-stopping dessert.
Don't be fooled by her simple, cloud-like appearance - pavlova is a deceptively complex dessert. With just a few basic ingredients and a whole lot of chemistry, there's a lot going on under that meringue shell.
This pavlova recipe has everything I wish I'd known when I baked my first one - from how to whip the meringue just right, to avoiding cracks and collapse. Whether this is your first pavlova or you've danced this dance before, I'll walk you through exactly how to get that crisp shell, marshmallow middle, and flawless finish every time. Let's dive into the fluffiest science lesson of your life!
Jump to:
What Is Pavlova?
Classic pavlova is a light dessert of French meringue that has been baked just right so it's crisp on the outside, but with a soft, marshmallowy center.
It's usually piled high with sweet whipped cream and fresh fruit, and sometimes drizzled with fruit coulis or curd. It looks fancy, but it's made from just a few simple ingredients - the magic is all in the method.
Ingredients

- Egg Whites - It's much better to use fresh eggs and separate them, rather than using boxed egg whites. Carton egg whites often won't whip up well, which can make your meringue flop. (See my ideas for recipes that use leftover egg yolks). Be extremely careful when separating your eggs, as even the tiniest trace of egg yolk in the whites will stop them from whipping up properly.
- Sugar - Superfine sugar (caster sugar) is best as it will dissolve into the egg whites easily. Regular granulated sugar may not dissolve and will leave you with grainy meringue. You can make your own superfine sugar by pulsing regular sugar in a food processor.
- Cornstarch - This will help create a super fluffy marshmallowy texture in the center of the pavlova, and it also absorbs excess moisture to prevent weeping and cracking.
- Cream of Tartar - The acid helps the egg whites whip up well and creates a more stable meringue. If you can't find cream of tartar, you can use 1 teaspoon lemon juice instead.
- Vanilla - To add a lovely depth of flavor, use vanilla extract or vanilla bean paste.
- Heavy Whipping Cream - We'll use this as a topping for the meringue. Make sure it's nice and cold before whipping.
- Fresh Berries - Choose a variety of your favorite summer berries to go with your lovely pavlova. I used strawberries, raspberries, and blueberries. Tart fruits tend to work best as they cut through the sweetness of the meringue.
See the recipe card for quantities and the full recipe.
What You'll Need
- Stand Mixer
- Mixing Bowl
- Rubber Spatula
- Baking Sheet
How to Make Pavlova
Follow this step-by-step guide to make the very best pavlova.

Whip the Eggs
In the bowl of a stand mixer, add the egg whites, cream of tartar, and a pinch of salt. Using the whisk attachment, whip on a low speed for 1-2 minutes until the mixture becomes foamy and opaque.

Add the Sugar
Gradually increase to medium-high speed, then add in the sugar, one tablespoon at a time. Leave the mixture to whip for around 15-30 seconds between each spoonful to let the sugar dissolve completely.
After all the sugar has been added, continue whipping for another 30 seconds. Then, check that the sugar has fully dissolved by rubbing a small amount of meringue between your fingers - it should feel perfectly smooth. If you notice any grittiness, keep whipping until it's completely dissolved.

Whip to Stiff Peaks
Scrape down the sides of the bowl with a rubber spatula, then add the vanilla.
Turn up the mixer to high speed, and whip until glossy, stiff peaks form - this means that the meringue peaks should stand up tall and straight without drooping.

Add the Cornstarch
Sift the cornstarch over the meringue and gently fold it in until fully incorporated.

Prepare the Pan
Draw an 8 or 9-inch circle onto a sheet of parchment paper (this will be a guide to shape the pavlova), turn it over, and place it onto a baking sheet.
Pop a tiny blob of meringue in the corners of the tray to stick down the piece of parchment paper, then spoon the rest of the meringue mixture into the circle.

Shape the Pavlova
Use a spatula or the back of a spoon to form the meringue into a round mound. Create a shallow dip in the middle of the pavlova to hold your toppings later.
Then, run the spatula or spoon up the sides to form subtle vertical lines. This slight indent helps stabilize the pavlova and prevents the toppings from sliding off.

Bake
Carefully place the pavlova into a preheated oven at 265°F / 130°C (110°C fan-assisted) and bake for 10 minutes. Then, reduce the temperature to 210°F / 100°C (80°C fan) and continue baking for 1 hour and 30 minutes. The pavlova is done when the exterior feels dry to the touch and it lifts easily from the parchment paper.
Avoid opening the oven door to check until at least 1 hour and 15 minutes into baking. Once done, turn off the heat and leave the baked pavlova inside the oven to cool for at least an hour (ideally two) to help prevent cracking.

Decorate
Combine the heavy cream, sugar, and vanilla and whip until it reaches soft peaks.
Spoon the whipped cream on top of the fully cooled meringue, and pile high with mixed berries.
For more berry flavor, add some homemade strawberry coulis on top of the meringue too. Serve immediately.
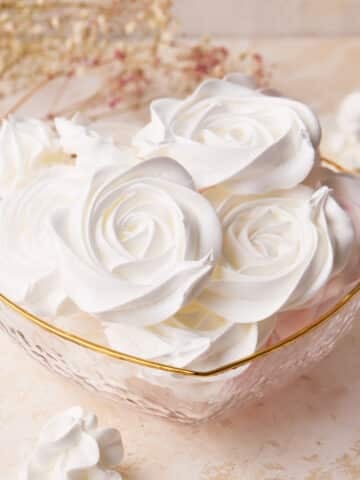
How to Make Mini Pavlova
The classic way of making pavlova is showstopping, but this recipe can also be used to make mini pavlovas so your guests can have their own individual desserts.
Instead of piling your meringue onto the baking tray, transfer it to a piping bag with a star tip fitted and pipe the meringue into little mounds. (You can also just use a spoon if you don't want to pipe them, but it is a little fiddly with the smaller pavlova!) Use a spoon to create a slight dip in the middle to hold the toppings.
When baking, preheat to the same temperature, but turn the oven temp down immediately once you put the pavlova in there, rather than waiting for 10 minutes. They still take a long time to bake because of the low temperature, but check them after about 1 hour and 15 minutes, and check for the same signs as the bigger pavlova.
Note: Mini pavlovas are different from meringue cookies or nests, though the terms are often used interchangeably. Though the mixture is the exact same, meringue nests are baked until they are crisp all the way through, whereas mini pavlova should still have that soft, marshmallowy center.
Troubleshooting
- Eggs won't whip - If your egg whites have been whipping for a long time and don't seem to be thickening up, there are a few possibilities.
- Eggs aren't fresh - If you are using older eggs, they may not whip up well. This is why it's important to use whole eggs and separate them, as carton egg whites have been sitting for a lot longer and tend not to whip up well.
- Egg yolk in the whites - If you get even the tiniest speck of yolk in your whites, then it will stop them from whipping. Be extra vigilant when separating your eggs. Room temperature egg whites whip up best, but separating while they are still cold will make it easier to keep the yolks from breaking.
- Fat on the bowl - Even a trace of fat on your bowl will impact the egg whites. Make sure to use a clean bowl, and if uncertain, you can wipe down your bowl with a paper towel and lemon juice or white vinegar before starting.
- Grainy Texture - If your sugar isn't dissolving into the egg whites, you likely added it too early or too quickly. Wait until the egg whites start to foam up, then add the sugar very gradually, just one tablespoon at a time. It's important to give the sugar time to dissolve in between additions (15-30 seconds).
- Pavlova Weeping - If your pavlova is weeping, there was some sugar in it that wasn't fully dissolved. Always add the sugar gradually and check to make sure there is no grittiness before continuing with the recipe.
- Pavlova Cracked - A little cracking is normal and to be expected, but if you see huge structural cracks on your pavlova, it was likely either baked at too hot a temperature or moved to a cool environment too soon. The sudden temperature change can shock the meringue and cause it to shrink or crack.
- Pavlova Collapsed - If your pavlova collapses, then either the meringue was overwhipped or the oven door was opened too soon during baking. Overwhipping creates a meringue that will deflate, and opening the door too soon lets the temperature cool down before the meringue has had a chance to set.
The Science of Meringue
There is a lot of science that goes into this simple dessert. Here are some of the most important things that will make your pavlova turn out perfectly every time.
- Egg White Foam Structure - When you whip egg whites, they trap air and create a foam that forms the meringue base. By starting to whip the egg whites slowly and gradually increasing the speed, we create much smaller air bubbles that forms a tighter structure and results in a smoother, more stable meringue that is less likely to deflate.
- Adding Acid - Acid (like cream of tartar or lemon juice) helps support the stabilisation of the foam by slowing down the unfolding of the proteins in the egg whites and encouraging finer bubbles, which also makes the meringue more stable.
- Sugar Stabilizes - The sugar doesn't just add sweetness, it dissolves into the egg whites and makes the liquid thicker, which strengthens those air bubbles and stops them from popping. The dissolved sugar is also what makes the meringue glossy and shiny, and it helps to form that crisp outer shell and marshmallowy center. It's important not to add the sugar too soon - the air bubbles need to form a base first so the sugar doesn't collapse the foam.
- Cornstarch Softens - The cornstarch seems like a small ingredient, but it is playing multiple important roles. First of all, it absorbs excess moisture during baking and creates a gel-like structure, which is what makes the middle so soft and marshmallow-like, rather than brittle. It also bonds with the egg white proteins to help make a structure that is flexible and less prone to cracking. The cornstarch also continues to work well after baking, by absorbing humidity and moisture to stop the meringue from weeping.
- Low and Slow Baking Method - This pavlova recipe is baked at a very low temperature. It takes a long time, but the result is pavlova perfection, which is worth it in my books! By baking low and slow, we are gradually drying out the meringue without browning the sugar or egg whites, so you'll have a perfectly snow-white pavlova without any discoloration. Baking at a higher temperature can cause the moisture to evaporate too quickly, which can lead to cracking or collapse, or the outside burning before the inside is properly cooked. All these things contribute to that perfect texture.
- Cooling in the Oven - Leaving the pavlova to cool in the oven after switching it off allows the pavlova to cool down very gradually. Meringue doesn't like sudden temperature changes, and if you take it out immediately, the shock of the colder air could cause it to crack or collapse. Leave it to cool in the oven for at least an hour, but preferably until it has come completely to room temperature.

Pavlova Topping Ideas
Pavlova is wonderfully versatile - it can become a totally different dessert with just a few simple tweaks. Here are a few ideas to inspire your next bake:
- Strawberry Sauce - Though traditional pavlova has just fruit and whipped cream, adding a delicious puree or coulis can make it extra special. Try my Strawberry Coulis recipe. Or for an easy strawberry topping, macerate some strawberries like in my Strawberry Shortcake recipe. You could also glaze the berries with my strawberry glaze recipe for a shiny, sweet finish.
- Tropical Twist - Keeping up with the summer vibes of this tasty dessert, using bright, tropical fruits can make for a gorgeously tangy and exotic pavlova. Swap out the berries for chopped mango, pineapple, and banana, and finish with a drizzle of passion fruit curd.
- Lemon Pavlova - The contrast of tart lemon curd on top of the sweet meringue is a really tasty combo.
- Pumpkin Pavlova - This summery dessert can also make a delicious fall-time treat. Try my Pumpkin Pavlova recipe with Pumpkin Curd and chopped pecans for a warm twist.
- Cherry Pavlova - Don't be fooled, pavlovas can be made all year round with the right toppings. In the colder months, I love to use cherries and chocolate shavings to garnish my pavlova, as well as a delicious sweet cherry filling (stolen from my Black Forest Cupcakes) to drizzle on top for a cosy flavor.
- Christmas Wreath Pavlova - Turn your pavlova into a festive centerpiece by shaping the meringue into a wreath before baking. Decorate with cranberries, figs, and raspberries, and finish with a swirl of raspberry coulis for a pop of colour and tartness (see my Raspberry Cupcakes for a tasty coulis recipe). It's an easy showstopper for any holiday table.

How to Store Pavlova
It's best to assemble the pavlova right before serving, as moisture is the enemy of meringue. Once assembled, store in an airtight container in the fridge for up to 2 days, but there may be some weeping.
The unfilled pavlova shell can be made a day or two ahead. Keep it in an airtight container or wrapped loosely in plastic wrap at room temperature, in a cool, dry place. After two days, the shell may start to lose its crispness.
The whipped cream and fresh fruit can be prepped a day ahead and stored covered in the fridge until needed the next day.
FAQ
If you have a question about this recipe that isn't answered here, feel free to write it in the comment section and I will get back to you as soon as I can.
Yes, an unfilled pavlova can be made 1-2 days in advance. Make sure you store it at room temperature in an airtight container or wrapped up gently in plastic wrap. It's best to assemble the pavlova right before serving.
That signature pavlova texture comes from a low-and-slow bake (see steps or recipe card for full instructions). The outside crisps up while the inside stays soft and marshmallowy. Additionally, the cornstarch helps to add that satisfying marshmallow middle.
Pavlova is light and sweet and is a dessert full of contrast. The sweetness of the meringue is balanced by the tart berries, and the textures vary from a crisp outer shell to smooth whipped cream to a soft, marshmallow-like center.
It's named after Russian ballerina Anna Pavlova, representing the soft ruffles of her tutu. The dessert is claimed by both Australia and New Zealand (and honestly, both deserve credit - it's fabulous).
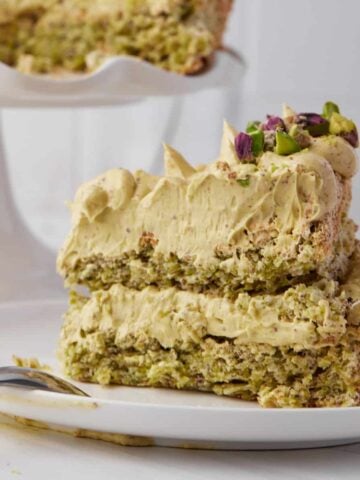
More Meringue Recipes
If you love making pavlova, try these meringue desserts:


Pavlova Recipe
Ingredients
- 4 Large Egg Whites fresh, not boxed (room temperature)
- 200 g (1 cup) Superfine Sugar (caster sugar)
- ½ teaspoon Cream of Tartar
- 1 teaspoon Vanilla Extract
- 2 teaspoon Cornstarch (cornflour)
- ¼ teaspoon Salt
- 240 ml (1 cup) Heavy Whipping Cream (double cream) cold
- 2 tablespoon Powdered Sugar (icing sugar)
- 1 teaspoon Vanilla Extract
- 300 g (2 cups) Fresh Berries
Equipment
- Stand Mixer with whisk attachment
Instructions
- Preheat the oven to 265°F / 130°C (110° fan-assisted).
- Add the egg whites, cream of tartar, and a pinch of salt to the bowl of a stand mixer with a whisk attachment fitted. Whip on low speed for 1-2 minutes until the egg whites become foamy and opaque.4 Large Egg Whites, ½ tsp Cream of Tartar, ¼ tsp Salt
- Gradually increase the speed to medium-high, then start adding the sugar, one tablespoon at a time. Let the mixture whip for 15-30 seconds in between each spoonful to allow the sugar to dissolve.200 g (1 cup) Superfine Sugar
- Once all the sugar has been added, whip for another 30 seconds, then check to make sure there are no sugar granules that haven't dissolved. You can do this by rubbing a little bit of meringue between your fingers, it should feel completely smooth. If it is gritty at all, keep whipping.
- Scrape down the sides of the bowl and then add the vanilla. Turn the mixer up to high speed and whip until glossy, stiff peaks form. This means that the meringue peaks should stand up tall and straight without drooping.1 tsp Vanilla Extract
- Sift in the cornstarch and fold it gently into the meringue.2 tsp Cornstarch
- Draw an 8 or 9-inch circle onto some parchment paper, then flip it over and put it on. your baking sheet. use a little blob of meringue in each of the four corners to stick the parchment paper to the pan. Spoon the meringue out into the circle.
- Use a spatula or spoon to shape the meringue into a round shape. Make a slight dip in the middle for holding your toppings. Run your spatula up the sides of the meringue to make indented lines that slope into the middle as they go up - this will make the pavlova more stable and stops the toppings from sliding off.
- Gently place the pavlova into the preheated oven and bake for 10 minutes. Then, without opening the oven door, turn the temperature down to 210°F / 100°C (80° fan-assisted) and bake for 1 hour and 30 minutes. The bake time may vary, but you'll know the pavlova is ready when the outside is dry to the touch and it lifts away from the parchment paper easily. Do not open the oven door to check this until at least 1 hour 15 minutes of baking.
- Once it's ready, turn the oven off and let the pavlova cool in the oven for at least an hour, but preferably until it has cooled completely to room temperature. This will prevent cracking.
- Put the heavy cream, sugar, and vanilla into a bowl and whip until soft to medium peaks form.240 ml (1 cup) Heavy Whipping Cream, 2 tbsp Powdered Sugar, 1 tsp Vanilla Extract
- Spoon the cream on top of the cooled pavlova, then top with fresh berries.300 g (2 cups) Fresh Berries
Nutrition
Notes
Ingredients Notes:
- Egg Whites - It's much better to use fresh eggs and separate them, rather than using boxed egg whites. Carton egg whites often won't whip up well, which can make your meringue flop. Be extremely careful when separating your eggs, as even the tiniest trace of egg yolk in the whites will stop them from whipping up properly. Tip: The egg whites will whip up better at room temperature, but they are easier to separate while cold.
- Sugar - Superfine sugar (caster sugar) is best as it will dissolve into the egg whites easily. Regular granulated sugar may not dissolve and will leave you with grainy meringue. You can make your own superfine sugar by pulsing regular sugar in a food processor.
- Cream of Tartar -. If you can't find cream of tartar, you can use 1 teaspoon lemon juice instead.


Chris Radwanski says
I love the tip of using the meringue to hold down the parchment paper. Wouldn't want that lovely, airy meringue to float away! XD This looks like a great summer dessert!