
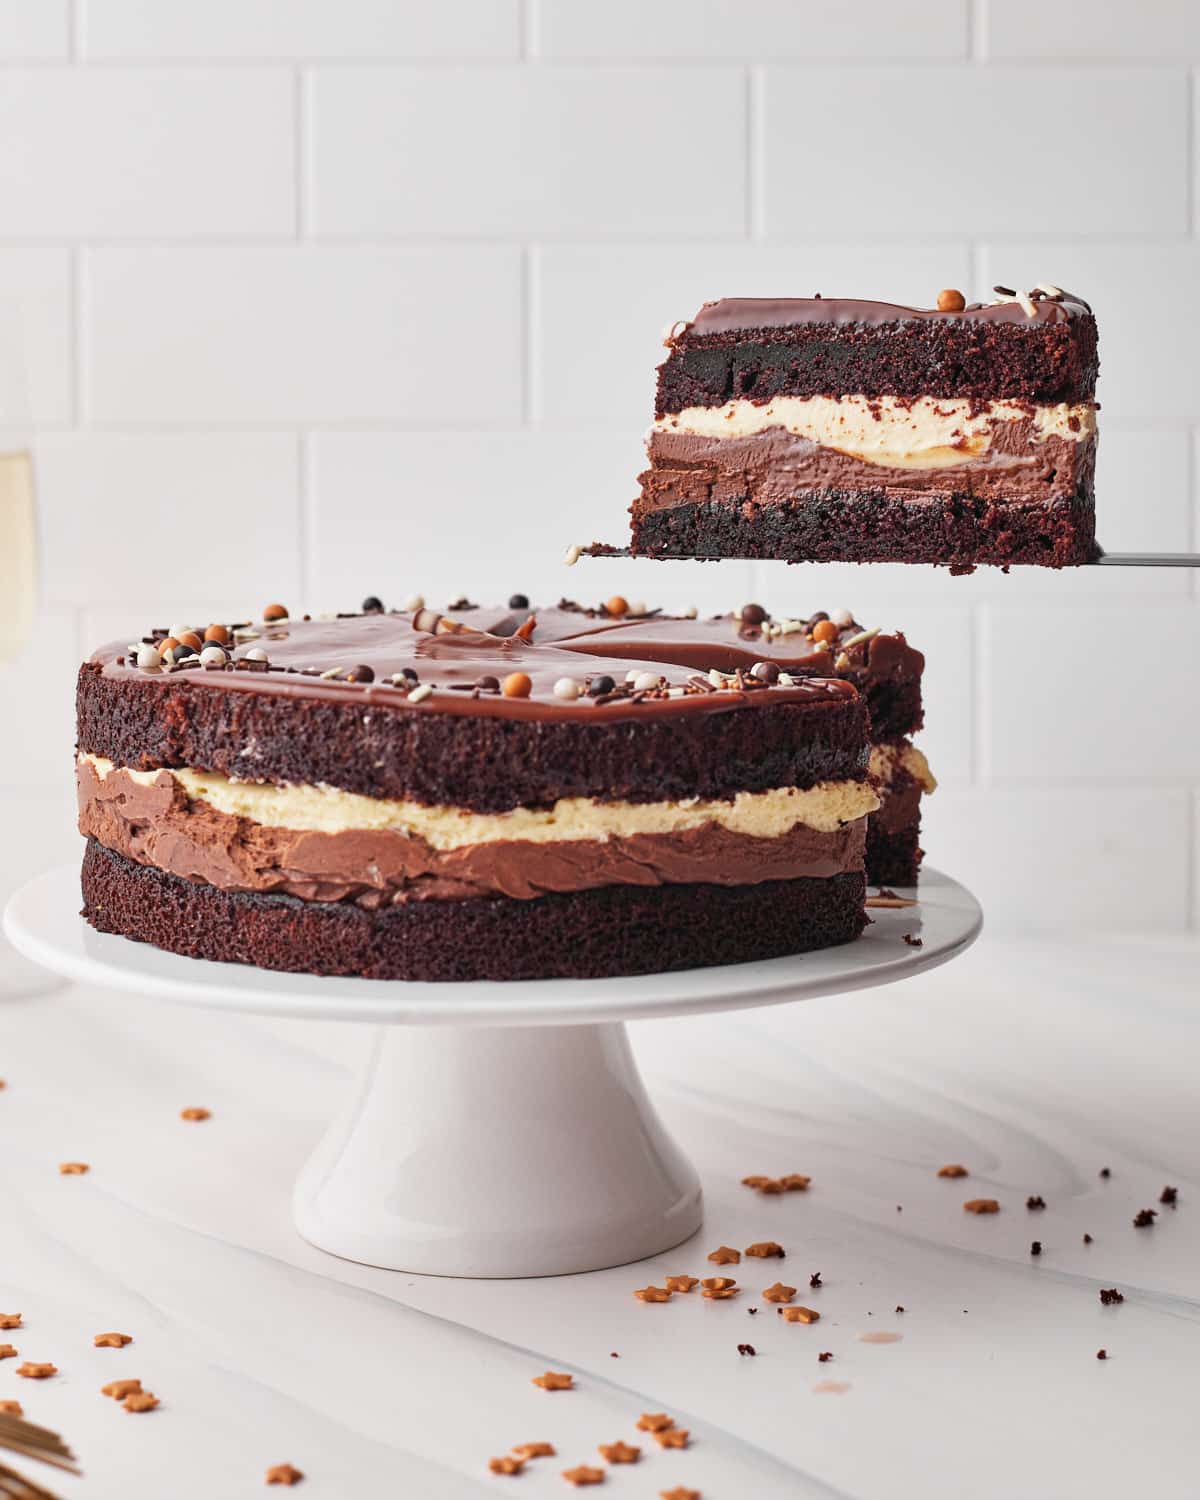
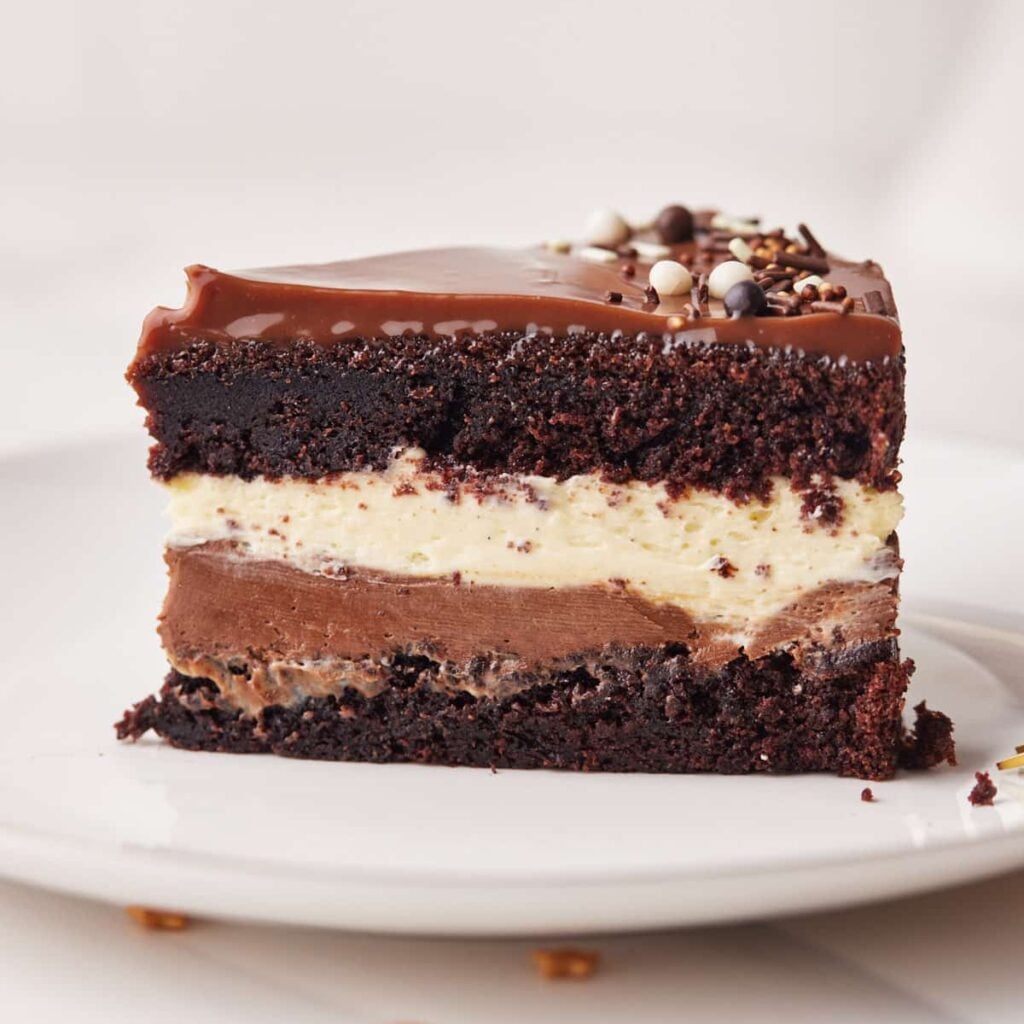
I don't do store-bought cakes, but when I first came across Costco's Tuxedo Cake, I knew I had to recreate it the way I'd make it: from scratch with rich chocolate cake, silky custard-based chocolate mousse, and glossy chocolate ganache.

Quick Look: Tuxedo Cake Recipe
A layered dessert with rich chocolate cake, dark chocolate mousse, white chocolate mousse, and a milk chocolate ganache.
☆ Why make THIS version? This is a from-scratch, patisserie-style Tuxedo Cake made with two rich, custard-based chocolate mousses - no instant pudding mix or cream cheese!
SUMMARIZE AND SAVE THIS POST ON
Many Tuxedo Cake recipes simplify the mousse layers with instant pudding mix or cream cheese. There's nothing wrong with taking that shortcut, but it wasn't the cake I wanted to create. I wanted something more indulgent, with silky chocolate mousses that taste as luxurious as the finished cake looks.
This version takes a little more time, but both mousses are made from one cooked custard base, so the process is more manageable than it first appears. And if you're going to make a showstopper for a special occasion, I think the extra effort is worth it!
Reader Review:
"This cake is unbelievably delicious and surprisingly simple to put together!! The rich custard in the filling makes it so luxurious as compared to a standard ganache, and the CAKE!!! My god woman it's the moistest cake I've ever made, I'm obsessed. Thanks for a great recipe!"
⭐⭐⭐⭐⭐ - Leah
Jump to:
Ingredient Notes
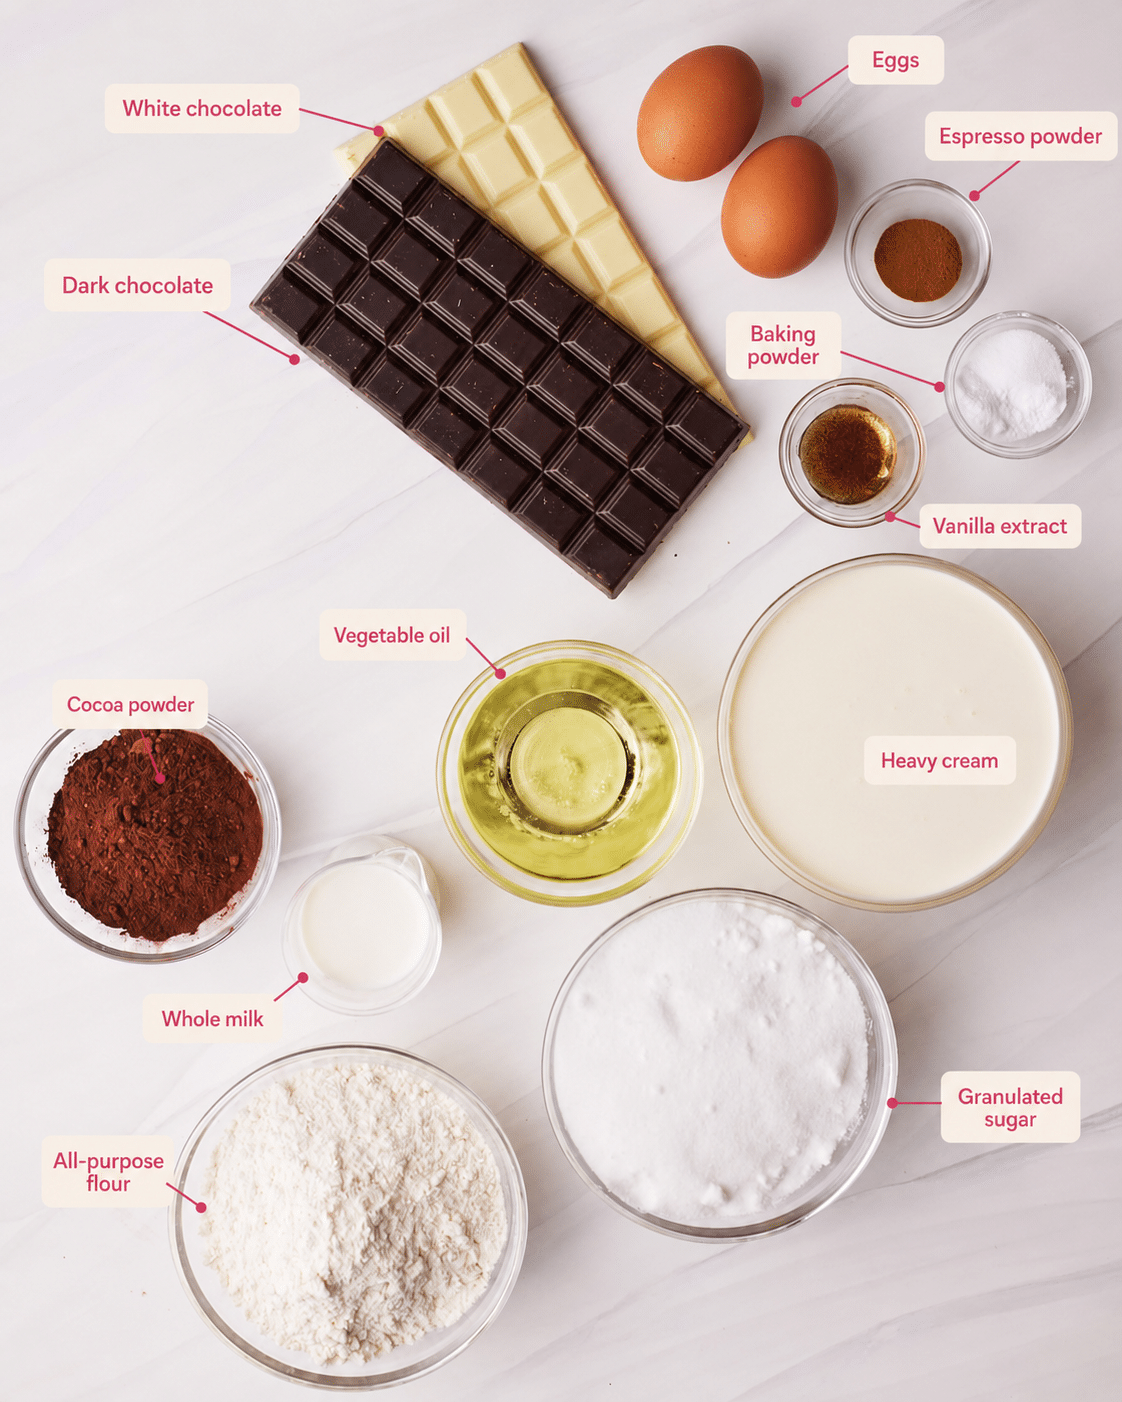
- Eggs - Whole eggs for the cake and egg yolks for the chocolate mousse. (See recipes for using leftover egg whites.)
- Oil - I use vegetable oil, but you can use any kind of flavorless oil like canola. The oil helps to keep the chocolate cake moist.
- Heavy Cream - Use heavy cream, heavy whipping cream, or double cream; the fat content should be at least 36%. Any lower than this and the mousse may not set.
- Chocolate - Use real chocolate, not chocolate chips or candy bars. This recipe uses dark and white chocolate for the mousses. I make the ganache topping with milk chocolate, but you can use more dark chocolate if you prefer.
See recipe card for quantities in both cups and grams (though I always recommend weighing your ingredients with a kitchen scale).
How to Make Tuxedo Cake
We'll make this cake in four stages: the chocolate cake, the chocolate mousses, the assembly, and the ganache. Don't worry if it looks like a lot - I'll guide you through each step with plenty of photos and visual cues.
If you want all of the indulgence but a lot less effort, check out my flourless chocolate torte recipe.
Before You Begin...
- Plan the timing - The chocolate cake needs to be completely cool before making the mousse, and the assembled dessert needs to set for at least 4 hours, preferably overnight - so factor both of those into your timing.
Chocolate Cake Layer
Start by making the chocolate cake as it needs time to cool before making the mousse. This is my easy and foolproof chocolate cake base. I also use it for my chocolate espresso layer cake and moist chocolate cupcakes with chocolate buttercream.
- Preheat the oven to 350°F / 180°C (160° fan), and prepare an 8-inch cake pan. I like to use baking spray and parchment paper circles.

- Sift all the dry ingredients, except the espresso powder, into a large bowl and stir to combine.

- In a separate bowl, mix together all the wet ingredients, except the hot water. Then pour into the dry ingredients and whisk until smooth.

- Dissolve the espresso powder in the hot water, then pour into the cake batter and whisk gently until combined.
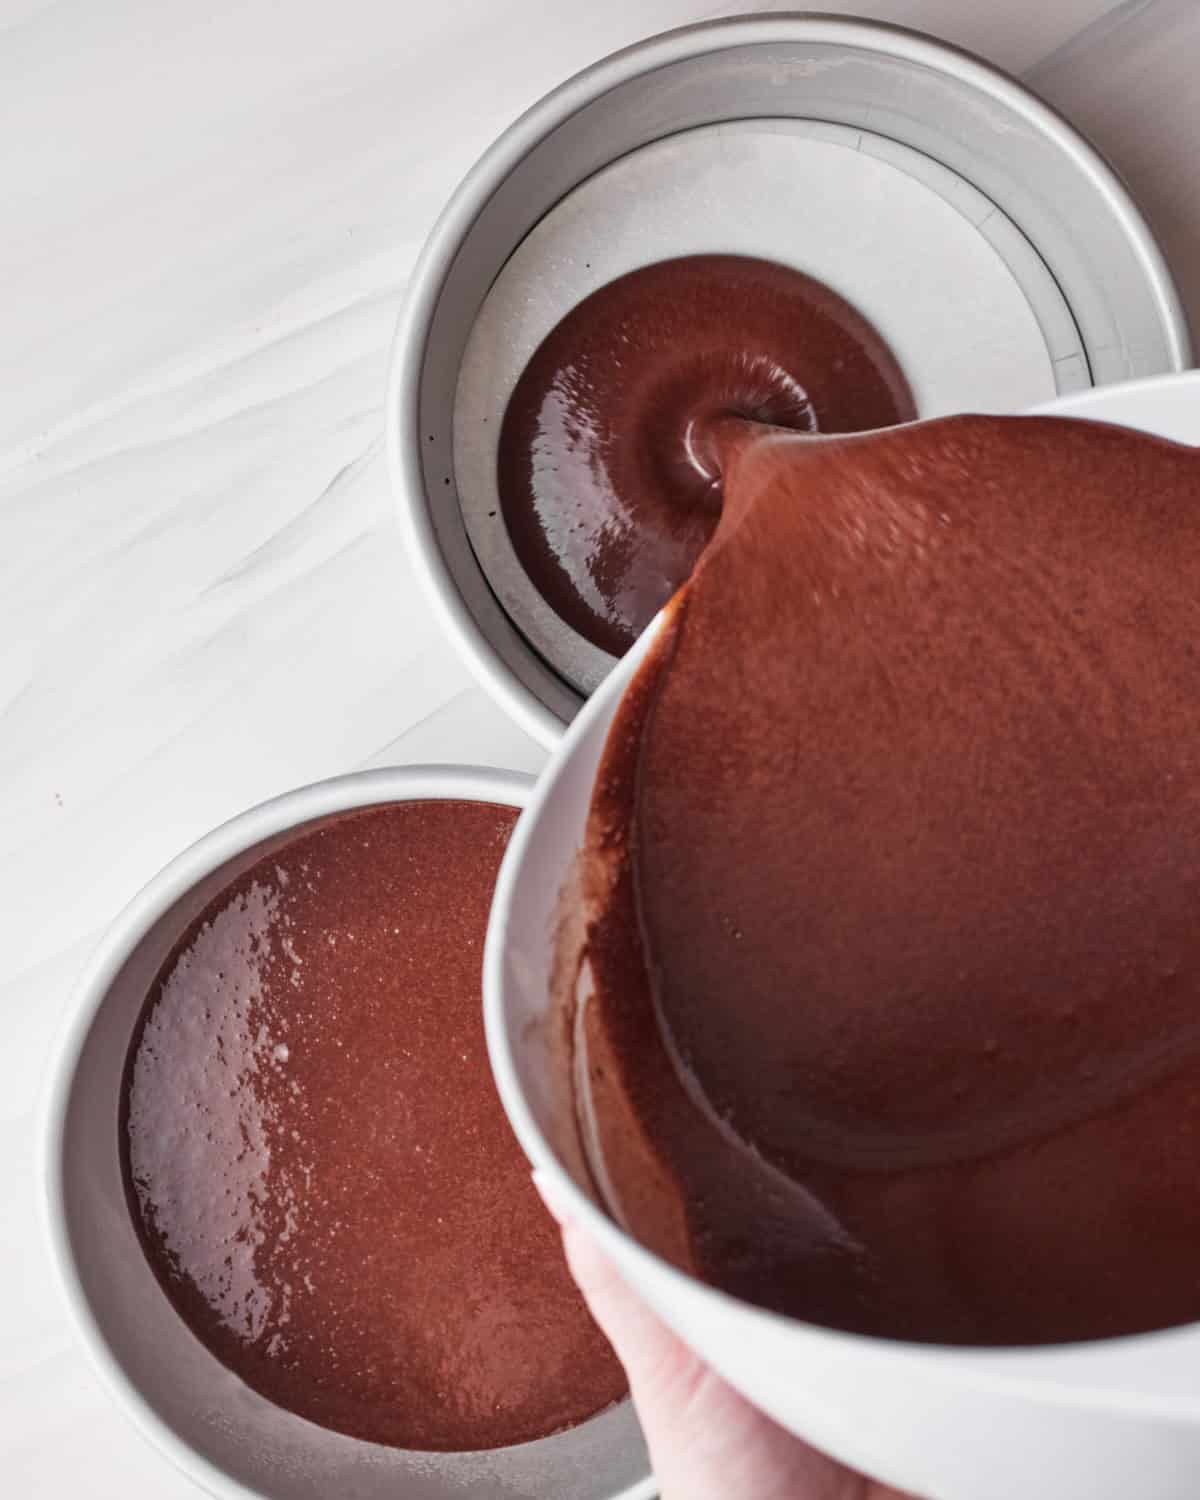
- Pour the chocolate cake batter into the prepared cake pan and bake for 25-30 minutes, or until a skewer in the middle comes out clean.
- Let the cakes cool in the pan for at least an hour before transferring them to a wire rack to cool completely.
- Once cool, use a serrated knife or cake leveler to cut off any dome on top, and slice the cake in half lengthwise, so you have two thin layers of cake.
Make the Chocolate Mousse Layers
Both chocolate mousses begin with the same custard base, so to make the process more efficient, you'll prepare one large batch and divide it between the dark and white chocolate to create the two layers.
The cooked custard is similar to a classic vanilla pastry cream (crème pâtissière). It gives the mousse a thick, creamy texture that is sturdy enough to layer in the cake. This differs from the filling in my chocolate mousse pie, which is made with a lighter, meringue-based mousse.
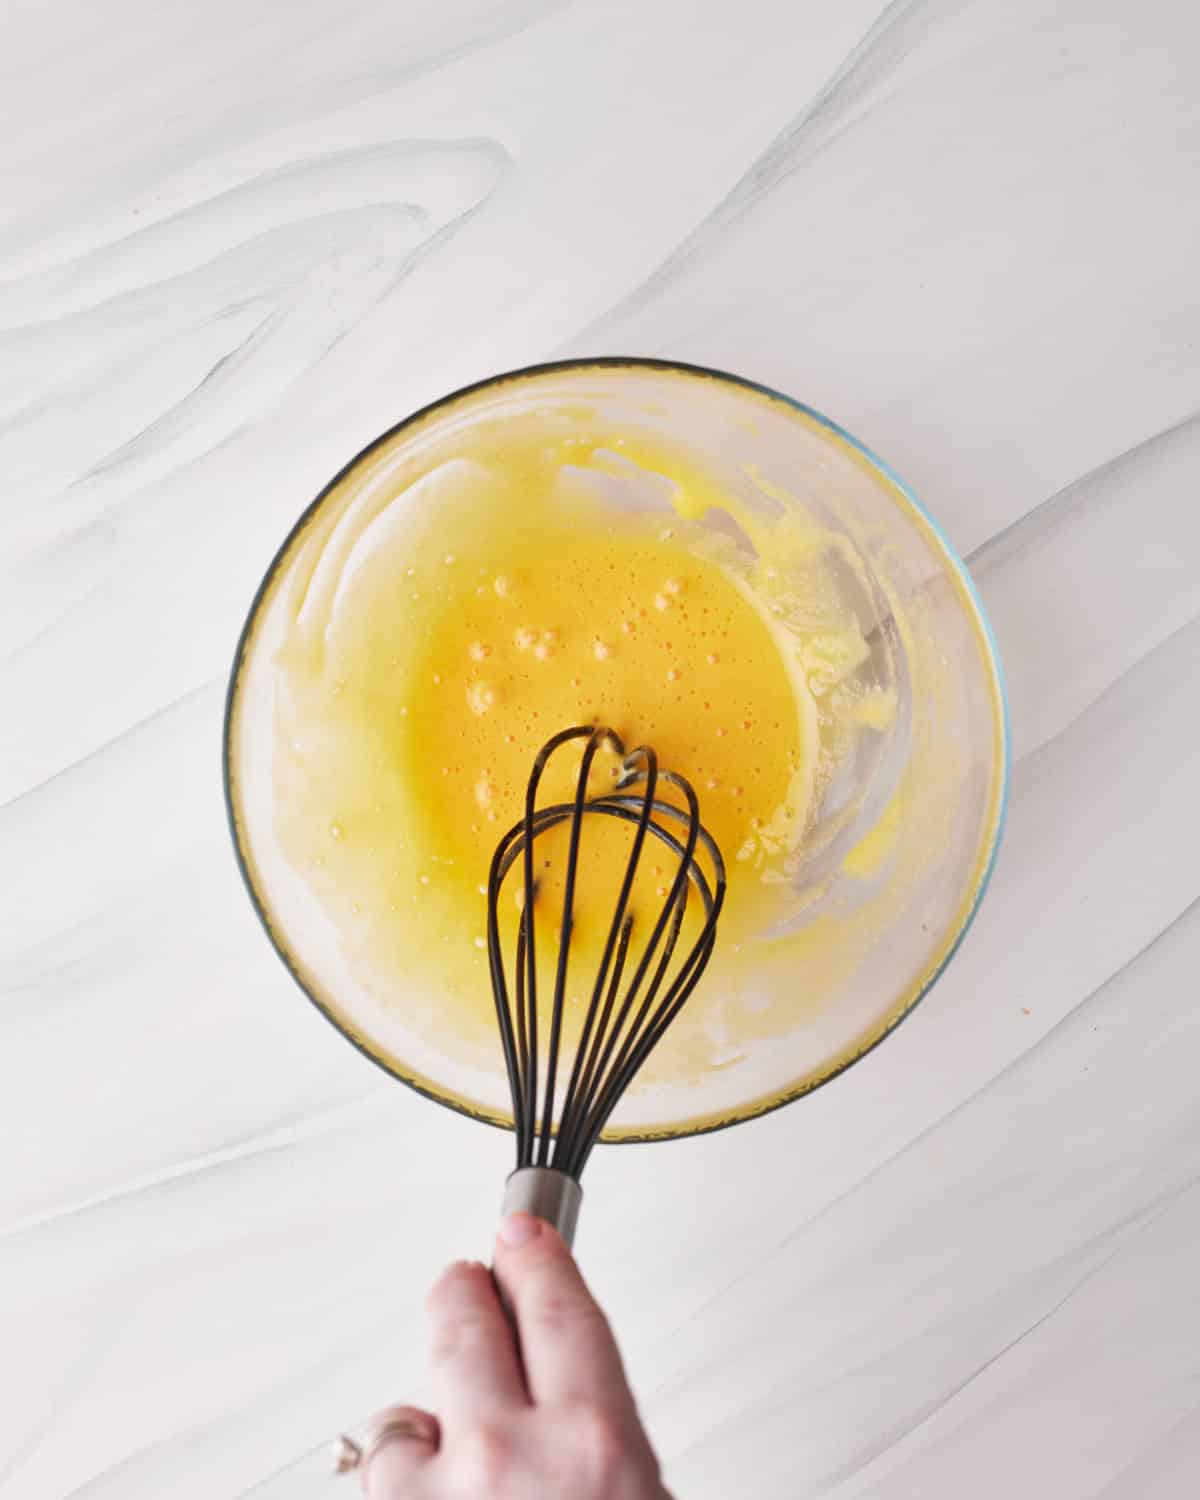
- Whisk the egg yolks, sugar, and cornstarch together until they are pale and thick.
Meanwhile, heat the cream in a saucepan over medium heat until scalding hot. (Steam rising and tiny bubbles appearing).

- Pour the hot cream into the egg yolks very gradually, whisking as you go. It's important to do it slowly to gently raise the temperature of the eggs and stop them from scrambling.
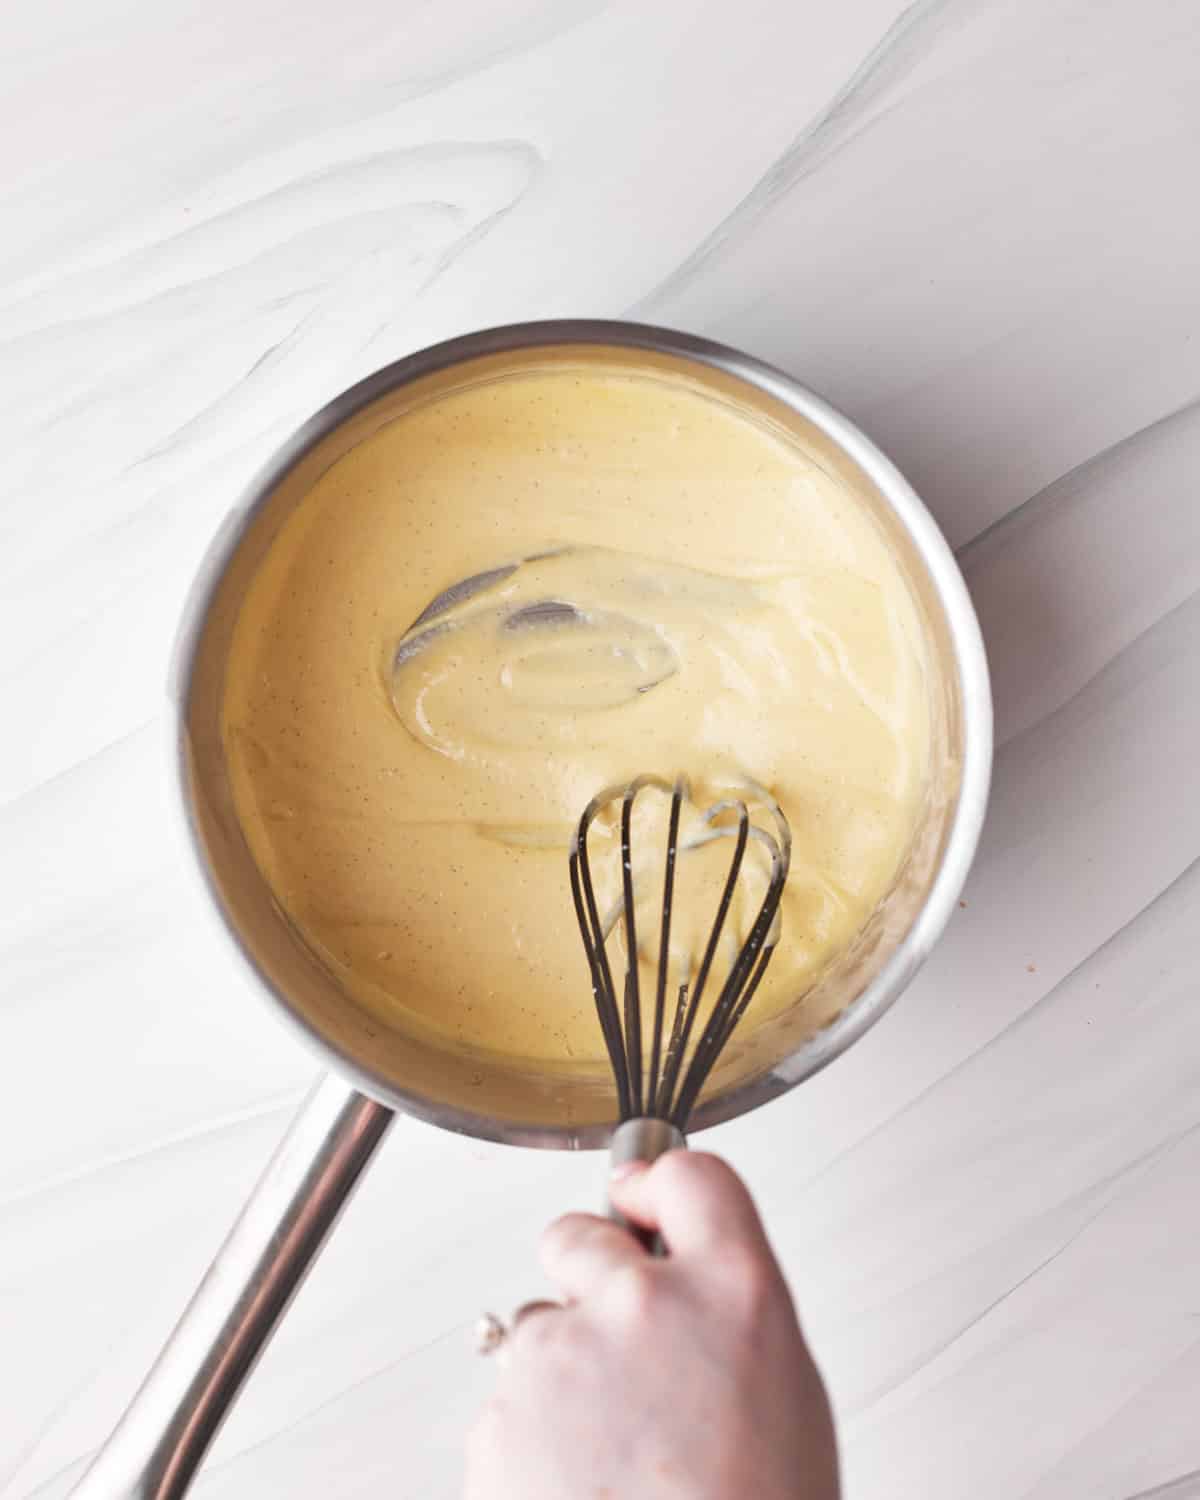
- Once all the cream is incorporated, pour the whole mixture back into the saucepan over medium-low heat, whisking constantly. The custard will thicken suddenly and begin to boil. Let it boil for 30-60 seconds or until it is noticeably thicker. Remove from the heat and stir in the vanilla and salt.
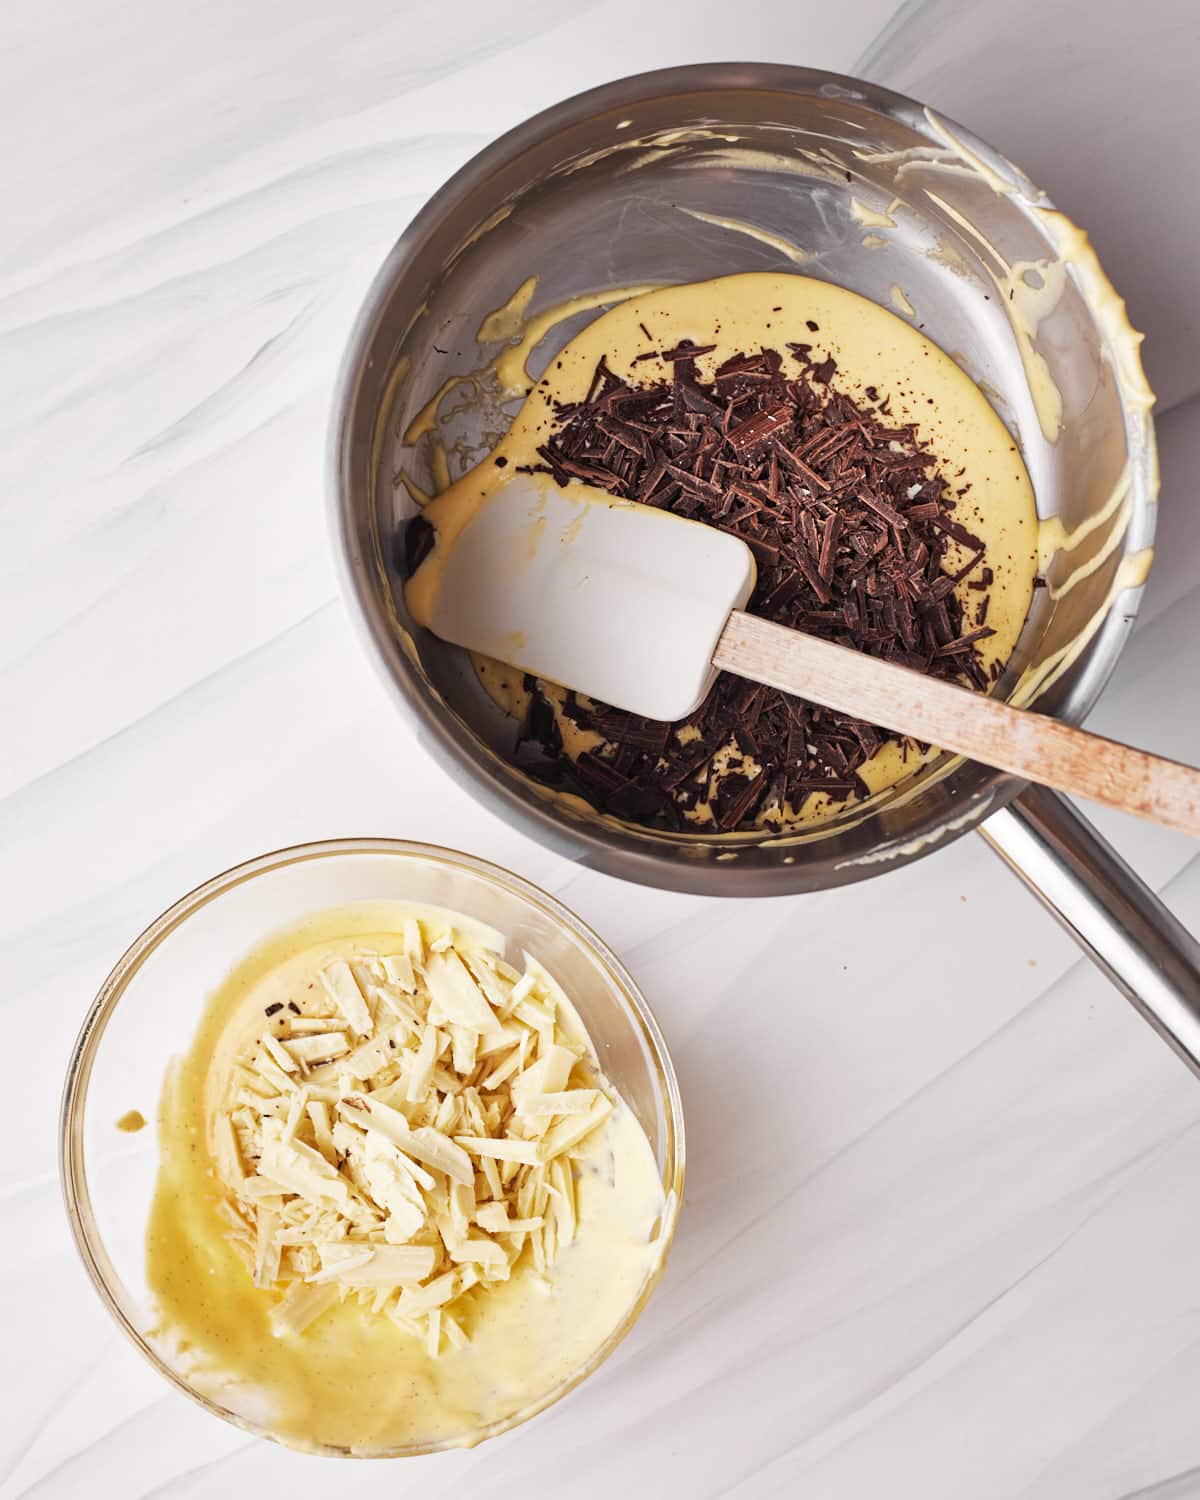
- Pour half of the custard base into the white chocolate, and half into the dark chocolate. I judged it by eye, but you can weigh it and divide it in two for total accuracy.
Stir until both chocolates have completely melted.
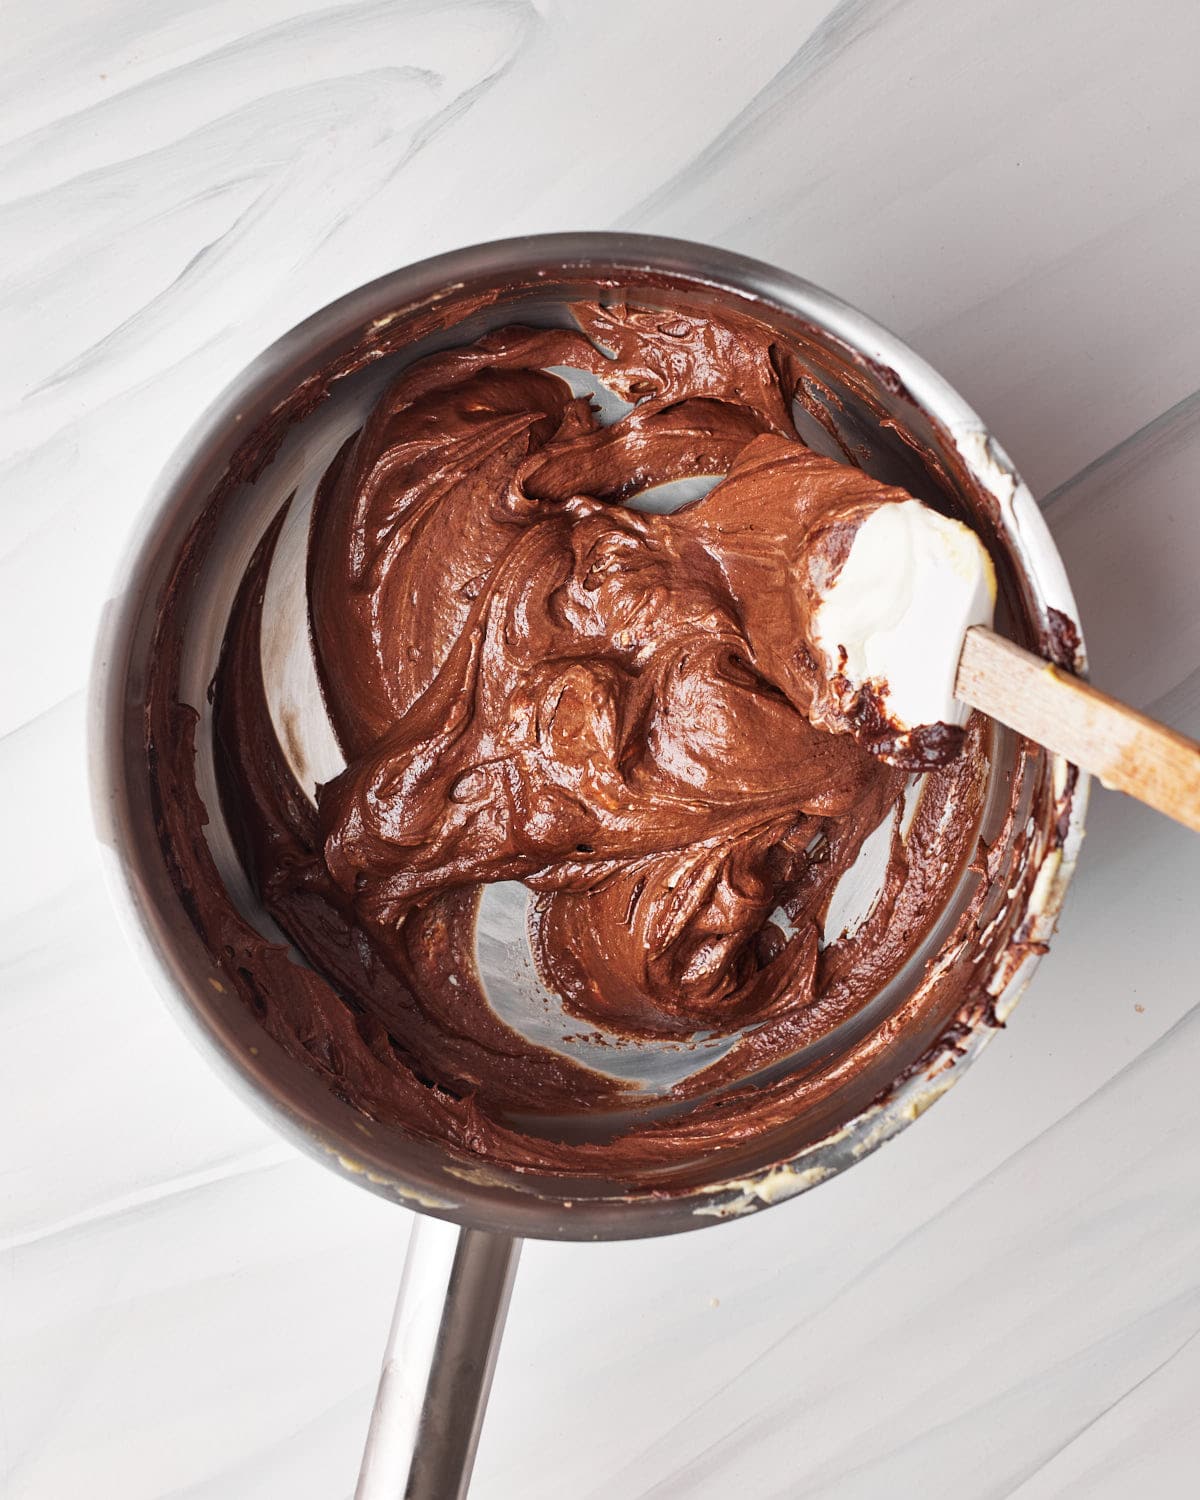
- Let the two mixtures cool while you whip the remaining heavy cream to medium peaks.
Once they are no longer warm, but still fluid, add half of the whipped cream into the dark chocolate mixture and gently fold it in until totally incorporated.
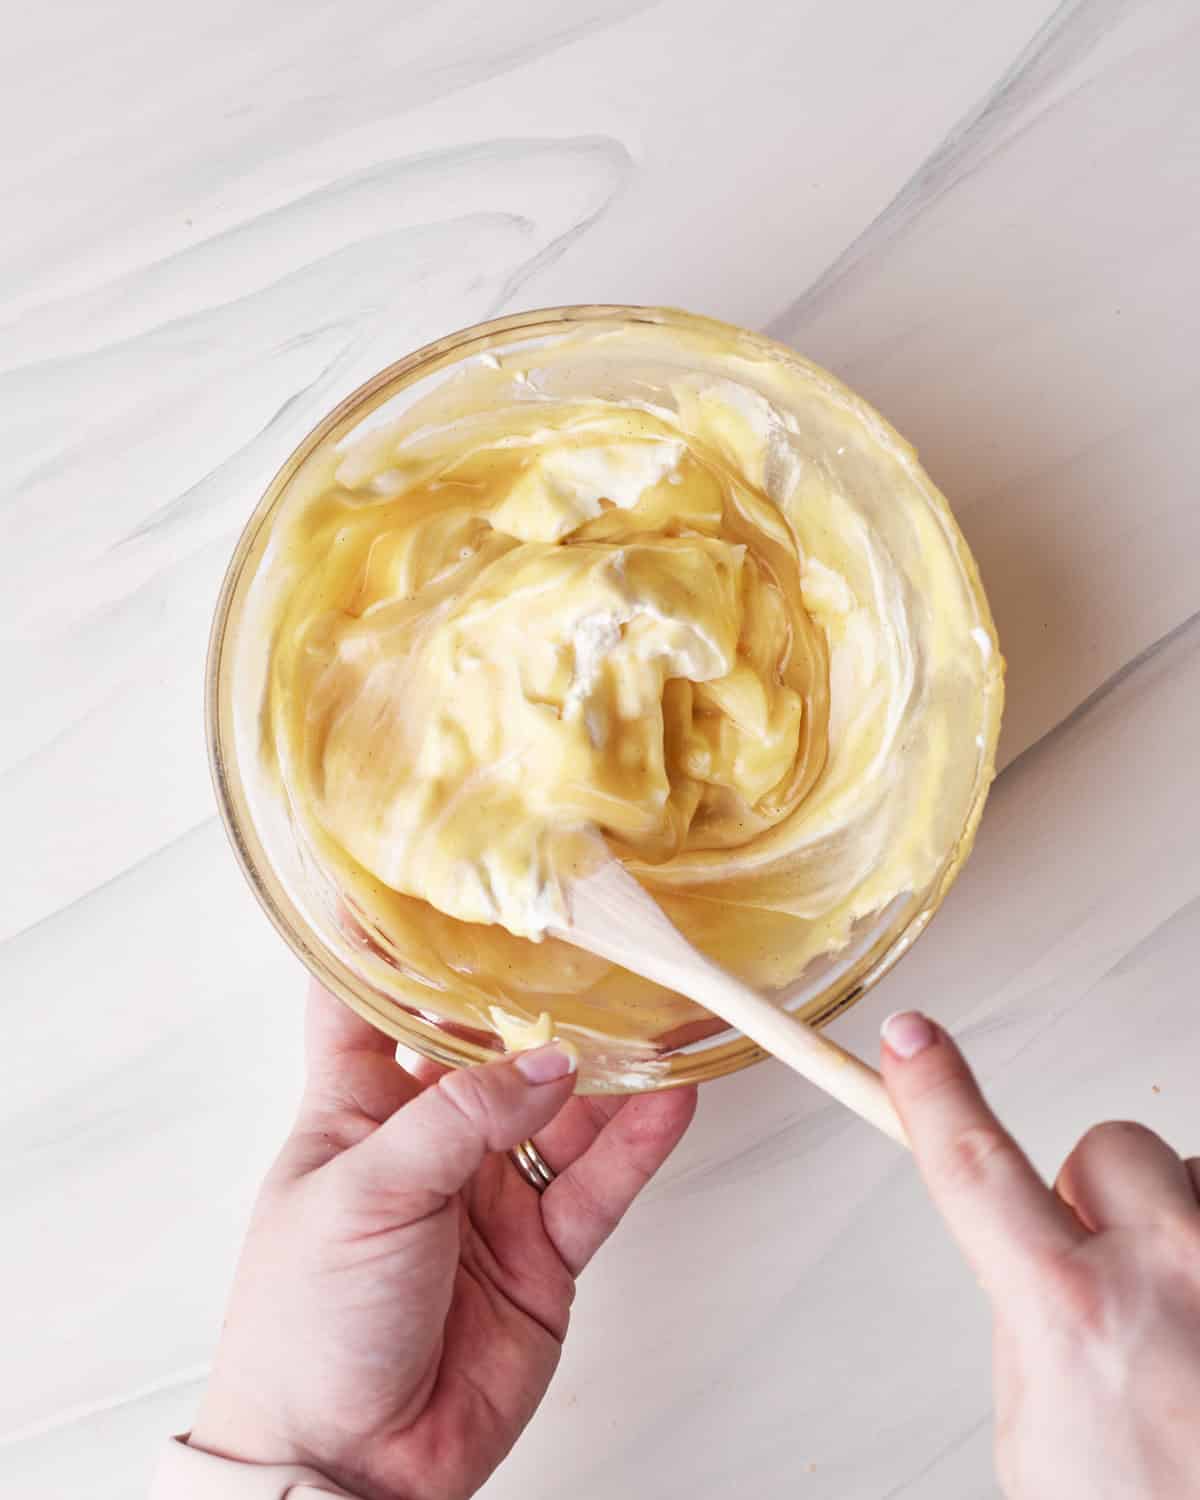
- Repeat with the white chocolate mixture, and then you are ready to assemble!
Folding whipped cream into a cooked custard lightens it while retaining stability - the same basic technique used to make crème diplomate.
Technique guide
If you're unsure what medium peaks should look like, my visual guide on how to make whipped cream shows the difference between soft, medium, and stiff peaks.
Assemble the Tuxedo Cake
Make sure you have your torted chocolate cake layers ready to go before you make the mousses, as they will begin to set fairly quickly.
Line your cake ring with acetate for clean sides and easy removal.
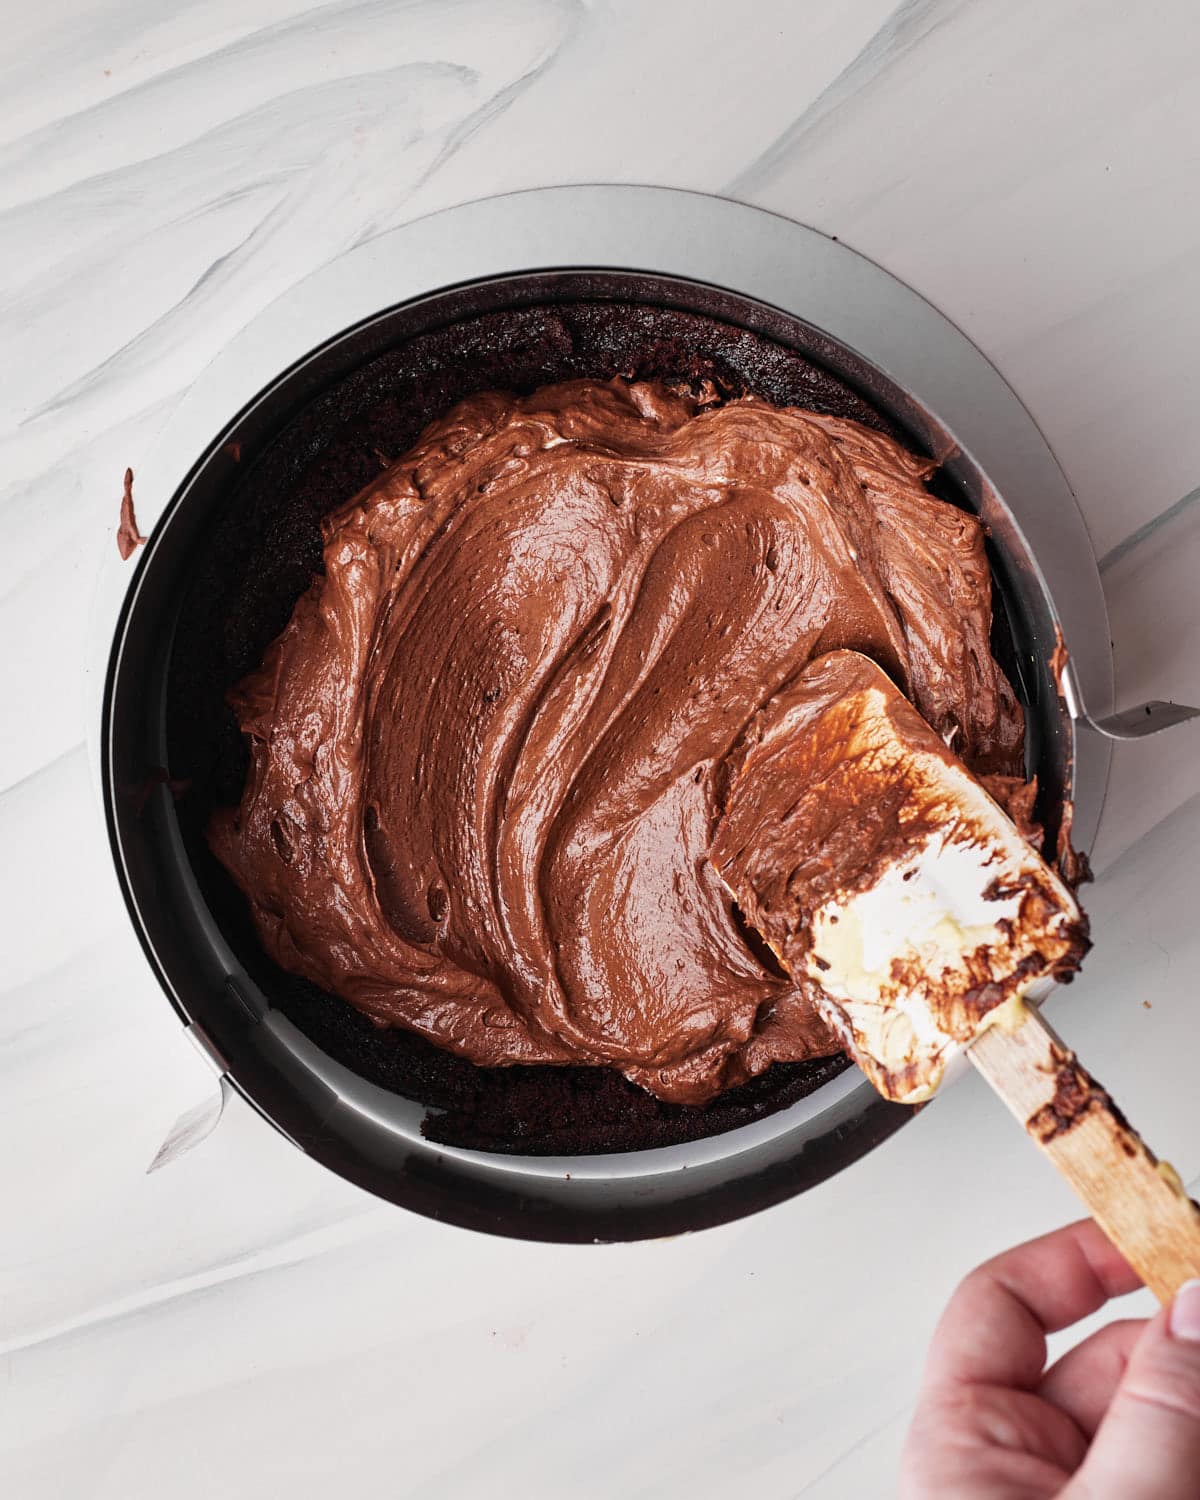
- Place one of the sliced cake layers at the bottom of your cake ring or pan, pour the dark chocolate mousse on top and spread it out into an even layer.

- Carefully pour the white chocolate mousse on top, then chill for 10 minutes while you make the chocolate ganache.
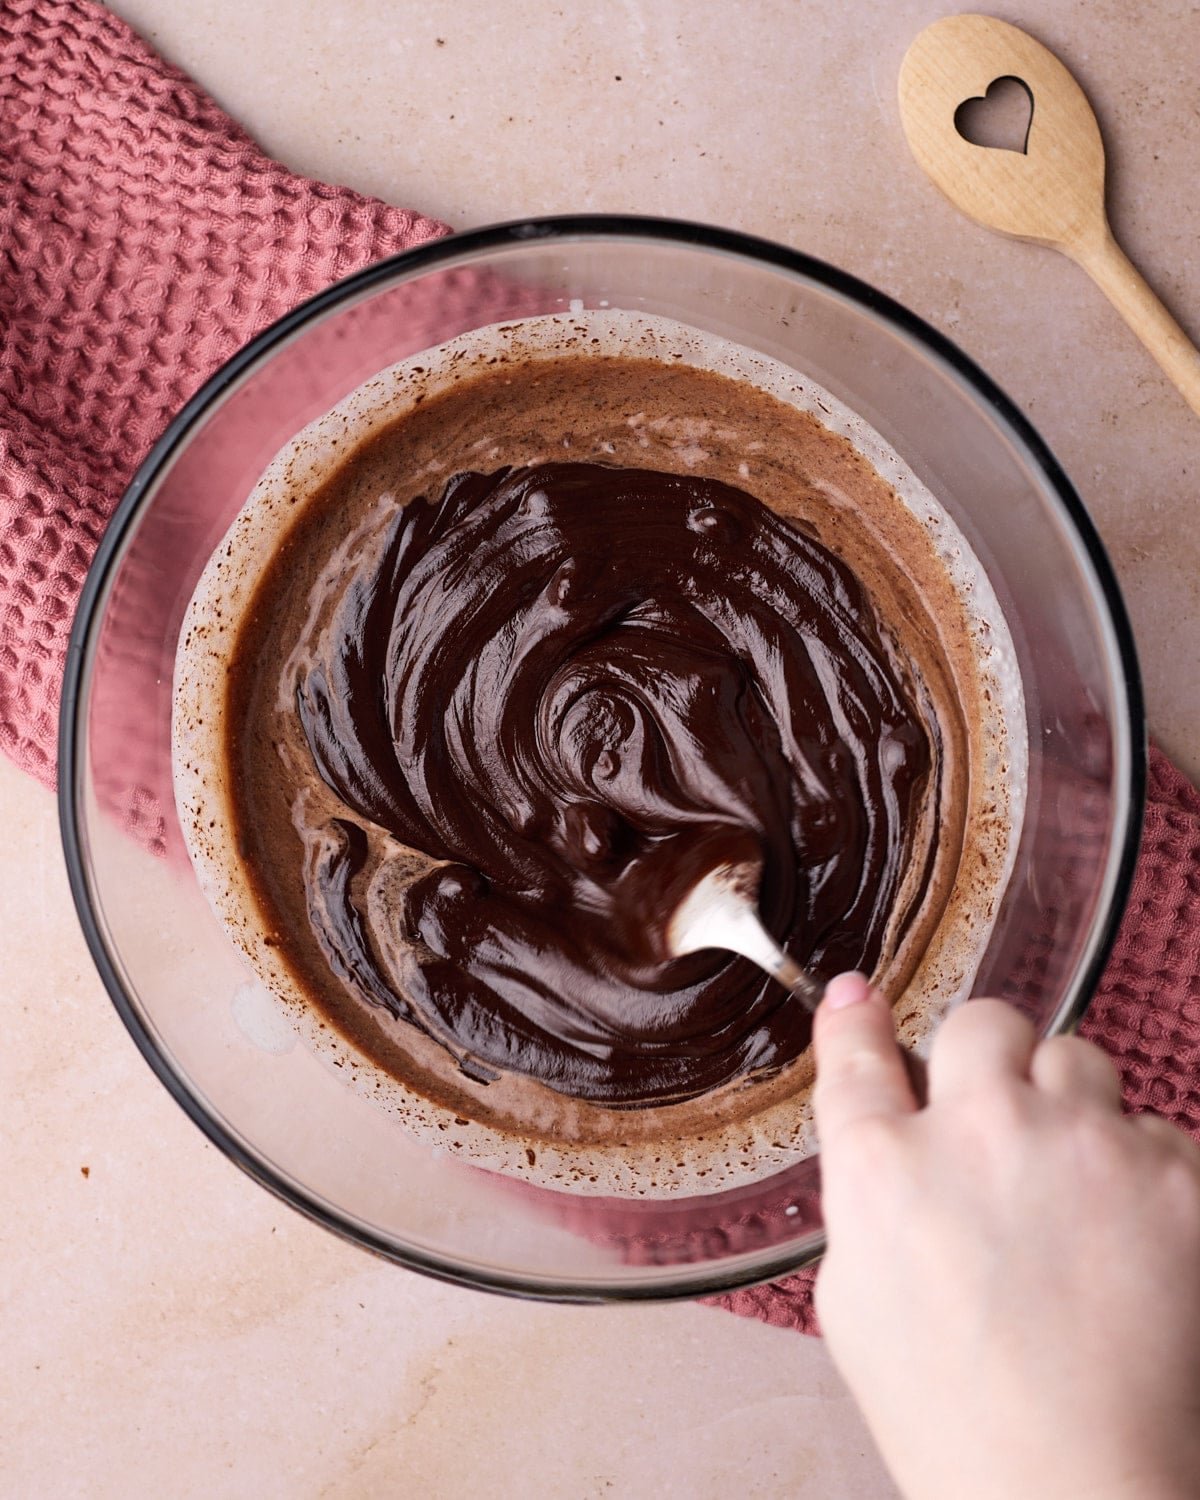
- Heat the heavy cream over medium heat until scalding, then pour over the chopped chocolate.
Let sit for 1 minute, then stir until glossy and smooth.
If you want to make the silkiest ganache, see how to make chocolate ganache.
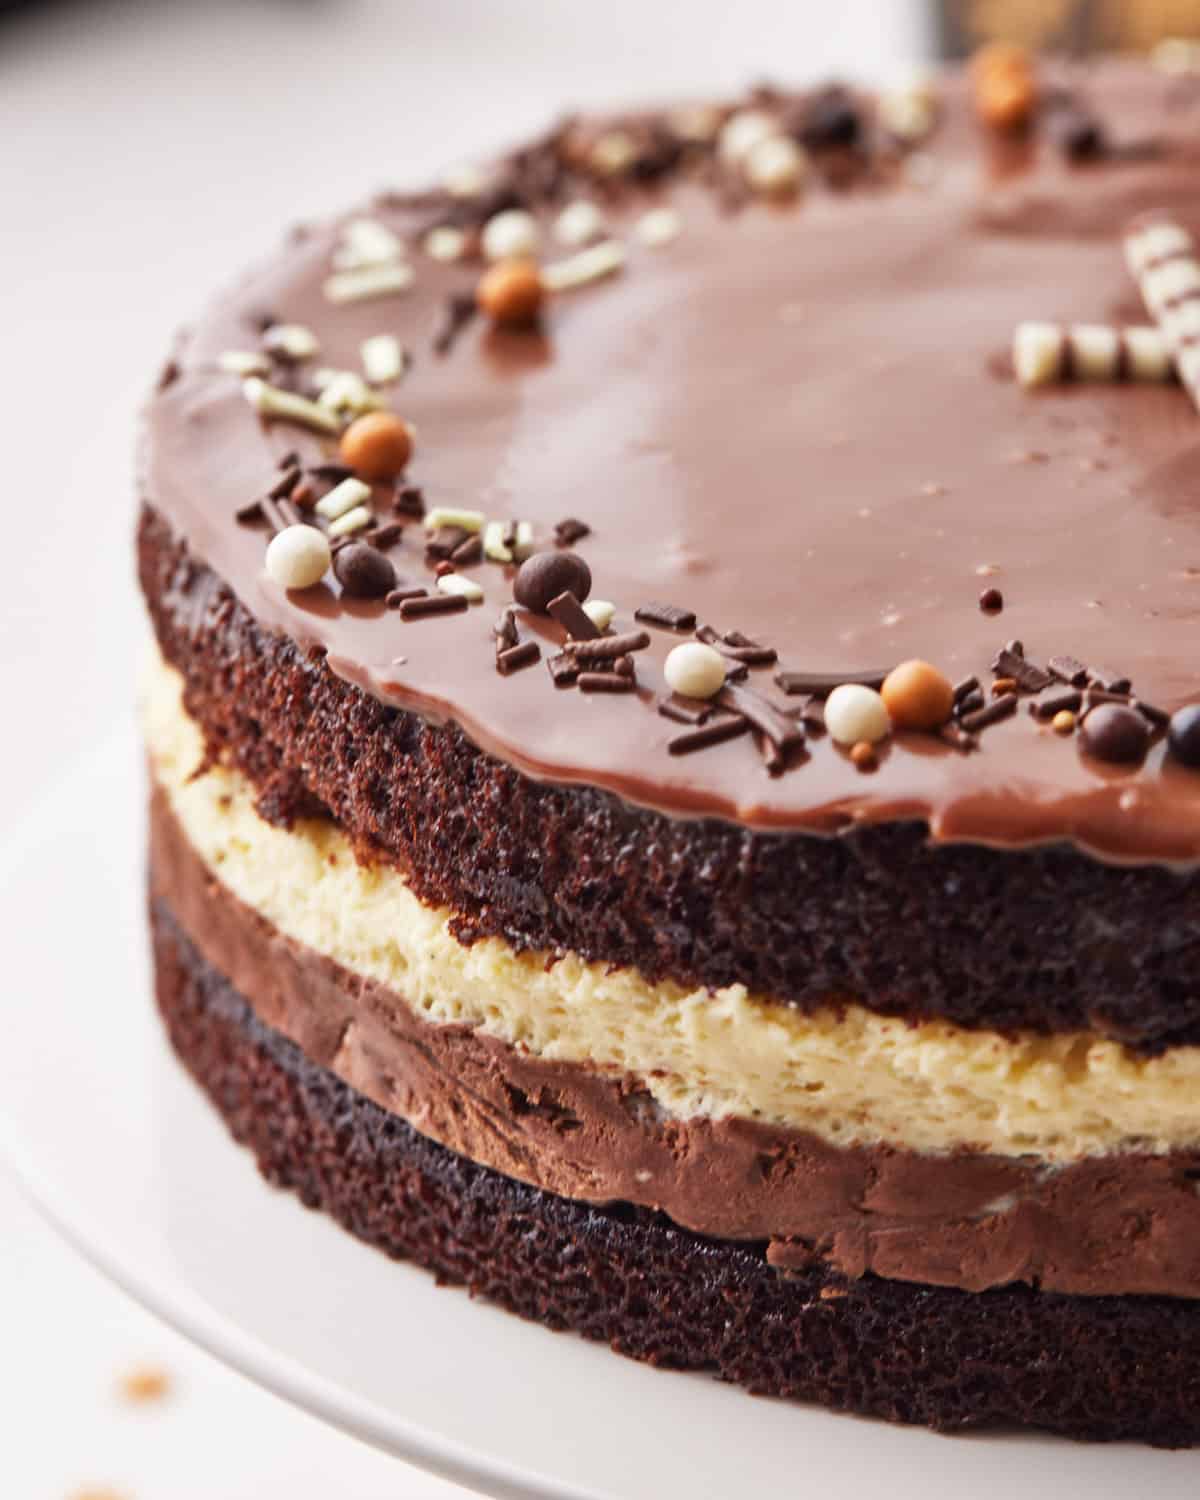
- Place the second cake layer on top of the white chocolate mousse and press down gently to help it stick.
Pour the chocolate ganache on top and decorate.
Chill for at least 4 hours, preferably overnight, before removing from the cake ring and slicing.
Storage
Once your tuxedo cake is assembled, you need to store it in the fridge in an airtight container to keep the chocolate mousse layers nice and fresh. It will be good in the fridge for up to 3 days, but I highly doubt it will last that long before being gobbled up!
If you make the chocolate cake layers ahead of time, wrap them in plastic wrap, or in an airtight container and store them at room temperature for up to 2 days.
Tuxedo Cake FAQs
If you have a question about this recipe that isn't answered here, please write it in the comments and i'll get back to you as soon as possible.
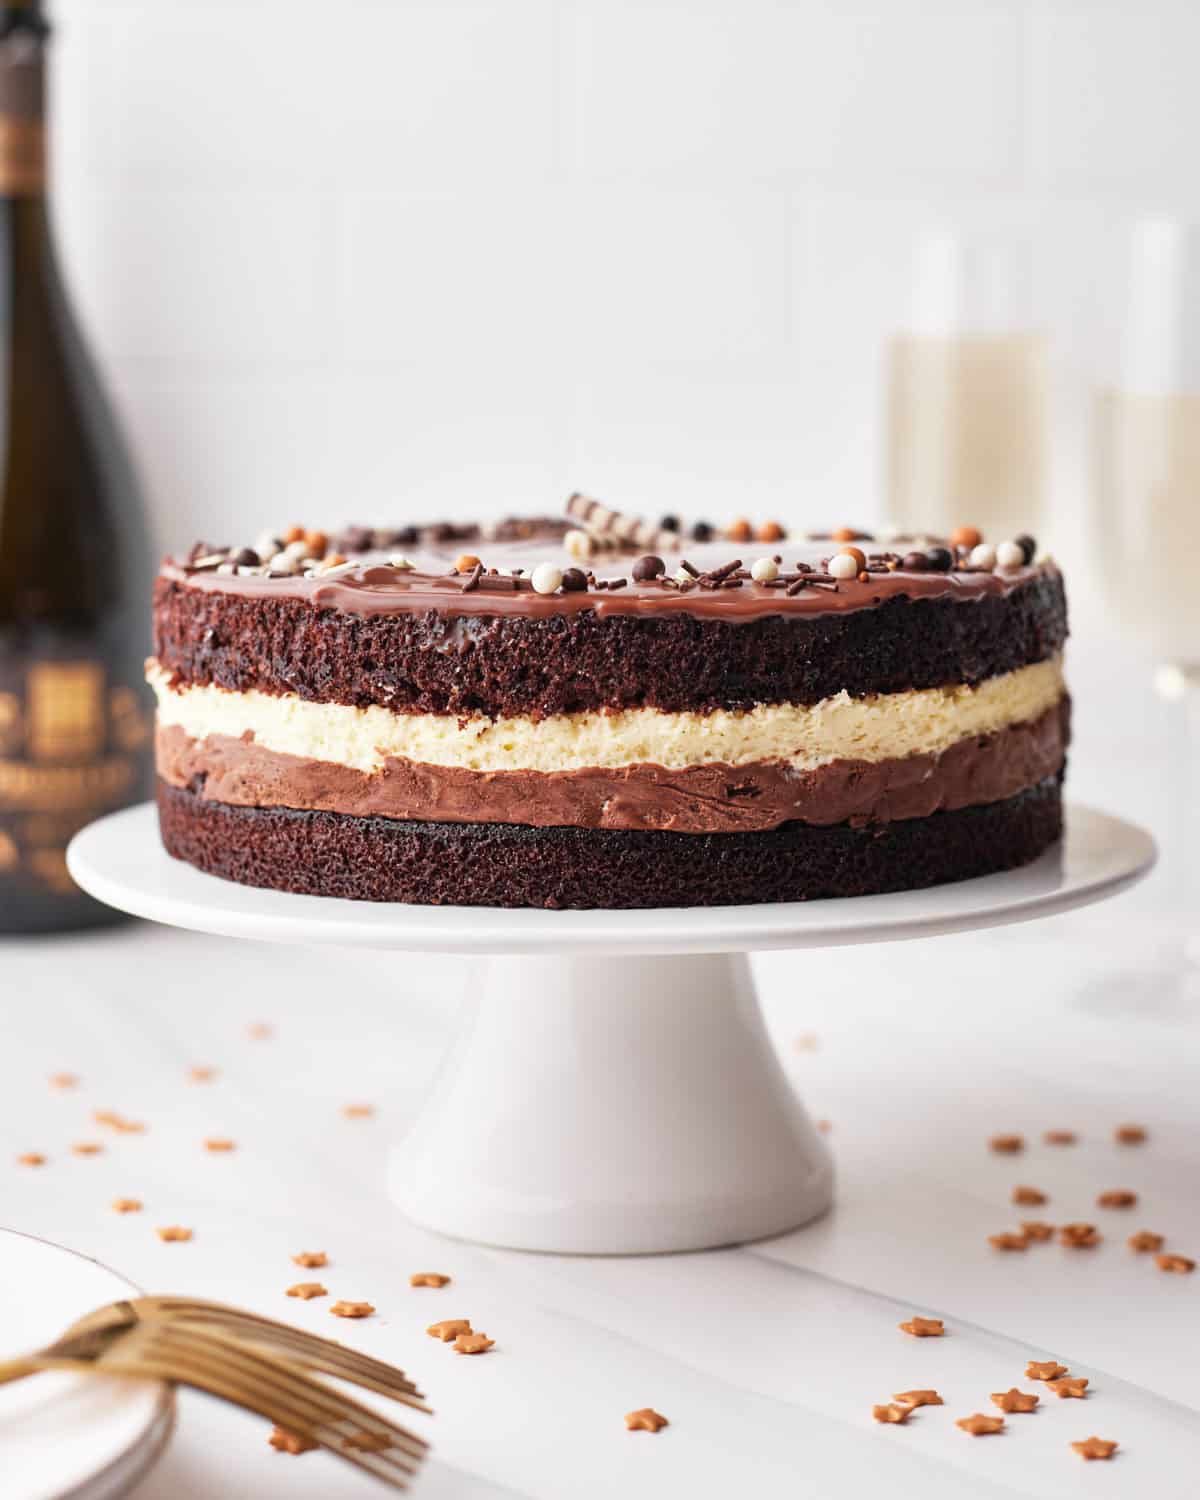
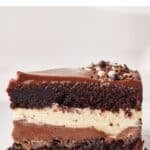
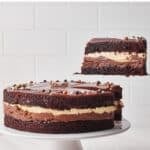
Tuxedo cake is a layered chocolate mousse cake with rich chocolate cake, dark chocolate mousse, white chocolate mousse, more chocolate cake, and then a chocolate ganache topping.
Yes, if you don't have a cake ring, you can use a loose-bottomed cake pan lined with acetate so you can remove it easily. It is also helpful to line the bottom of the pan with a parchment paper circle.
Tuxedo cake gets its name from the contrasting layers of dark and white chocolate, representing the black and white layers of a tuxedo. That's why we have dark chocolate cake layers right next to the white chocolate filling - to make it pop and show off the pretty layers of mousse inside the cake.
They're similar layered chocolate desserts, but they aren't quite the same. Tuxedo Cake has chocolate cake layered with both dark and white chocolate mousse. Black Tie mousse cake has one cake layer topped with chocolate cheesecake and a basic white chocolate mousse, then it's covered with ganache all over.
They are both delicious!
More Chocolate Desserts

Show Me Your Bakes!
If you tried this recipe, I'd love to know how it turned out in the comments!
Want to share a photo? You can send me a pic or tag @bonni_bakery on Instagram - I love seeing all your creations.
Tuxedo Cake Recipe
Ingredients
- 120 g (1 cup) All-purpose Flour (Plain Flour)
- 200 g (1 cup) Granulated Sugar (Caster Sugar)
- 35 g (⅓ cup) Cocoa Powder Dutch processed
- 1 teaspoon Baking Powder
- ½ teaspoon Salt
- 60 ml (¼ cup) Whole Milk room temperature
- 2 Large Eggs room temperature
- 60 ml (¼ cup) Vegetable Oil
- 1 teaspoon Vanilla Extract
- ½ teaspoon Espresso Powder
- 60 ml (¼ cup) Hot Water
- 5 Large Egg Yolks
- 480 ml (2 cups) Heavy Cream
- 100 g (½ cup) Granulated Sugar (Caster Sugar)
- 12 g (1½ tablespoon) Cornstarch
- 2 teaspoon Vanilla
- ½ teaspoon Salt
- 100 g (3.5 oz) Dark Chocolate finely chopped
- 170 g (6 oz) White Chocolate finely chopped
- 140 g (5 oz) Milk Chocolate finely chopped
- 80 ml (⅓ cup) Heavy Cream
Equipment
Instructions
- Preheat your oven to 350°F / 180°C (160°C fan-assisted) and grease an 8-inch cake pan.
- In a large bowl, sift the dry ingredients, including the flour, sugar, cocoa powder, baking powder, and salt. Whisk everything together.120 g (1 cup) All-purpose Flour, 200 g (1 cup) Granulated Sugar, 35 g (⅓ cup) Cocoa Powder, 1 tsp Baking Powder, ½ tsp Salt
- In a separate bowl, combine all the wet ingredients, except the hot water, which includes the eggs, milk, vegetable oil and vanilla. Whisk together lightly until smooth.60 ml (¼ cup) Whole Milk, 2 Large Eggs, 60 ml (¼ cup) Vegetable Oil, 1 tsp Vanilla Extract
- Pour the wet ingredients into the dry and whisk until everything is combined and there are no lumps.
- In a small bowl or a glass, combine the hot water with the espresso powder and mix until completely dissolved. Pour into the cake batter and mix until combined.½ tsp Espresso Powder, 60 ml (¼ cup) Hot Water
- Pour the batter into the prepared cake pan and bake for 25-30 minutes, or until a skewer inserted comes out clean. Let it cool completely in the pan.
- Once cooled, use a cake leveler or serrated knife to cut off any dome on top, then slice cake in half lengthwise so you have two thinner layers.
- Place a cake ring on top of a cake board or serving plate and place one of the layers of cake on the bottom. Set aside until the mousse is ready.
- Put egg yolks in a bowl with the sugar and cornstarch and whisk until they become slightly thick and pale.5 Large Egg Yolks, 100 g (½ cup) Granulated Sugar, 12 g (1½ tablespoon) Cornstarch
- Pour 1 cup of the heavy cream into a saucepan and warm over medium-low heat until it is scalding hot. This means it is giving off steam and there are tiny bubbles appearing on the surface. Don't let it boil.(Make sure you keep the remaining heavy cream in the fridge so it is cold enough to whip later).240 ml (1 cups) Heavy Cream
- Drizzle a little of the hot cream into the egg yolks and whisk it in. Keep drizzling a little more, whisking the whole time, until all the cream is added. Then pour the entire mixture back into the saucepan and return to the heat.
- Heat the custard while whisking constantly until it thickens and begins to boil. Let it bubble for 30-60 seconds or until it is noticeably thickened.
- Remove from the heat and mix in the vanilla extract and salt.2 tsp Vanilla, ½ tsp Salt
- Divide the mixture evenly between two bowls, then stir the dark chocolate into one and the white chocolate into the other. Mix each bowl until the chocolate has completely melted.100 g (3.5 oz) Dark Chocolate, 170 g (6 oz) White Chocolate
- In a separate bowl, whip up the reserved heavy cream until medium peaks form. By the time you have whipped the cream, the two chocolate mousse bases should have cooled to the point that they are no longer warm, but still fluid. If they are still hot, let them cool further.240 ml (1 cups) Heavy Cream
- Split the whipped cream evenly between the two chocolate mousse mixtures and fold it in gently until completely combined.
- Pour the dark chocolate mousse on top of the cake layer in your dessert ring and smooth it out with a spatula.
- Pour the white chocolate mousse on top and smooth it out in the same way. The dark chocolate should be firm enough to add the white mousse on top without them mixing together, but if it seems too soft, put the cake in the fridge for 5 minutes before adding the white chocolate mousse.
- Put the entire cake in the fridge for 10 minutes while you make the ganache.
- Heat the cream on medium heat, stirring occasionally until it is steaming; don't let it boil.80 ml (⅓ cup) Heavy Cream
- Remove from the heat and pour the cream over the chopped chocolate. Let it sit for a minute.140 g (5 oz) Milk Chocolate
- Mix the cream and the chocolate together until completely melted, glossy, and smooth.
- Take the cake back out of the fridge and place the second cake layer on top, gently pressing it down into the mousse.
- Pour the chocolate ganache on top of the cake, it should spread out into a nice even layer.
- Top with chocolate shavings, sprinkles, gold leaf, or edible glitter.
- Chill the whole cake in the refrigerator for at least 4 hours, preferably overnight.
Nutrition
Notes
- Increased the amount of white chocolate in the white chocolate mousse so it sets up better.
- Adjusted the ratio of cream to chocolate in the chocolate ganache so it is less runny
- Improved instructions to clarify how the cream is divided and used.
- Improved the instructions for heating the cream properly so that the mousse thickens.






Leah says
This cake is unbelievably delicious and surprisingly simple to put together!! The rich custard in the filling makes it so luxurious as compared to a standard ganache, and the CAKE!!! My god woman it's the moistest cake I've ever made, I'm obsessed. Thanks for a great recipe!
Jules Grasekamp says
Haha this is my new favorite comment - thank you Leah!
So glad you love the cake. Thank you for trying my recipe and for putting a smile on my face today!
Jules
Anna says
I made this cake and it was good, but the assembly was very difficult. My egg yolk mixture did start to cook a little even though I did a water boil, but it was still salvagable. And the omelet layer that was created at the bottom of the pan was pretty good. The assembly was difficult. The chocolate layer went on okayish but the white chocolate mousse just took the entire cake down, the chocolate mousse underneath started spilling out, the cake itself started breaking down, and the white chocolate mousse just ran down all the edges. I got super frustrated so I put the whole thing in the freezer and the remaining white chocolate mousse in the fridge. What was weird was that my chocolate mousse was nice and thick, I'm not sure why it just took the whole cake down. A few hours later I continued to try to assemble the cake but it was messy. Definitely not something I would be able to present, but my family still liked it cause it was yummy. I also added some raspberry jam on the cakes under the mousse, it gave it a nice sour kick. I might try it again because I love chocolate.
Jules Grasekamp says
Hi Anna, thank you for trying my tuxedo cake recipe, I'm sorry to hear it didn't turn out quite as planned!
I have had a few people say their white chocolate mousse was runny and I am trying to figure out why as I can't seem to replicate the problem. Would you mind telling me what kind of white chocolate and what kind of heavy cream you were using? I'd love to get to the bottom of this so everyone's cake can turn out perfectly every time!
Thank you so much,
Jules
LJohnson says
Well this is a decent recipe-not for inexperienced bakers though- I know what I’m doing and I still screwed up the white chocolate mousse. It never set so I ended up with a real mess on my hands.
Also-if you use duck eggs you can use whole milk instead of heavy cream when making the mousses but again that is experienced baker stuff.
Really liked the crumb on this cake too. Very nice. Would like to use it in other applications where there are wet fillings like back forest cake or crème de menthe cream cake.
Overall good recipe!
Trish says
I did it and it turned out GREAT! I followed your recipe step by step and took my time while creating the perfect birthday cake for our chocolate loving daughter. It was a hit with the entire family. I look forward to trying some of your other recipes.
Jules Grasekamp says
Thanks Trish! I'm so glad you loved the Tuxedo cake!
Mikaela says
The cake was delicious. I had no issues with the cake portion, I subbed in a shot of espresso and filled the rest of the measuring cup with hot water. It worked fantastic.
I really struggled with the mousse. I have experience making custard, so I didn't think making the crème anglaise would be much different. I don't know if it was because my house was warm and humid, when I tried to make it, but after adding the egg mixture and heating, in about 10 seconds it cooked into scrambled eggs. I had it on medium low heat. After a couple more tries I found that using a double boiler and heating on low while whisking constantly for about 15 minutes worked well. I successfully made it two seperate times. The mousse had a fantastic texture and it set up very nicely.
After all was said and done, it was a little bit hard to follow the instructions (especially for the mousse) but the end result was absolutely worth it.
I saw that you asked in previous comments about how to make the recipe more beginner friendly, I think the main aspect that could be improved would be explaining in a bit more detail how to heat the crème anglaise so it doesn't cook/scramble and maybe some tips on how to prevent it, like if it starts to clump to remove it from the heat and whisk rapidly to distribute the heat. And possibly some other tips you might know of to help with that step.
Thank you for the awesome recipe
Jules Grasekamp says
Hi Mikaela,
Thank you so much for this thoughtful comment, i really appreciate it! I will absolutely be including this when I update the recipe.
I take a lot of pride in my work and want to provide the most reliable recipe possible, so this kind of feedback is absolutely essential to help me do that.
Thank you for trying my recipe and for letting me know your thoughts.
Jules
Dana says
Wow that looks so yummy!! I can’t wait to try and make it 🙂 also I don’t have a cake ring. Can I use a springform pan like the ones for cheesecakes?
Jules Grasekamp says
Hi Dana,
Yes you can use a springform cake pan instead. It might be a little trickier to work with but it shouldn't be a problem!
Hope you love the Tuxedo cake!
Jules
Jacquelyn says
Loved making it. The chocolate cake was rich and had a perfect crumb. The mouse base was difficult to get, I think a double boiler situation would help. I have a gas stove and I was taking it off the heat every other minute to keep it from cooking. Other than that, it worked perfectly
Jules Grasekamp says
I'm so glad to hear you enjoyed the Tuxedo cake Jacquelyn!
That's a good tip about the base being difficult - I plan to update this recipe soon and will take that into account to see if there is a way to make it easier.
Thank you,
Jules
Jennifer Rice says
This cake is excellent & one of the moistest cakes I’ve ever made from scratch! I ended up using a different ganache recipe which included kahlua & made a larger portion which I spread down the sides & top. The profile of my cake wasn’t as pretty as the photos & I thought covering the entire cake would keep it moist. I had an issue with the mousse sticking to the cake ring. Next time I’ll put some wax paper around the sides before adding the cake ring, & that should solve the problem.
I will definitely make this cake again! Great recipe!
Jules Grasekamp says
Hi Jennifer,
I'm so happy to hear you loved the tuxedo cake! Kahlua ganache all over sounds absolutely divine!
Thank you so much for trying my recipe and for taking the time to let me know you enjoyed it - I really appreciate it!
Jules
Courtney Justus says
Can this recipe be made in advance and kept in freezer? I noted the 5 days at room temperature for the cake, but was hoping to make it (or the components) further in advance. Thank you, in advance, for your feedback.
Jules Grasekamp says
Hi Courtney,
Yes you can freeze the cake once assembled but I would recommend waiting to add the ganache until after it has defrosted as ganache can be a bit funny when changing temperature!
Make sure the cake is well wrapped to stop it from absorbing any odors from the freezer, then defrost it in the fridge gradually when you are ready to use it.
Hope you love it!
Jules
Katie says
I love this cake. I first heard of and had this cake at a restaurant and knew I needed to make it at home. I make it for celebrations, and everyone always raves about the richness of the cake and how moist it is. I followed the instructions to a T, and it always comes out perfectly. I made it February and September of 2024, and just the chocolate cake recipe several times since then. I'll actually be making it tomorrow for a birthday party. It's so much fun making the layers. There is no starch in white chocolate, which is why it's always a little runnier than the dark chocolate ganache. But that has never been an issue for me when preparing the cake and layering.
Jules Grasekamp says
Hi Katie,
Thank you SO much for your lovely comment! Nothing makes me happier than hearing when people return to one of my recipes time and time again! I'm so happy you love it - thank you for trying my recipe and for taking the time to let me know!
Jules
LORI NAY says
If I’m not using the espresso do I still add the hot water
Jules Grasekamp says
Hi Lori,
Thank you for your question. Yes absolutely still add the water as this is an essential part of the cake batter. The espresso just adds flavor but is not essential to the baking process, whereas the water is needed to add moisture to the cake.
Happy baking!
Jules
LORI NAY says
Can you tell me where to find your revised recipe
Elizabeth says
I don’t understand the instructions to return the egg yoke/cream moisture to heat and boil for 1-2 min. Mine just turned into cooked egg yokes and cream in less than a min over medium heat…
Jules Grasekamp says
Hi Elizabeth,
I'm sorry to hear your cake didn't turn out and apologies if the instructions weren't clear enough. It is really important to heat the mixture gradually and keep whisking the entire time so the egg doesn't get a chance to burn.
I am going to be updating this post soon with improved instructions so I will be sure to keep your feedback in mind when doing so - thank you.
Jules
Colette says
Better than Costco’s! My family was delighted. Thanks for sharing, and your instructions were very good.
Jules Grasekamp says
I'm so glad to hear that Colette!
Thank you so much for letting me know you loved the Tuxedo cake 🙂
Jules
Shannon Nieland says
Nails
2
7
6
8
11
I wish the instructions for the mousse were a little more specific. The cake portion was fantastic. I subbed a cup of hot coffee for the espresso/water and the rounds came out beautifully moist and flavorful. I think part of the problem comes from trying to eyeball the creme anglaise and whipped cream when dividing them between the two chocolates. I feel like they should either be done separately, or the divided mixtures need to be weighed out. My dark chocolate ended up very thick like frosting, and my white chocolate was extremely runny. After setting overnight, the white chocolate was still more the consistency of pudding, and I’m honestly shocked I was able to stack the second cake layer. It looked very messy though so I ended up making extra ganache and covering the whole thing in ganache. I almost wonder if the white chocolate wouldn’t benefit from some gelatin or cream cheese to help stabilize it. I would absolutely use the cake and ganache recipes again but I will probably look for something different for the mousses next time.
Shannon Nieland says
Lol I did not mean to put my nail sizes in there! I typed my comment in my notes because the page kept reloading and deleting my comment before I could post.
Jules Grasekamp says
Hi Shannon,
Thank you so much for your thoughtful feedback, I really appreciate it!
I have heard from a few people that the instructions are confusing so I will be doing a big edit on this recipe in the near future. If you have any more thoughts about how to improve it, I'd love to hear them!
In the meantime, if you do make it again, my FAVOURITE chocolate mousse recipe is actually the one in my chocolate mousse pie, you might like to give that at try!
Thank you,
Jules
Carissa says
The cake is good, but the way the recipe is written needs major work. I definitely don’t recommend this recipe for beginners due to the lack of critical information and tips.
If you’re an experienced baker and already know how to make custard and whip cream, then you can follow the recipe loosely for a good cake.
Jules Grasekamp says
Hi Carissa,
Thank you for your comment, I really appreciate genuine feedback like this!
I am always working to make my recipes as approachable and informative as possible for home bakers and I think you are right that this one needs a bit of editing.
I would love if you have any morefeedback on what specifically you would like to see here, so I can improve the recipe and help more people to have success with it!
Thank you,
Jules