
My Genoise Sponge recipe will walk you through all the little steps that make a big difference, so you end up with a light, springy, perfectly tender sponge cake every time.

Genoise Sponge Recipe Snapshot
What it is: Traditional Italian sponge cake that is light and airy - perfect for layer cakes or delicate desserts.
Why you'll love it: Detailed technique to master a core patisserie skill and make the lightest sponge cake that is super versatile and can be paired with endless frostings, fillings, and syrups.
How to make it: Whip whole eggs for 15 minutes until pale and thick, then fold in the flour and wet ingredients.
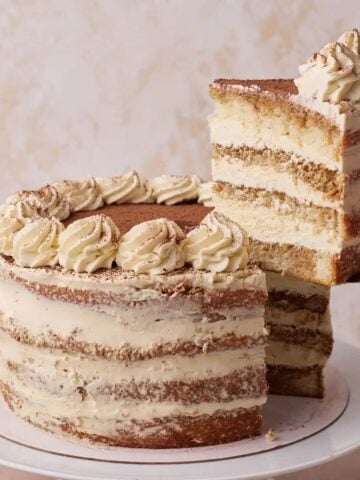
Genoise sponge is an absolute classic recipe to have in your toolkit. It can be used in so many ways, and this recipe is the one I use over and over in various desserts, like my Tiramisu Cake.
I'll show you how to whip the eggs just right, fold in the flour without losing any air, and bake it gently so it stays soft and golden. Every tip from my own recipe testing, so you can feel confident at every stage - and end up with a Genoise that's truly Star Baker-worthy!
Jump to:
What is Genoise Sponge?
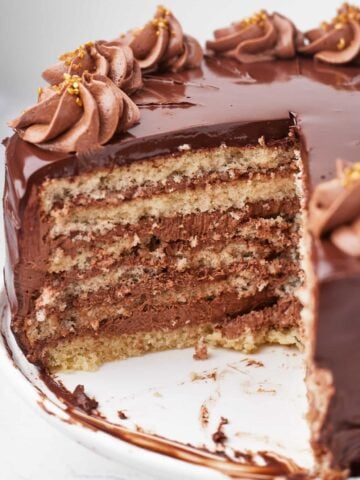
Genoise (pronounced "jen-wazz") is a classic sponge cake from Genoa, Italy. It gets all its rise just from whipping air into the eggs (like Angel Food Cake), which gives it an incredibly light, airy texture. This makes it a perfect base for delicate or layered desserts - like a German 8-layer chocolate custard cake!
Because it's so versatile, Genoise is a staple in European desserts. Its sponge-like texture soaks up syrups beautifully, adding extra flavor to cakes like my Tiramisu Cake. And it's light enough to stack on top of layers of custard, cream, or mousse, which makes it ideal for desserts like a Fraisier Cake.
Ingredients
Genoise sponge cake only has a few basic ingredients, but it's important that they are right.
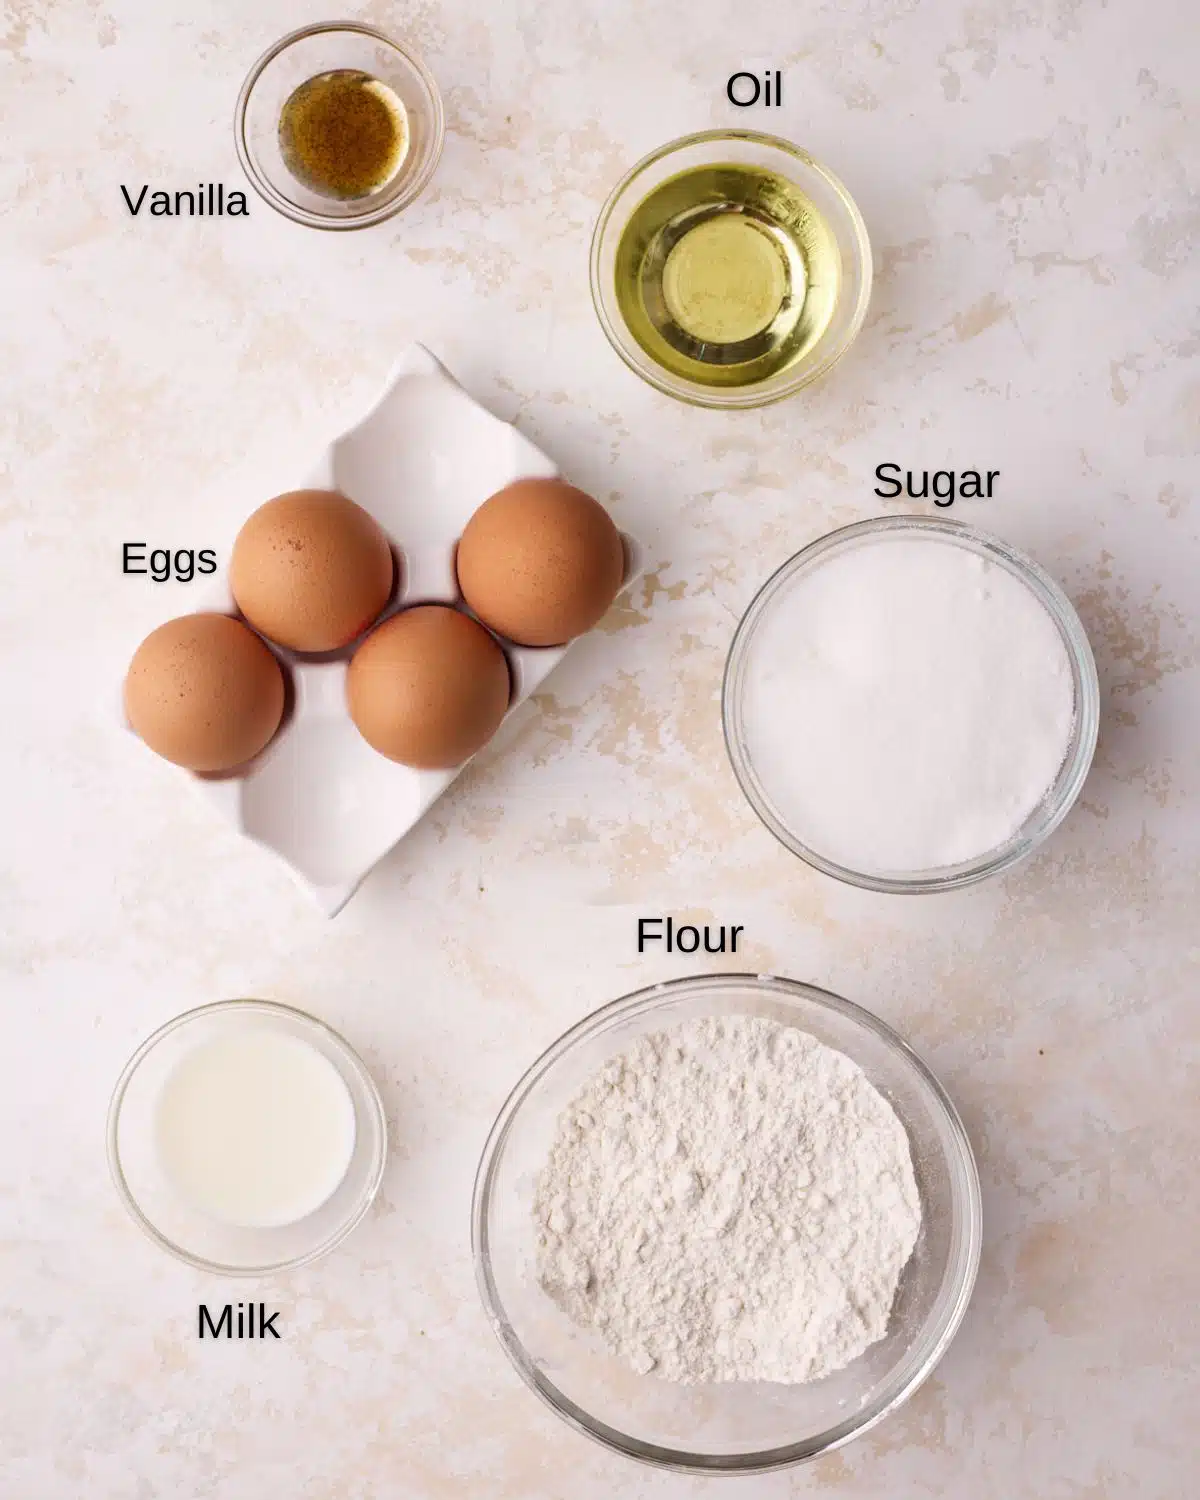
- Eggs - As this is a sponge cake recipe without baking powder or other chemical leavening agents, the eggs will do all the magic to make this genoise cake rise. So make sure you use fresh, large eggs. We will be whipping the eggs up as you would in foam cakes, but genoise uses the egg yolks as well as the egg whites for better texture and flavor.
- Sugar - Use granulated white sugar (caster sugar in the UK).
- Flour - For best results, use cake flour. It will give a finer crumb and is easier to incorporate into the batter without knocking out too much air. If you can't find cake flour, you can use all-purpose flour (plain flour) or even 00 flour.
- Oil - I use vegetable oil, but any kind of flavorless oil will work great. The oil helps to create more moist cakes. You can also use melted butter - see my section below comparing the two.
- Milk - You can make genoise cake without milk, but I find a small dash of milk helps to create a soft, fluffy texture.
- Vanilla - Vanilla extract or vanilla bean paste will add a hint of flavor.
See the recipe card for quantities and full recipe.
Butter vs Oil
I've tested this genoise recipe with both butter and oil - it works either way, but while butter gives a richer flavor, it also makes a slightly denser, less stable sponge that may not rise quite as much.
This is because butter solidifies as the cake cools, making the crumb a little heavier, whereas oil stays liquid and keeps the cake lighter.
If you want a richer, slightly denser cake, use butter. For a super light and fluffy texture, stick with oil. Both are delicious - and since genoise is usually soaked in simple syrup, any extra moisture or flavour can easily be added back in.
If substituting, use the same amount of melted butter as oil, and make sure it's still warm when you fold it into the batter.
What You'll Need
- Stand Mixer - I strongly recommend using a stand mixer for this recipe. You can use an electric mixer, but there is a solid 15 minutes of whisking, so your arms may get tired if you don't use a stand mixer!
- Saucepan - To make a bain-marie.
- Heatproof bowl
- Cake pan - I used a 20cm / 8-inch cake pan for this recipe. You can also split this recipe between two cake pans, but I found that it doesn't increase the cake height by much. If you split into two pans, make sure to reduce the bake time to about 20 minutes.
- Whisk
- Rubber Spatula

How To Make Genoise Sponge Cake
This classic European sponge cake is surprisingly simple to make. It might seem daunting at first, but I hope you'll find the steps in this genoise recipe straightforward and easy to follow.
Prepare
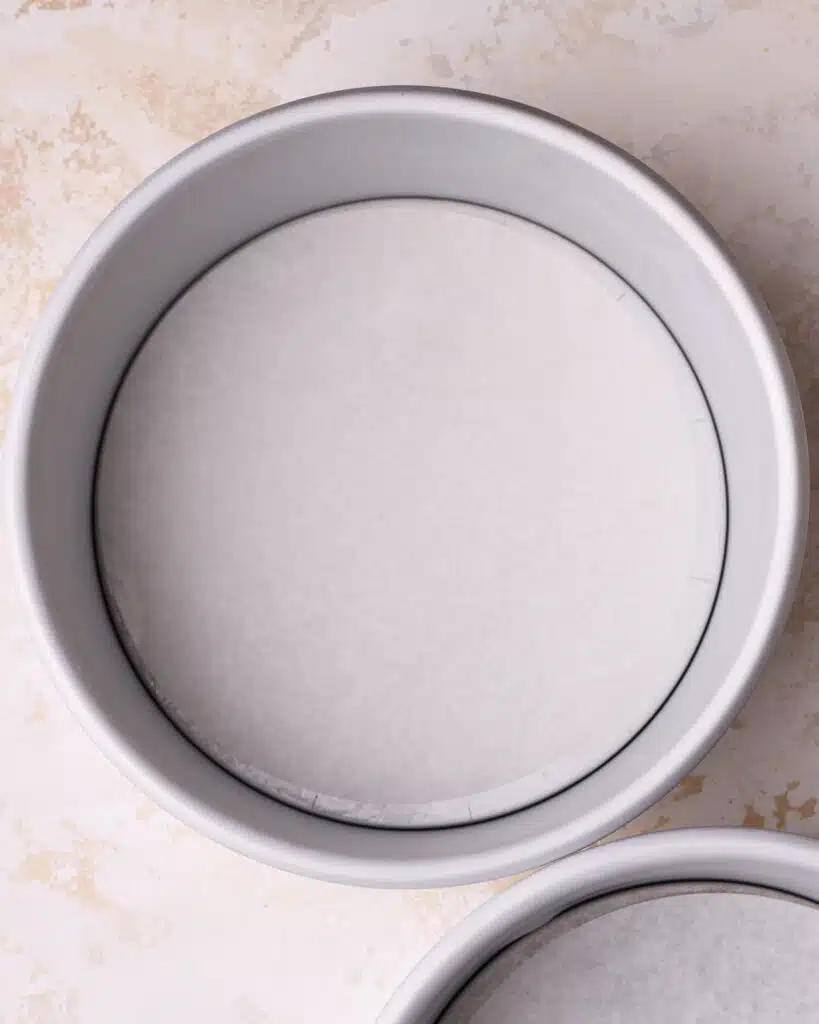
Preheat the oven to 350°F / 180°C (160° fan) and grease an 8-inch cake pan
I like to line the bottom of my pan with a parchment paper circle to make sure there is no sticking.

Double Boiler
Make a double boiler (bain marie) by placing a heatproof bowl over a saucepan with about an inch of water in the bottom. Make sure the bottom of the bowl is not touching the hot water. Let the water come to a simmer and then add the sugar and whole eggs, whisk to combine.

Warm the Eggs
Warm the egg mixture gently on the double boiler, whisking well the whole time, until the sugar has dissolved.
You can check by rubbing the mixture between your fingers - if it's grainy, it needs longer. The mixture should not get hot at any point, just warm enough to dissolve the sugar, which should only take a few minutes.
Whisking the warm eggs allows the mixture to gain volume.
Whisk
Transfer the egg mixture to the bowl of a stand mixer with a whisk attachment fitted.
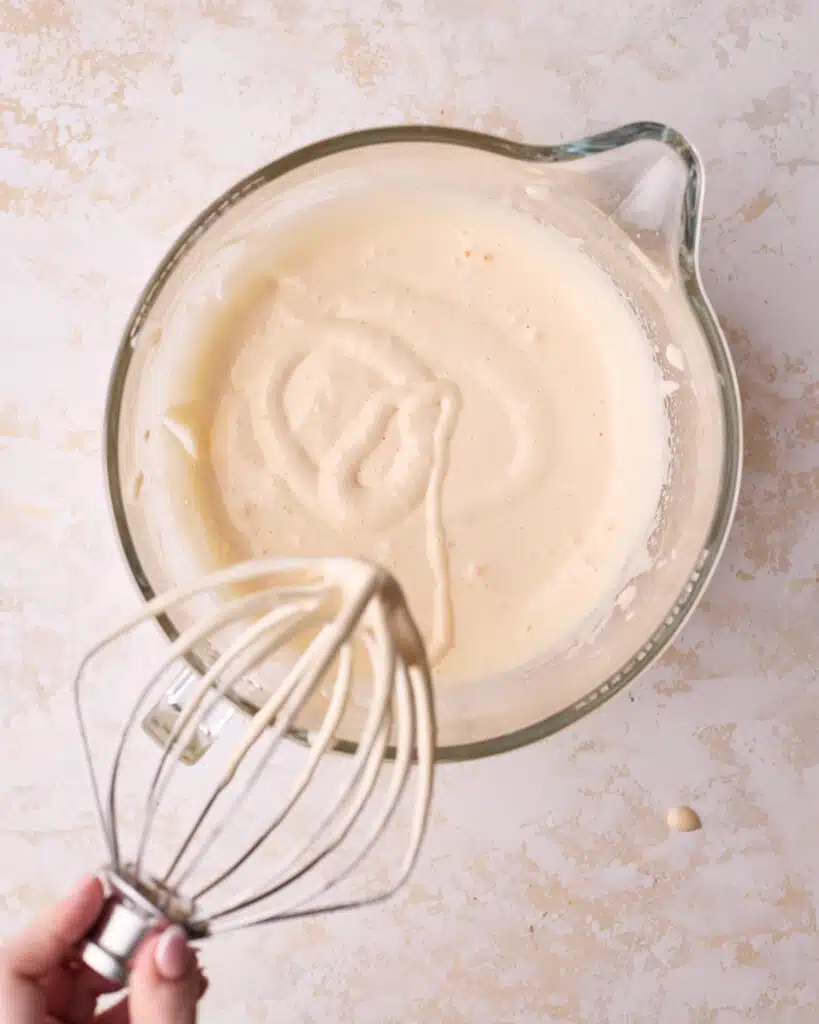
Whip on the highest speed setting for 5 full minutes. Once it's done, it will be very pale and should have doubled in volume.
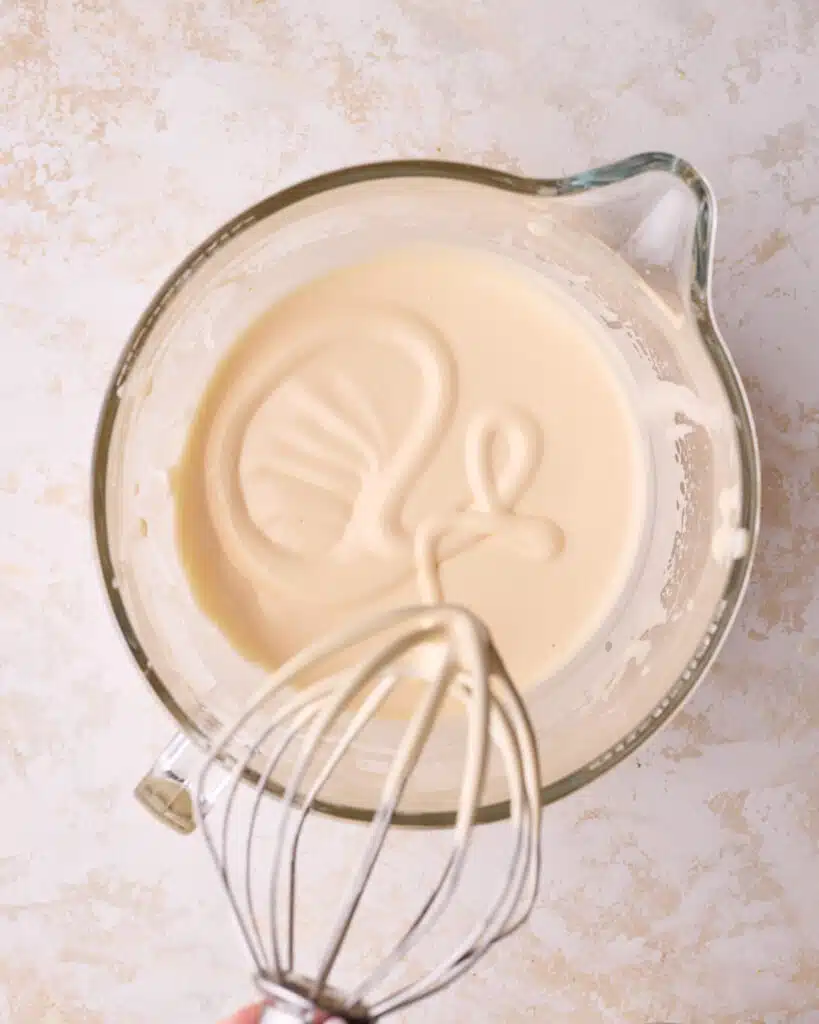
Don't try to make stiff peaks; the mixture will still be runny, but it should have thickened enough that if you pick up the whisk and drizzle a little of it on top of the batter, it should stay on the surface for a few seconds before disappearing.
If it disappears immediately, whip for another minute.
Whisk More
Turn the mixer down to low speed (the lowest setting) and whip for a further 10 minutes.
This knocks all the large air bubbles out while keeping the smaller ones, which makes for a smoother and more consistent batter and a nice airy cake.
Prep Other Ingredients
While the eggs are whipping, you can prepare the other ingredients.
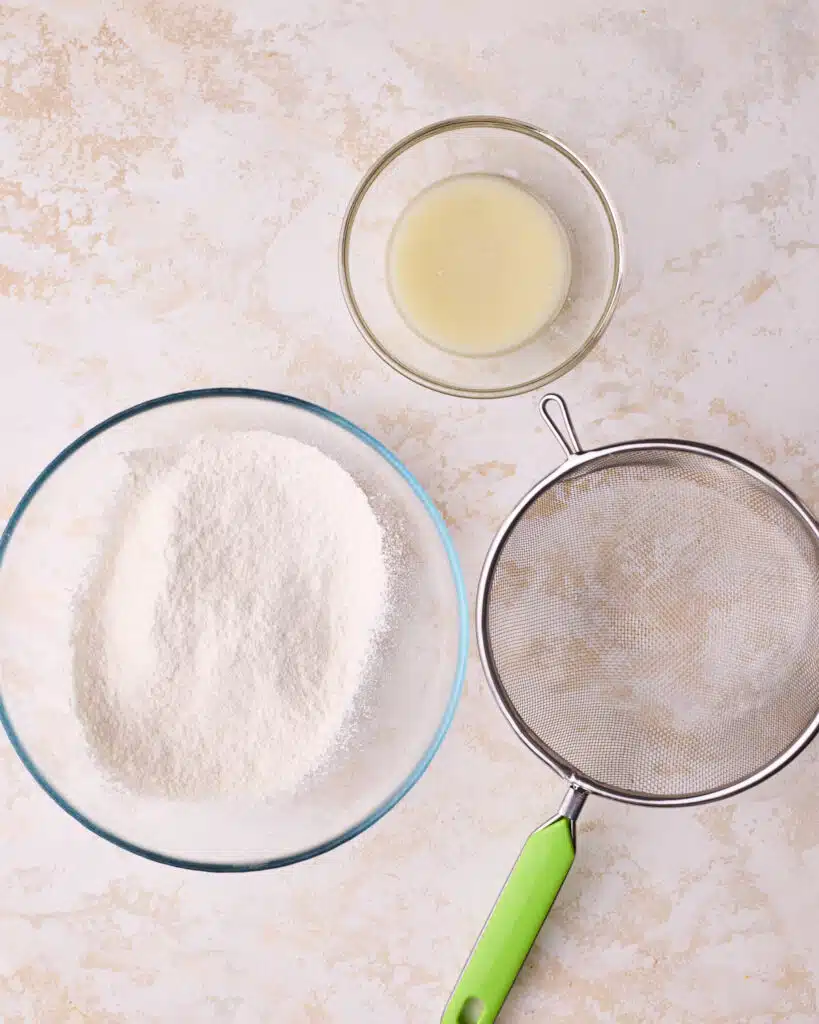
Sift your flour into a large mixing bowl (sift twice for best results).
In a separate bowl, mix together the milk, oil, and vanilla.

Fold in the Flour
Add the sifted flour to the whipped eggs and fold it in carefully with a rubber spatula. Be as gentle as possible here because knocking the air out will mean the genoise cake can't rise.
Make sure all the flour is incorporated and not hiding at the bottom of the bowl.
Sacrifice the Batter
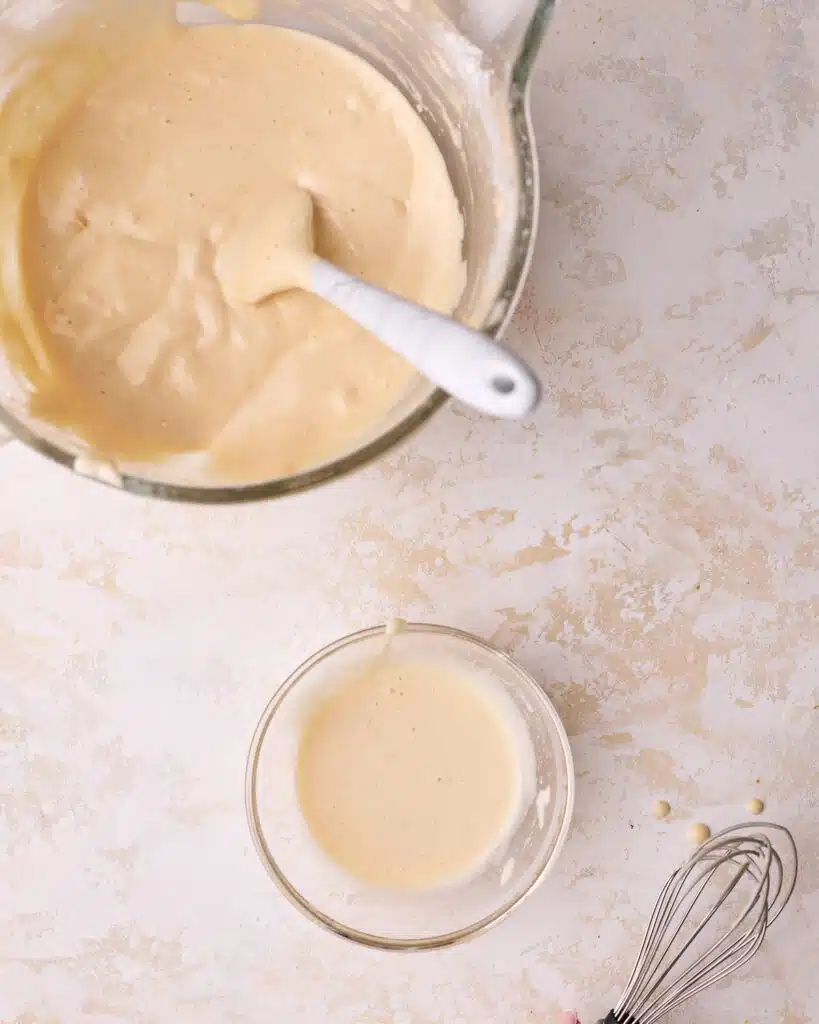
Take a large dollop of the mixture and put it into a separate bowl. Then add the wet ingredients. Mix them together thoroughly.
This is called 'sacrificing' the batter - the air will be knocked out of it, but it will help the liquids to incorporate into the rest of the cake batter more easily.
Fold
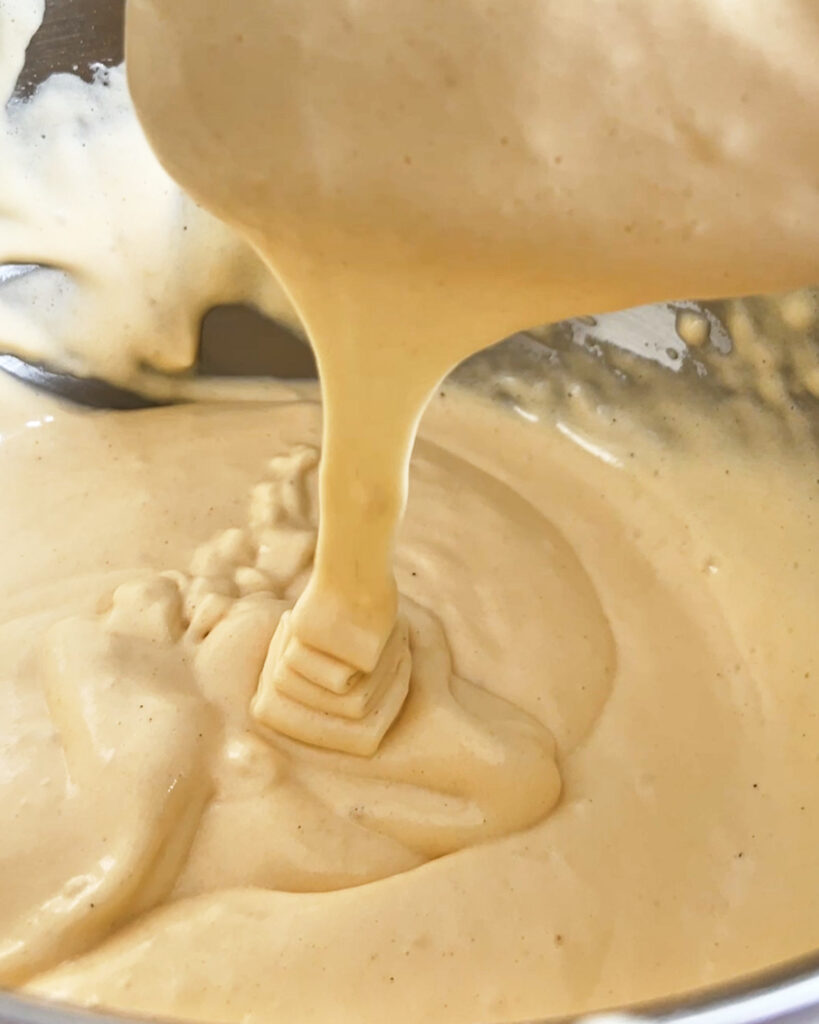
Once totally combined, pour the 'sacrificed' batter back into the main batter and fold in gently until combined.
Keep folding until the genoise batter reaches the 'ribbon stage'. This means that if you lift your spoon or spatula out of the batter, the batter should run off the spoon steadily in a flowy, ribbon-like motion.
Bake
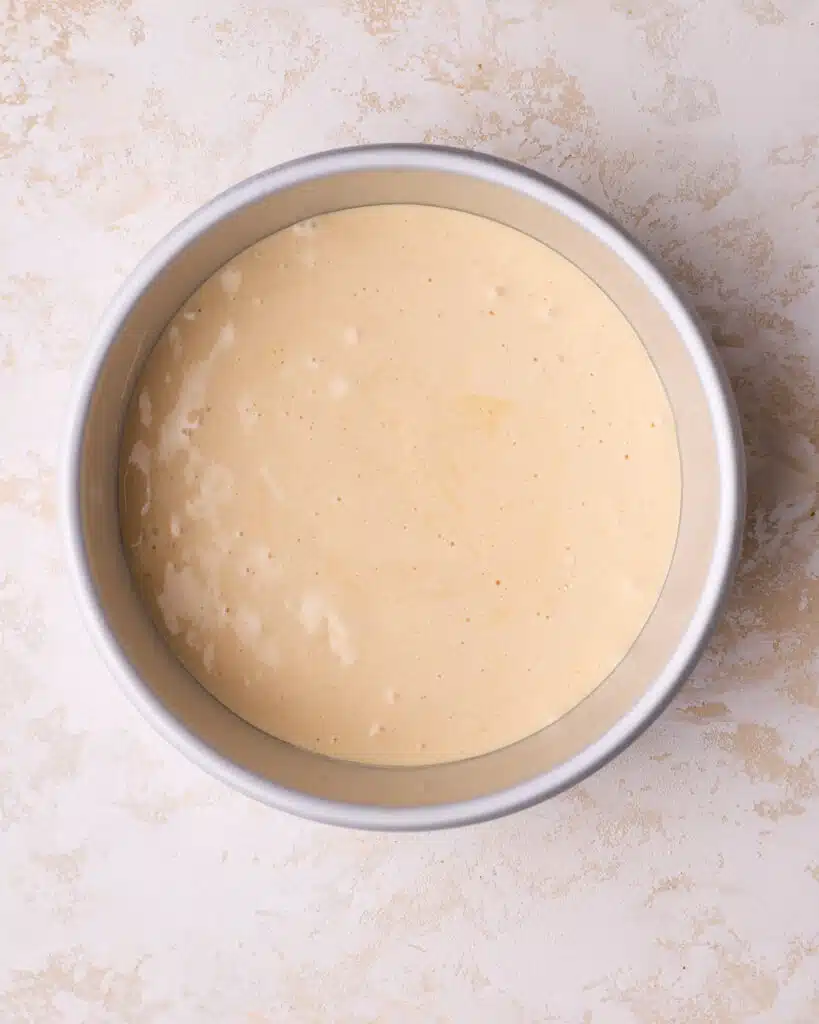
Pour the batter into your prepared cake pan and tap the pan on the counter a few times to release any large air bubbles.
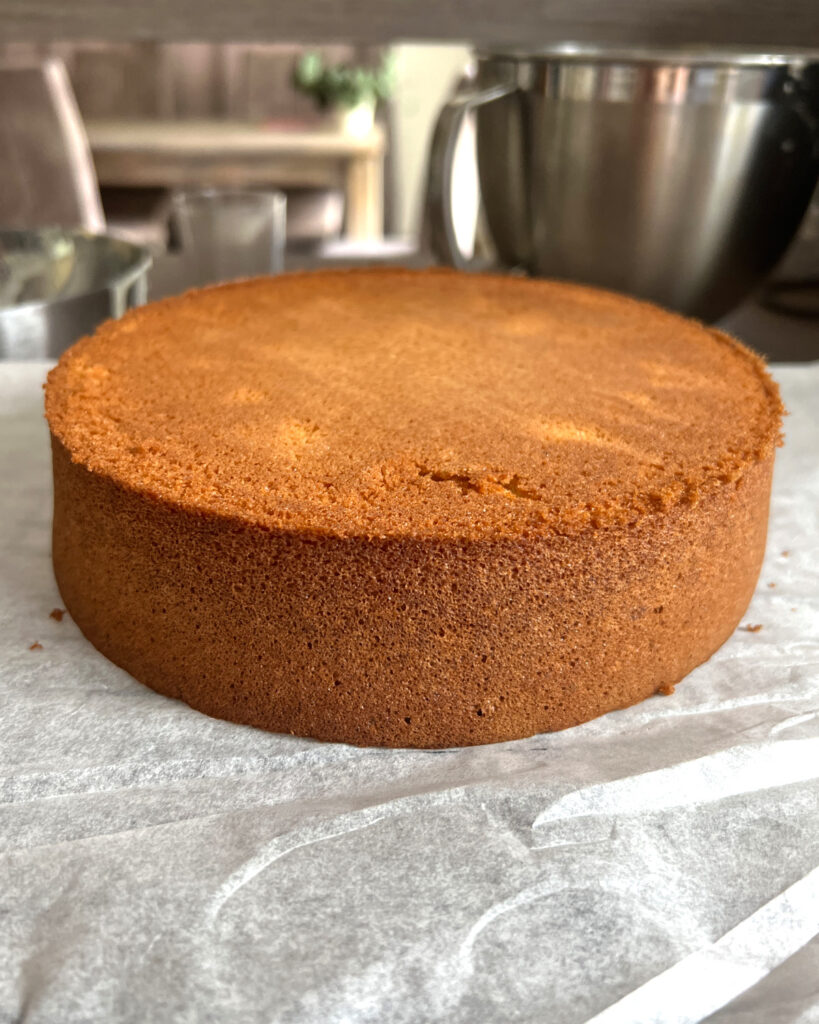
Place it into the preheated oven and bake for 35 minutes, or until the top is golden brown and bounces back slightly if you press on it.
Baking time will vary depending on your oven, so make sure to check it regularly.
Cool
Remove the genoise sponge cake from the oven and bang it on the counter again to release additional air bubbles and prevent the sponge cake from collapsing while it cools.
Put a piece of parchment paper on top of a wire rack and flip the cake upside down on the rack - let it cool like this. Don't worry if the cake immediately falls away from the bottom of the pan.
Once it's cool enough to touch, remove the cake pan and let the cake cool completely (upside down).
What To Do With Genoise Sponge
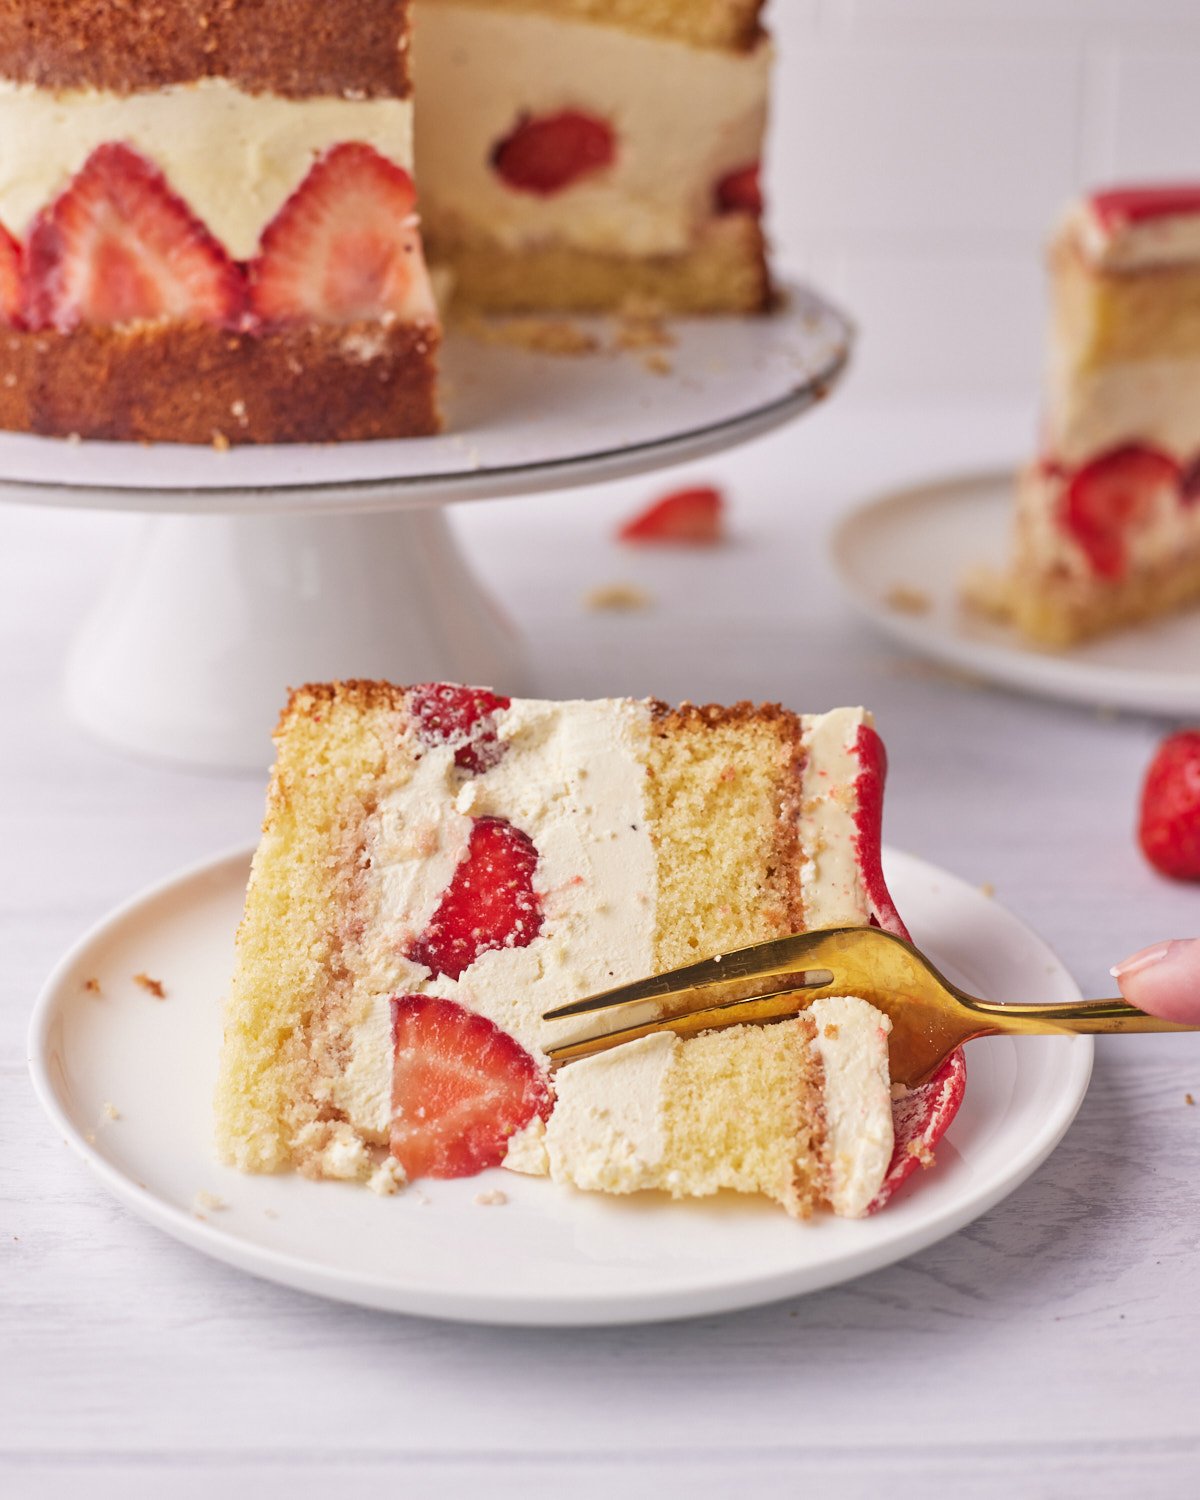
The first time you bake a genoise sponge cake, you will probably be surprised by just how light it is once baked. This means that it is fantastic for layering with delicate components like mousse, fresh fruit, and whipped cream, because the weight of the cake won't crush them.
Because there isn't much added fat in genoise cake, it can be a little drier and not quite as flavorful as other cake recipes (like pound cake), so it is often soaked with some kind of simple syrup to add flavor and moisture.
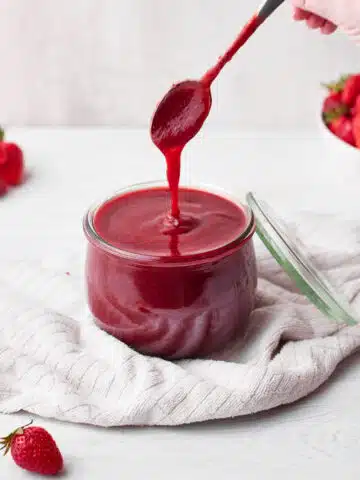
Sponge cake can absorb a lot of moisture, so it soaks up all the lovely flavors. You can use something like my strawberry simple syrup, or even just coffee or alcohol, as I do in my Tiramisu Cake recipe.
Here are a few ideas of what you can do with genoise sponge.
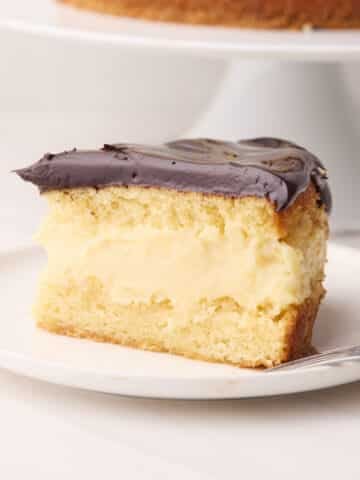
- Layer Cakes - Its light texture, ability to soak up flavors, and the fact that you can slice it into nice thin layers makes genoise sponge the perfect cake for layer cakes like Custard Cake or Boston Cream Pie.
- Rolled Cakes - Genoise is also often used to make rolled cakes like Swiss rolls. It's perfect because it's soft and doesn't squash the filling.
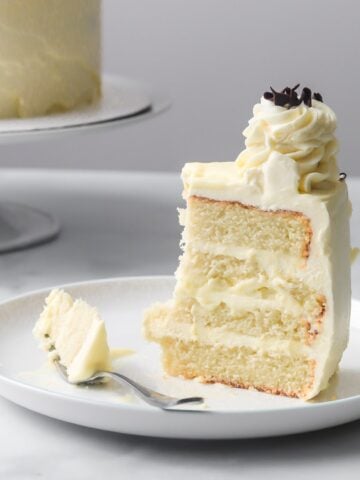
- Cream Cakes - There is no better type of cake to pair with fresh fruit and chantilly cream than genoise. It's so light you feel like you can just keep going back for more. Try using it in my Berry Chantilly Cake.
- Tiramisu - Genoise sponge cake is perfect for desserts like Tiramisu, as it can soak up all of the liquids. Use it in place of ladyfingers in my Strawberry tiramisu recipe.
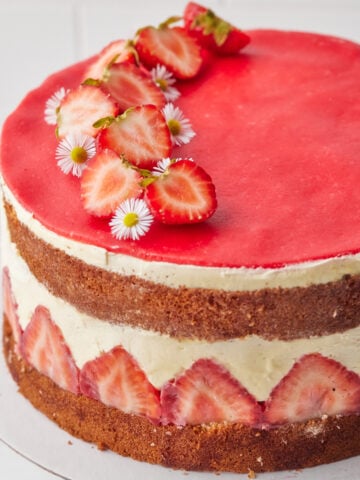
- Mousse Cakes - Because it is such a light sponge cake, it can gently lay a layer of genoise on top of unset mousse without displacing it or squashing it down, so this is the perfect cake for mousse or custard cakes like Fraisier.
- Trifles - The airy texture of genoise makes it a great cake to put in a trifle recipe. Layer it with all kinds of toppings to make a delicious layered dessert.
Frostings and Fillings
You can really pair this sponge cake with anything, but here are some of my favourite frostings and fillings to layer with genoise:


Storage
Genoise can dry out pretty quickly if not stored properly. I like to wrap it tightly in plastic wrap and then place the whole thing in an airtight container. Do not store in the fridge. It should stay moist for about 3 days like this.
Once it has been filled, you will likely need to store it in the refrigerator, depending on what fillings you used. Anything with dairy or fruit will need to be stored in the fridge. Keep it in an airtight container.
You can freeze an unfilled genoise sponge cake for up to a month, just make sure the whole cake is very well wrapped.
FAQ
Genoise is a type of sponge cake. There are many different types of sponge cake. Some of the most popular sponge cake recipes that you may have heard of are angel food cake and chiffon cake.
These recipes are all similar in that they use whipped eggs to create air and make the cake rise. The difference is that angel food cake and chiffon cake only use whipped egg whites, whereas genoise uses whole eggs.
Angel food cake goes one step further than chiffon cake and doesn't contain any fat at all in the recipe.
They all make for a lovely, fluffy sponge cake, but with slightly different results.
Yes! You can make genoise cake in any pan size you like. This recipe is developed for one tall 8-inch cake or 2 thinner ones. You can bake it in any pan, but be sure to adjust the baking time and check it regularly to make sure you don't overbake it.
Show Me Your Bakes!
If you make this recipe, please tag @bonni_bakery on Instagram or send me a photo - I love seeing all your creations.
Want your bake featured on the blog? You can also upload a photo here.
More Cakes
If you love this genoise sponge, try some of my other cake recipes:


Genoise Sponge Recipe
Ingredients
- 4 Large Eggs (medium in the UK)
- 150 g (¾ cup) Granulated Sugar (Caster Sugar)
- 114 g (1 cup) Cake Flour
- 45 ml (3 tablespoon) Vegetable Oil
- 30 ml (2 tablespoon) Whole Milk
- 1 teaspoon Vanilla Extract
Equipment
- Stand Mixer with whisk attachment
Instructions
- Preheat oven to 350°F / 180°C (160° fan) and grease an 8-inch cake pan.
- Make a bain-marie (double boiler) by placing a heatproof bowl over a saucepan with about an inch of water in the bottom. Make sure the bottom of the bowl is not touching the hot water. Let the water come to a simmer and then add the sugar and whole eggs, whisk to combine.4 Large Eggs, 150 g (¾ cup) Granulated Sugar
- Warm the egg mixture gently on the double boiler, whisking well the whole time, until the sugar has dissolved. You can check by rubbing the mixture between your fingers - if it's grainy it needs longer. The mixture should not get hot at any point, just warm enough to dissolve the sugar, which should only take a few minutes.
- Transfer the egg mixture to a stand mixer with a whisk attachment. Whip on the highest speed setting for 5 full minutes. Once it's done it will be very pale and should have doubled in volume. Test if it's ready by drizzling a little of the batter on top of itself - if the pattern stays on the surface for a few seconds then it's good. If it disappears immediately, whip for another minute.
- Turn the mixer down to low speed (the lowest setting) and whip for a further 10 minutes. This knocks all the large air bubbles out while keeping the smaller ones, which makes for a smoother and more consistent batter and a nice airy cake.
- While the eggs are whipping, you can prepare the other ingredients. Sift your flour into a large mixing bowl (sift twice for best results), and in a separate bowl mix together the milk, oil, and vanilla.114 g (1 cup) Cake Flour, 45 ml (3 tablespoon) Vegetable Oil, 30 ml (2 tablespoon) Whole Milk, 1 tsp Vanilla Extract
- Add the sifted flour to the whipped eggs and fold it in carefully with a rubber spatula. Be as gentle as possible here because knocking the air out will mean the genoise cake can't rise.
- Take a large dollop of the mixture and put it into a separate bowl. Then add the wet ingredients. Mix them together thoroughly. This is called 'sacrificing' the batter - the air will be knocked out of it, but it will help the liquids to incorporate into the rest of the cake batter more easily.
- Once totally combined, pour the 'sacrificed' batter back into the main batter and fold in gently until combined. Keep folding until it reaches the 'ribbon stage'. This means that if you lift your spoon or spatula out of the batter, the batter should run off the spoon steadily in a flowy, ribbon-like motion. If it hasn't reached this stage yet, keep folding gently.
- Pour the batter into your prepared cake pan and tap the pan on the counter a few times to release any large air bubbles. Place it into the preheated oven and bake for 35 minutes, or until the top is golden brown and bounces back slightly if you press on it. Baking time will vary depending on your oven, so make sure to check it regularly.
- Remove from the oven and bang the cake pan on the counter again to release additional air bubbles and prevent the sponge cake from collapsing while it cools. Put a piece of parchment paper on top of a wire rack and flip the cake upside down on the rack - let it cool like this. Don't worry if the cake immediately falls away from the bottom of the pan. Once it's cool enough to touch, remove the cake pan and let the cake cool completely (upside down).

Kai says
This recipe turned out great. Light and fluffy yet strong enough to support the layers of cream and strawberries I used. Best of all, it was super easy to make. It turned out better than many recipes I made with egg whites beaten separately. This is definitely my go to recipe for Genoise now.
Derek says
Hi Jules,
I'm looking forward to making your genoise sponge. Can you tell me please the expected height of this cake in an 8" tin? Your recipe has a link to an 8x3" tin, but I'm wondering if an 8x2" tin would be high enough.
Thank you,
Derek
Maureen Nolan says
Hi Jules, my mother used to make a genoise cake in a 12 x 13 rectangular pan. She created a layered masterpiece using Chantilly cream and meringue pieces, all frosted with Chantilly cream and glazed strawberries. Would I need to double the recipe for a cake this size and how long a baking time would you suggest...thanks so much.
Jules Grasekamp says
Hi Maureen,
This depends a little on how thick you want the genoise sponge to be. This recipe bakes quite a tall cake in one pan, which is then sliced into two or four thinner layers.
You could put a single batch of the recipe in a 12x13 pan for a thinner layer. A 12x13 inch pan holds about 3 times the volume of an 8-inch round pan, but you probably don't want it to be quite as tall, so a double batch would likely work best.
The bake time will vary substantially depending on a few factors, so I would recommend keeping a close eye on the cake for visual signs that it is ready, rather than sticking to a specific bake time.
I hope this helps, I'm sorry I can't give you a more precise answer! I'd love to hear how it turns out.
Jules
Sasha Miel says
Hi there
I had to leave you a comment (not something I typically do on the internet because I'm lazy). I wanted to make a Tiramisu cake but your sponge looked complicated so I opted for another recipe over yours. What a disaster that Genoise was ... that recipe seemed to lay down a blubbery layer on the bottom of the sponge. Unusable. I came back to your recipe and boy oh boy, am I thrilled that I did!!! I have got to say, this Genoise recipe of yours is he bomb!!! I made three sponges and each one was perfect. Light, fluffy, good flavour and perfect crumb. I finished off the recipe and this was actually my daughters 30th birthday cake. Thank you for a fabulous recipe. 11/10 ****
Jules Grasekamp says
Hi Sasha,
I'm so glad you enjoyed it! Thank you for trying my recipe, and for taking the time to let me know you loved it!
Jules
Unique places in the World says
Genoise sponge, or Genoese/Genovese cake, is an absolute classic! Its incredibly fluffy and light texture makes it perfect for layering and filling with whatever delicious combination you choose. It’s a versatile and elegant cake that never fails to impress.
Nanajee Travels says
This Genoise sponge cake recipe is absolutely fantastic! It turns out super light, fluffy, and full of flavor. It’s the ideal base for a wide range of desserts, from tarts to layer cakes and even patisserie creations. A versatile classic that never disappoints!
barry says
hi