
Fraisier cake is a classic French cake that can only be described as a celebration of strawberries! It looks like it would be impossibly complicated to make, but it's actually just a combination of a few simple components. I'll walk you through how to make each one.
Fraisier Cake Recipe Snapshot
What it is: Genoise sponge cake layered with light crème mousseline and fresh strawberries.
Why you'll love it: It looks incredibly fancy but is actually simple to make once you know the technique.
How to make it: Bake the sponge cake and slice it in half, soak it in simple syrup, and line strawberries on the bottom layer. Fill with creme mousseline and top with the other half of the cake.
Fraisier cake is the kind of cake that bakers look at and think is too advanced for them. I can tell you right now - it's not. It may look daunting, but this French strawberry cake is actually surprisingly easy to make.
There are multiple components, but each one is straightforward (if a little time-consuming). I'll walk you through each part, step-by-step, so you can make a showstopping fraisier and blow everyone away (including yourself).
Jump to:
What is Fraisier Cake?
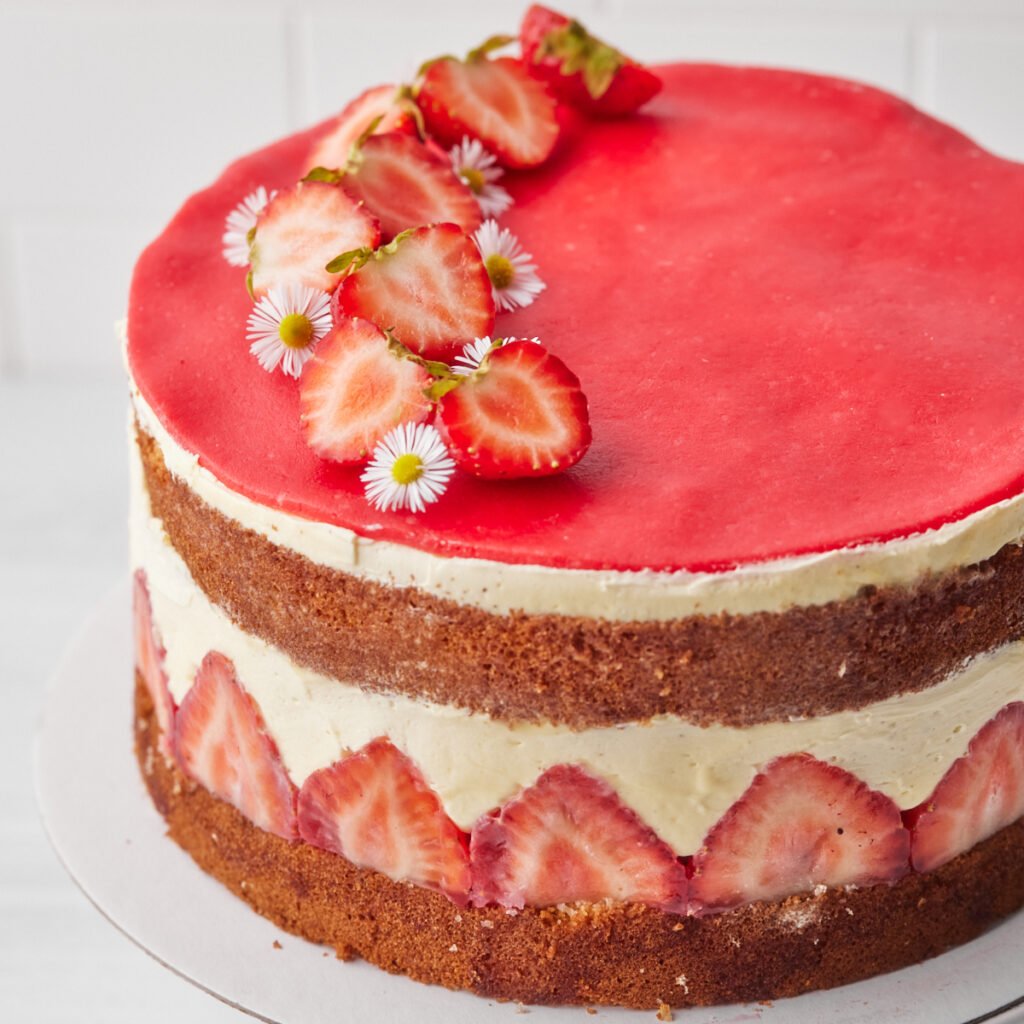
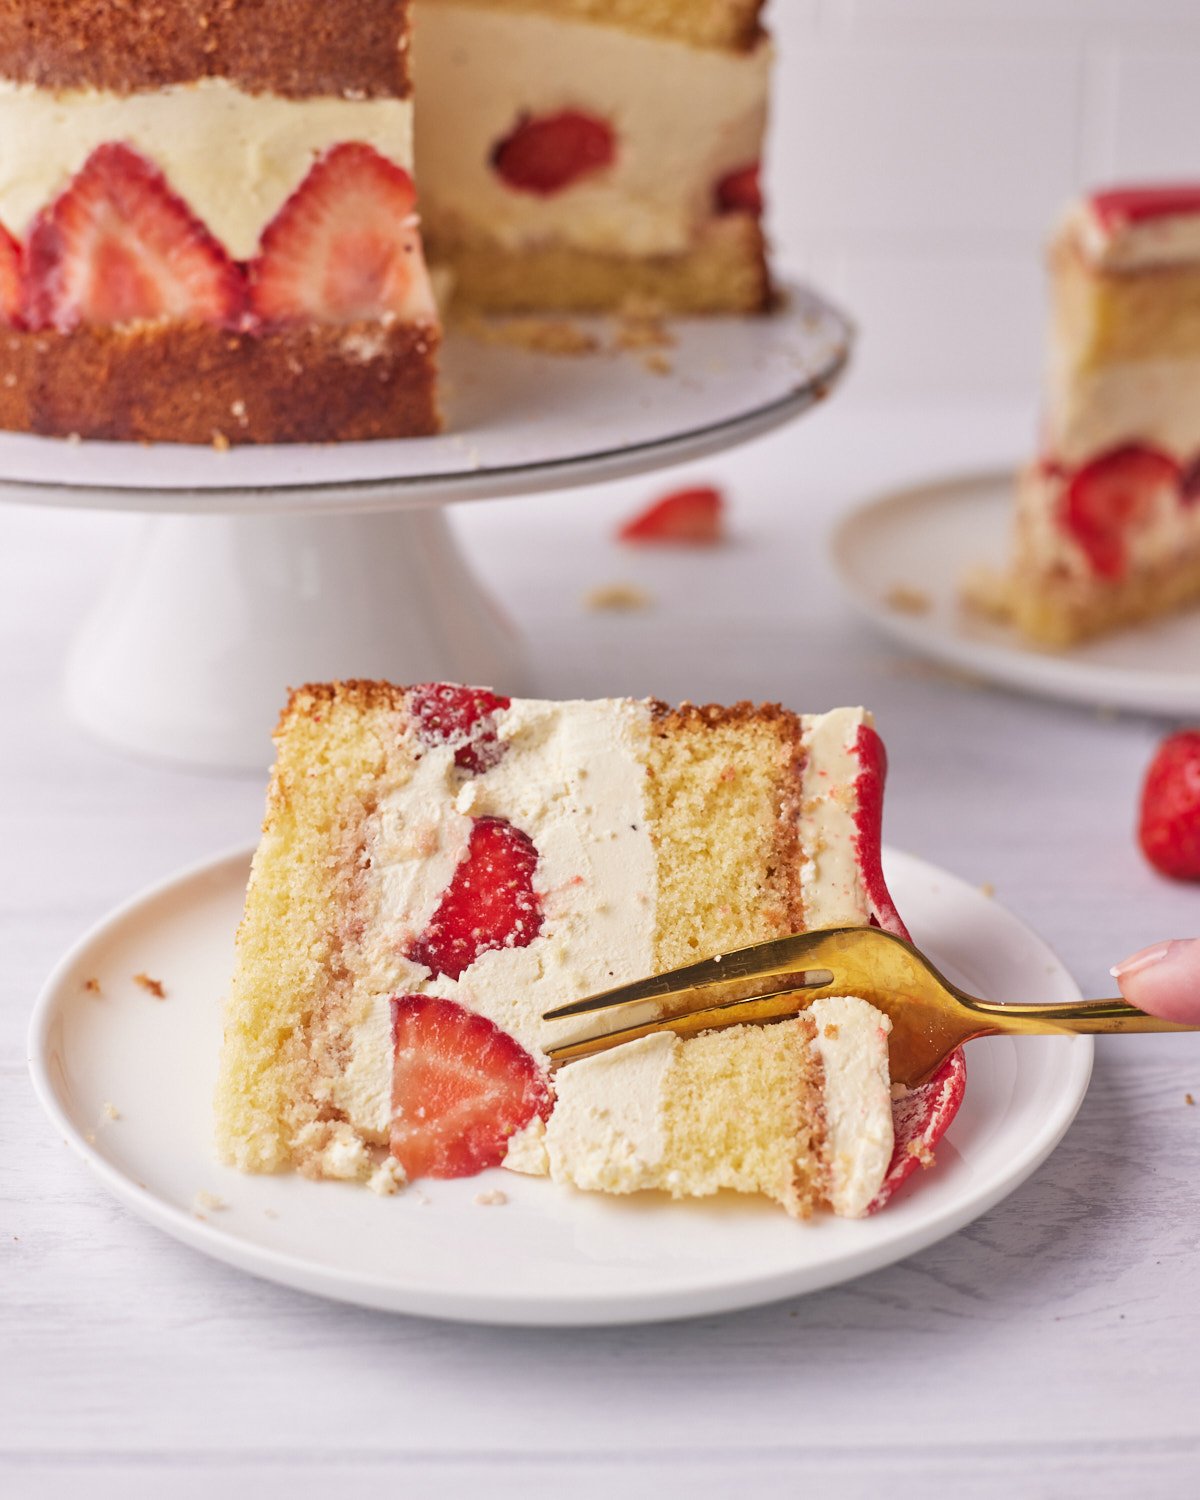
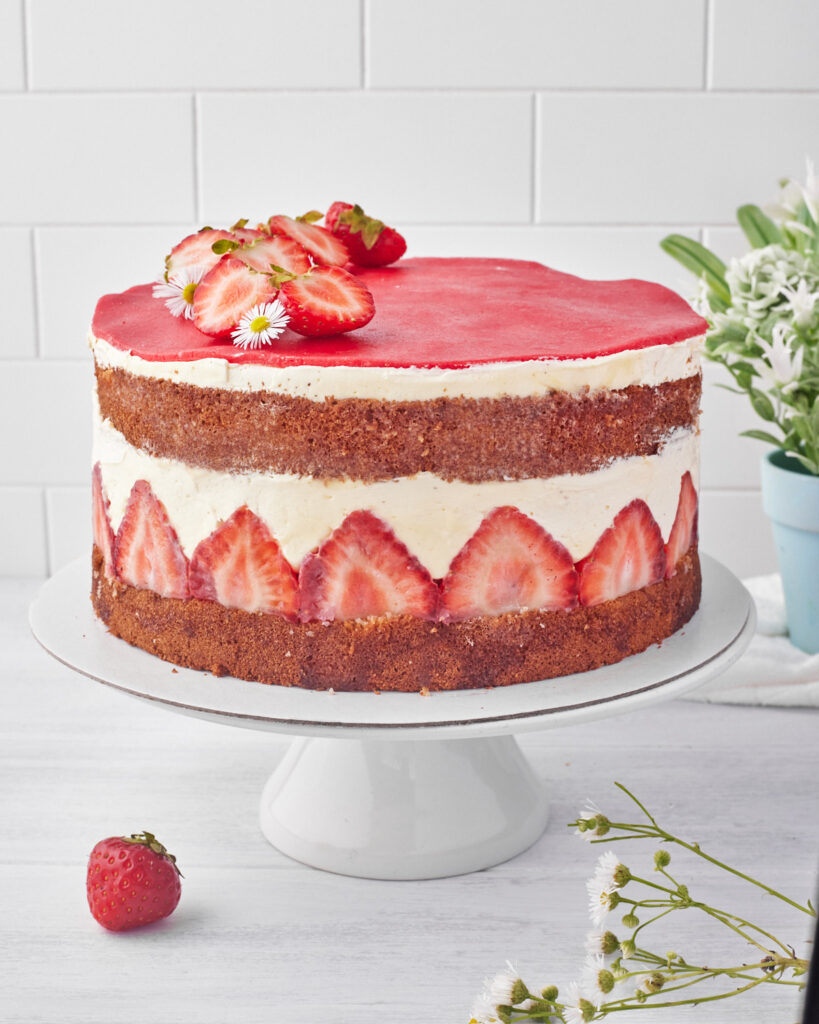
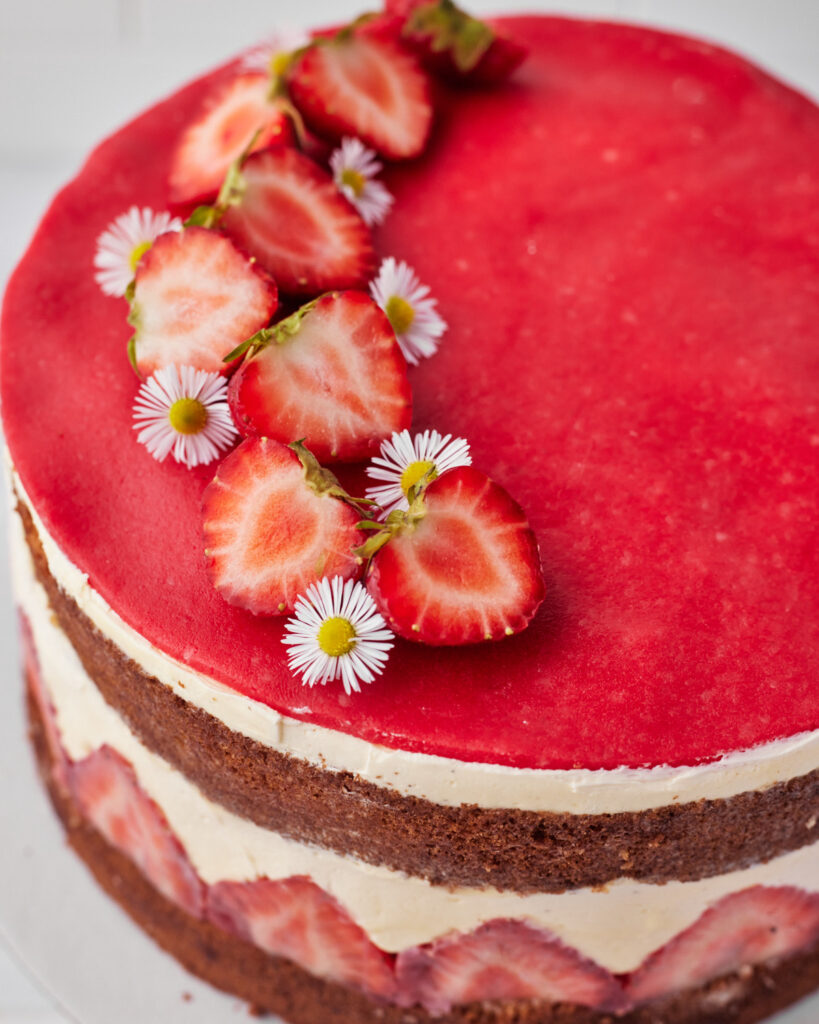
Fraisier cake is a classic French dessert that celebrates strawberries. It's a layered cake consisting of fluffy genoise sponge, soaked in strawberry simple syrup, and a light creme mousseline filling that sets around the strawberries and holds them in place on the outside of the cake to show off the beautiful insides of the fruit. That is the signature look of Fraisier. It also has a thin marzipan topping for that striking red color on top.
Ingredients
- Eggs - This recipe does use a lot of eggs! We use whole eggs in the genoise sponge. Use large eggs in the US or medium eggs in the UK.
- Egg Yolks - For the custard filling.
- Sugar - Use granulated sugar (caster sugar in the UK).
- Flour - For the genoise sponge, I find cake flour works best as it produces a beautifully light and airy sponge, which is what we want. However, if you don't have cake flour then all-purpose flour (plain flour) will do the trick.
- Oil - I use vegetable oil, but canola oil or any kind of neutral oil will do.
- Milk - Use whole milk to make sure your creme mousseline carries the flavor and structure.
- Vanilla - The vanilla flavor will really shine through in this recipe, so try to find a high-quality vanilla extract or vanilla bean paste. Or you can use a whole vanilla pod. Vanilla pods or vanilla bean paste will mean you can see those gorgeous vanilla seeds in your vanilla mousseline cream.
- Butter - Use unsalted butter. The butter will be whipped into oblivion to make the creme mousseline. Try to use a high-quality butter as the fat content tends to be higher and will produce a better result.
- Corn starch - Corn starch (or cornflour in the UK) is a thickening agent we will use in the custard (pastry cream). Do not confuse it with cornmeal.
- Strawberries - If you are making your strawberry syrup from scratch, you can use frozen strawberries for that, but inside the cake should absolutely be fresh strawberries and the best ones you can find. These strawberries will be on display, so you want to make sure you find red, ripe, juicy ones.
- Marzipan - Fraisier is also often finished off on top with a layer of marzipan or almond paste. I dyed my marzipan red to fit the aesthetic of the dessert, but you can skip the red food coloring if you like and just put it on au naturel.
See the recipe card for measurements.
What You'll Need
- Cake pan or ring
- Use a loose-bottom pan, springform pan, or cake/pastry ring. It must be the same size or smaller than your genoise pan and tall enough to hold all the layers. If needed, add an acetate collar to increase the height.
(I used an adjustable pastry ring set to 8 inches to match my sponge.)
- Pastry brush -
For brushing the syrup onto the sponge. Use a food-grade or silicone brush.
- Stand mixer with whisk attachment -
Strongly recommended - both the genoise and crème mousseline require long whipping times. A hand whisk will work, but it's a workout.
- Saucepan - Needed for the bain-marie, strawberry syrup, and pastry cream.
How To Make Fraisier Cake
You should prepare your creme patissiere (pastry cream) and simple syrup ahead of time so they have time to cool. The strawberry syrup will be soaked into the sponge cake, and the pastry cream will be whipped into butter to make the mousseline cream.
You can also make the genoise sponge ahead of time if you like.
Make The Pastry Cream
If this is your first time making pastry cream, you can get detailed step-by-step instructions in my creme patissiere recipe.

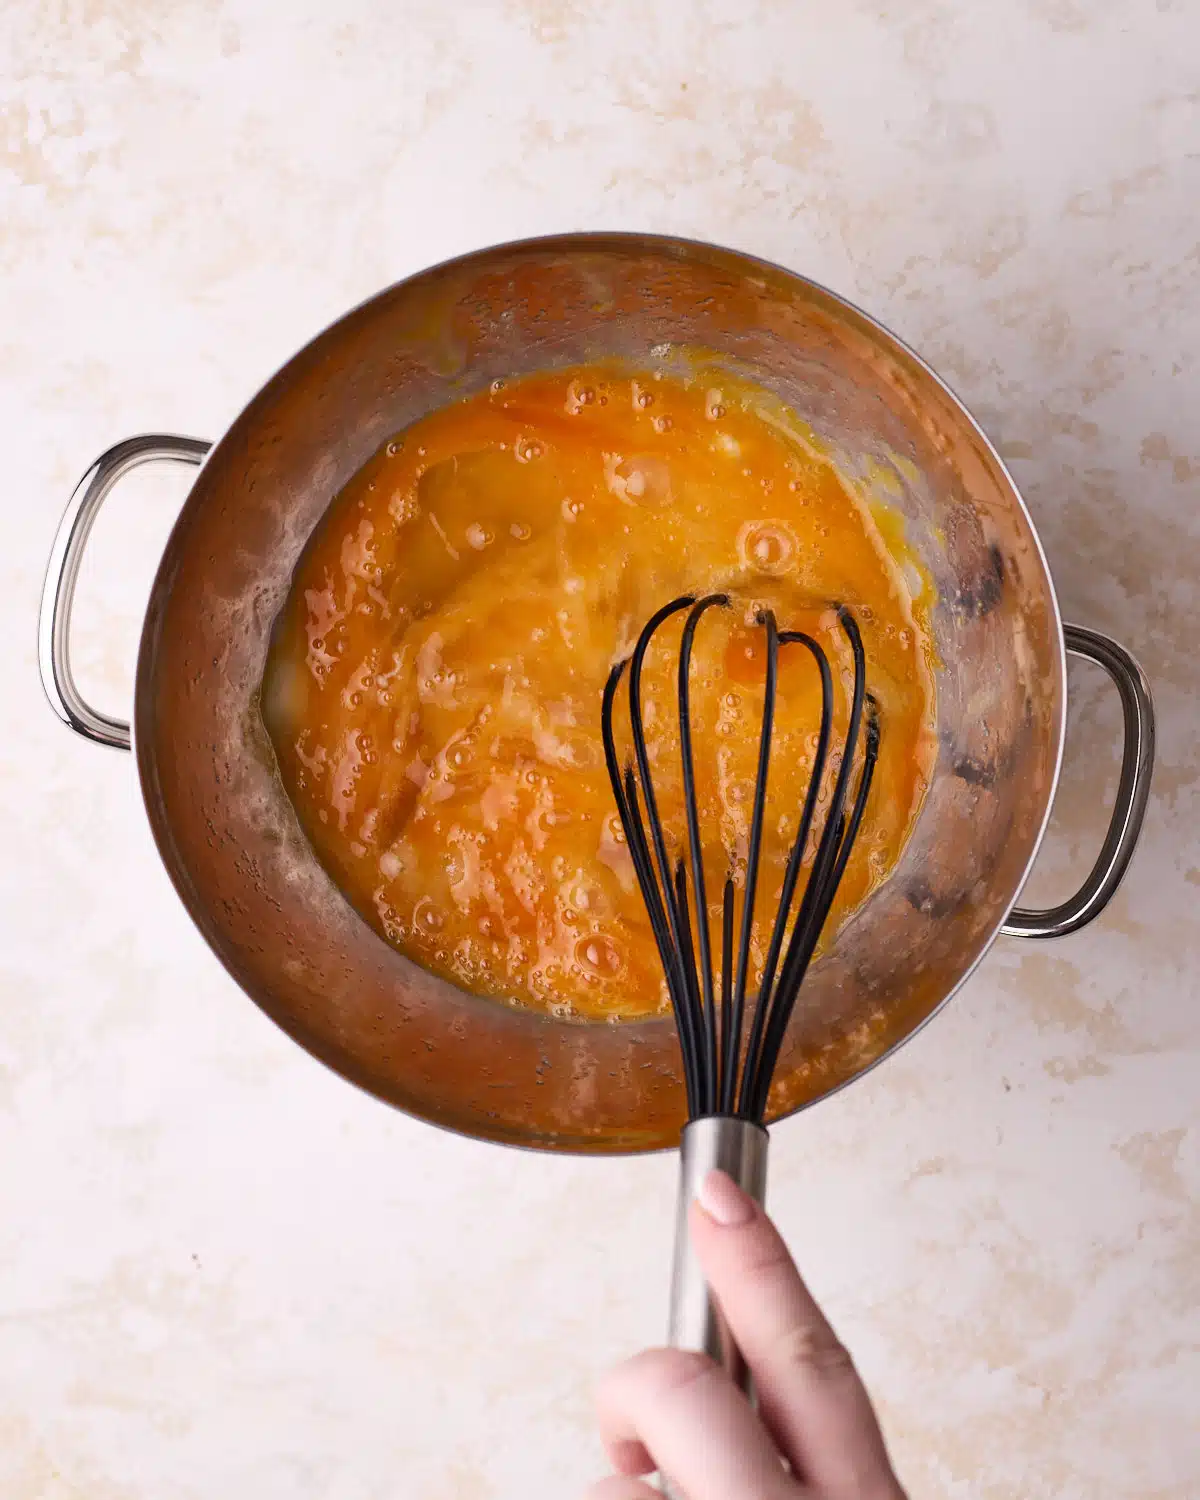
- Whip the eggs, sugar, and cornstarch together until pale and thick.
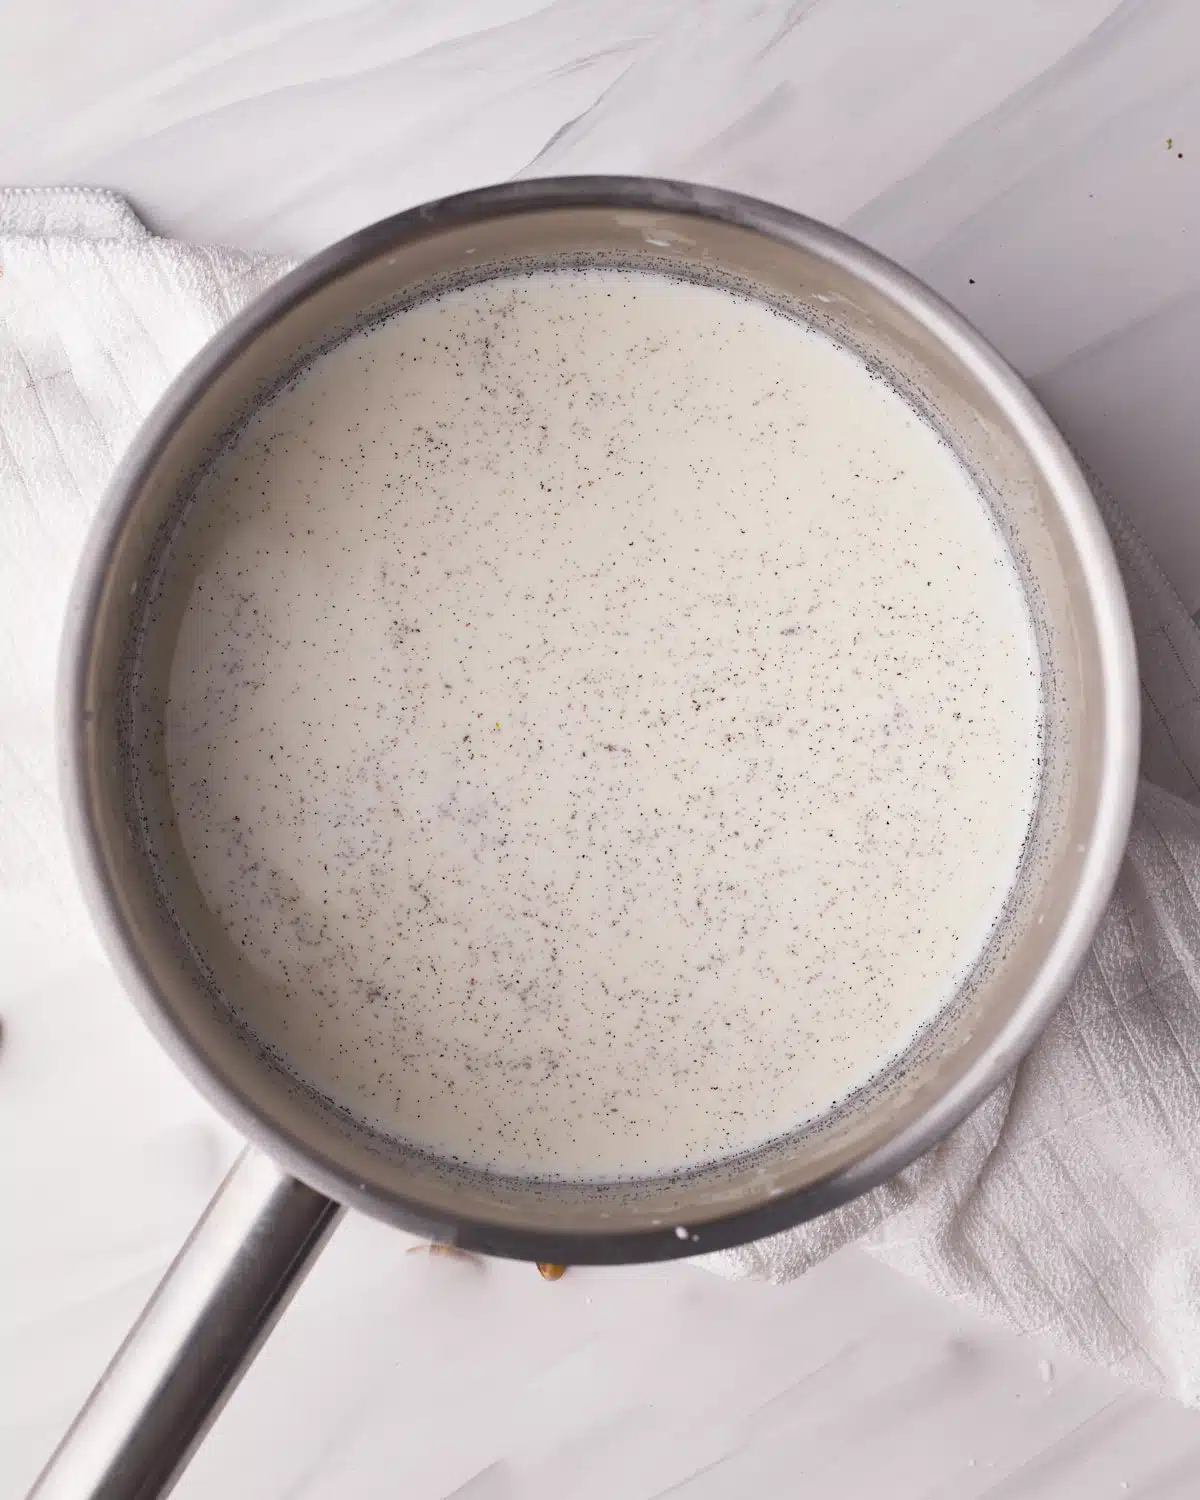
- Heat the milk and vanilla over medium heat until scalding hot.
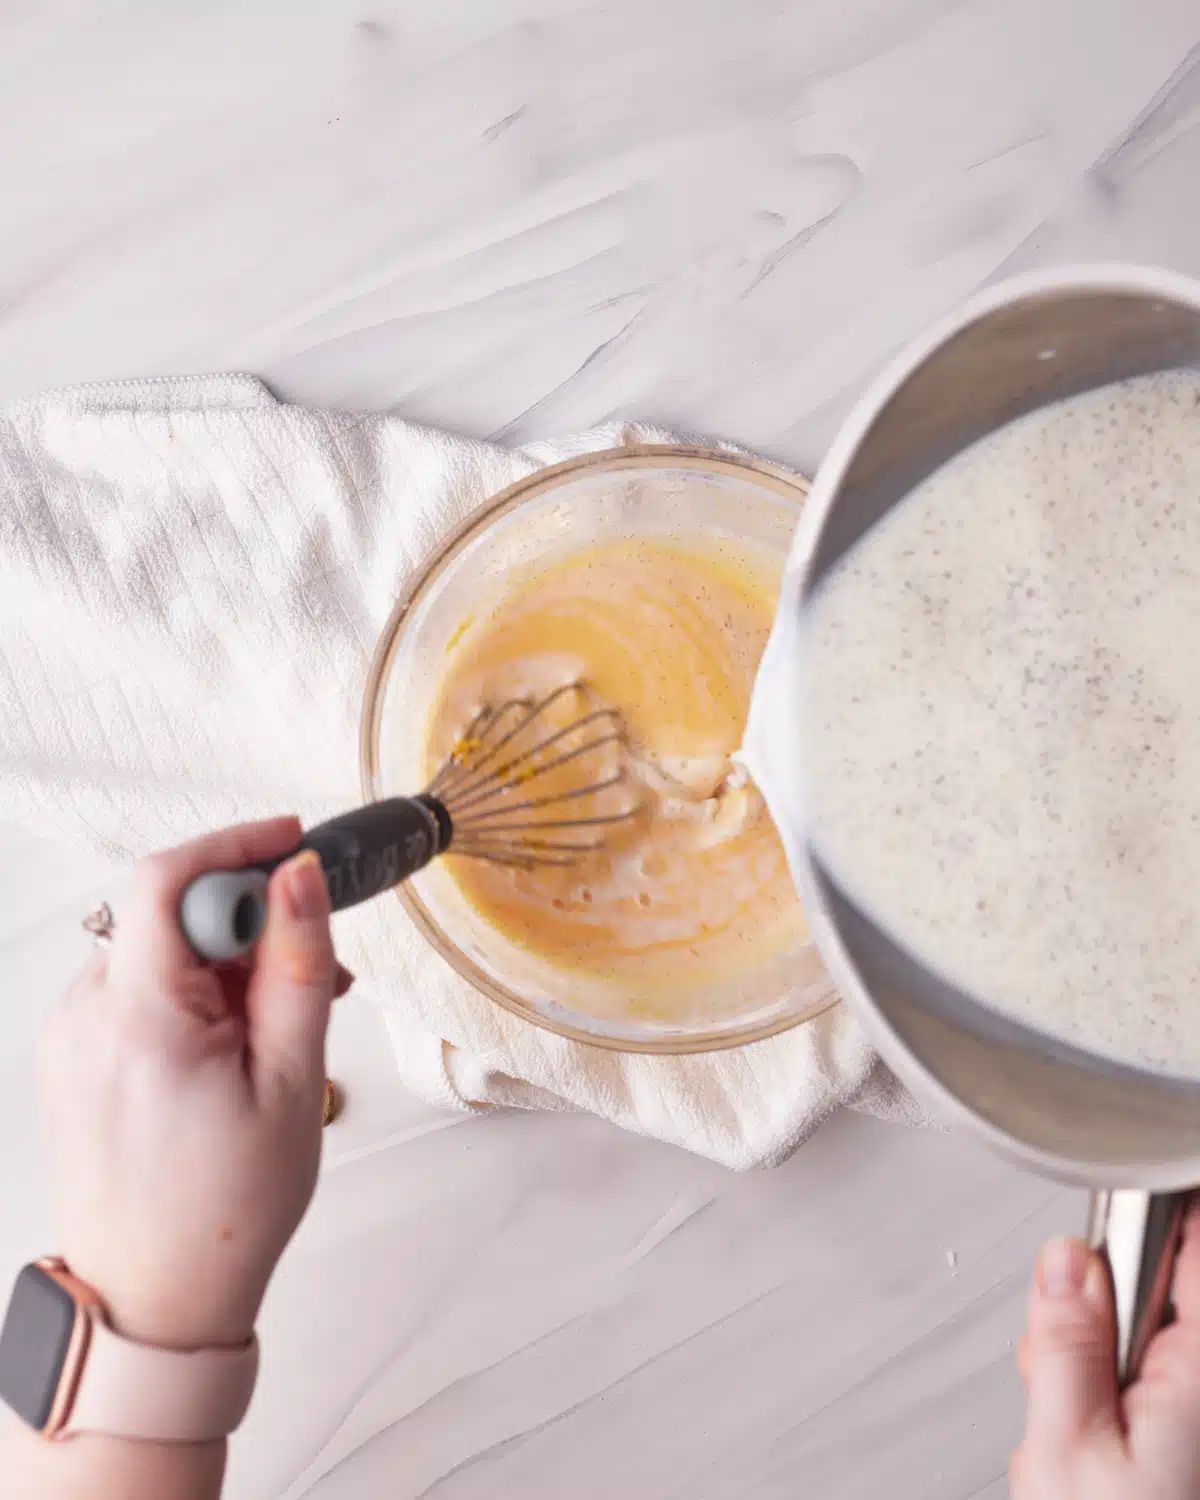
- Slowly drizzle the milk into the egg mixture while whisking.

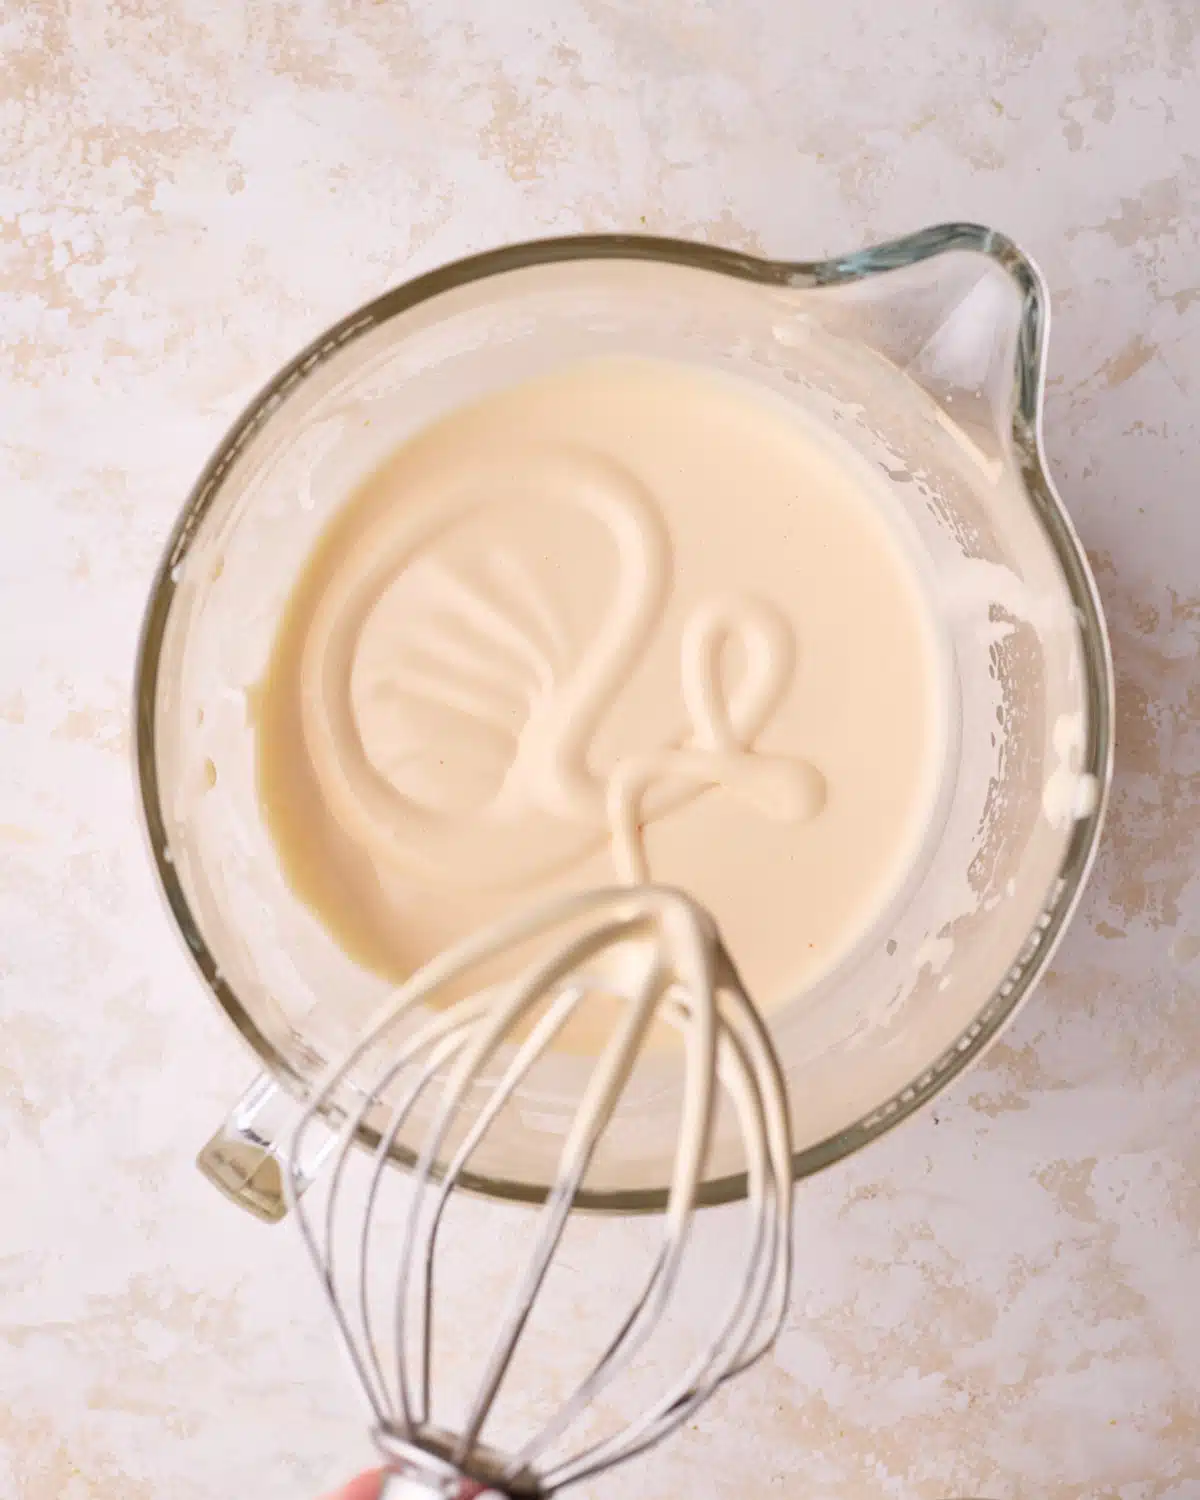
- Return everything to the heat and boil for 1-2 minutes until thick. Cover and let cool.
Make the Strawberry Simple Syrup
This strawberry simple syrup is so quick and easy, and it's amazing on all kinds of desserts. I use a raspberry version in my Berry Chantilly Cake aswell.
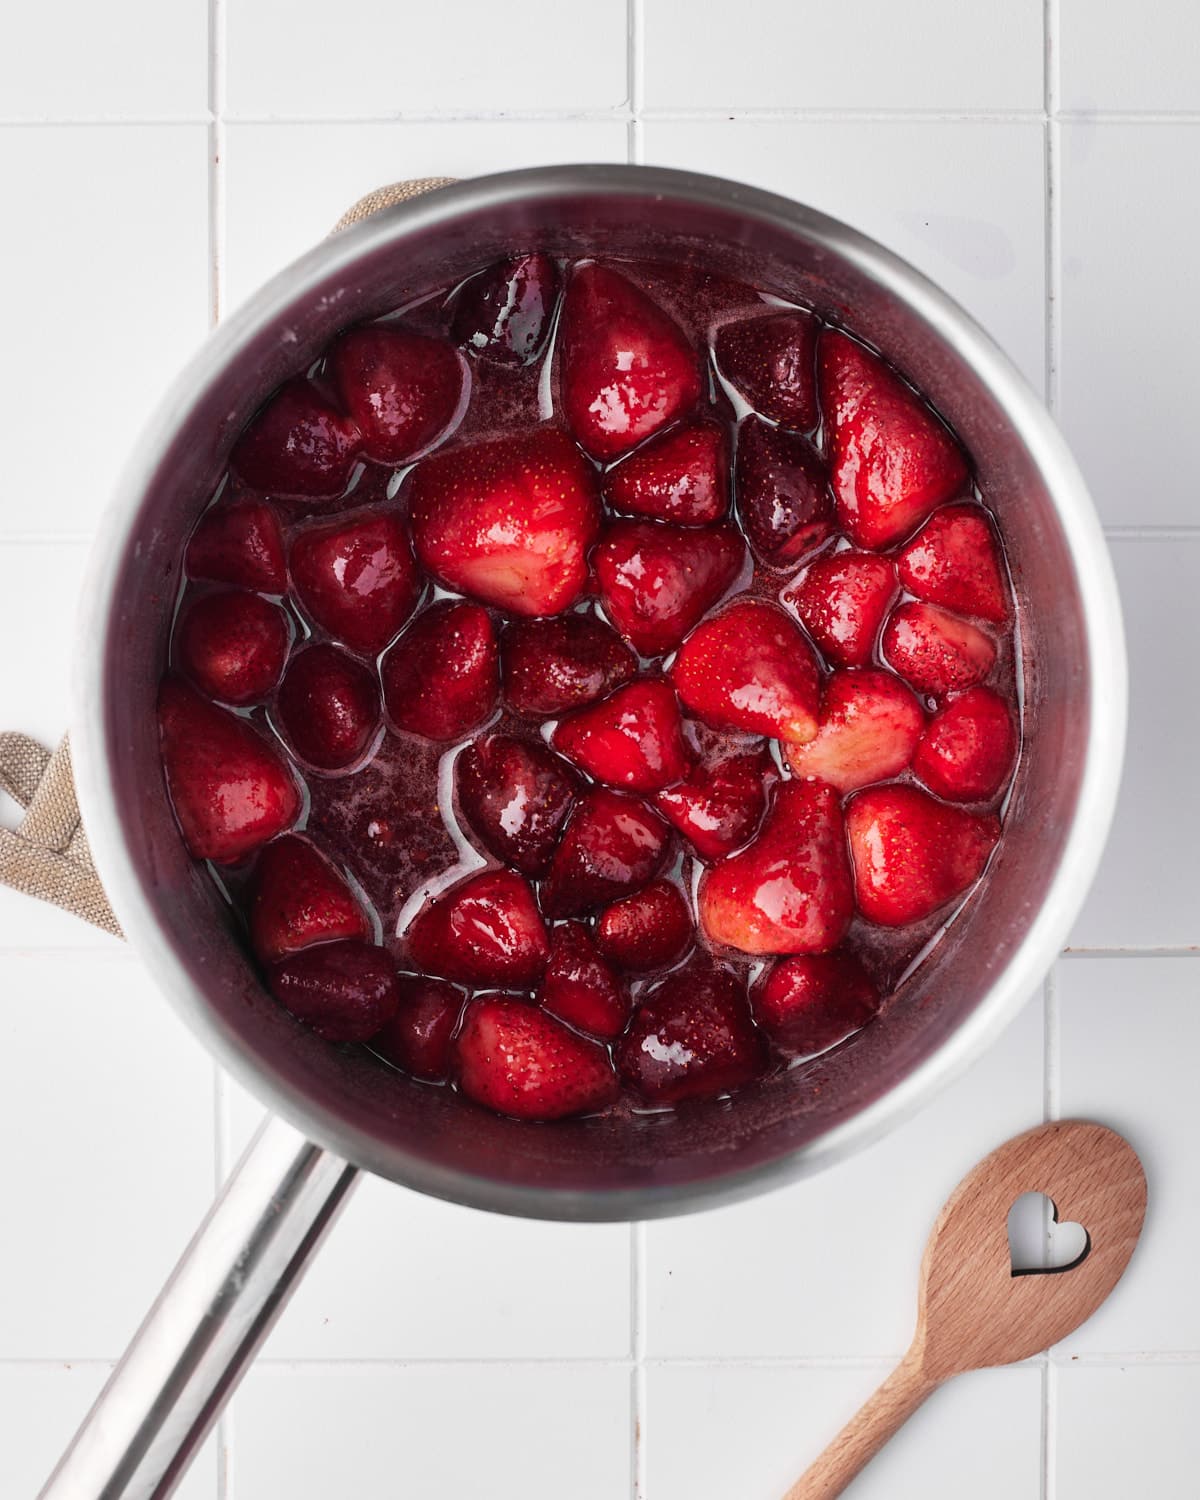
- Put the strawberries, water and sugar in a saucepan and bring to a boil until the sugar dissolves.

- Strain out the strawberries and set aside to cool.
Genoise Sponge Cake
The genoise sponge is the foundation of Fraisier - it is a light and airy Italian sponge cake used in a lot of European desserts and patisserie. Sponge cakes are notorious for drying out easily, which is why we soak them in simple syrup.
You can also try this cake with my hot milk sponge cake, which is a little more forgiving than the genoise technique.
See my genoise sponge cake recipe for more detailed instructions.
- Whisk eggs and sugar over a double boiler until the sugar dissolves and the mixture no longer feels gritty.
- Transfer to a stand mixer and whip on high speed for 5 full minutes. Then turn down to low speed and whip for a further 10 minutes.
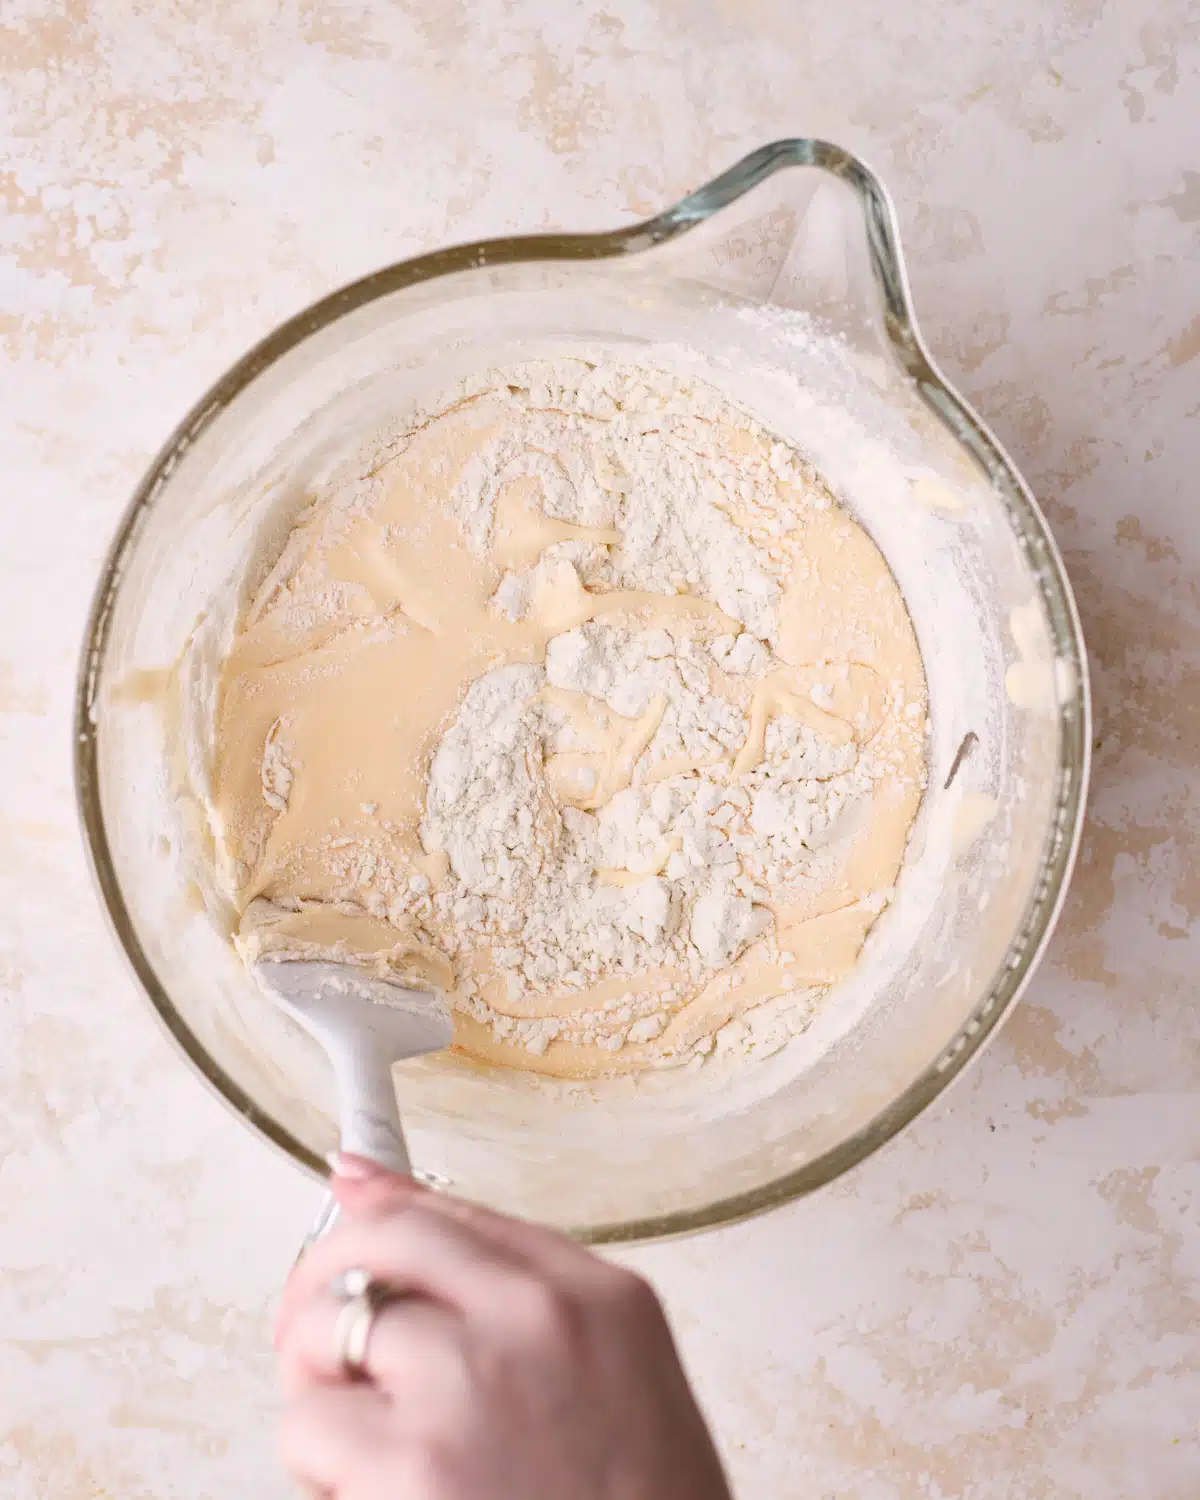
- Fold the sifted flour into the whipped eggs very gently, being careful not to knock out too much air.
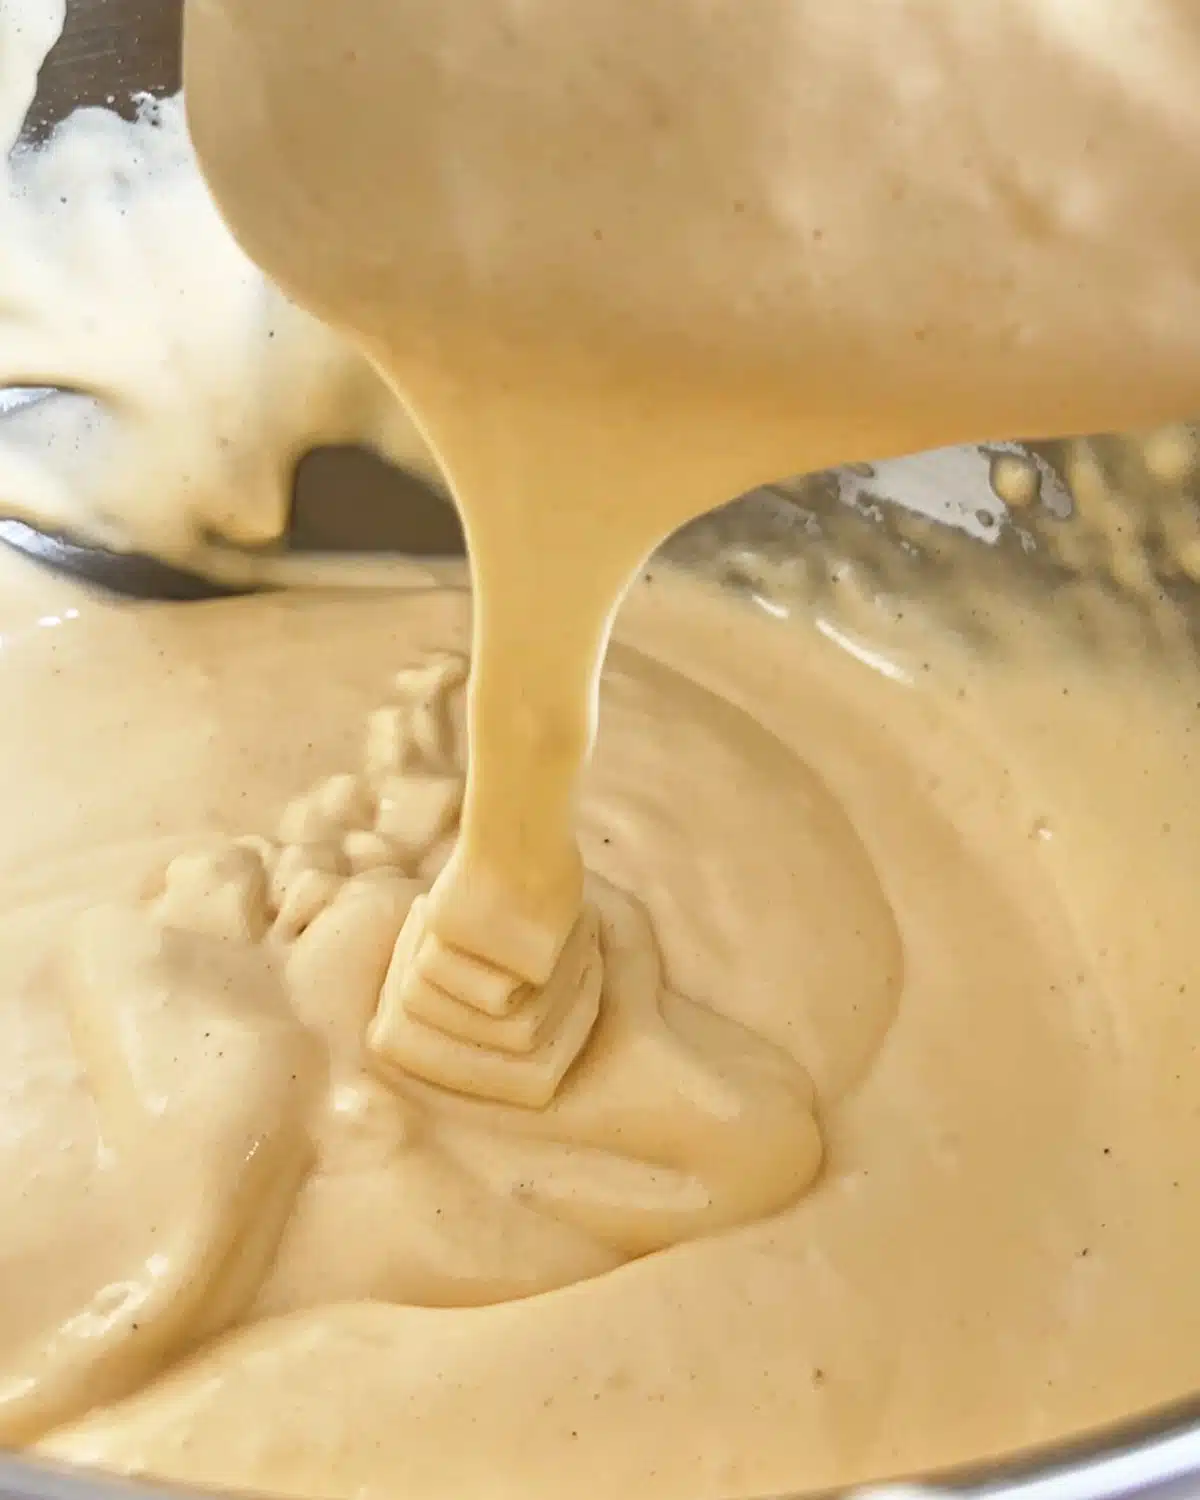
- Gently fold the wet ingredients into the batter until it reaches the ribbon stage.
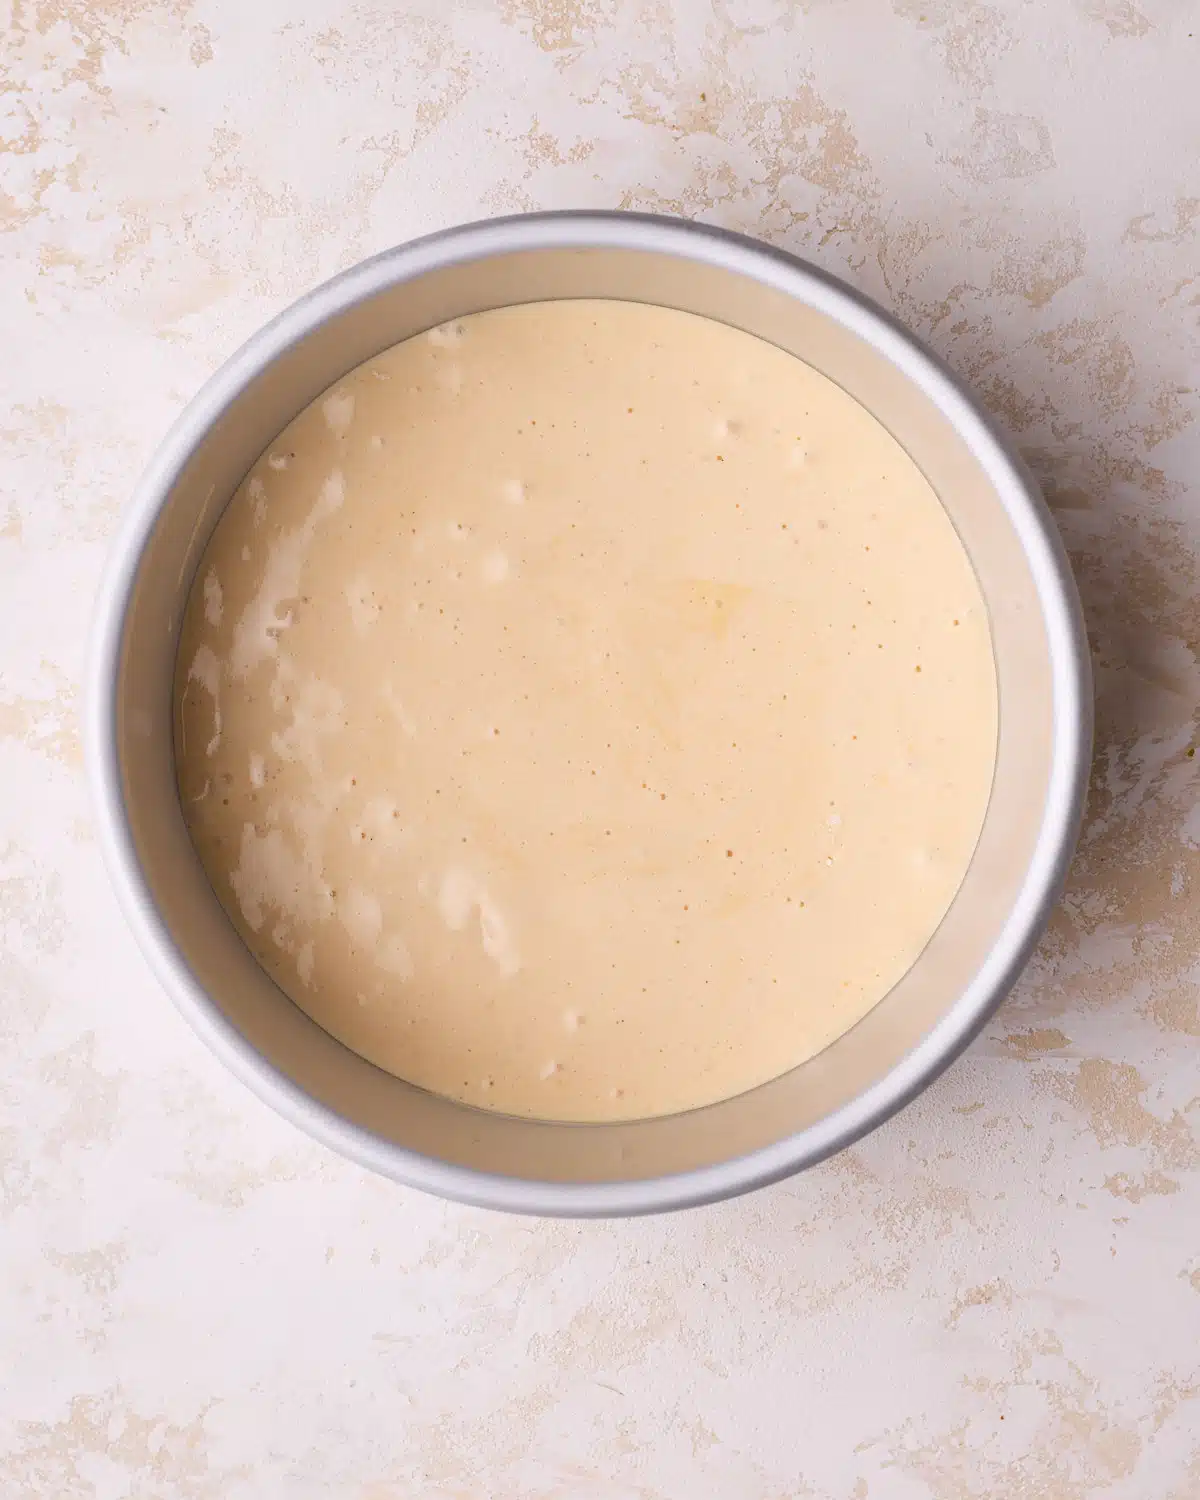
- Pour into a greased cake pan and bake at 350°F / 180°C (160° fan-assisted) for 35 minutes until golden brown and springy.
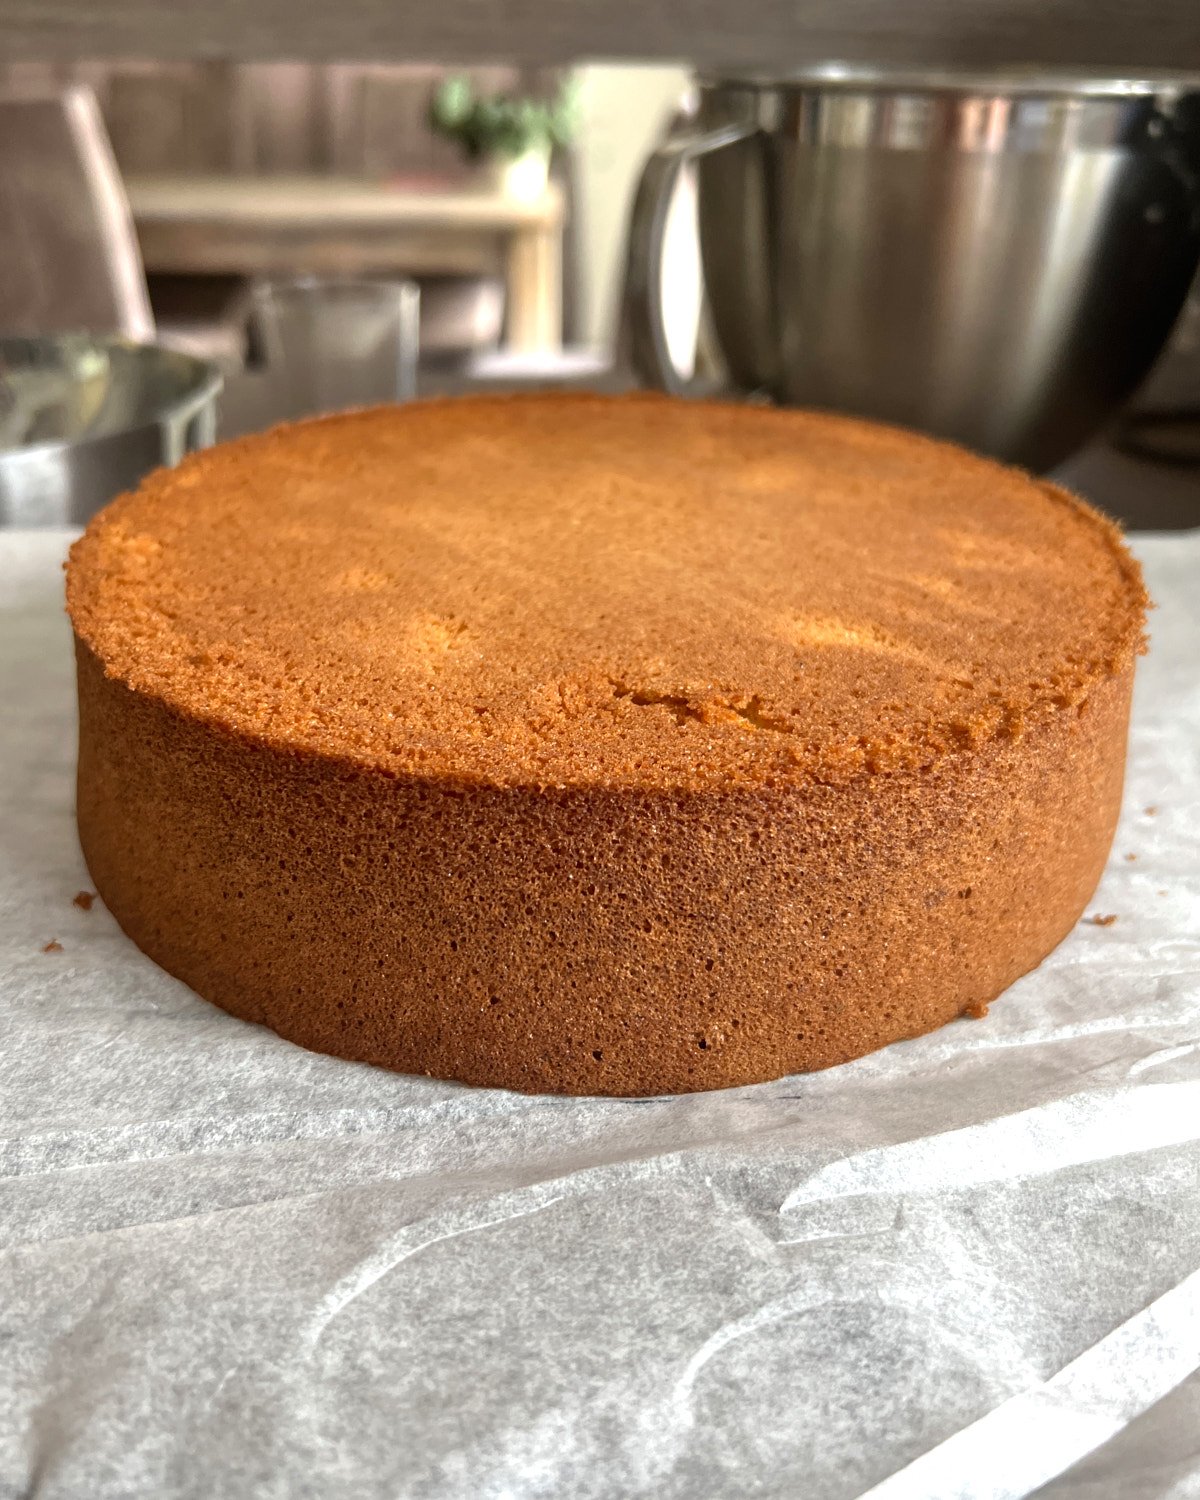
- Flip the cake upside down on some parchment paper to cool. Remove the pan once no longer hot to the touch.
Make The Créme Mousseline
By now, you should have a baked and cold genoise sponge, cooled strawberry simple syrup, and chilled vanilla pastry cream. Let the pastry cream come to room temperature before making the creme mousseline.
Crème Mousseline is a wonderfully light and creamy filling often used by pastry chefs in various treats and desserts. When prepared as in this recipe, it sets like a mousse. It is made by mixing crème pâtissière (also known as pastry cream or custard) with whipped butter to make a truly smooth and decadent center that just melts on your tongue.
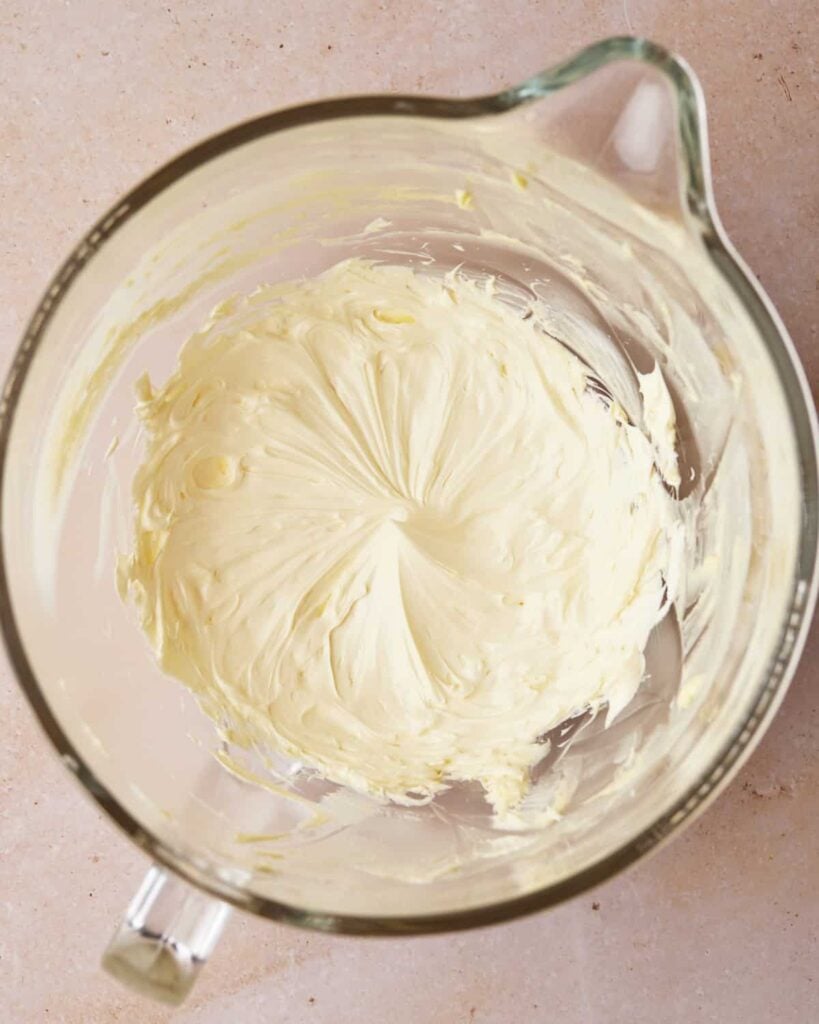
Whip Butter
Whip the butter on high speed until very pale and creamy - about 3 minutes.
Then slowly add the room temperature pastry cream, one tablespoon at a time, while whipping on medium speed. Whip for about 20 seconds in between each addition.
Make Mousseline Cream
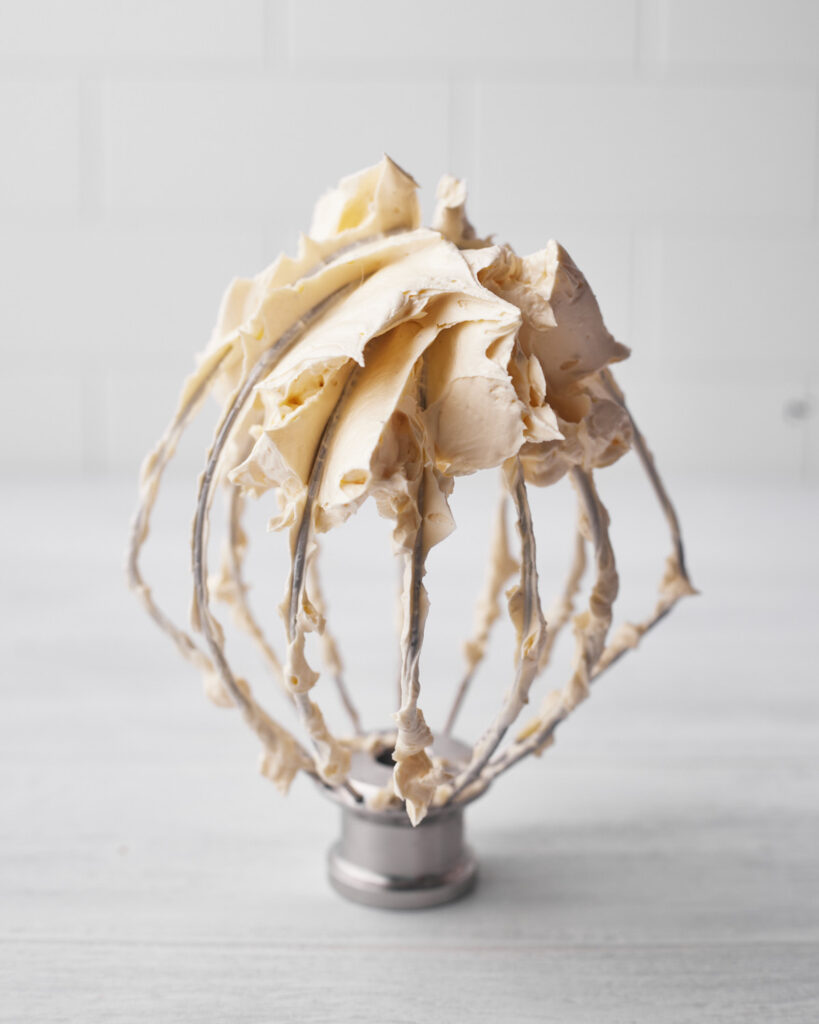
Once everything is incorporated, turn the mixer back on high and whip for another minute.
The créme mousseline should be thick, glossy, and pipable. If it isn't, see my Crème Mousseline recipe post for troubleshooting or more detailed instructions.
Transfer into a piping bag and cut the end off to make a small opening.
Assembling Fraisier Cake
It's easiest to get all the components lined up in front of you before you assemble the cake.
Note: If you are using an open-bottomed pan like a pastry ring, you want to build your fraisier cake directly on a cake board or whatever plate you will be serving on. If you are using a spring form pan or loose-bottomed cake pan, you can transfer it to the board or plate immediately after removing it from the pan.
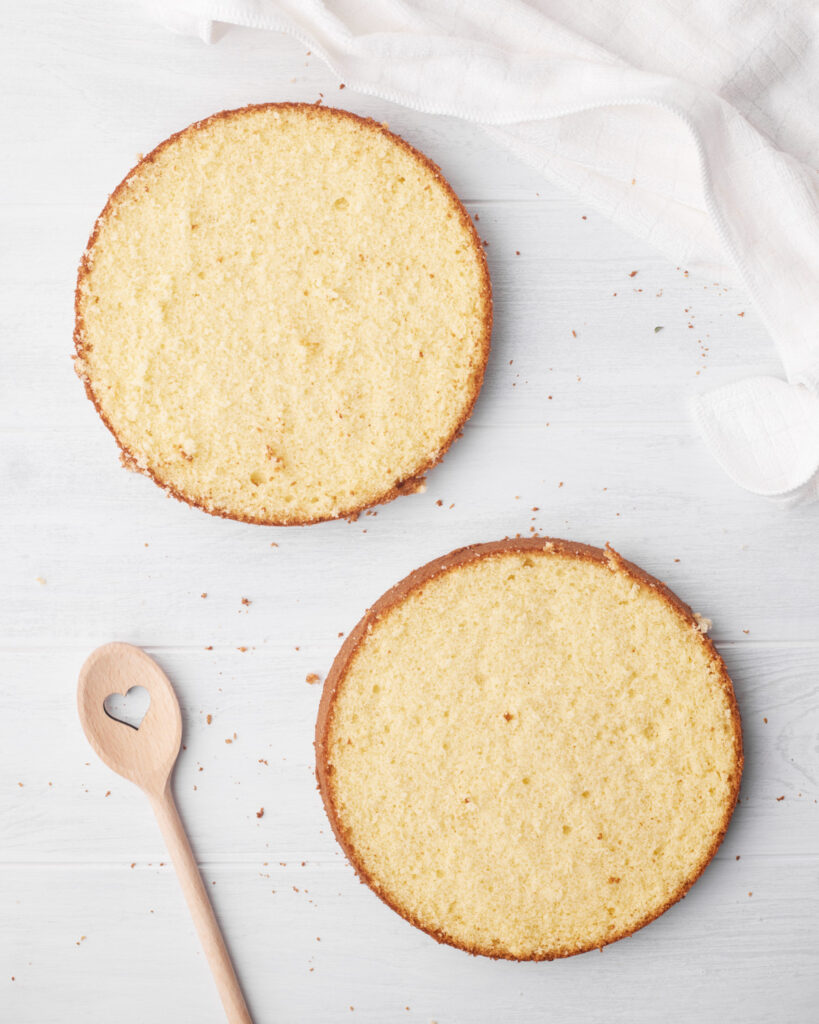
Torte The Sponge
Slice the cooled genoise sponge cake in half to make two even layers.
I like to use a cake leveler to make it super straight, but a serrated knife works too.

Soak With Syrup
Place one of the cake layers into a pastry ring or loose-bottomed cake pan and soak with strawberry simple syrup. Don't add so much that it goes soggy, just enough to keep it moist.
I find using a pastry brush is the easiest way to soak it evenly.
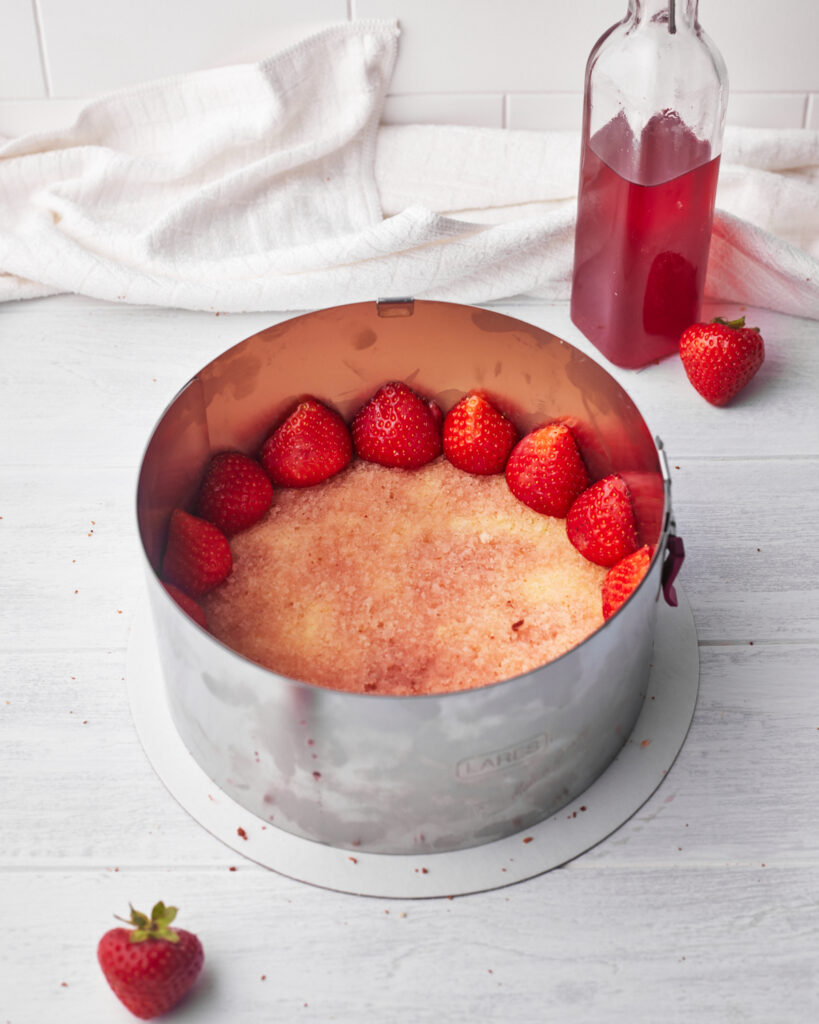
Line Up Strawberries
Find the prettiest strawberries and slice them in half. It's best if they are roughly the same size.
Line the outside of the pan with strawberries facing outward, pack them tightly.
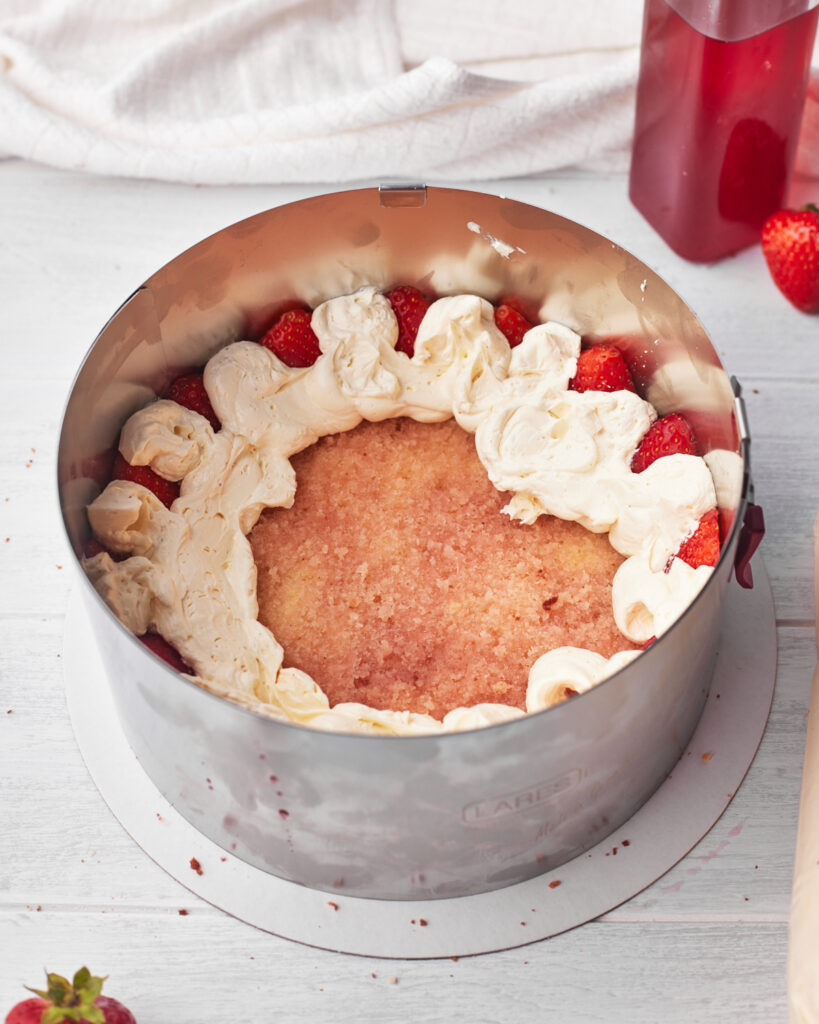
Fill In The Gaps
Pipe creme mousseline all around the strawberry halves to fill in all the gaps.
Once all the gaps are filled in, put a thin layer of mousseline over the rest of the cake as a base for the remaining strawberries.
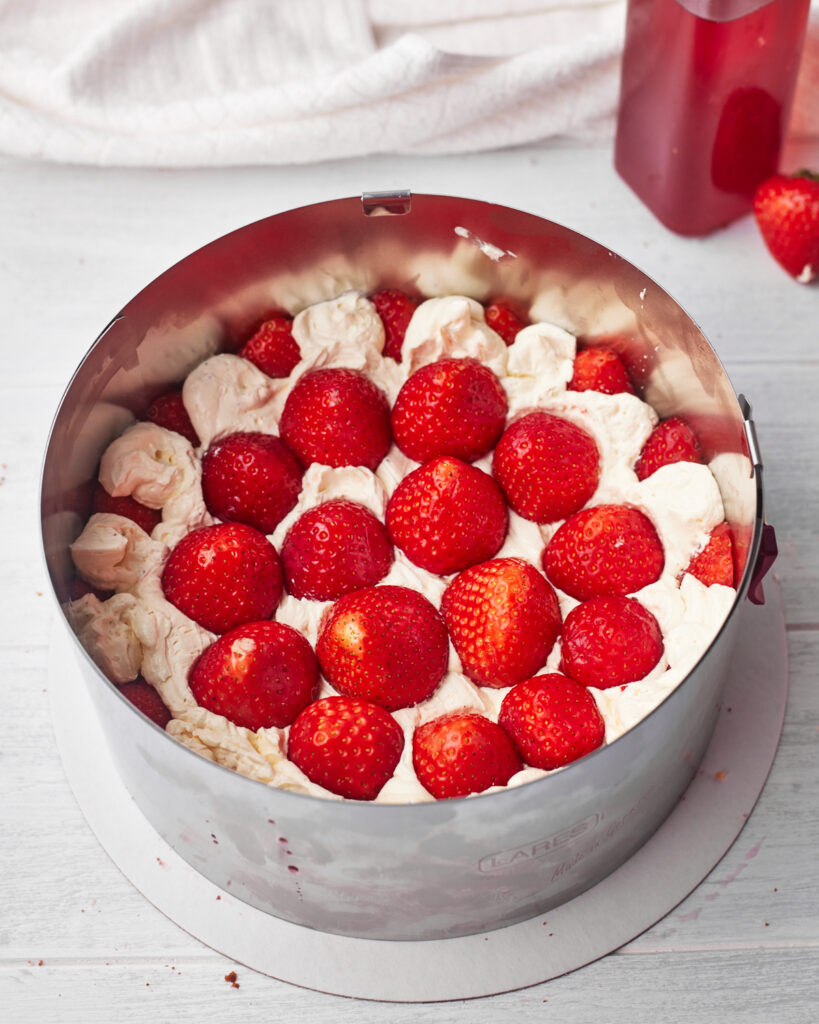
Cover With Strawberries
Slice the top off of some whole strawberries to give them a flat base and make them a uniform size, then place them in the middle of the cake until it is covered in a bed of fresh strawberries.
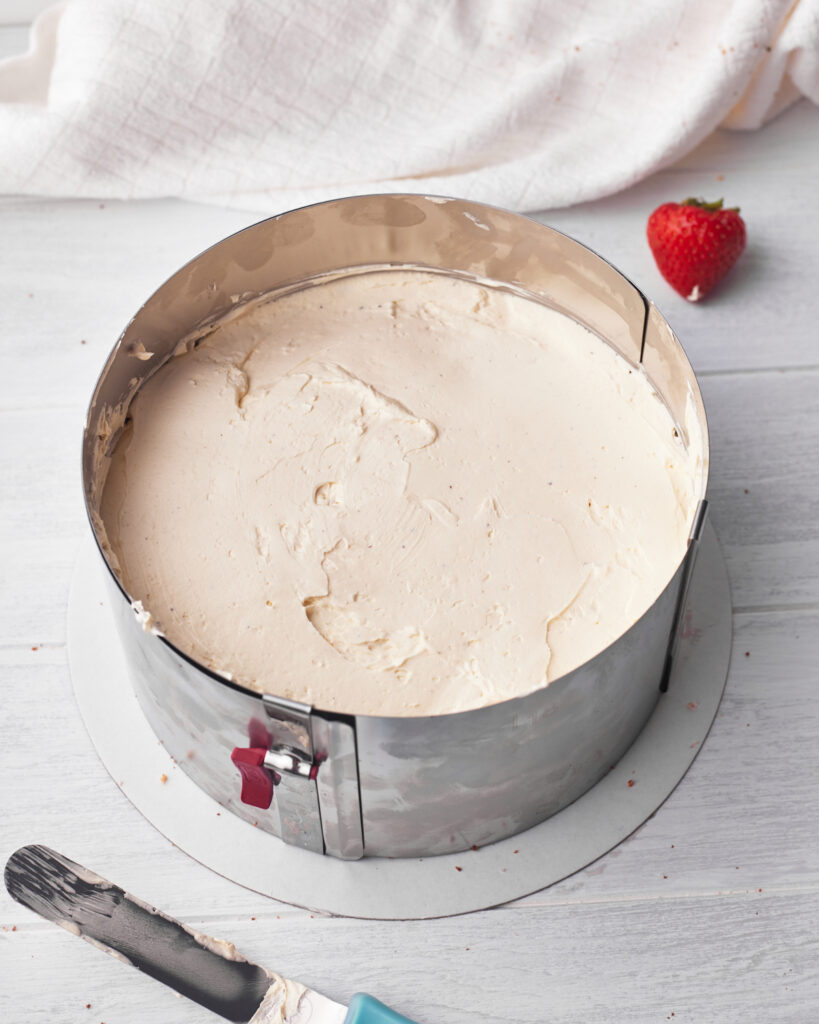
Crème Mousseline Layer
Pipe more creme mousseline on top of the strawberries to form a thick layer - it should cover the top of the strawberries so they can't be seen anymore.
Use an offset spatula to smooth it out nice and flat.
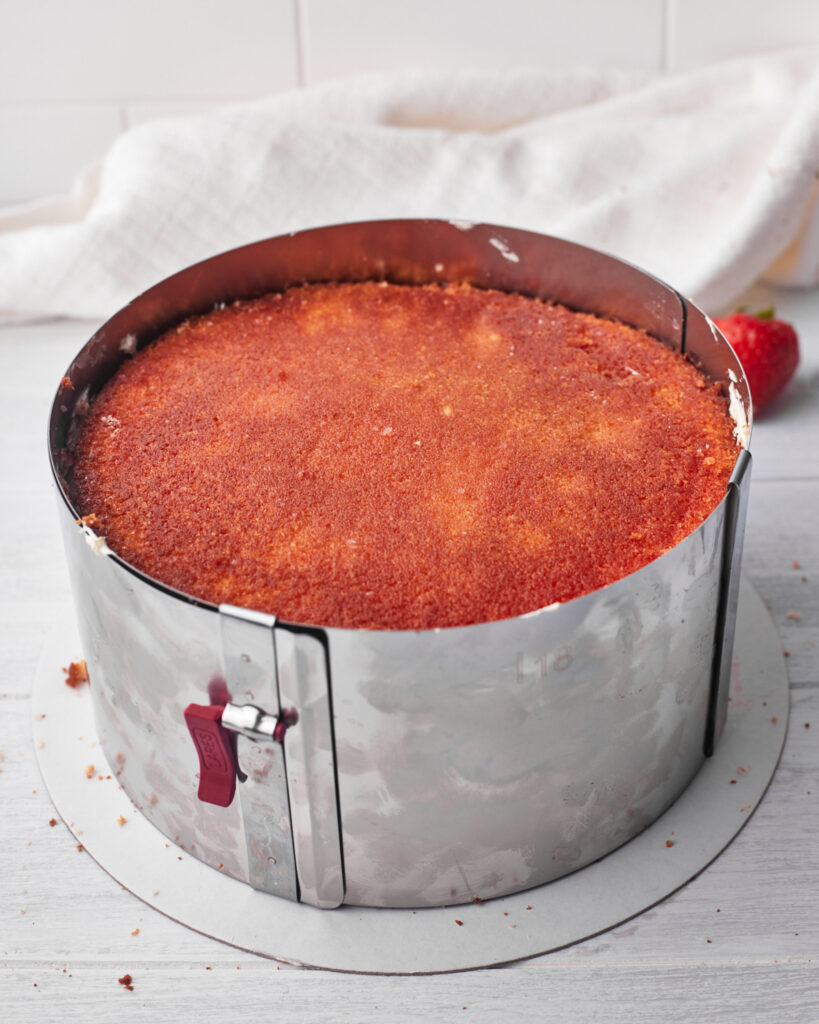
Top Cake Layer
Put the second sponge layer on top of the crème mousseline layer and press it down gently.
Soak with simple syrup, then put the remaining creme mousseline on top and smooth it out flat.
Chill for at least 4 hours.
Decorate The Fraisier Cake
Once the fraisier cake has set, let it sit at room temperature for 5 minutes, then remove it from the cake ring.
A classic fraisier cake has a red marzipan layer on top, but if you don't want to add the marzipan, you can just decorate with more fresh strawberries. You could also cover the top with sliced fruit and brush with a shiny glaze, just like a fresh fruit tart.
Make the Marzipan Topping
- Knead a little red food coloring into the marzipan until it is evenly distributed.
- Roll the marzipan out on a worktop, lightly dusted with powdered sugar to whatever thickness you'd like it to be.
- Use the cake ring or pan that you used for the cake to trace and cut a circle of marzipan the same size as your cake. Then lift it from the worktop and place it gently on top of your fraisier cake.
- Decorate with fresh strawberries. Voila!
Storage
Once it has been assembled, the fraisier cake should be stored in the fridge and is best eaten within 3 days. The longevity really depends on the freshness of the strawberries that were used inside it. You should be able to get a good indicator by looking at the strawberries on the outside of the cake.
Show Me Your Bakes!
If you make this recipe, please tag @bonni_bakery on Instagram or send me a photo - I love seeing all your creations.
Want your bake featured on the blog? You can also upload a photo here.
More Strawberry Desserts
If you love fresh fruit desserts, try some of my other strawberry recipes:


Fraisier Cake
Ingredients
- 4 Large Eggs
- 150 g (¾ cup) Granulated Sugar (caster sugar)
- 114 g (1 cup) Cake Flour
- 3 tablespoon Vegetable Oil
- 2 tablespoon Whole Milk
- 1 teaspoon Vanilla Extract
- 600 ml (2½ cups) Whole Milk
- 5 Egg Yolks
- 2 teaspoon Vanilla Extract
- 100 g (½ cup) Granulated Sugar (caster sugar)
- 3 tablespoon Corn Starch (cornflour)
- 1½ tablespoon All-purpose Flour (plain flour)
- ½ teaspoon Salt
- 453 g (4 sticks) Unsalted Butter
- 200 g (1 cup) Granulated Sugar (caster sugar)
- 240 ml (1 cup) Water
- 1 teaspoon (1 teaspoon) Lemon Juice
- 166 g (1 cup) Strawberries fresh or frozen
- 680 g (24 oz) Fresh Strawberries no exact amount, just enough to fill and decorate the cake
- 1 small pack Marzipan optional. Just enough to roll a thin circle on top of the cake
- ¼ teaspoon Red food colouring optional
Equipment
Instructions
- This recipe is made of multiple separate components, to give thorough instructions without making this page super long, I have split each component up into its own recipe to make it easier to read. Click on each component below to be taken to the full recipe and detailed instructions.
- Make the Strawberry Simple Syrup ahead of time.
- Make the Genoise Sponge Cake. Let cool and then remove the top and slice in half so you have two thin layers of cake.
- Prepare the Creme Mousseline and set aside.
- Place one of your genoise cake layers into the base of a pastry ring or loose-bottomed cake pan. Do not grease the cake pan.
- Find the prettiest strawberries in the box and slice them in half. It's best if you can find ones that are all roughly the same size.
- Place the strawberries in a ring around the outside of the cake, with the inside of the strawberry facing the cake ring/pan.
- Brush a layer of strawberry simple syrup all over the sponge cake.
- Put the creme mousseline into a piping bag and cut a hole in the end - there is no need for a nozzle. Pipe creme mousseline all around the strawberries to fill in all the gaps (see pictures above). Once all the gaps are filled in, pipe a thin layer of creme mousseline in the middle of the cake to cover any cake layer you might still be able to see.
- Fill the center of the cake with strawberries, with the tops cut off, standing upright (see pictures), until the whole cake is covered in strawberries.
- Pipe more creme mousseline on top of the strawberries to form a thick layer - it should cover the top of the strawberries so they can't be seen anymore. Use a palette knife to smooth it out nice and flat.
- Put the second half of the genoise cake on top of the creme mousseline layer and press it down gently.
- Brush some more strawberry simple syrup all over the top cake layer.
- Put the remainder of the creme mousseline on top of the genoise cake and smooth it out flat. Place Fraisier cake in the fridge to set for at least 4 hours - or even overnight.
- Once the fraisier cake has set, remove it from the fridge and let it sit for 5 minutes.
- Try to very gently remove the cake from the cake ring/pan. It should slide easily, but if there is any resistance, you can use a hair dryer or blow torch to gently heat the outside of the ring very slightly, then try again.
- Once the cake is removed from the cake pan, put it back in the fridge while you prepare the marzipan.
- Take a small amount of red food coloring and knead it into the marzipan with your hands (you may want to wear gloves until the color is incorporated evenly. Roll the marzipan out thinly on your worktop, using a little powdered sugar underneath so it doesn't stick.
- Use the cake ring or pan that you used for the cake to trace and cut a circle of marzipan the same size as your cake. Then lift it from the worktop and place gently on top of your fraisier cake.
- Decorate with fresh strawberries. Voila!


Chris Radwanski says
I gotta say, at first I thought that was a lot of icing (i later found out its not icing) for a cake, but the crème mousseline was AMAZING! I enjoyed the fact that this was light and fluffy, while being not overly sweet. I could easily eat this for breakfast and not feel guilty about it. Perfect summertime dessert!
Jules says
Haha i'm glad you enjoyed it once finding out it was NOT a thick layer of icing 😀