
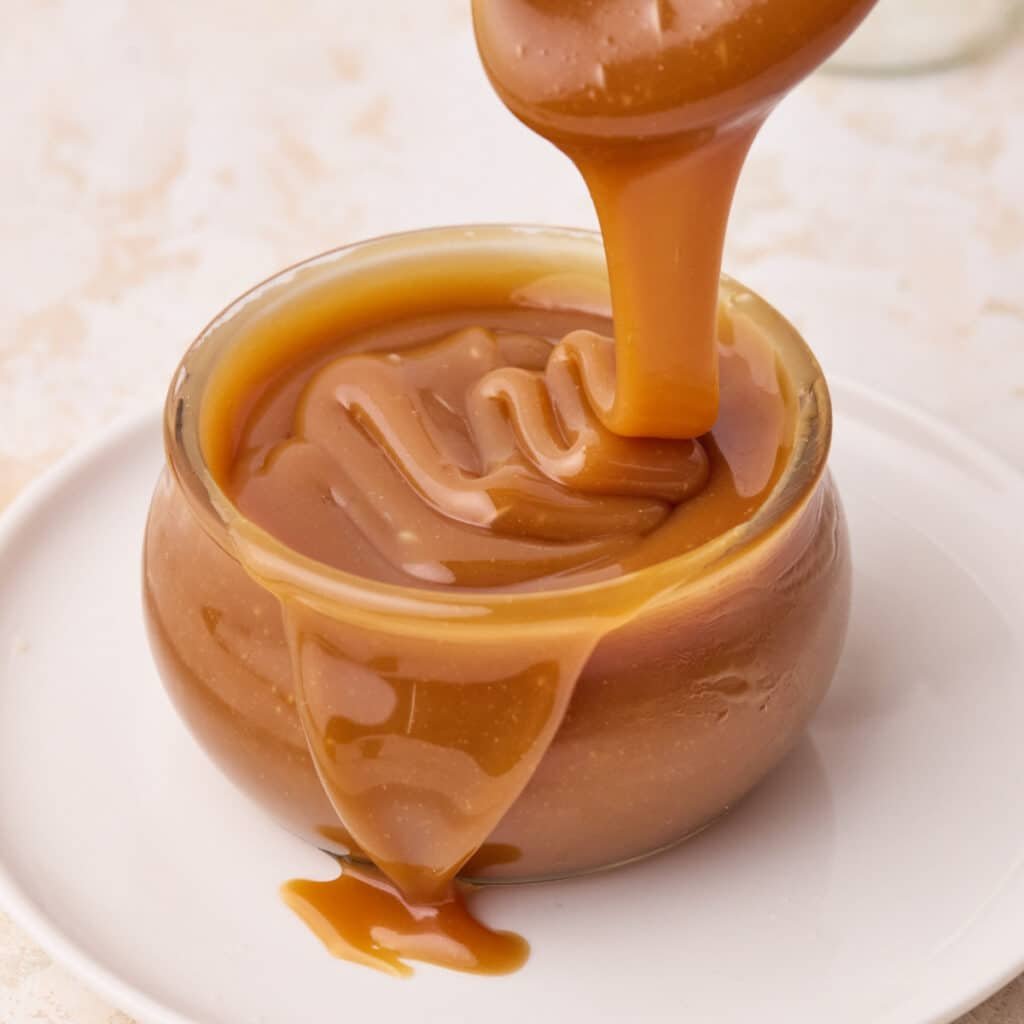
This homemade caramel recipe shows you exactly how to consistently make smooth, buttery caramel sauce every time.

Homemade caramel isn't just for professional pastry chefs - honestly, it's a lot easier than you might think once you understand the science behind it. My caramel recipe not only guides you step-by-step but also explains the reasoning behind each technique, so you really understand the process.
I use the wet caramel method as it's far more forgiving and foolproof than dry caramel. It gives you extra time and control to achieve that perfect golden color without burning or crystallizing - making it ideal for home bakers who want a reliable, silky-smooth caramel every time.
Jump to:
Why You'll Love This Caramel Recipe
- Detailed instructions to help you master homemade caramel.
- Uses the wet caramel technique for an easier, foolproof method.
- Tested to create a beautifully smooth and toasty caramel sauce.
What is Caramel?
Caramel is essentially sugar that has been melted down until it browns, developing a deep color and a rich, sweet, slightly toasty flavor. It can be soft and gooey like a sauce, chewy like homemade candy, or hard like toffee, depending on how it's cooked and what ingredients are added, such as butter or cream.
Wet vs Dry Caramel Method
There are two main methods for making caramel: a dry method and a wet method (which this recipe uses) - the core difference being the use of water.
The dry caramel method is just heating sugar on its own until it caramelizes, letting it clump up into dry balls of sugar before it finally melts and browns. The dry caramel method is faster, but much more difficult to control, and can crystallize more easily, or burn in seconds if not timed perfectly.
The wet caramel dissolves the sugar in water first, which makes crystallization far less likely and slows the whole process down, giving you a better chance to monitor the color changes and remove from the heat at the best time.
Both methods produce great results, but the wet caramel method is a lot more home-baker friendly and your best chance at achieving a perfectly smooth homemade caramel sauce.
Ingredients
You'll need 4 simple ingredients to make the perfect caramel.

- Sugar - Granulated sugar (caster sugar in the UK) works the best when it comes to caramel. It is the purest form of sugar, and is free from any impurities that could inhibit caramelization. Plus, it makes it super easy to monitor the change in color. You can make brown sugar caramel, though this is technically a butterscotch and has quite a different flavor profile.
- Butter - This recipe calls for room temperature, unsalted butter - it will let you control the salt content in the caramel. Using a high-quality butter will give the caramel a lovely, rich flavor.
- Heavy Cream - Be sure to use heavy cream, heavy whipping cream, or double cream. Bring it up to room temperature before using.
- Corn Syrup - Corn syrup is an inverted sugar - adding it helps to prevent crystallization and gives a smoother final texture. You can leave it out if you prefer, or replace it with ½ teaspoon lemon juice or cream of tartar. Alternatively, you could use liquid glucose or golden syrup if you can't find corn syrup.
- Salt - Adding salt to the caramel really helps to cut through the sweetness. You can add just a little, or you can add more for a more pronounced salted caramel flavor. I don't recommend skipping it though.
See the recipe card for quantities and the full recipe.
What You'll Need
- Saucepan - For best results, use a stainless steel pan. Avoid using nonstick, as it doesn't play nicely with the high temperatures needed for caramel. Additionally, a light colored pan is great so you can see the color change better.
- Whisk - A regular hand whisk is perfect for this recipe, but a wooden spoon will also work well.
- Pastry Brush - Using a pastry brush dipped in water will sweep any escaping sugar shards back into the pan, returning them to a liquid state.
- Heatproof Container - Glass jars work great for storing caramel in.
How To Make Caramel
Get ready to become a caramel master! This homemade caramel recipe only has a few simple steps, but there are key details that may seem small that will contribute to its success.

Make A Sugar Syrup
Add the sugar, cold water, and corn syrup to a stainless steel saucepan. Whisk it together a little to combine, then place the pan over a low heat - don't stir it anymore once it's on the heat.
If you notice any dry spots whilst the sugar heats, you can slowly move the pan in a circular motion to gently swirl the liquid around.
Heat until the mixture is simmering, and let the sugar dissolve - you'll know when this occurs because the mixture will turn clear instead of cloudy, just like with simple syrup.

Boil Sugar Syrup
Once the sugar has dissolved, turn it up to a medium heat and let it bubble - don't stir or swirl it at all after this point.
If you notice any sugar crystals forming on the side of the pan, you can use a wet pastry brush to 'paint' them with water so they slide back into the caramel in a liquid state.

Caramelize
You'll see the syrup start to thicken, and the bubbles will become slower.
Eventually, it will start to change color - the caramel needs constant attention at this point, as it can go from ready to burnt very quickly.
Once it reaches a deep amber color, remove it from the heat.
If you want to use a thermometer for absolute accuracy, the caramel should reach 340°F / 165°C.

Add Butter
Gradually add in the butter one chunk at a time, whisking until completely melted.
It may froth up a bit if the butter is cold, so I would recommend using it at room temperature.

Whisk in Cream
Slowly pour in the heavy cream whilst whisking until it is all combined. It may also bubble up as you add it, so be careful.
Then, add the salt and whisk it in.

Return to the Heat
Place the pan back on the heat and simmer for 1-2 minutes, whisking constantly, but slowly.
Remove from the heat and let the caramel cool in the pan for 10-15 minutes before transferring it to a jar or heat-safe container. It will still be quite runny, but it will thicken up as it cools.
Caramel Making Tips
Making caramel is easy once you know how - read these expert tips to ensure everything goes to plan!
Don't Stir - Once the sugar mixture starts boiling, it's really important not to stir it or disturb it in any way. This can cause sugar crystals to form and ruin the whole batch.
Light Pan - Using a light-colored pan makes it much easier to see when the caramel has reached the perfect color.
Corn Syrup - Using corn syrup in your caramel helps to prevent sugar crystals from forming, leaving you with a nice smooth caramel. If you skip this ingredient, you can replace it with ½ teaspoon lemon juice or cream of tartar.
Room Temperature Dairy - If your butter and cream are room temperature, they are less likely to cause the hot caramel to seize up when they are added, making it a lot easier to work with. In addition, it will also mean less bubbling up and spitting, and therefore, less stress!
Return to Heat - Simmering the caramel sauce for a further 1-2 minutes after adding the butter and cream will help bring everything together, and make sure the ingredients are emulsified properly.
Salted Caramel - You can adjust the amount of salt or sea salt according to your taste. You can always add more, so be sure to incorporate it gradually.

Troubleshooting
Here are some of the common issues when making homemade caramel:
Caramel Crystallized - This is the biggest risk with making homemade caramel. If your caramel has turned lumpy and grainy, it has unfortunately crystallised. There are lots of little details to pay attention to in order to prevent your caramel from crystallising next time. See my section above for tips on how to prevent crystallization.
Crystals On Pan - If you see crystals forming on the side of the pan as your caramel is cooking, use a pastry brush dipped in water to brush the sides so the crystals are covered in water and slip back into the caramel in a liquid state.. If the dry crystals fall into the caramel, they could cause it to crystallise.
Caramel Separated - If your caramel separates when adding the butter (it gets lumpy, thick, or the butter won't mix in), return it to the heat and whisk continuously for a few minutes until it comes back together into a nice smooth sauce.
Caramel Too Runny - If your caramel has cooled and is still too runny, it likely needs to simmer for a little longer after the butter and cream were added. You can return it to a low heat, whisking constantly, and simmer for a couple more minutes to thicken it up some more.
Caramel Too Thick - The caramel was likely cooked for too long. If left to set, it may turn into a hard caramel (like caramel candy) You can reheat it gently on low heat and whisk in 1-2 tablespoons of cream to loosen it up a little.
Bitter Taste - If your caramel tastes bitter, it is likely burnt. It only takes a matter of seconds to go from ready to burnt, so it's important that you keep your eye on it and remove it from the heat as soon as it turns that deep amber color. Unfortunately, once caramel is burnt there is nothing you can do about it.
How To Prevent Crystallization
There's nothing more frustrating than watching your beautiful caramel seize up or turn grainy. This is caused by sugar crystallization, which is the trickiest thing about making caramel. With a few simple techniques, you can prevent this from happening so that you'll have perfect homemade caramel sauce every time.
What Causes Crystallization?
Crystallization happens when dry sugar molecules in the sugar syrup join together and start to form solid crystals. They act like 'seeds', causing other crystals to latch onto them, starting a chain reaction that turns your syrup solid and grainy.
Tips to Prevent Crystallization:
Avoid Scraping - Though it can be tempting to get every bit of that liquid gold out of the pan, don't scrape down the sides and bottom of the pan when you pour your caramel out, as they are more likely to have crystals on them. Scraping them in with your perfect caramel could encourage crystallization as the caramel cools.
Wet Caramel Recipe - Using the wet caramel method instead of dry makes it much easier to control the cooking process, and lessens the risk of caramelization. This is down to the sugar being partially dissolved in water already, making it less likely to crystallize.
Invert Sugar - Using a small amount of corn syrup alongside the regular white sugar also helps to prevent crystallization, and makes the caramel much more forgiving. Corn syrup is an invert sugar, and its structure kind of 'teaches' the other sugar crystals how to behave in a way. You can also use liquid glucose, golden syrup, lemon juice or cream of tartar to do a similar job.
Use the Right Pan - Use a clean, heavy-bottomed saucepan that is preferably stainless steel. If your pan has any sugar residue, an uneven hot spot, or scratches in the nonstick coating, it can encourage crystallization. Be sure to give your pan a good inspection before you start!
Brush Down Crystals - As the sugar and water boil, you might see sugar crystals forming on the sides of the pan, just above the water line. To solve this, dip a pastry brush in water and essentially 'paint' the inside edges of the pan to melt those crystals back into the syrup, before they can cause problems. If they fall in dry, they can start a chain reaction - once melted into water, they are less likely to do so.
Don't Stir - This is one of the first things they teach you in pastry school! Once the sugar starts boiling, do not disturb it in any way - no stirring or swirling. Just let it bubble away untouched to create beautifully caramelized sugar.

Ways To Use It
The option is there to simply grab a spoon and enjoy...but there are also SO many ways to use your beautifully homemade caramel. Here are a few caramel dessert ideas:
- Caramel Sauce - The easiest way to use caramel is to drizzle it over pretty much anything you like! From ice cream, desserts, and pancakes, to your breakfast granola - it is the perfect topping to level up your dishes. I love to drizzle it over my Banoffee Pie, it's also wonderful drizzled over warm baked apples, apple crumble, or peach crisp!
- Caramel Filling - You can spread this gooey caramel in between sandwich cookies and macarons, or even make caramel linzer cookies. It can be a great element to add to a chocolate layer cake or fill the middle of cupcakes, choux buns, and donuts.
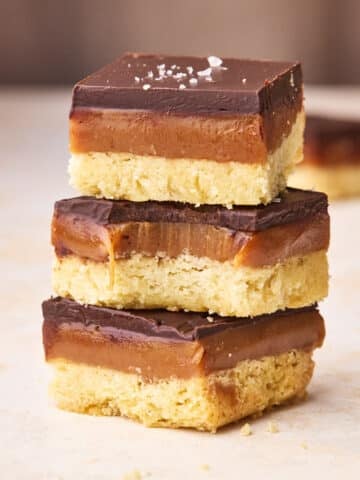
- Caramel Brownies - Spread a thick layer of caramel on top of homemade brownies or traybakes to level them up.
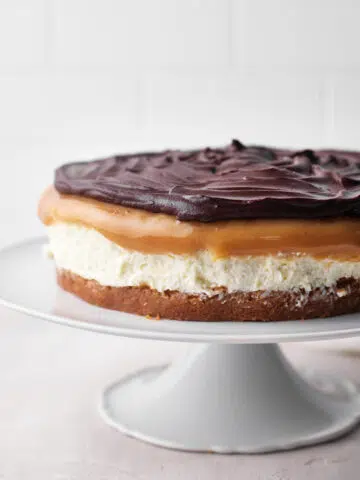
- Cheesecake Topping - This homemade caramel can be used both in a cheesecake and on top, just like my creamy Caramel Cheesecake recipe.
- Caramel Frosting - Add a few spoonfuls of caramel to your favorite buttercream recipe to make a decadent caramel buttercream!
- Filled Chocolates - Use this silky caramel as a luxurious filling for homemade truffles or caramel chocolates.
- Drinks - If you've got a bit of a sweet tooth, pouring a splash of homemade caramel into hot or iced coffees, hot chocolate, or even just warm milk adds a lovely extra flavor. If using it for iced coffee, be sure to mix it into the hot espresso first before mixing with cold milk or water.

Storage
Store your lovely caramel in the fridge in a jar or an airtight container for up to 2 weeks. Bring it up to room temperature or reheat gently before using.
FAQ
If you have a question about this recipe that isn't answered here, feel free to write it in the comment section and I will get back to you as soon as I can.
The end consistency of caramel depends on how it is cooked. If you want a caramel that will harden, heat the sugar to the hard-ball stage and don't add any additional ingredients such as butter or cream. This is the method used in my floating island dessert recipe, and it's the same process used for the topping of crème brûlée.
Sugar that is only heated to the soft-ball or firm ball stage will not harden, and adding ingredients like butter and cream will help it to maintain a soft, silky consistency once it has set.
No! This is probably the most important step of the entire process. Stirring the caramel whilst it is heating can cause sugar crystals to form, triggering crystallization, which will leave you with grainy caramel. Let it bubble undisturbed for the best texture.
It takes about 10-15 minutes to make caramel if you're using the wet method, like this recipe.
It depends on what kind of caramel you are making, but for a soft caramel like this one, it will be ready when it reaches 340°F / 165°C if you're using a thermometer. However, it is not strictly necessary to use a thermometer to make caramel successfully.
Caramel is made by heating sugar until it melts and browns, developing a rich, toasty, sweet taste - it is sometimes mixed with butter or cream to make caramel sauces or candies.
Dulce de Leche, on the other hand, is made by heating sweetened milk (condensed milk) until it thickens and turns golden brown through a process called the Maillard reaction (like brown butter).
Butterscotch is made by melting together brown sugar and butter over a lower temperature, whereas caramel is made by caramelizing white sugar (and sometimes adding butter after).
Butterscotch is typically a little softer and has a slight molasses flavor.
There are so many types of caramel you can make for your desserts. One other method you might like to try is using condensed milk to make a caramel (different from dulce de leche). I use this method in my Millionaire's Shortbread recipe as it creates a thick, sweet, caramel layer that can be cut cleanly but is soft to bite into.
Caramel Dessert Recipes
If you love caramel, try some of these other caramel inspired dessert recipes:


Recipe
Homemade Caramel Recipe
Ingredients
- 200 g (1 cup) Granulated Sugar (Caster sugar)
- 60 ml (¼ cup) Water
- 86 g (¾ stick) Unsalted Butter (room temperature)
- 120 ml (½ cup) Heavy Cream (Double Cream) room temperature)
- 1 tablespoon Corn Syrup (or liquid glucose, or golden syrup)
- ½ teaspoon Salt
Equipment
- Stainless Steel Sauce pan (dont use non-stick)
Instructions
- Add the sugar, water, and corn syrup to a stainless steel saucepan. Whisk together briefly to combine, then place over low heat.200 g (1 cup) Granulated Sugar, 60 ml (¼ cup) Water, 1 tablespoon Corn Syrup
- Don't stir it anymore once it's on the heat. If you have any dry spots, you can slowly move the pan in a circular motion to gently swirl the liquid. Heat until it is simmering and the sugar has dissolved - you'll know because the mixture will turn clear instead of cloudy, just like with simple syrup.
- Once the sugar has dissolved, turn the heat up to medium and let it bubble - don't stir or swirl it at all after this point. If you notice any sugar crystals forming on the side of the pan, you can use a pastry brush dipped in water to 'paint' them with water so they slide back into the caramel in a liquid state.
- You'll see the syrup start to thicken, and the bubbles will become slower. Eventually, it will start to change color - don't take your eyes off of it at this point, as it can go from ready to burnt very quickly. Once it reaches a deep amber color, remove it from the heat. If you want to use a thermometer for absolute accuracy, caramel should reach 340°F / 165°C.
- Add the butter, one chunk at a time, whisking until melted. It may froth up a bit if the butter is cold.86 g (¾ stick) Unsalted Butter
- Slowly pour in the heavy cream while whisking until it is all incorporated. It may also bubble up as you add it, so be careful. Then add the salt and whisk it in.120 ml (½ cup) Heavy Cream, ½ teaspoon Salt
- Return the pan to the heat and simmer for 1-2 minutes, whisking constantly, but slowly.
- Remove from the heat and let the caramel cool in the pan for 10-15 minutes before transferring to a jar or heat-safe container. It will still be quite runny, but it will thicken as it cools.


Piper Penny
To make more than one cup of caramel, should the ingredients be doubled or tripled?
Chris
I made this recipe and as a novice baker, I found it really easy to follow. You provided such detailed information so I felt confident I could make this. It turned out great and my family was impressed I could make such a thing. I have saved some and will try it out with your caramel cheesecake recipe.