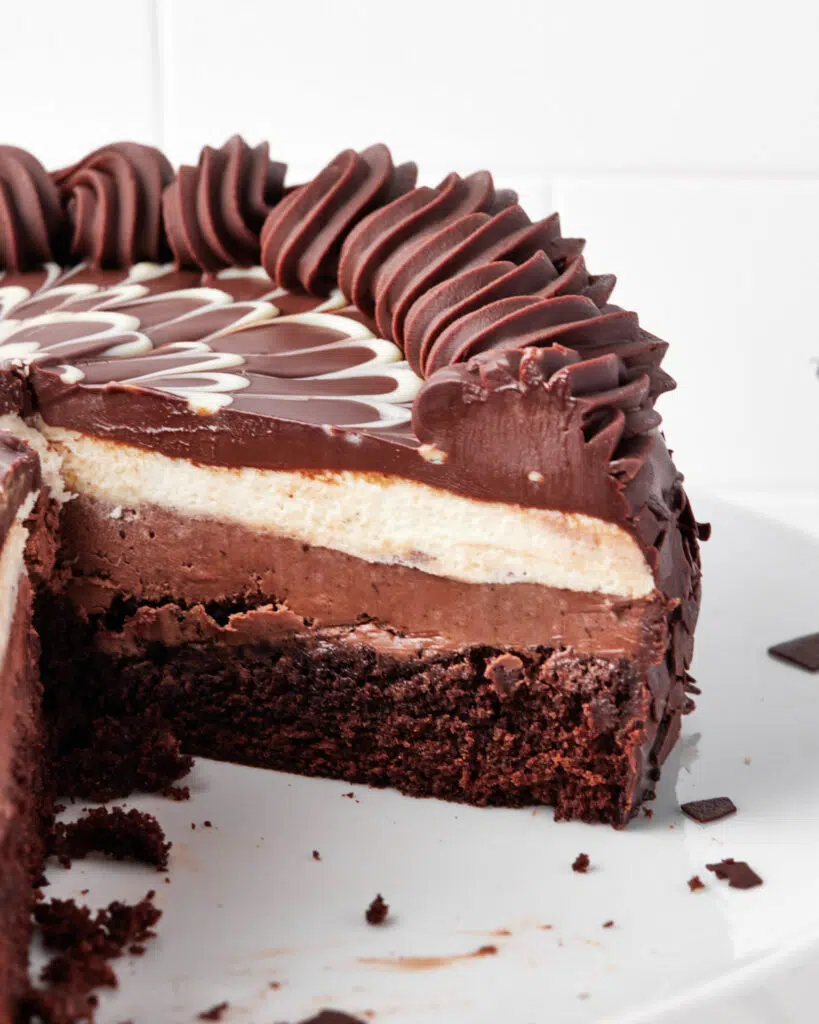
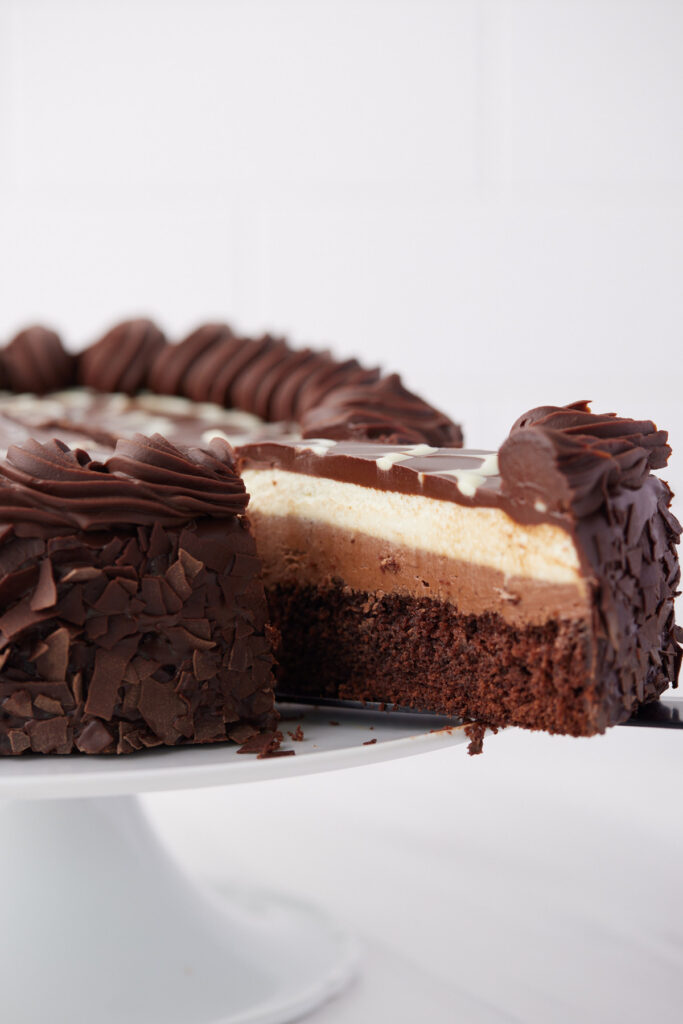
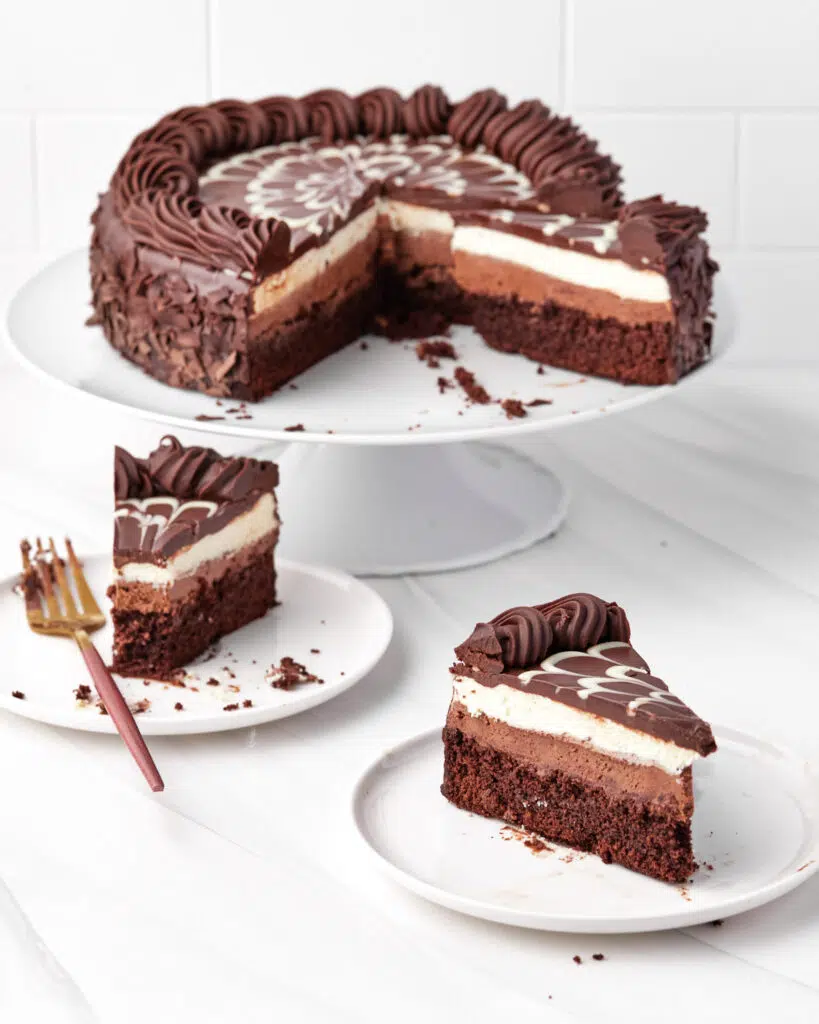
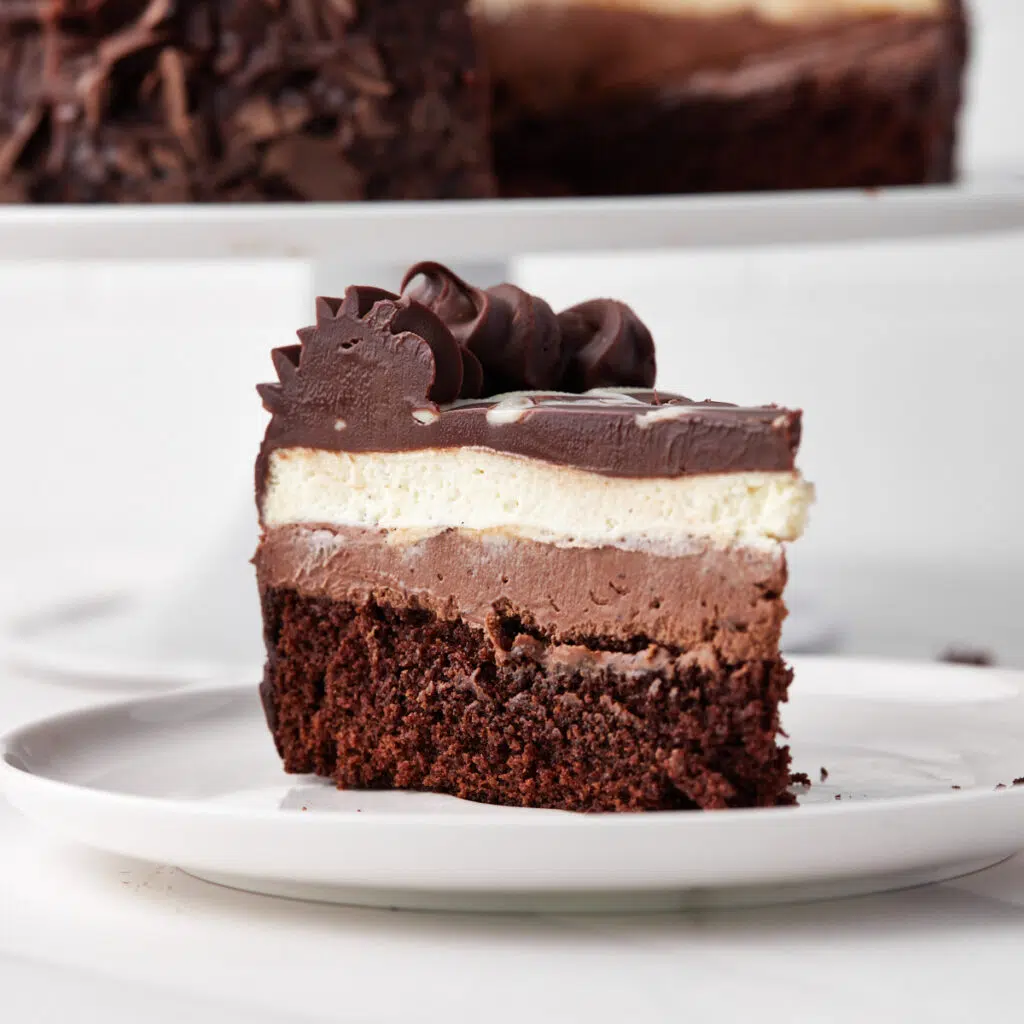
What better way to mark World Chocolate Day than with this ultimate celebration of chocolate - Black Tie Mousse Cake? Four layers of chocolatey goodness - chocolate cake, chocolate cheesecake, white chocolate mousse, and rich chocolate ganache. Chocoholics - hold onto your hats!
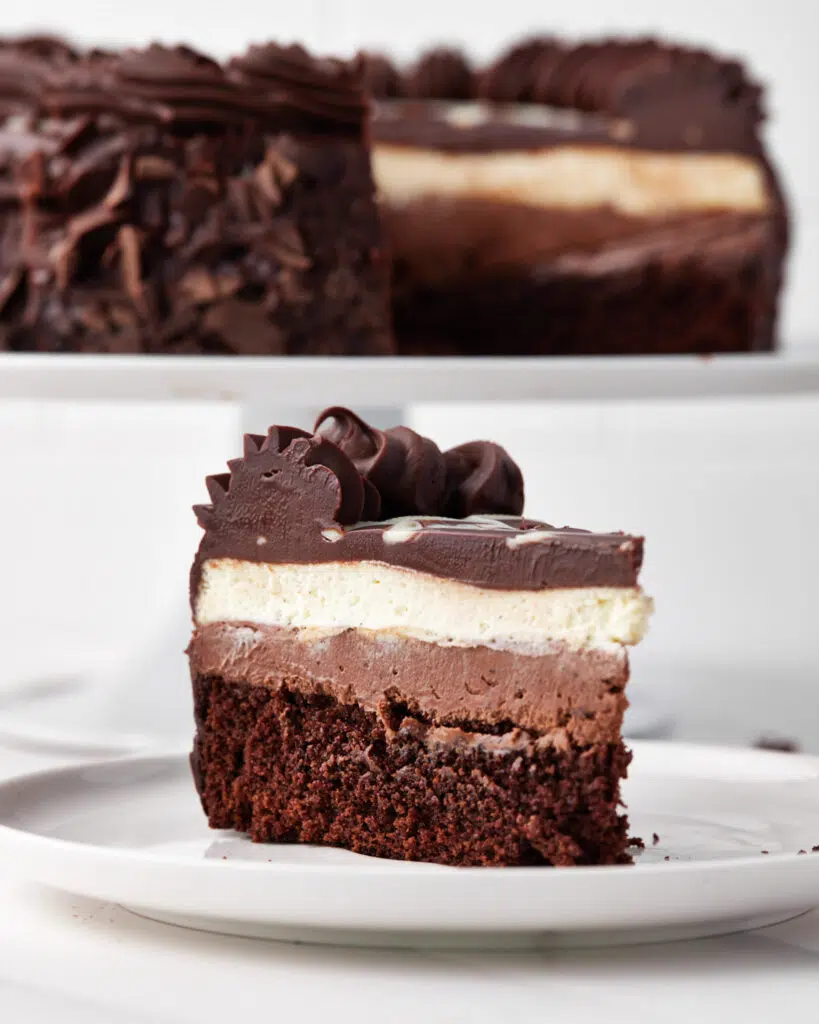
I'm not normally one for doing 'copycat' recipes, but the idea of this four-layered chocolate sensation was just too good to pass up - so I created my version of it. And as it's homemade and packed with flavor, I suspect it's better than the real thing!
Decadent and over-the-top is the only way to go with chocolate desserts in my opinion. I actually have an entire section on the blog dedicated just to Chocolate Recipes. It includes showstopping recipes like my Chocolate Mousse Pie, Flourless Chocolate Torte, and Tuxedo Cake.
Jump to:
What is Black Tie Mousse Cake?
There are four elements to Black Tie Mousse Cake:
Chocolate Cake Base
Chocolate Cheesecake
White Chocolate Mousse
Chocolate Ganache Coating
There are a lot of steps, but none of the steps are difficult or particularly complicated. And you have plenty of time waiting for things to set or cool in between each layer, so you can take it slow and easy. Once it's broken down into different sections, it's actually quite a simple recipe, but is an absolute showstopper of a dessert and would be perfect to impress guests at a dinner party or to celebrate a special occasion.
Ingredients
- Chocolate - Of course, we're going to need chocolate for this! We will use dark chocolate, milk chocolate, and white chocolate in this amazing recipe. Try to get high-quality chocolate to ensure the best results - it is the star ingredient so you want it to shine.
- Flour - All-purpose flour is perfect for the chocolate cake recipe, you can also use cake flour if you like.
- Sugar - Regular white sugar will work best, make sure you use superfine sugar - caster sugar in the UK.
- Eggs - Use large eggs and always free-range eggs if you can.
- Cocoa Powder - You want Dutch Processed cocoa powder if you can find it. It gives a better flavor and texture.
- Vegetable Oil - This will keep the chocolate cake super moist and easy to cut through. Canola oil works great too, or any other kind of flavorless oil.
- Milk - It's best to use whole milk, but whatever kind of milk you have will do.
- Vanilla - Vanilla will complement the chocolate nicely, use vanilla extract or vanilla bean paste - but try to avoid vanilla essence.
- Cream Cheese - Full-fat cream cheese will help carry the flavor of the chocolate and make this cheesecake super flavorful and decadent.
- Whipping Cream - use heavy cream, heavy whipping cream, or double cream. Make sure it is at least 36% fat - do NOT use half and half.
- Powdered Sugar - this is for the cheesecake; it creates a beautifully soft cheesecake without any risk of graininess.
See recipe card for quantities.
How to Make the Chocolate Cake Base
This is the same chocolate cake recipe I use for a lot of my chocolate-based cakes (like my Chocolate Espresso Cake) - it's super quick and easy and uses the all-in-one method, and it works out perfectly every time.
- Preheat the oven to 350°F / 180°C and grease your cake pan.
- Put all the chocolate cake ingredients (except the hot water) in a large mixing bowl and beat together until it's smooth and there are no more lumps.
- Add the hot water to the chocolate mixture and mix until combined - this will help release the flavor in the cocoa powder. The batter will be very liquid.
- Pour the chocolate batter into your prepared cake pan and tap on the counter a few times to release any large air bubbles.
- Bake for 30-40 minutes or until a wooden skewer comes out clean.
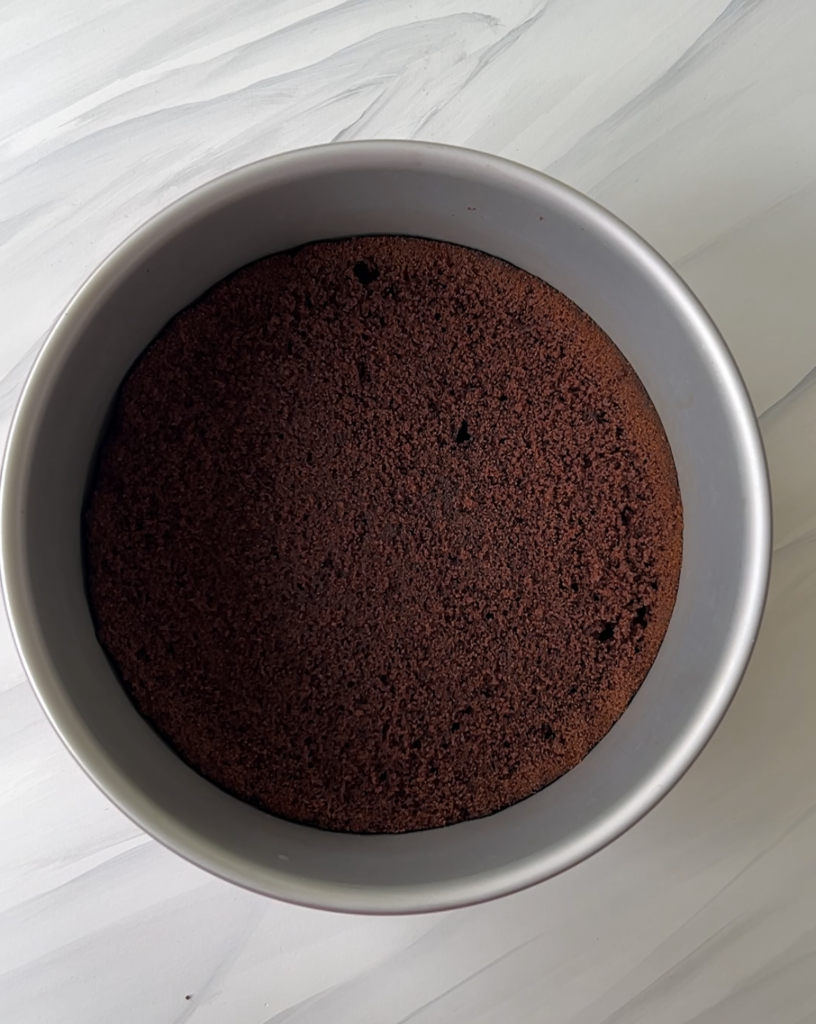
- Let cool for 20 minutes before removing from the cake pan onto a cooling rack to cool completely.
- Slice off the domed top of the cooled chocolate cake to make a nice flat cake layer. Never try to cut a warm cake as it will not be a clean cut.
- Place the leveled cake into your mousse cake pan/ring to make the bottom layer. If it is the same size as the pan you baked it in, put it right in. If the pan you are using is slightly smaller than the cake layer, use the pan as a template and trim the edges of the cake so it will fit.
Note: If you are using the same pan to bake the chocolate cake and to build the final mousse cake, make sure you clean the sides of the pan after baking the chocolate cake base - otherwise you may end up with crumbs on the outside of your mousse cake and it will ruin the final look!
How to Make the Chocolate Cheesecake
This is a super simple no-bake chocolate cheesecake recipe. When I first looked at the Black Tie Mousse cake I thought the second layer was a creamy chocolate mousse, but after some more research, I realized it's actually chocolate cheesecake - and man is it delicious!
- Melt chocolate in the microwave in 30-second increments, stirring in between, until totally melted. Set aside to cool slightly. This chocolate cheesecake absolutely tastes best with dark chocolate, but you could swap it for semi-sweet chocolate if you really want to.
- Cream the cream cheese, powdered sugar, and vanilla together until completely smooth and free from lumps. It's easiest to get a smooth, lump-free cheesecake if you let your cream cheese come to room temperature before beginning.
- Pour melted chocolate into the cream cheese mixture and beat until combined. Your melted chocolate shouldn't be hot at this point, it should be room temp or just slightly warm. If it still feels hot, let it sit for a bit of time to cool a little, otherwise, it will melt your cream cheese.
- In a separate bowl, whip up the whipping cream until stiff peaks form. I definitely recommend using a stand mixer or electric mixer for this, as doing it by hand can be pretty tiring! It's easiest to whip your cream if it is cold, straight from the fridge.
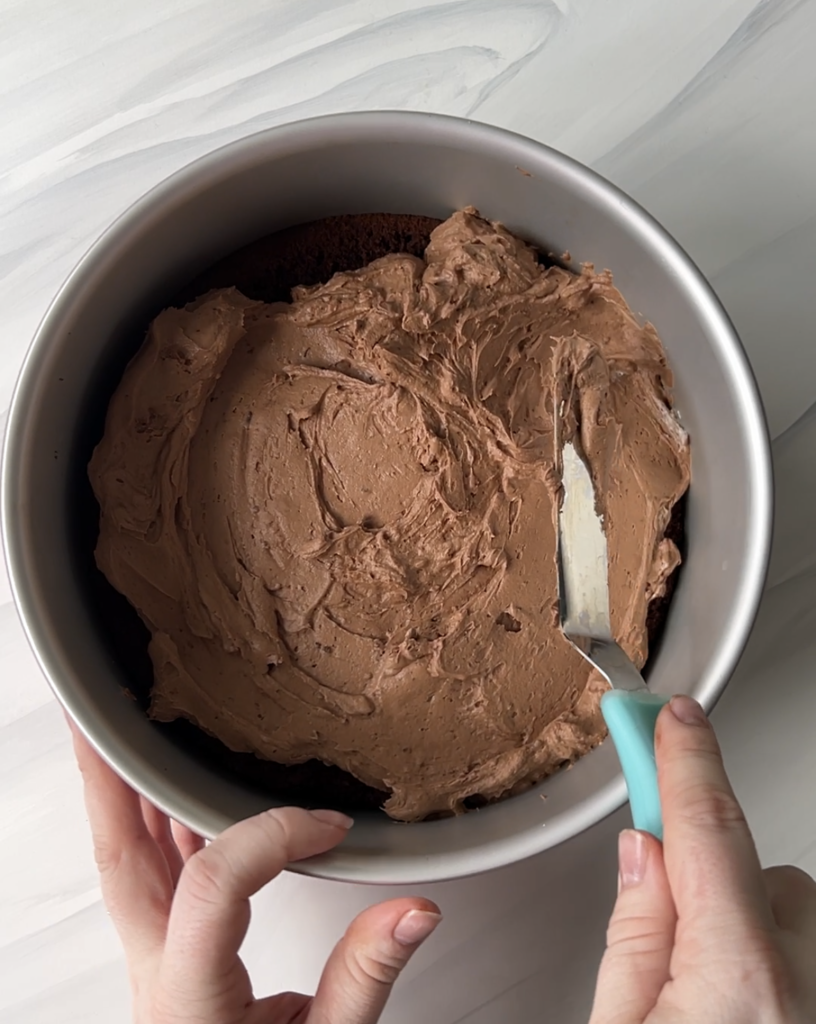
- Take a small amount of cream and mix it into the chocolate cheesecake mixture to loosen it up a little. Then fold in the remaining cream - be careful not to overmix as you don't want to knock too much air out of the whipped cream. We want it to be light and creamy.
- Pour the chocolate cheesecake into the cake pan, on top of the cake layer and smooth out the top as best you can. Then put it in the fridge to chill while you prepare the next layer. It's important to let it chill for at least 20 minutes before pouring the third layer (white chocolate mousse) on top so that you will have nice distinct layers when you cut into the mousse cake. If you don't let them set a little first the two layers will meld together and it won't look as clean-cut and defined.
How to Make the White Chocolate Mousse
The third layer of white chocolate mousse is probably the easiest to make and has only three ingredients.
- Melt the white chocolate in the microwave in 30-second increments. It will melt faster than the dark chocolate, so keep a close eye on it.
- While it cools slightly, whip up the whipping cream and vanilla until stiff peaks form. You want this to be well whipped so that the white chocolate mousse layer will hold its shape. Just like before, the cream will whip up better if it is cold, so make sure you put the cream back in the fridge after making the chocolate cheesecake so it will be cold for this layer.
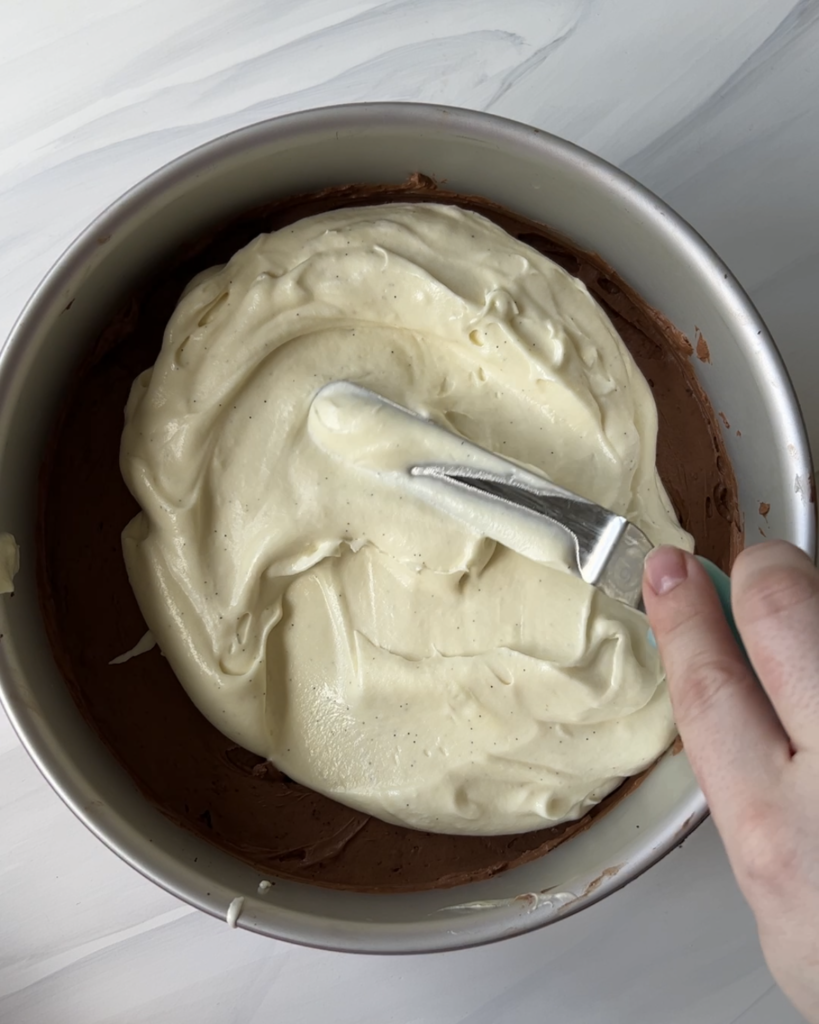
- Pour the melted white chocolate into the whipped cream and fold gently until completely combined. As before, you don't want to knock too much air out of the mousse so don't overmix.
- Pour into the cake pan on top of the chocolate cheesecake layer and smooth out the top. Put in the fridge to set for at least 3 hours. Do not try to remove the mousse cake from the pan before 3 hours have passed, or you run the risk of it turning into a gloopy mess all over your countertop!
How to Make the Chocolate Ganache
The fourth layer is chocolate ganache. We are going to make one large batch of ganache and pour ¾ of it over the cake, like in my Prinzregententorte recipe. Then the rest we will let cool further to pipe on top of the cake.
- Once the mousse cake has set, break up your chocolate and put it into a bowl. I used a mixture of milk chocolate and dark chocolate for this as I feel the flavor combination works really well with the mousse cake. But if you want an extra dark chocolate ganache then you can skip the milk chocolate and replace with an equal amount of dark chocolate.
- Pour the cream into a saucepan and heat on medium-low until it starts to steam and tiny bubbles begin appearing on the surface.
- Remove the cream from the heat and pour it over the chocolate. Let sit for a minute and then gently start to stir. Keep going until the chocolate is totally melted and it turns into a smooth, glossy mixture.
- Let the ganache cool slightly, the perfect pouring temperature is about 89°F / 32°C. If you don't have a thermometer just look for the ganache to thicken slightly so it leaves a slight trace in itself when you drizzle it back into the bowl, but not so thick that it won't flow easily and spread over the cake.
How to Decorate Black Tie Mousse Cake
- Once the mousse cake is set and the ganache is at the right temperature, carefully remove the cake from the cake pan. It should slide out easily, but if it doesn't you can gently heat the outside of the cake pan with a hairdryer or blowtorch, this should slightly melt the outer layer of mousse cake so it slides out easily. Don't go too far though!
- Reserve about a quarter of the ganache and set it aside to cool further for piping later.
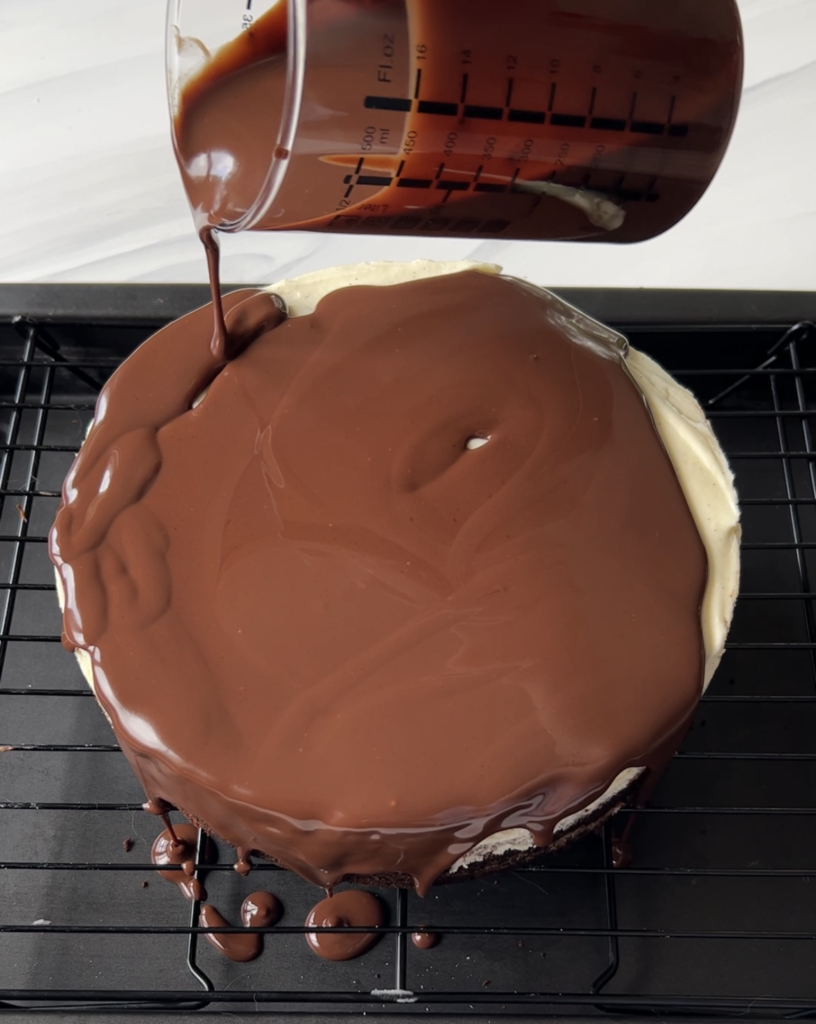
- Place the cake on a wire rack and pour the chocolate ganache all over the cake. You want a thin layer on top of the chocolate mousse and an even coating around all sides of the cake, all the way down to the bottom. Pour slowly so you can control where the ganache goes and cover up any gaps. If you have any stubborn gaps that didn't get filled in by the pour, use a warm offset spatula to smooth out the ganache immediately and cover any open spots.
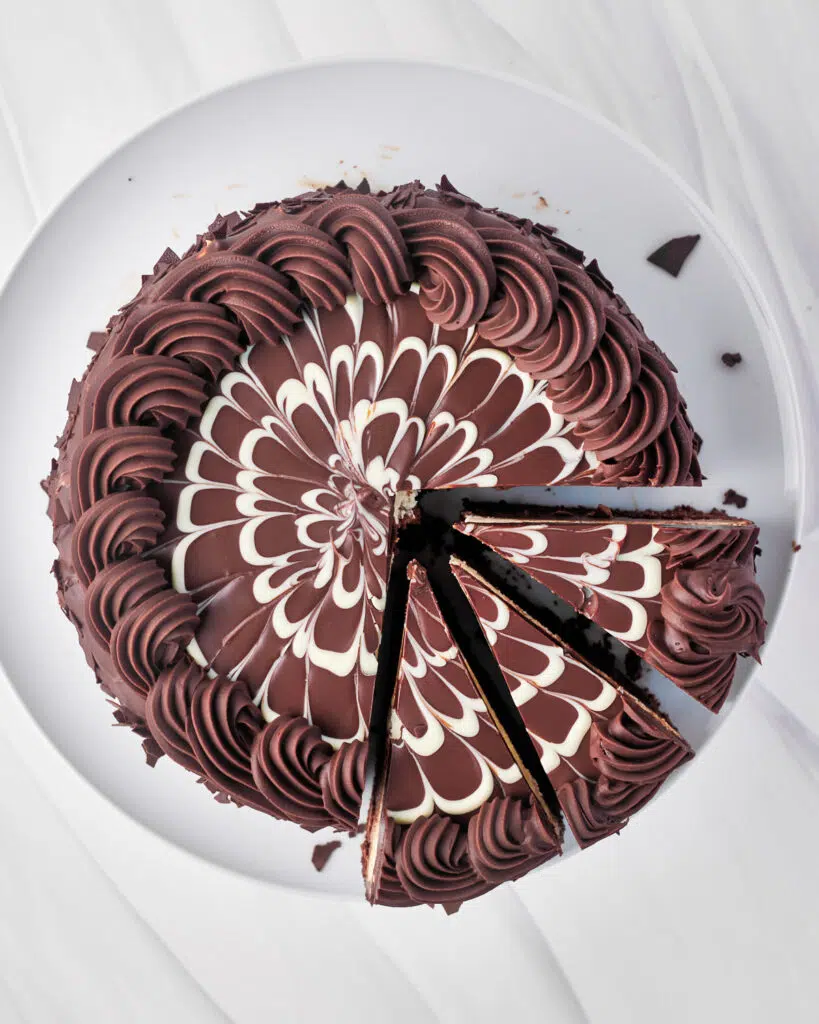
- If you want to add the design on top, melt a small about of white chocolate and pipe a design on top of the ganache immediately after pouring. For feathering, pipe circles around the cake and then run a toothpick from the middle of the cake to the outer edge. Or for an easier design, just pipe some random blobs and do a knife swirl to make a pretty pattern.
- While the ganache is still wet put chocolate chips around the side of the cake and use your hands to press them in. Olive garden's black tie mousse cake uses mini chocolate chips but I didn't have any to hand, so I used chocolate flakes - I actually really like the way it looked.
- Once the remaining ganache has cooled and thickened to piping consistency, put it in a piping bag with a star tip nozzle and pipe around the outside of the mousse cake to decorate.
- Transfer the cake gently onto your cake plate or serving platter.
How to Slice Mousse Cake
You don't want to put all this time and effort into making a gorgeous cake like this just to ruin it at the last step and end up with messy slices! Here are my tips for getting beautiful, perfect slices every time.
- Make sure the cake is cold when you are about to cut it.
- The key to getting nice clean cuts is to use a warm knife! Soak a very sharp knife in hot water for a minute or so before beginning.
- Once you are ready to take the first slice, remove the knife from the hot water and dry it off quickly with a paper towel.
- Line up the pointed edge of the knife with the very center of the cake and plunge the tip in first, followed by the rest of the knife. Keep the knife perfectly straight all the way down until you hit the plate, then, making sure not to wiggle or angle the knife at all, gently pull it out towards you - dragging the knife along the plate.
- Now the important part - dip the knife back in the hot water and dry it off with a paper towel in between every single cut! Yes, every cut! I know it sounds tedious but I promise you will have the most beautifully perfect, clean-cut slices.
Equipment
Cake pan - you have a few options for what kind of round pans you can use to build the Black Tie Mousse Cake in - you can use a loose-bottomed cake pan, a springform pan or a pastry ring (the ones with no bottom). As long as it will support the sides of the cake while they set and you can remove the sides easily - it will work. The important thing is that whatever you build the mousse cake in is the same size or smaller than the cake pan you use to bake the chocolate cake in.
I used a loose-bottomed 8-inch cake pan to bake the cake and then after removing the chocolate cake I cleaned the pan and used the same one to build the mousse cake. Also, pay attention to the height of your pan - it needs to be tall enough to house all the layers comfortably. If it isn't, you can use some acetate around the inside of the pan to make it taller.
Saucepan - This is to heat the cream for the chocolate ganache. A small saucepan should do the trick.
Mixer - you could technically make this cake by hand, but there is a lot of whipping involved so I highly recommend using some kind of aid. I used a stand mixer but a handheld electric mixer would also work great.
Storage
Store in the fridge in an airtight container. It will be good for 3-5 days.
I may not have invented Black Tie Mousse Cake, but I am confident my version of it is going to blow your mind. Though there are many steps, they are easy steps and create a very professional-looking dessert that would comfortably belong in a patisserie!
More Chocolate Desserts
Some more chocolate dessert recipes you might enjoy...
Recipe
Black Tie Mousse Cake
Ingredients
- 180 g (1½ cups) All-purpose Flour
- 300 g (1½ cups) Granulated Sugar
- 2 Eggs
- 65 g (⅔ cup) Cocoa Powder
- 120 ml (½ cup) Vegetable Oil
- 160 ml (⅔ cup) Whole Milk
- 1 teaspoon Baking Powder
- 1 teaspoon Salt
- 1 teaspoon Vanilla Extract
- 60 ml (¼ cup) Hot Water
- 225 g (8 oz) Cream Cheese (room temperature)
- 125 g (4.5 oz) Dark Chocolate
- 120 ml (½ cup) Heavy Cream
- 42 g (⅓ cup) Powdered Sugar
- 1 teaspoon Vanilla Extract
- 240 ml (1 cup) Whipping Cream
- 150 g (5.5 oz) White Chocolate
- 1 teaspoon (1 tablespoon) Vanilla Extract
- 420 ml (1¾ cups) Heavy Cream
- 210 g (7.5 oz) Dark Chocolate
- 210 g (7.5 oz) Milk Chocolate
- 30 g (1 oz) White Chocolate
- 180 g (1 cup) Mini Chocolate Chips Or chocolate flakes
Equipment
- Loose-bottomed pan See notes
- Electric Whisk Stand mixer or handheld
Instructions
- Preheat oven to 350°F / 180°C (160°C fan-assisted) and prepare an 8-inch cake pan.
- Put all ingredients (except hot water) in a large bowl and mix together until totally incorporated and free from lumps. I use a stand mixer, but you can also do this by hand.180 g (1½ cups) All-purpose Flour, 300 g (1½ cups) Granulated Sugar, 2 Eggs, 65 g (⅔ cup) Cocoa Powder, 120 ml (½ cup) Vegetable Oil, 160 ml (⅔ cup) Whole Milk, 1 teaspoon Baking Powder, 1 teaspoon Salt, 1 teaspoon Vanilla Extract
- Add the hot water into the batter and stir until combined.60 ml (¼ cup) Hot Water
- Pour into prepared cake pan and bake for 30 - 40 minutes or until a skewer comes out clean.
- Let cool completely, remove from the cake pan, then slice off the rounded top so you are left with one thin cake base layer.
- Clean and dry the cake pan, then place the cake base layer on the bottom and set aside while you prepare the other layers.
- Melt the dark chocolate in the microwave in 30-second increments until totally melted. Set aside to cool slightly.125 g (4.5 oz) Dark Chocolate
- Cream the cream cheese, powdered sugar and vanilla together until completely smooth and free from lumps.225 g (8 oz) Cream Cheese, 42 g (⅓ cup) Powdered Sugar, 1 teaspoon Vanilla Extract
- Pour melted chocolate into the cream cheese mix and beat until combined.
- In a separate bowl, whip up the whipping cream until stiff peaks form.120 ml (½ cup) Heavy Cream
- Take a small amount of the whipped cream and mix it into the chocolate cream cheese mixture to loosen it up a little. Then fold in the remaining cream.
- Pour the chocolate cheesecake into the cake pan, on top of the cake layer, then put it in the fridge to chill while you prepare the white chocolate mousse layer.
- Melt the white chocolate in the microwave in 30-second increments.150 g (5.5 oz) White Chocolate
- While it cools slightly, whip up the whipping cream and vanilla until stiff peaks form.240 ml (1 cup) Whipping Cream, 1 teaspoon (1 tbsp) Vanilla Extract
- Pour the melted white chocolate into the whipped cream and fold gently until completely combined.
- Pour into the cake pan on top of the chocolate cheesecake layer and put in the fridge to set for at least 3 hours.
- Once the mousse cake has set, break up your milk and dark chocolate and put them into a bowl.*210 g (7.5 oz) Milk Chocolate, 210 g (7.5 oz) Dark Chocolate
- Pour the cream into a saucepan and heat on medium-low until it starts to steam and tiny bubbles begin appearing on the surface.420 ml (1¾ cups) Heavy Cream
- Remove the cream from the heat and pour it over the chocolate. Let it sit for a minute and then gently start to stir. Keep going until the chocolate is totally melted and it turns into a smooth, glossy mixture.
- Let the ganache cool slightly, the perfect pouring temperature is about 89°F / 32°C. If you don't have a thermometer, just look for the ganache to thicken slightly so it leaves a slight trace in itself when you drizzle it back into the bowl.
- Once the mousse cake is set and the ganache is at the right temperature, carefully remove the cake from the cake pan.
- Reserve about a quarter of the ganache and set it aside to cool further for piping later.
- Place the cake on a wire rack and pour the chocolate ganache all over the cake.
- If you want to add the design on top, melt a small amount of white chocolate and pipe a design on top of the ganache immediately after pouring.30 g (1 oz) White Chocolate
- While the ganache is still wet, use your hands to press mini chocolate chips or chocolate flakes into the sides of the cake.180 g (1 cup) Mini Chocolate Chips
- Once the leftover ganache has cooled to piping consistency, put it in a piping bag and pipe around the outside of the mousse cake.



rachael houser
I had trouble with the white mousse portion of this recipe. When mixing in the white chocolate it curdled my whip cream once and the second time it didn't
I found warming up Half a cup of heavy whipping cream and melting white chips into that and then letting it cool works better.
I do start mixing my heavy whipping cream and I wait until I have soft peaks and then I mixed the white chocolate and heavy mixture cream in a little bit at a time while the hard peaks form.
Normally when I make whip cream I stabilize it with gelatin or instant pudding, and I didn't' do that either. I kind of assumed the white chocolate would stabilize it, but it didn't really.
So, while it tasted delicious and like olive gardens, it was a mess after cutting into it. So, in the future I definitely recommend stabilizing the whip cream with some gelatin. DO NOT USE CREAM CHEESE- I tried this and bc the cream cheese was cold it made the white chocolate hard and chunky. Def use Knox gelatin or instant pudding powder - like a vanilla mix.
Lastly, my ganache was very hard. The shell was so hard it was hard to cut through and made the white mousse even messier. I also piped a bunch and it got so hard it was hard to eat. I have never made ganache before, but in the future I will be researching ways to make it softer. I used 60% dark cocoa Ghirardelli chips for the ganache and semi-sweet and milk chocolate but it seemed to dark so I might do half milk chocolate and half dark chocoalte next time so it isn't as dark,
I also used Ghirardelli dutch process cocoa in my cake and chocolate cheesecake portion, and it almost seemed too dark. So, I may tweak that a bit too.
Over all, I really liked this recipe the best for the cheesecake portion and cake portion, but strongly reccomend doing the white mousse differently. 100% recommend melting chips into heavy cream and letting them cool as well as stabilizing. That is biggest change- but the rest was easy and surprisingly simple
GG
Hi. What temperature should the white chocolate be before adding to the whipped cream?