Red Velvet Brownies are the perfect combination of fudgy brownies and red velvet cake. With a striking red crumb and a thick layer of luxurious cream cheese frosting on top, they are a delicious anytime treat.

Reader Review:
Oh my goodness! These are the absolute best red velvet brownies I have ever had. Sweet, chocolatey moist and dense at the same time . The chewiness is what really won me over though. My family loved these too.
⭐⭐⭐⭐⭐ - Heidi
Choosing between a slice of red velvet and a gooey brownie is now a thing of the past! These fudgy red velvet brownies will satisfy two sweet tooth cravings at once! When it comes to cake flavors, I think you can rarely go wrong with red velvet - it's one of my all-time favorite desserts, as are my Red Velvet Cookies. But at heart, I am a sucker for a really good, gooey brownie - like my S'mores Brownies.
Whether you're looking for a festive treat, something for Valentine's Day, or you just really fancy that tangy red velvet flavor, this red velvet brownie recipe will not disappoint. I went through so many iterations of this recipe to get it the perfect balance of gooey and cakey to bring you a texture that is just right.
Jump to:

Why You'll Love This Recipe
- You can have the best of both worlds of Red Velvet Cake and gooey brownies.
- They are beautiful and the perfect dessert for parties, events, or just as a delicious treat.
- Cream Cheese Frosting - need I say more??
Ingredients
This red velvet brownies recipe uses simple ingredients, similar to what you'd find in red velvet cake, but tweaked for texture and homemade brownie perfection.
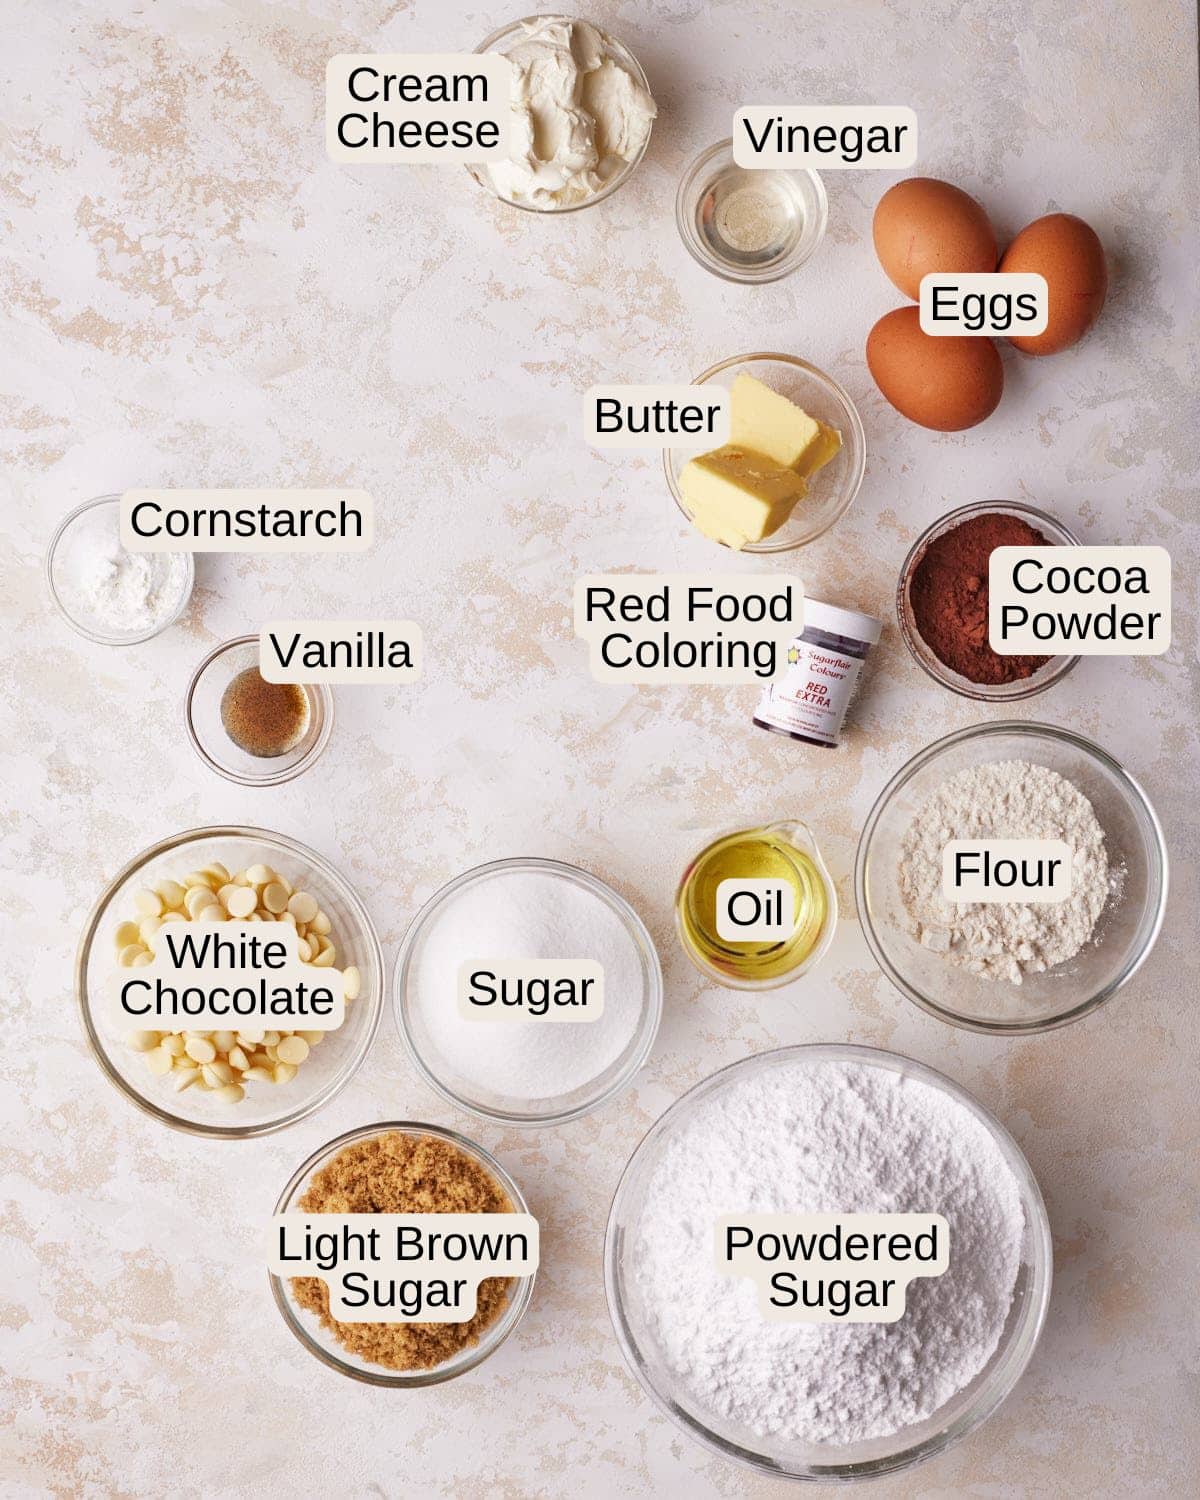
- Butter - This recipe uses a combination of butter and oil to get a balance between a rich flavor and a gooey texture. Use unsalted butter so you can control the level of salt in the recipe.
- Sugar - Most of the sugar in this recipe is regular white sugar - you'll want to use extra fine sugar (caster sugar in the UK).
- Light Brown Sugar - Adding light brown sugar to the regular sugar does two things, firstly it will add a little depth to the flavor, but the moisture in the light brown sugar also contributes to the fudgy texture that we want in a brownie.
- Eggs - We'll need whole eggs and an extra egg yolk on top for additional richness. Use large eggs and always free-range if you can.
- Vanilla - Vanilla extract or vanilla bean paste does a lot for this recipe by rounding out all the other flavors.
- Oil - I use vegetable oil, but you can use any flavorless oil you like such as canola oil or sunflower oil. The oil helps keep the brownies gooey and moist.
- Cocoa Powder - You want Dutch-processed cocoa powder for these red velvet brownies. Cocoa powder is an important part of red velvet cake AND brownies, so make sure that you're using a high-quality cocoa powder if you can find one for that subtle chocolate flavor.
- Flour - Regular all-purpose flour is best for this recipe. It is super important that you measure this accurately as I found while developing this recipe that even the tiniest bit too much flour will make these brownies come out cakey and they'll lose the brownie-like texture. I always recommend using a scale to measure ingredients rather than cups, but it's especially important here.
- Vinegar - It might seem strange to add vinegar to brownies, but it is one of the key ingredients in red velvet recipes and will help give them that 'Red Velvet tang'. I used white wine vinegar but you can also use regular white vinegar.
- Cornstarch - This will help create make the brownie a little chewy.
- Red Food Coloring - You want to make sure you use a gel food coloring for these brownies, or for any red velvet cake. The liquid ones you get at the grocery store are just not strong enough and you won't get the lovely bright red color.
- White Chocolate Chips (optional) - I tested this recipe both with and without white chocolate chips. Both were good, but in the end, I had a slight preference for the ones without. But it's totally up to you if you want to throw them in or not!
- Cream Cheese - We'll need cream cheese to make the cream cheese frosting on top of the brownies. Make sure the brand you use is not too runny - Philadelphia is always a good bet.
- Powdered Sugar - Also for the frosting, we'll need powdered sugar (also known as confectioners sugar or icing sugar).
See recipe card for quantities.

Make the Red Velvet Brownies
These homemade red velvet brownies are super easy to make and you don't need any fancy equipment. I strongly recommend using a kitchen scale to weigh out your ingredients to get the absolute best red velvet brownies.
- Preheat your oven to 350°F / 180°C and line a 8-inch square cake pan with parchment paper.
- Melt the butter in the microwave in 30-second intervals until completely melted.
- Pour the melted butter into a large mixing bowl along with the sugar and light brown sugar. Mix everything together with a whisk. You can use an electric mixer for this recipe if you really want to, but it's a very easy recipe to do by hand and may actually be better as an electric hand mixer may actually incorporate too much air.
- Add the eggs, egg yolk, and vanilla and whisk in until just combined, being careful not to incorporate too much air.


- Add the vegetable oil and the cocoa powder to the wet ingredients and mix in completely.
- Take a couple of tablespoons of the batter and put them into a small bowl, add your red gel food coloring to this bowl and mix it in until the gel is all incorporated and there are no lumps. Add this mixture into the main bowl of batter and mix until combined.
Make sure you use red gel food coloring as the liquid kind is not strong enough to give you that beautiful red velvet color. The batter will look like a very dark, deep red color right now, but as it bakes it will lighten into that classic beautiful red color.


- Switch from a whisk to a wooden spoon or rubber spatula and add the dry ingredients, including the flour, cornstarch, and salt. Fold everything together until there are no more lumps.
- Add the vinegar and mix in completely, this will help to achieve that classic red velvet flavor.
- If you want to add some white chocolate chips you can add them at this point.
- Pour the red velvet brownie batter into the prepared pan and bake in the preheated oven for 20-25 minutes. The top should look set and no longer wet, and a toothpick inserted into the center of the brownies should either come out clean or with moist crumbs on it. Don't overbake the brownies or they will lose some of their lovely fudginess.


- Remove from the oven and let the red velvet brownies cool for about an hour before moving to a cooling rack. Let them cool completely before attempting to frost and slice.

Make the Cream Cheese Frosting
- Beat the butter and cream cheese together until completely smooth. Make sure they are both at room temperature, this will help ensure they incorporate nicely without any lumps. I find it easiest to use a stand mixer with a paddle attachment, or an electric mixer to make cream cheese frosting.
- Add the powdered sugar to the softened cream cheese and butter and mix on low until the dust cloud settles down. I find it helpful to wrap a dishcloth or some paper towels around the top of the mixer to prevent the powdered sugar from flying everywhere.
Once it's no longer blowing out the bowl, turn the mixer up to high speed and beat for a few minutes until the frosting looks creamy and fluffy.
- Check the consistency of your frosting, if you'd like it to be thicker, add some more powdered sugar and repeat until you reach the desired thickness.
- Add the vanilla and beat for another few seconds.
- Spread the cream cheese frosting in a single layer all over the top of your cooled red velvet brownies.
- Slice the brownies into 16 individual pieces and serve.


Tip: If you want some pretty red crumbs to sprinkle on top of the cream cheese frosting, you can cut a small slice off of one end of the brownies before putting the frosting on, Crumble it up with your fingers and sprinkle on top for that classic red velvet cake look.

Video
Watch my video tutorial on exactly how to make these Red Velvet Brownies:
Reader Review:
These are delicious and easy to make and are now in my permanent recipe file. .. I like the way the recipe is written (with quantities listed under each instruction, making it easy to double check quantities.
⭐⭐⭐⭐⭐ - Lore
Getting the Perfect Brownie Texture
I always recommend that the best way to measure out your ingredients is with a scale, rather than cup measures. This is because it's incredibly difficult to get exact ingredient measurements with cups and a lot of people end up adding way too much of some ingredients, like flour, which can throw off your entire recipe. This is particularly important with this recipe.
I tested this recipe so many times with the tiniest little tweaks that made massive differences to the texture of the brownies. I had multiple versions of the red velvet brownies with drastically different textures - they all had the exact same ingredients in them, just in slightly different quantities.
If you like to nerd out about the science of recipe development like I do, check out the image below which shows a few iterations of the recipe, with the last one being the final version.

The first brownie was absolutely delicious, but just a little too gooey for what I wanted here. I wanted them to be fudgy, but I also wanted slightly chewy brownies, and I still wanted to show off the gorgeous red velvet color.
The second brownie had more flour and I also incorporated a lot more air into the mixture as I was preparing it - it turned out far too cakey and wasn't really like a brownie at all.
The second last brownie and the final brownie were almost identical in the recipe, except the last one had 30g less flour in it (about a quarter cup). You can see from the image what a huge difference this tiny tweak made.
If you were measuring your ingredients in cups, it's very easy to accidentally add this amount of flour or more to your batter, creating a totally different texture for your homemade brownies. So for best results, use a scale to get the fudgy, decadent red velvet brownies!

Variations
- Red Velvet Cheesecake Brownies - For a twist on these easy red velvet brownies, try swapping the cream cheese frosting for a delicious cheesecake swirl. Mix 8oz cream cheese (226g) with 1 egg and ⅓ cup white sugar (67g) and swirl it into the top of the brownie batter before baking. It will create a gorgeous pattern and taste delicious.
- White Chocolate Chips - I experimented with these brownies having white chocolate chips and not. Both versions were good but in the end, I liked them best without. You can add them for some extra texture and flavor. You could also add milk chocolate or dark chocolate chips if you prefer, but I feel like they might overpower the flavor of the brownies a little.

Equipment
- 8-inch square cake pan
- Scale - for measuring the ingredients accurately (not required but recommended)
- Large Bowl
- Whisk
- Rubber Spatula

Storage
Once the red velvet brownies are frosted it's best to keep them in the fridge as the frosting contains dairy. Store them in an airtight container in the fridge. They will be good like this for up to five days.
If you are storing the brownies separately before frosting them, you can keep them at room temperature, wrapped in plastic wrap, or in an airtight container until you are ready to frost them.
Show Me Your Bakes!
If you make this recipe, please tag @bonni_bakery on Instagram or send me a photo - I love seeing all your creations.
Want your bake featured on the blog? You can also upload a photo here.
More Brownie Recipes
If you love this red velvet brownie recipe, try some of my other brownies!
Recipe
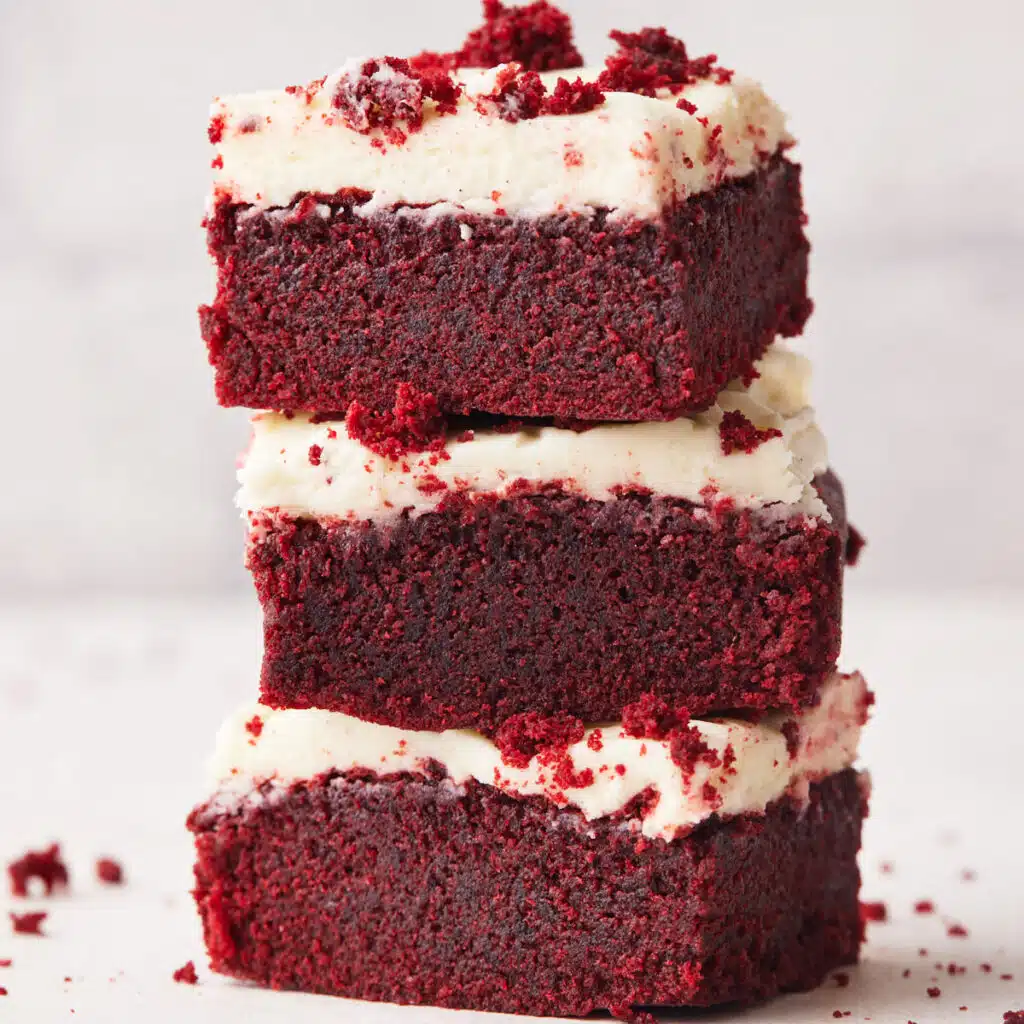
Red Velvet Brownies
Ingredients
- 85 g (¾ stick) Unsalted Butter
- 200 g (1 cup) Granulated Sugar
- 55 g (¼ cup) Light Brown Sugar
- 3 Large Eggs
- 1 Large Egg Yolk
- 1 teaspoon Vanilla Extract
- 80 ml (⅓ cup) Vegetable Oil
- 25 g (¼ cup) Cocoa Powder
- 90 g (¾ cup) All-purpose Flour
- 1 tablespoon Vinegar
- 1 tablespoon Cornstarch
- ¼ teaspoon Salt
- ½ teaspoon Red Food Coloring
- 130 g (¾ cup) White Chocolate Chips optional
- 115 g (4 oz) Cream Cheese
- 85 g (¾ stick) Unsalted Butter
- 480 g (4 cups) Powdered Sugar
- 1 teaspoon Vanilla Extract
Instructions
- Line an 8-inch square cake pan with parchment paper and preheat the oven to 350°F / 180°C (160°C fan assisted).
- Melt butter in the microwave in 30-second increments until completely melted.85 g (¾ stick) Unsalted Butter
- Put the white sugar and light brown sugar in a large mixing bowl, then add the melted butter and whisk together until combined.200 g (1 cup) Granulated Sugar, 55 g (¼ cup) Light Brown Sugar
- Add the eggs, egg yolk and vanilla and mix together. Be careful not to overmix - we are not trying to add air into the mixture as that will make the brownies cakey.3 Large Eggs, 1 Large Egg Yolk, 1 teaspoon Vanilla Extract
- Add the vegetable oil and the cocoa powder to the brownie batter and whisk together gently until completely combined - again, we are not trying to incorporate air.25 g (¼ cup) Cocoa Powder
- Take a couple of tablespoons of the batter and put them into a small bowl. Add your red gel food coloring to this bowl and mix it in until the gel is all incorporated and there are no lumps. Add this mixture into the main bowl of batter and mix until combined.80 ml (⅓ cup) Vegetable Oil, ½ teaspoon Red Food Coloring
- Switch from a whisk to a rubber spatula or wooden spoon and fold in the dry ingredients, including flour, cornstarch and salt.90 g (¾ cup) All-purpose Flour, 1 tablespoon Cornstarch, ¼ teaspoon Salt
- When there are no more lumps of flour, add the vinegar and mix in well.1 tablespoon Vinegar
- Optional: If you like, you can add some white chocolate chips at this stage. I decided I liked the brownies better without.130 g (¾ cup) White Chocolate Chips
- Pour the brownie batter into the prepared cake pan and bake for 20 - 25 minutes or until a skewer comes out with just moist crumbs on it.
- Remove from the oven and let cool completely before attempting to frost and slice.
- Beat the room temperature butter and cream cheese together until smooth and combined.115 g (4 oz) Cream Cheese, 85 g (¾ stick) Unsalted Butter
- Add the powdered sugar and mix in slowly. Once the dust cloud settles, turn your mixer onto high speed and beat for a few minutes until light and fluffy.480 g (4 cups) Powdered Sugar
- Add the vanilla and beat in for another few seconds.1 teaspoon Vanilla Extract
- Spread over the red velvet brownies before slicing.






MK
I bake frequently, and have for a long time and I followed the recipe exactly and these turned our absolutely nothing like the picture. Very dry cake like texture, this were absolutely horrible and basically inedible. I had to toss in the garbage and go to the bakery instead, such a disappointment and waste of time.
Phila
I should have read the reviews, very weird texture, quite dry and very little flavour. Sure red velvet is a bit of a difficult flavour to capture, but I paused when I saw how little cocoa powder was being used, and I should have clocked it then.