
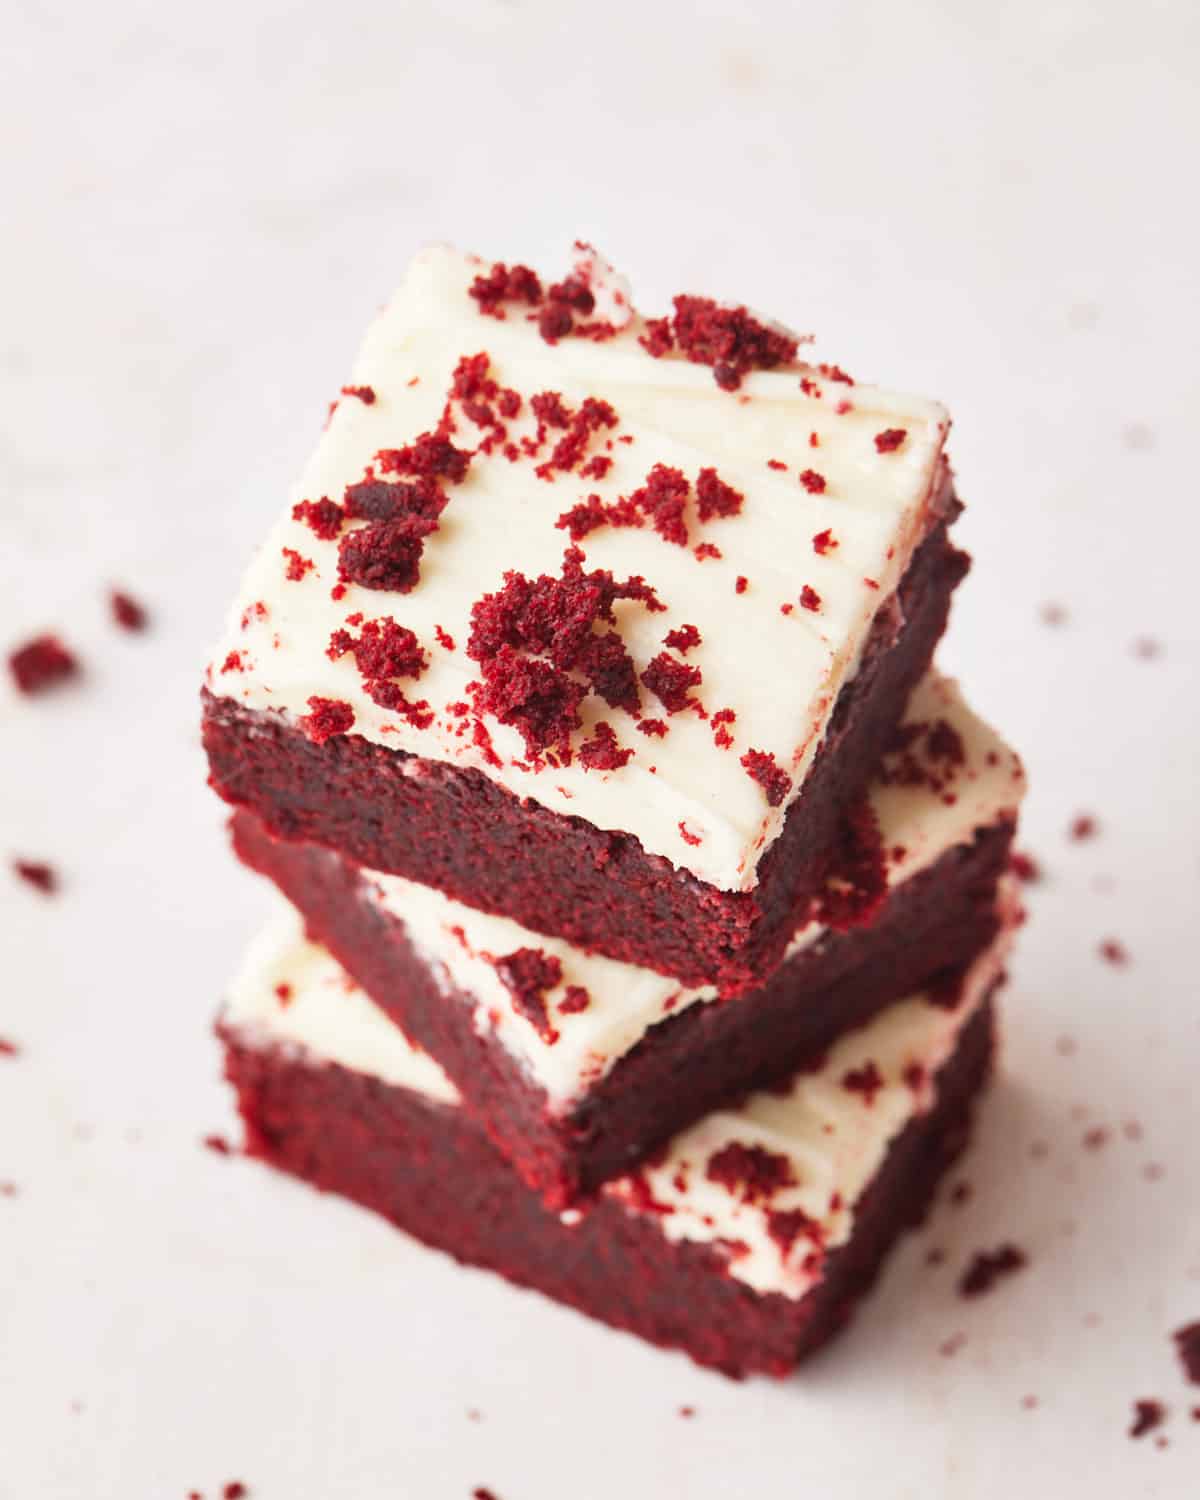
Red Velvet Brownies that actually taste like red velvet, without compromising on the fudgy brownie texture.
Red Velvet Brownie Recipe Snapshot
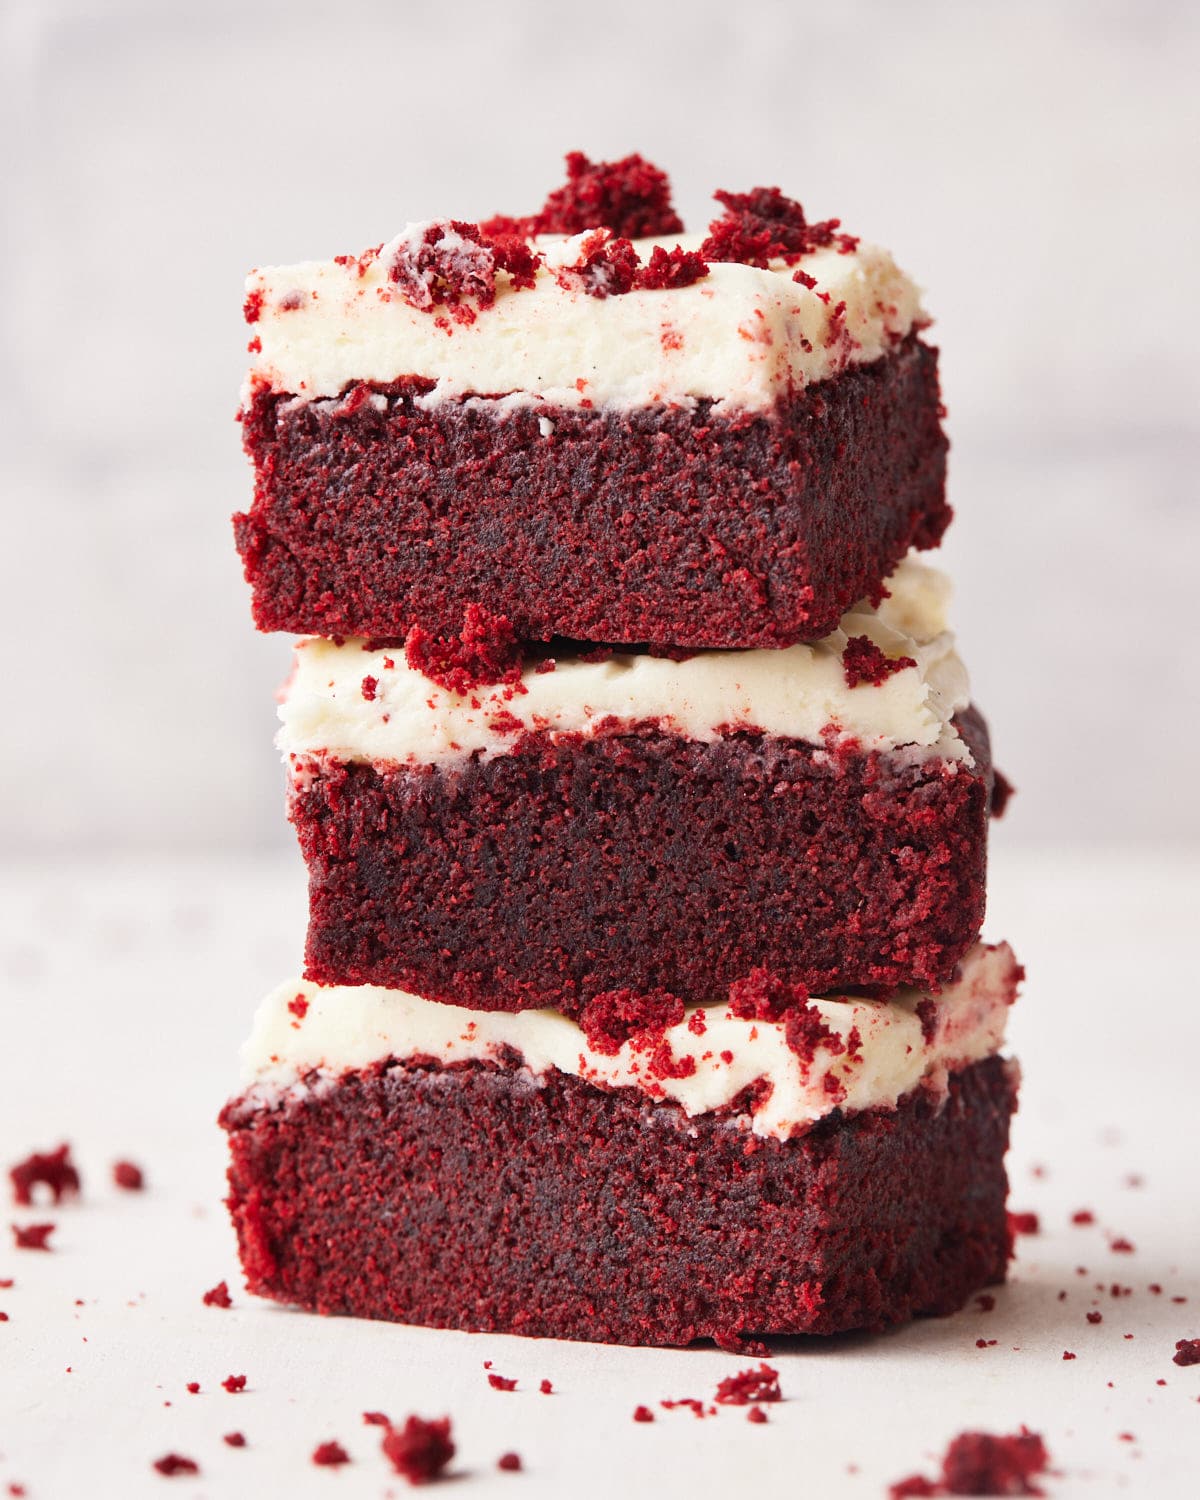
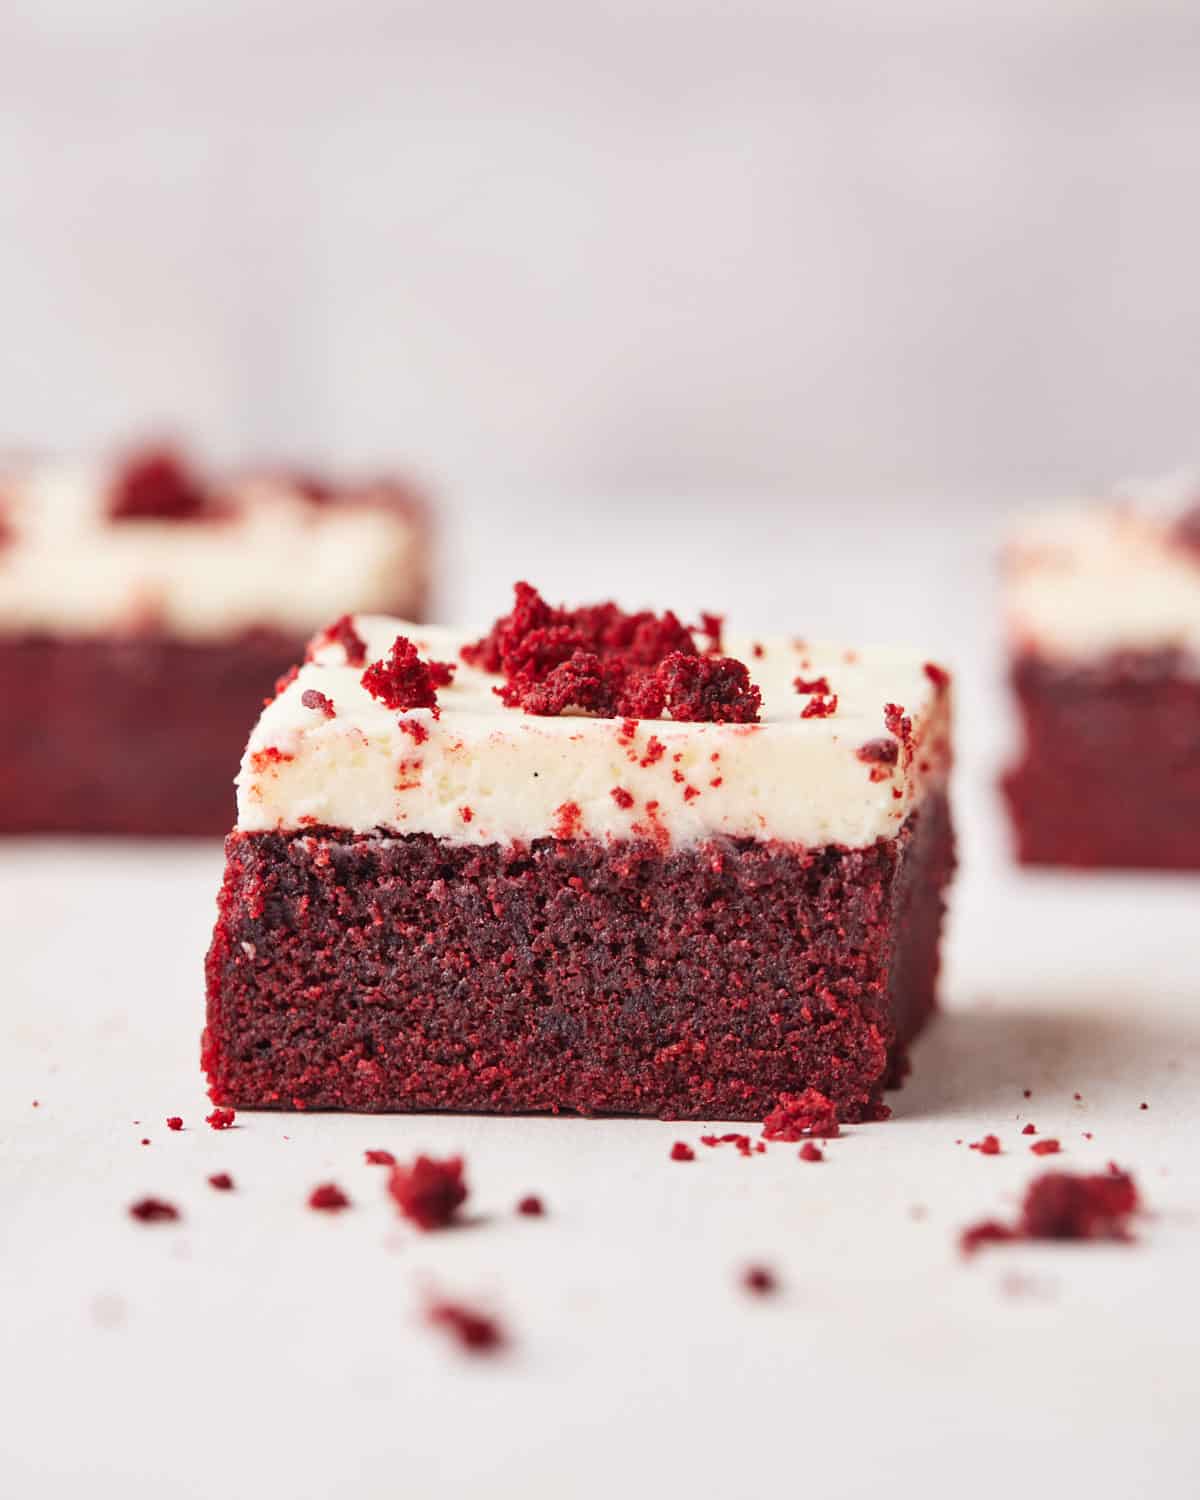
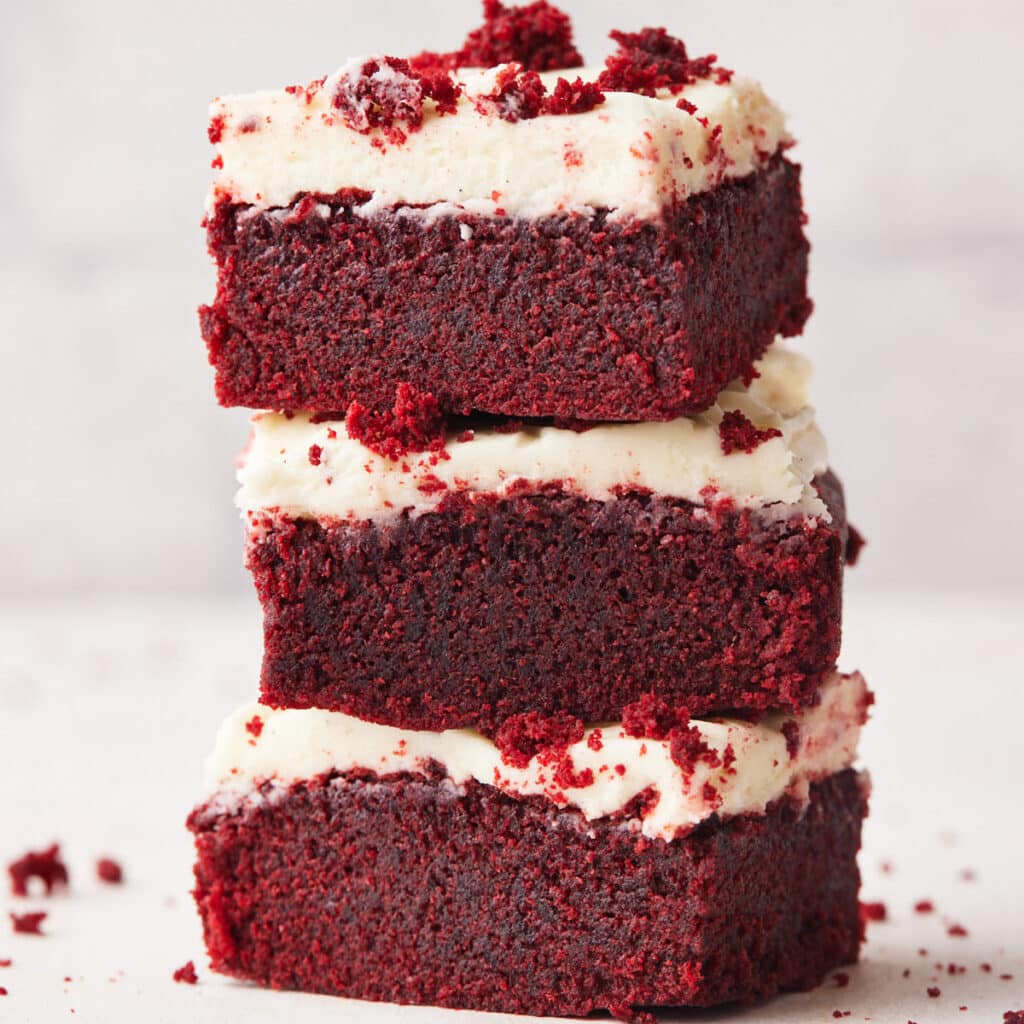
What it is: The perfect combination of fudgy brownies and red velvet cake - topped with cream cheese frosting.
Why you'll love it: They have the unique flavor of red velvet, but are soft and fudgy, not cakey.
How to make it: Whisk melted butter and sugars together, then add the eggs, followed by wet, then dry ingredients. Colour the batter and bake. Top with cream cheese frosting.

Red Velvet Brownies should taste like red velvet - not just chocolate dyed red. The problem is, the ingredients that give that signature flavor often push the texture in the wrong direction, leaving you with something closer to cake bars than brownies.
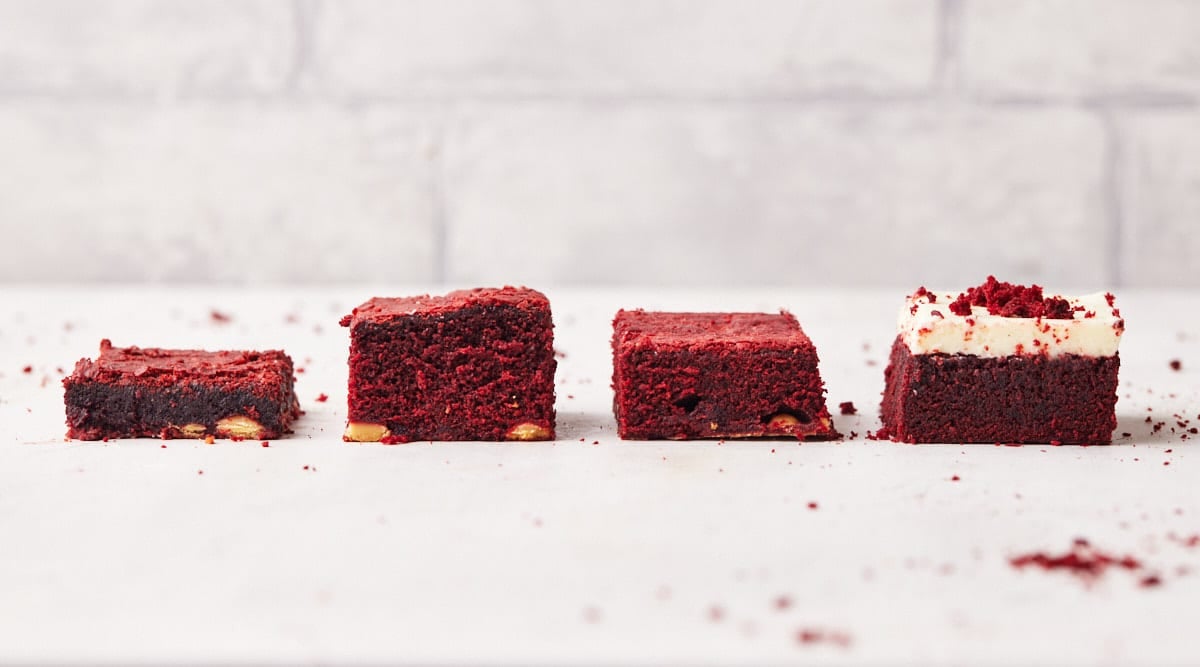
I spent a full week testing different versions of this recipe to find the balance - getting that subtle cocoa flavour and slight tang, while keeping the rich, chewy texture a good brownie should have. Small tweaks to the ingredient ratios made a huge difference (you can see some of my test batches below).
Now I can show you how to make red velvet brownies that actually taste like red velvet, AND have the perfect chewy, fudgy bite.
Reader Review:
Oh my goodness! These are the absolute best red velvet brownies I have ever had. Sweet, chocolatey moist and dense at the same time . The chewiness is what really won me over though. My family loved these too.
⭐⭐⭐⭐⭐ - Heidi
Jump to:
Why This Recipe Works
- Balanced Fats: I used a combination of butter AND oil to make the perfect texture. Butter adds rich flavour and oil keeps them soft and moist, even after cooling. The extra egg yolk adds richness and creates a deliciously dense, chewy bite.
- Cocoa Ratio: Red velvet isn't supposed to be chocolatey. Using just a small amount of cocoa powder gives that subtle chocolate note while letting the other flavors shine.
- Brownie Method: Classic red velvet ingredients are combined using a melted butter method, rather than the creaming method. This limits air in the batter and is the key to a fudgy texture rather than a cakey crumb.

Ingredients
This red velvet brownie recipe uses simple ingredients, similar to what you'd find in red velvet cake, but tweaked for texture and homemade brownie perfection.
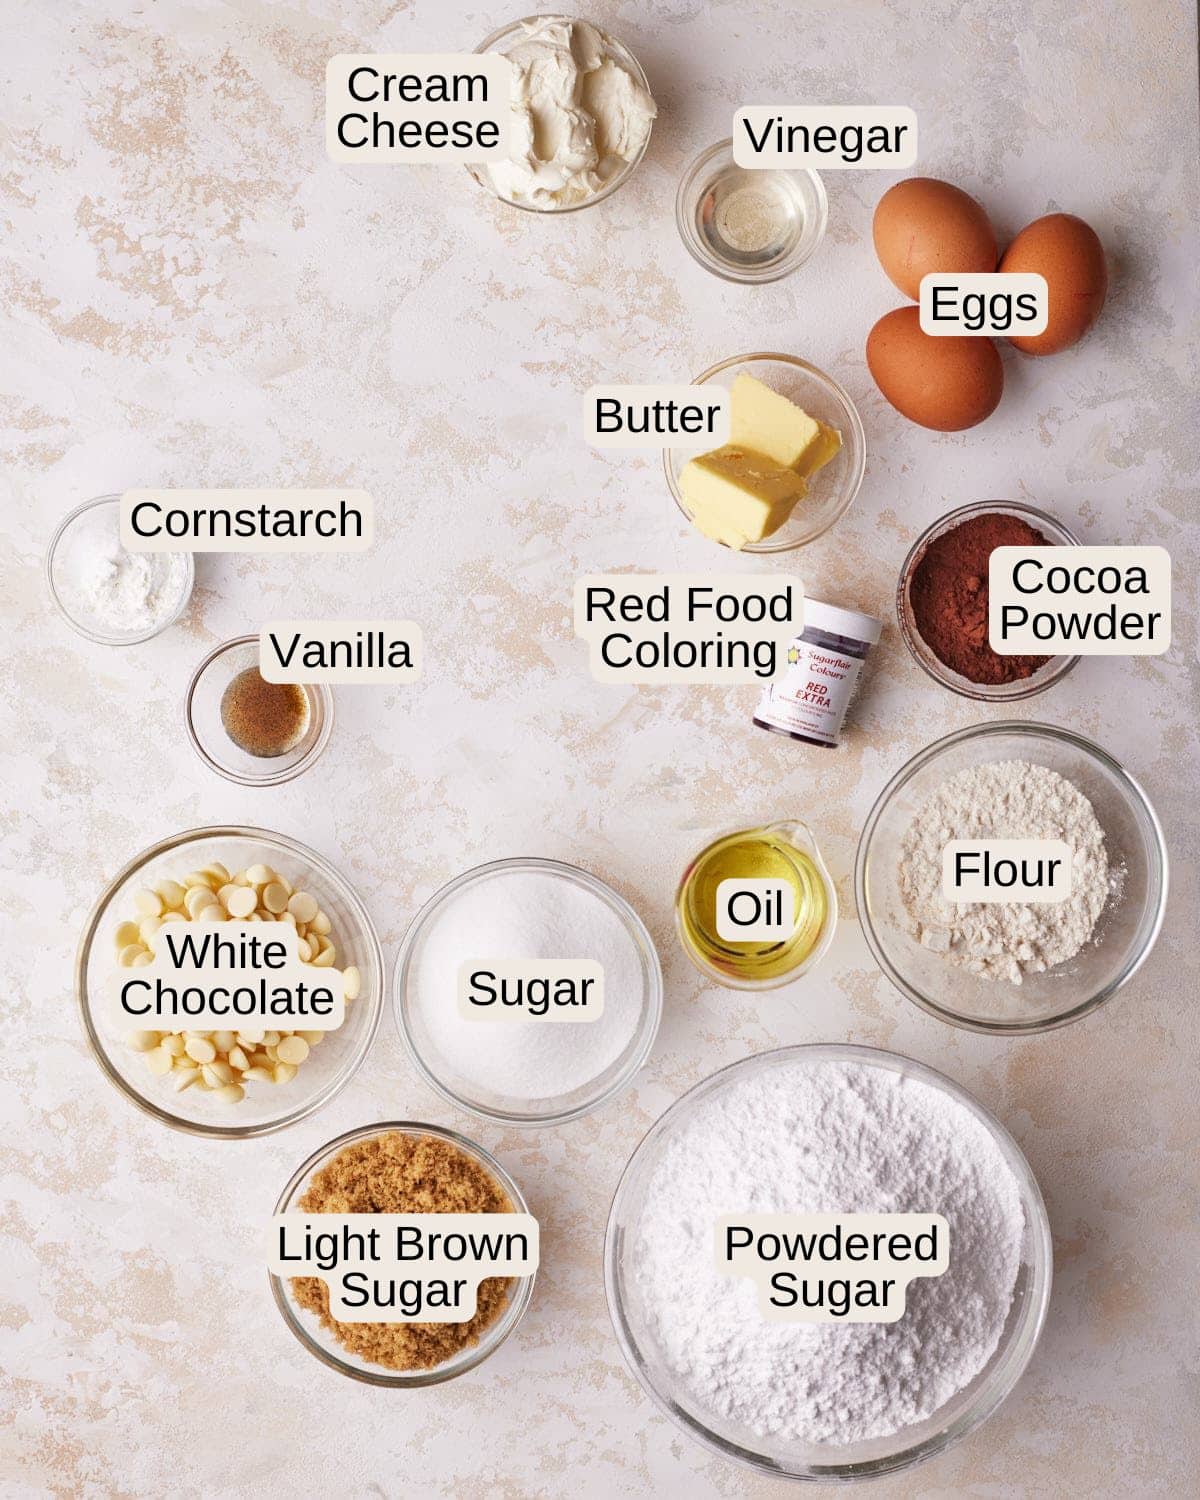
- Unsalted Butter - We'll use both butter and oil in these brownies to balance a rich flavor and fudgy texture.
- White Sugar - Granulated sugar (Caster sugar in the UK).
- Light Brown Sugar - brown sugar adds depth of flavor, but the higher moisture content also contributes to that gooey brownie texture.
- Eggs - We'll need whole eggs and an extra egg yolk on top for additional richness. Get some ideas for how to use extra egg white.
- Vanilla - Vanilla extract or vanilla bean paste for a base flavor.
- Oil - I use vegetable oil, but you can use any neutral oil, like canola or sunflower oil. This helps keep the brownies gooey and moist.
- Cocoa Powder - Dutch-processed cocoa powder will help make your brownies fudgy rather than cakey. It also has a milder chocolate flavor that won't overpower everything else.
- Flour - Regular all-purpose flour (plain flour) is best for the structure of the brownies.
- Vinegar - The ingredient most recipes skip, and the one that makes these taste like red velvet. It adds a subtle tang and reacts with the cocoa to enhance the flavor. White vinegar or apple cider vinegar both work
- Cornstarch - This will help keep the brownie soft and a little chewy.
- Red Food Coloring - Use a gel food coloring to make sure the color comes through after baking.
- Cream Cheese - For the cream cheese frosting, use full-fat, not the spreadable kind.
- Powdered Sugar - (icing sugar). You may need more or less, depending on how soft your cream cheese is.
See recipe card for the full recipe and quantities in both cups and grams (though I strongly recommend weighing your ingredients with a kitchen scale for this recipe).
Things You'll Need
- Square Cake Pan - 8-inches / 20cm
- Mixing bowls
- Whisk
- Rubber Spatula
- Sieve
Reader Review:
These are delicious and easy to make and are now in my permanent recipe file. .. I like the way the recipe is written (with quantities listed under each instruction, making it easy to double-check quantities.
⭐⭐⭐⭐⭐ - Lore
How To Make Red Velvet Brownies
These homemade red velvet brownies are super easy to make, and you don't need any fancy equipment.
Before beginning, preheat your oven to 350°F / 180°C (160° fan) and line an 8-inch square cake pan with parchment paper.
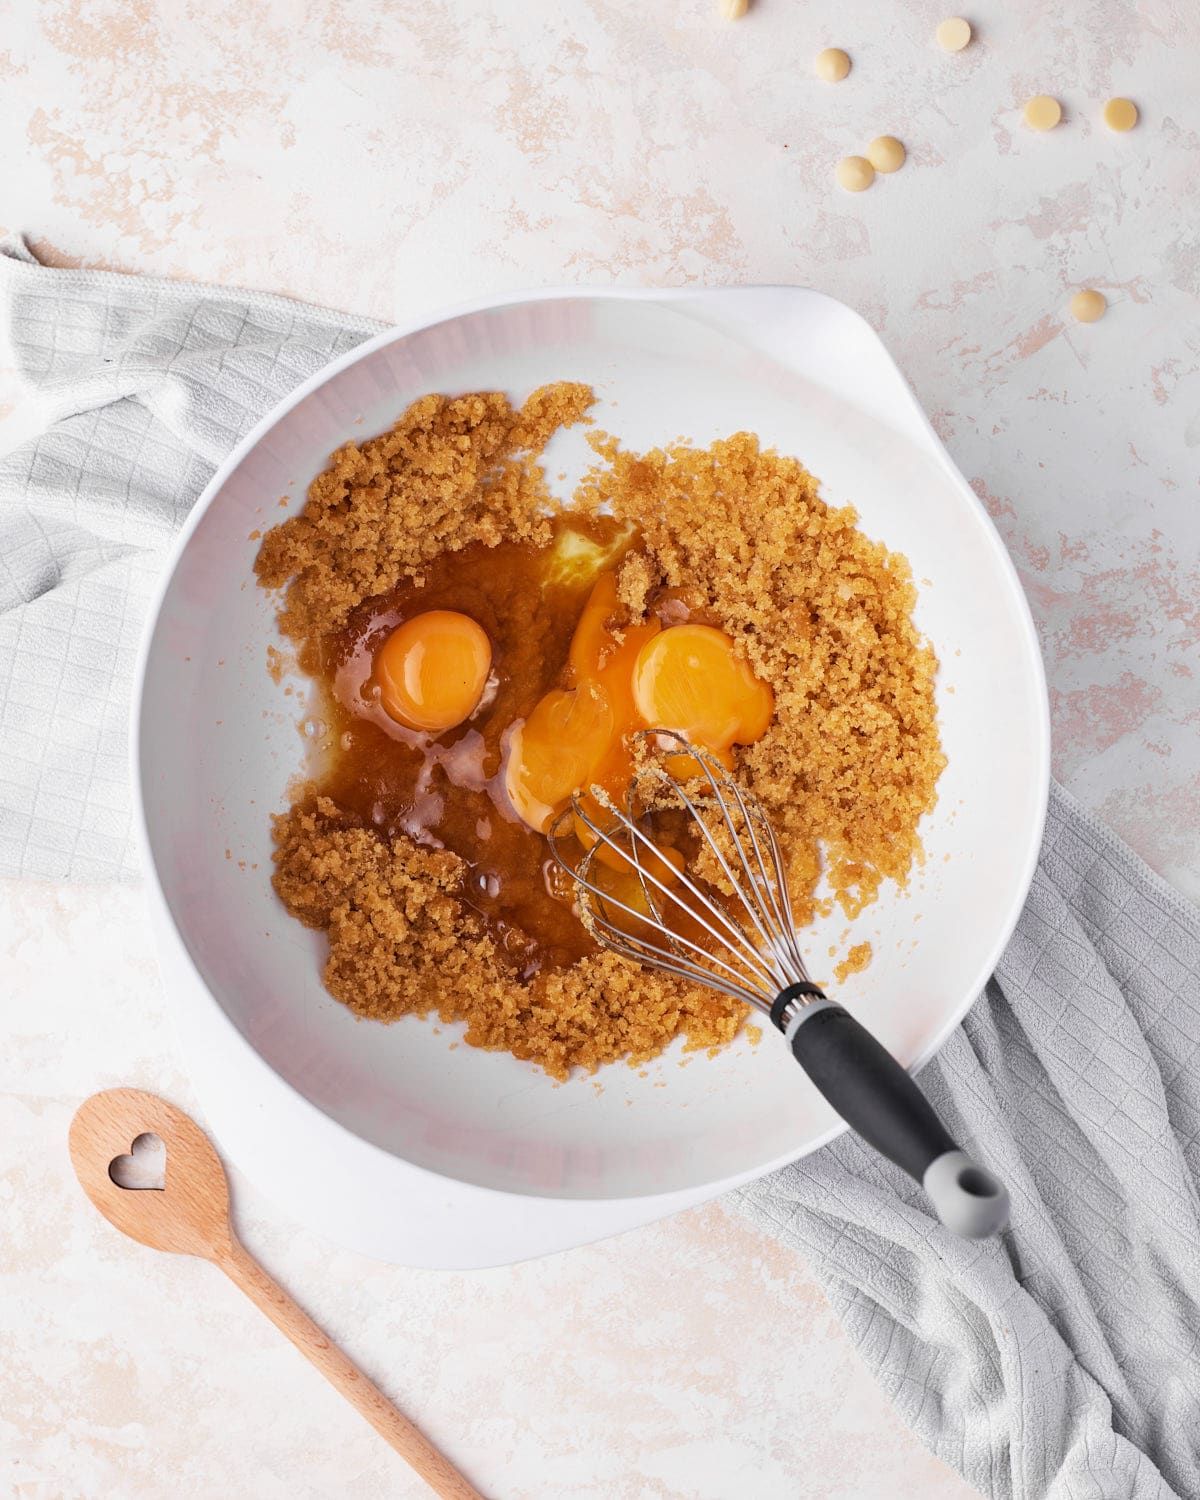
Butter + Sugars
Pour the melted butter into a large mixing bowl along with the white and brown sugar and whisk together just until combined.

Wet Ingredients
Whisk in the eggs, egg yolk, and vanilla, then add the oil and vinegar and whisk until glossy and smooth.
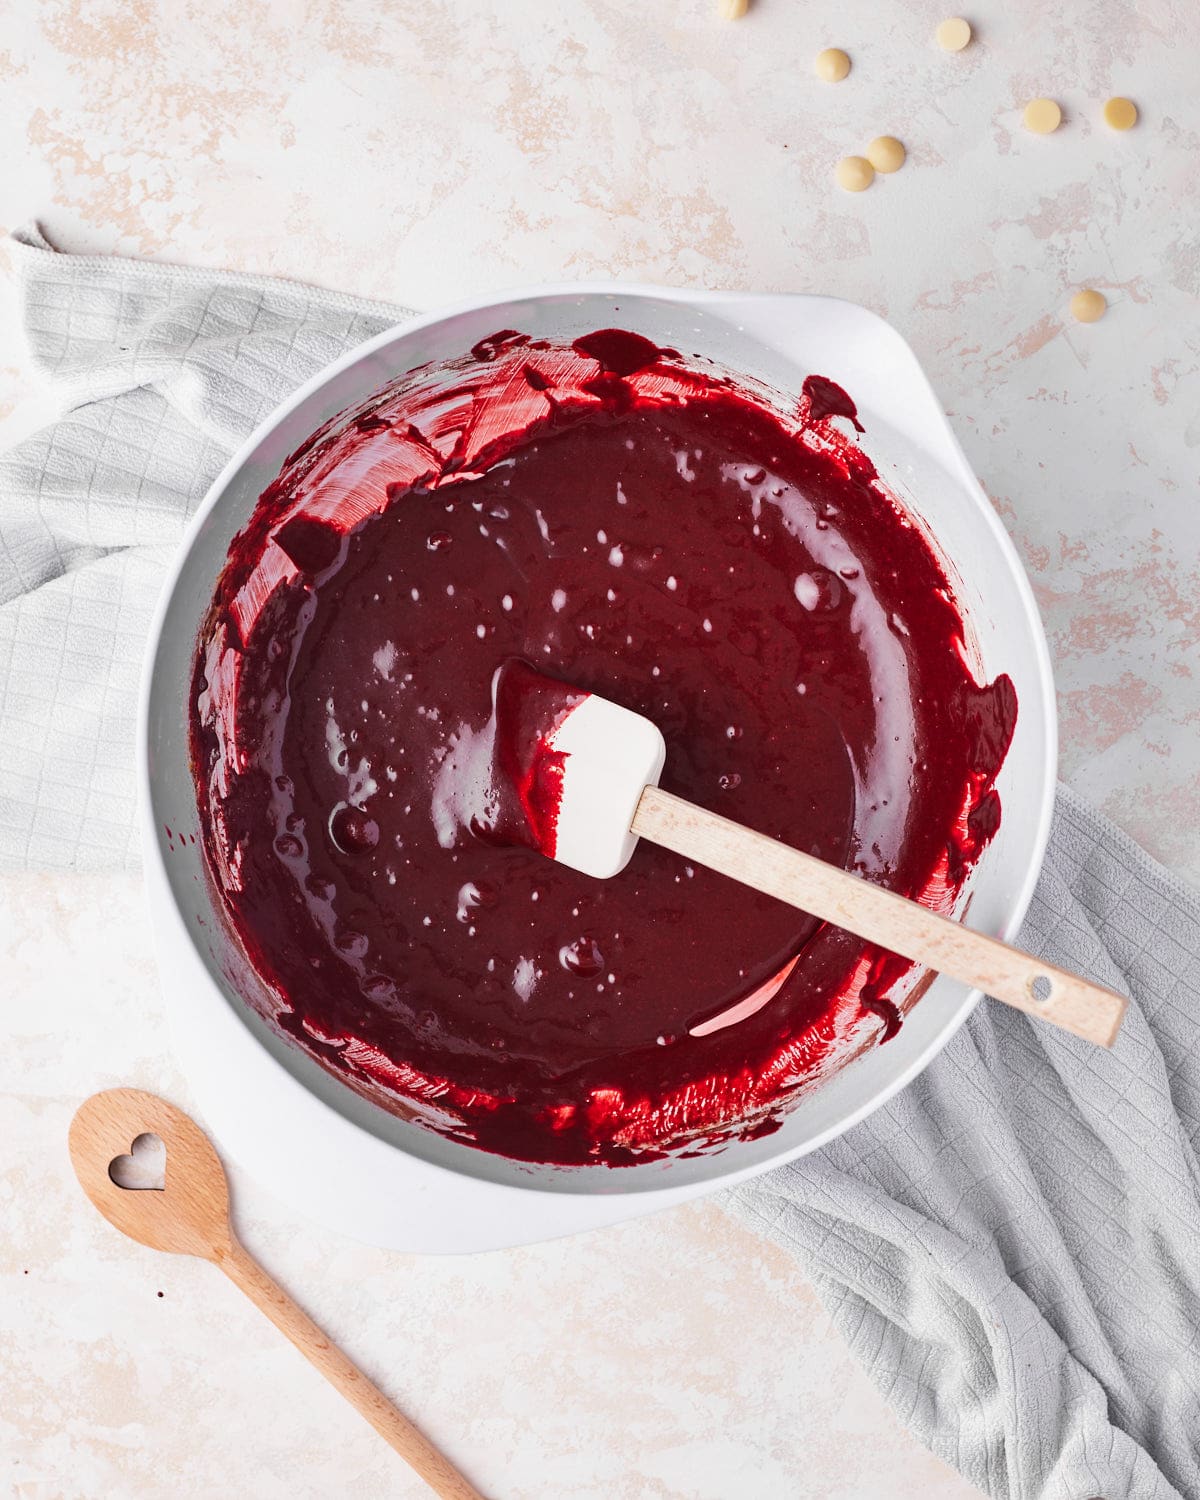
Red Food Colouring
Take a couple of tablespoons of the batter and put them into a small bowl, add your red gel food coloring to this bowl and mix it in until the gel is all incorporated and there are no lumps. Add this mixture to the main bowl of batter and mix until combined.
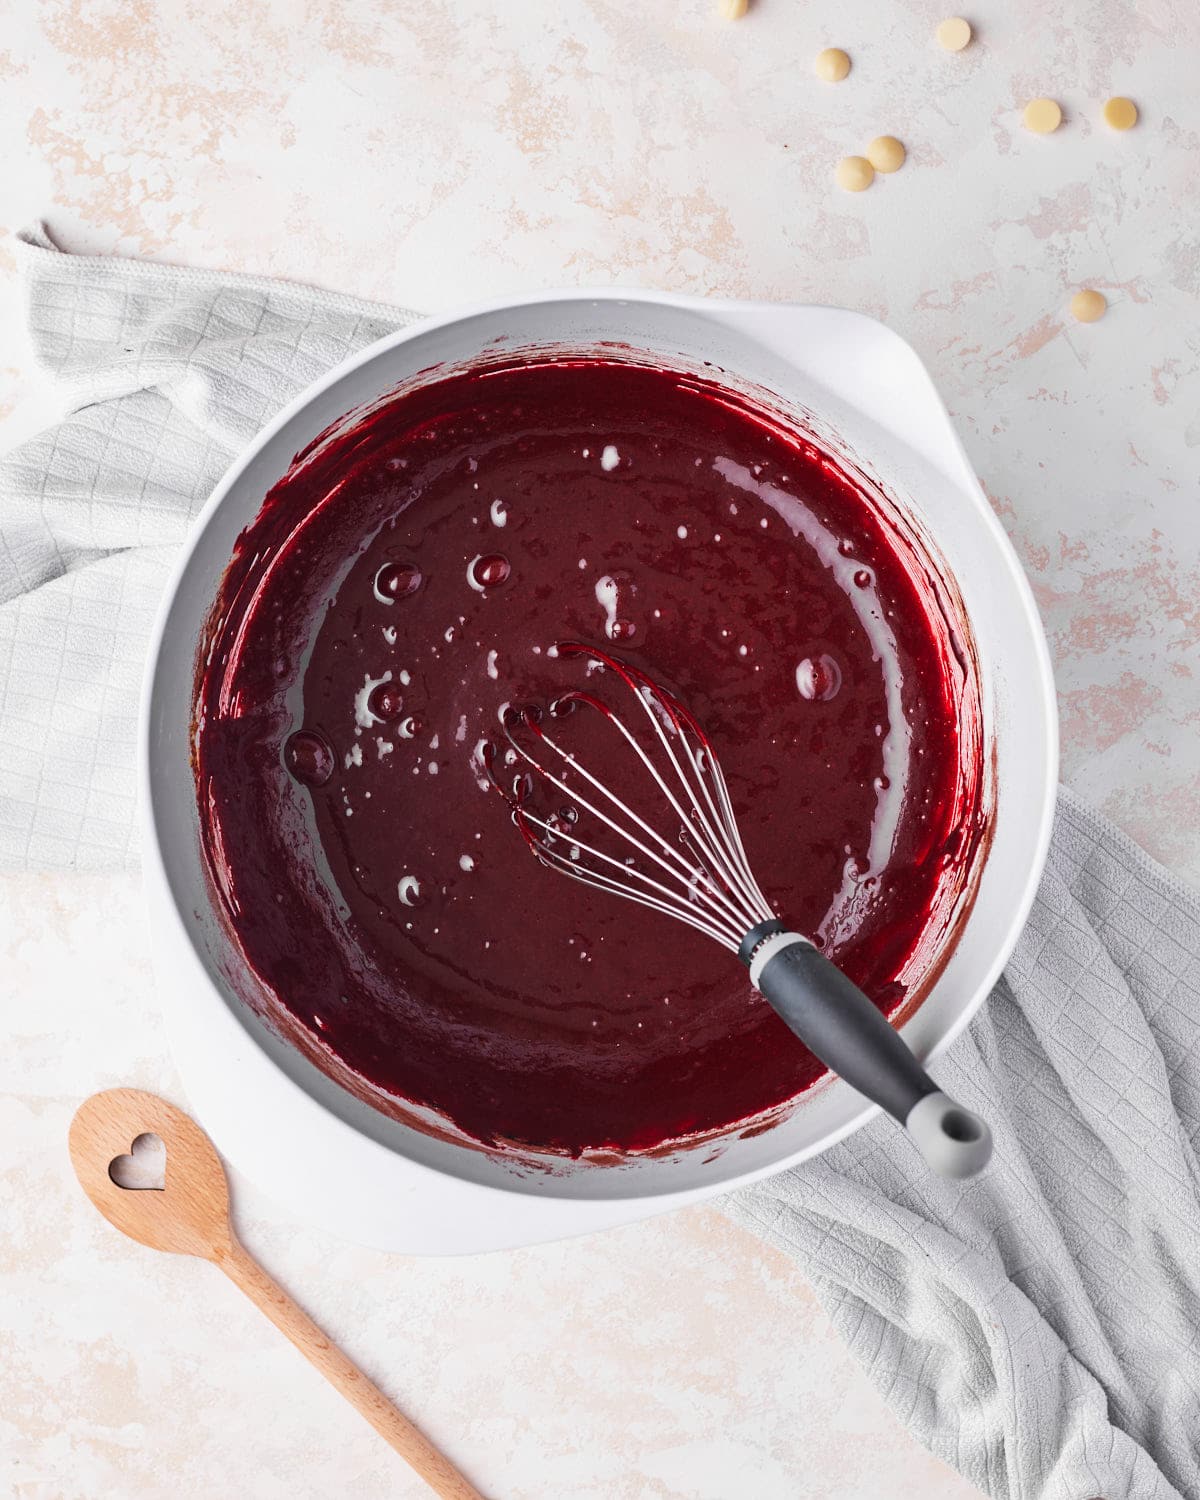
Dry Ingredients
Sift the flour, cornstarch, cocoa powder, and salt together, then gently fold them into the batter in two batches, using a rubber spatula. Be very careful not to overmix here.
Optional: If you want to add white chocolate chips, fold them in now.
Bake
Pour the brownie batter into the prepared cake pan and bake until the edges are set and pulling away from the pan, and the centre still looks soft, but not wet.
Baking time will vary depending on your oven and pan, but mine takes roughly 20-25 minutes. If you insert a cake tester in the middle, it should come out with moist crumbs. The brownies will continue to bake as they cool.
Let them cool completely before decorating and slicing.

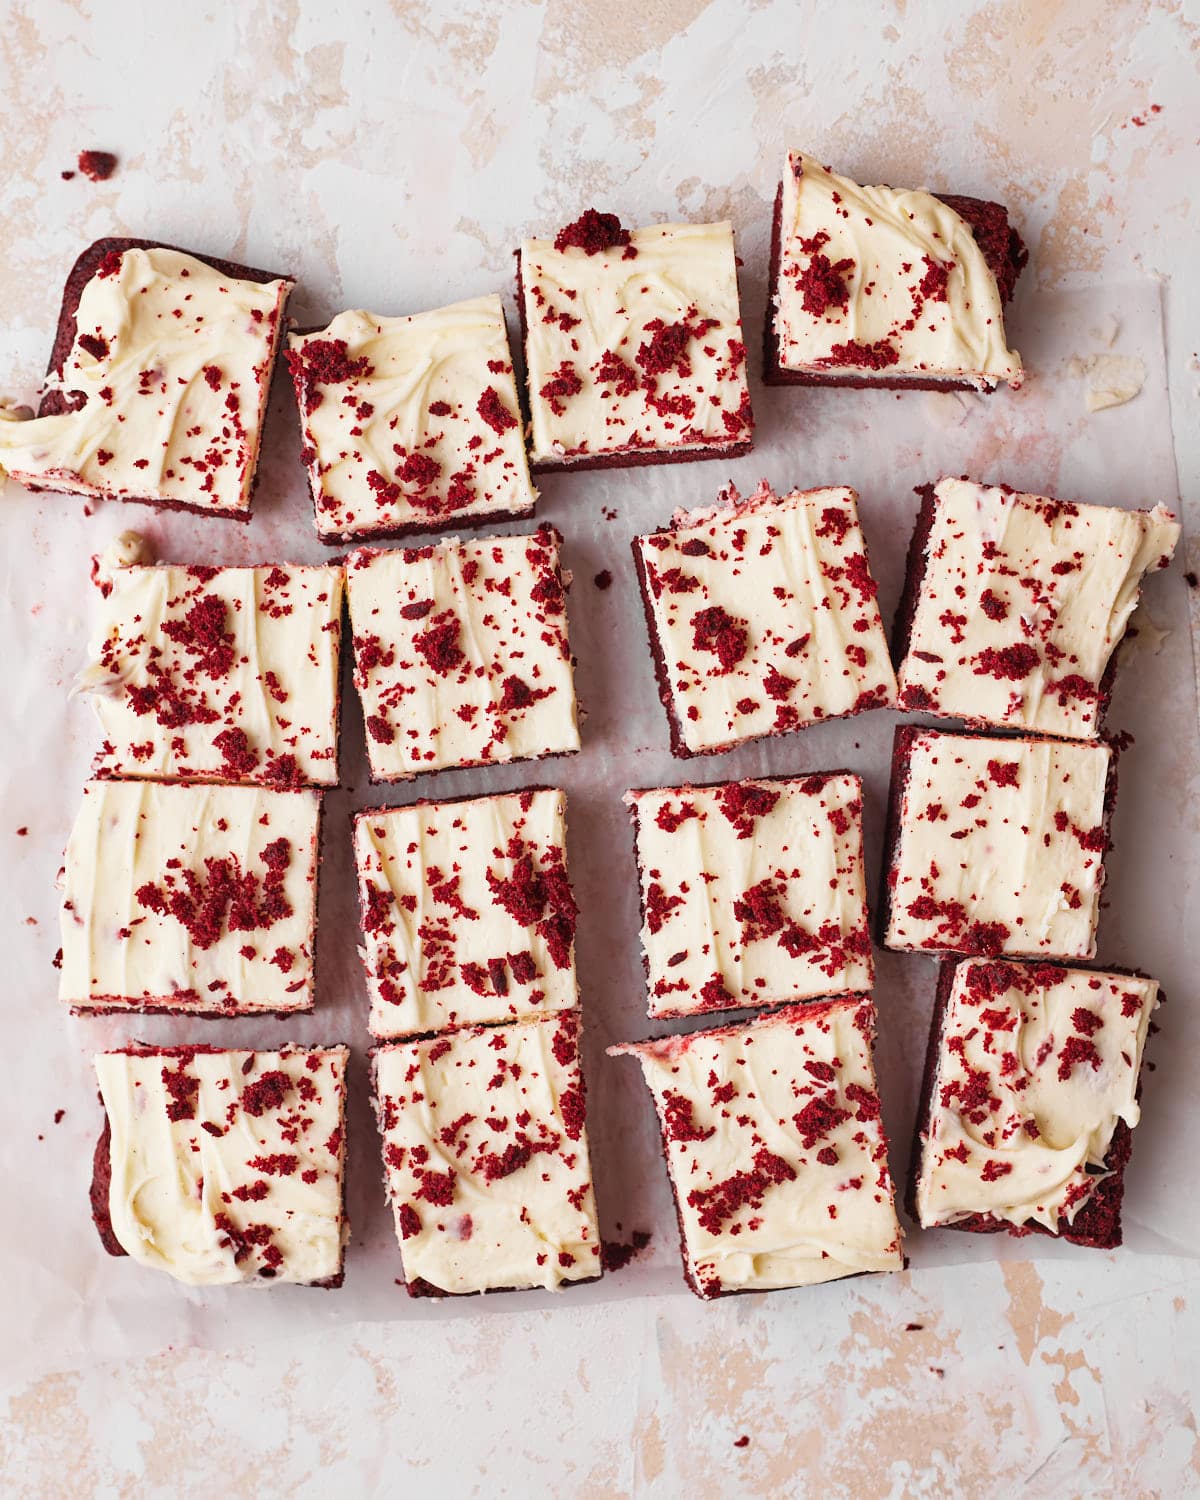
Decorate and Slice
Once the brownies are completely cool, remove them from the pan and cover with cream cheese frosting.
If you want some pretty red crumbs to sprinkle on top, cut a small slice off one end of the brownies before putting the frosting on. Crumble it up with your fingers and sprinkle on top for that classic red velvet cake look.
Slice into 9 or 16 squares.
Getting the Perfect Brownie Texture
After testing a lot of small variations of this recipe, I was surprised by how much even tiny changes affected the final texture. Here are the key rules I found that make the biggest difference:
- Use a scale:
This is especially important for brownies. Even small differences in flour can completely change the texture from fudgy to cakey. The last two brownies in this picture had a difference of just 30g of flour. Cups are not consistent or accurate - use a scale if you want perfect bakes.
- Don't overmix:
Once the flour is added to the batter, fold it in gently just until there are no more dry streaks. Overmixing incorporates extra air and develops the gluten, which will make the brownies more cakey than fudgy. - Bake for texture, not time:
Baking times vary depending on your oven and bakeware, so visual cues are more reliable than exact timing. These brownies are ready when the edges are set and pulling away from the edges, but the centre still looks a little soft. They continue to bake as they cool, so don't wait for them to look fully set or they will end up overbaked.
Most Common Mistakes
These red velvet brownies have been one of the most popular recipes on my blog for the past 3 years, with over 400,000 of you baking them at home. While most people absolutely love them, I've also seen a small number of inconsistent results.
I've gone through your comments and questions to identify the most common issues, so you can avoid them and get perfect brownies on your first bake.
- Cakey texture or dry brownies:
Almost always caused by too much flour or overmixing the batter after the dry ingredients are added. Even a 1-2 tablespoons too much flour can significantly change the texture, which is why weighing your ingredients is so important for this recipe. - Taking a long time to bake
Bake time will vary, so it's better to use visual cues to know when the brownies are baked. They are supposed to still look soft and a bit underbaked before coming out, as they will continue to bake as they cool. If they are taking a lot longer than they should, make sure you are using a metal 8x8-inch pan (not glass or silicone) and check your oven temperature with an oven thermometer. - Dense or heavy texture:
This can be because of overmixing or mis-measured ingredients. - Wrong pan size:
This recipe was developed to be baked in an 8-inch square pan. It's fine to use a different size of pan, but you'll need to adjust the baking time accordingly. - Ingredient Swaps:
Substituting ingredients (like reducing the sugar or swapping fats) can massively affect the texture and structure of the brownies. The most common one I see is people using natural cocoa powder instead of Dutch-processed, which can make the brownies drier and denser, and can overpower the other flavours.
Storage
You can store the unfrosted red velvet brownies in an airtight container at room temperature for up to 4 days. Once they have the cream cheese frosting on, though, it's best to keep them in the fridge for up to a week.
They will go a little firmer in the fridge, so let them sit at room temp for 20-30 minutes before serving.
Show Me Your Bakes!
If you make this recipe, please tag @bonni_bakery on Instagram or send me a photo - I love seeing all your creations.
Want your bake featured on the blog? You can also upload a photo here.
More Brownie Recipes
If you love this red velvet brownie recipe, try some of my other brownies!

Watch How To Make Them (Video)
Watch me make, bake, and decorate these red velvet brownies in this full video tutorial.
Subscribe to
Red Velvet Brownies
Ingredients
- 85 g (¾ stick) Unsalted Butter melted
- 200 g (1 cup) Granulated Sugar (Caster Sugar)
- 55 g (¼ cup) Light Brown Sugar
- 3 Large Eggs room temperature
- 1 Large Egg Yolk room temperature
- 1 teaspoon Vanilla Extract
- 80 ml (⅓ cup) Vegetable Oil
- 25 g (¼ cup) Cocoa Powder Dutch-processed
- 90 g (¾ cup) All-purpose Flour (Plain Flour)
- 1 tablespoon Vinegar
- 1 tablespoon Cornstarch
- ¼ teaspoon Salt
- ½ teaspoon Red Food Coloring
- 130 g (¾ cup) White Chocolate Chips optional
- 115 g (4 oz) Cream Cheese full-fat, room temperature
- 85 g (¾ stick) Unsalted Butter room temperature
- 240-360 g (2-3 cups) Powdered Sugar (Icing Sugar) *see notes
- 1 teaspoon Vanilla Extract
Instructions
- Line an 8-inch square cake pan with parchment paper and preheat the oven to 350°F / 180°C (160°C fan assisted).
- Put the white sugar and light brown sugar in a large mixing bowl, then add the melted butter and whisk together until combined.200 g (1 cup) Granulated Sugar (Caster Sugar), 55 g (¼ cup) Light Brown Sugar, 85 g (¾ stick) Unsalted Butter
- Add the eggs, egg yolk and vanilla and mix together. Be careful not to overmix - we are not trying to add air into the mixture as that will make the brownies cakey.3 Large Eggs, 1 Large Egg Yolk, 1 tsp Vanilla Extract
- Add the vegetable oil and vinegar to the brownie batter and whisk until it looks glossy and smooth.25 g (¼ cup) Cocoa Powder, 1 tbsp Vinegar
- Take a couple of tablespoons of the batter and put them into a small bowl. Add your red gel food coloring to this bowl and mix it in until the gel is all incorporated and there are no lumps. Add this mixture into the main bowl of batter and mix until combined.80 ml (⅓ cup) Vegetable Oil, ½ tsp Red Food Coloring
- Sift the dry ingredients and mix them together, then fold them gently into the brownie batter in two batches, using a rubber spatula or wooden spoon. Be very careful not to overmix here as it can make the brownies dense or cakey.90 g (¾ cup) All-purpose Flour (Plain Flour), 1 tbsp Cornstarch, ¼ tsp Salt, 25 g (¼ cup) Cocoa Powder
- Optional: If you like, you can add some white chocolate chips at this stage. I decided I liked the brownies better without.130 g (¾ cup) White Chocolate Chips
- Pour the brownie batter into the prepared cake pan and bake until the edges are set and pulling away from the pan, but the centre still looks slightly soft. Baking time will vary depending on your oven and pan, but mine takes roughly 20-25 minutes. If you insert a cake tester in the middle, it should come out with either moist crumbs or a very thin layer of batter. The brownies will continue to bake as they cool.
- Remove from the oven and let cool completely before frosting and slicing.
- Beat the room temperature butter and cream cheese together until smooth and combined.115 g (4 oz) Cream Cheese, 85 g (¾ stick) Unsalted Butter
- Add the vanilla and powdered sugar and mix in slowly to avoid a dust cloud. You may need more or less powdered sugar depending on the thickness of your cream cheese, so add it 1 cup at a time until it is thick enough to spread. Beat for a few minutes until light and fluffy.240-360 g (2-3 cups) Powdered Sugar (Icing Sugar), 1 tsp Vanilla Extract
- Spread over the red velvet brownies before slicing.


Jules Grasekamp says
Hi A,
Thanks for trying my recipe. I'm happy to help you troubleshoot! A lot of people make this recipe with great results, but a few have ended up with thin brownies - it seems to usually be a result of mismeasured ingredients or overmixing the batter.
Hope this helps,
Jules
Judi Christianson says
Can I use swerve powered sugar and almond four for this recipe
Jules Grasekamp says
Hi Judi,
I haven't tested this recipe with those substitutions but I can't see a reason why the swerve powdered sugar wouldn't work.
As for almond flour, you can use it but the texture will be quite different and you might not get as much rise.
Hope this helps,
Jules
Judi Christianson says
Can I use almond flour and swerve sugar for this recipe
Nancy says
I have always found red velvet anything to be dry. THESE RES VELVET are the exception!
I made these and didn’t have a lot of expectations, that is until I took the first bite! OMG! AMAZING. So good my father told me to laminate the recipe and ensure I never lose it. So good that we made another batch the next day!
The frosting adds to the brownies but they are delicious all on their own! I highly recommend. Jules thanks for another wonderful recipe!
Jules Grasekamp says
Hi Nancy,
Thank you so much for such a glowing review of my red velvet brownie recipe! I'm SO happy to hear you loved them!
Thank you for being here.
Happy baking!
Jules
Gaby says
How can I make these gluten free?
Jules Grasekamp says
Hi Gaby,
I haven't tested a version of these as gluten free so unfortunately I can't give a confident answer on that.
I believe some people have tried with a 1:1 substitution with gluten free flour.
If you do make them GF, I'd love to know how they turn out!
Jules
Jules Grasekamp says
Hi Charlie,
How did your brownies turn out in the end?
335 is the correct temperature but every oven is different so if you find that they bake too slowly at that temp you can try it at 350 next time. You might always want to try calibrating your oven if you find this happens regularly. Lots of other factors can also contribute to bake time including the kind of bakeware you use and the temperature of your ingredients, that's why it's always best to know what signs to look for if things are baked, rather than relying solely on baking time - and it sounds like you were looking out for those signs!
I hope they turned out great for you 🙂
Jules
Louise says
When you say 3/4 stick butter, do you mean 3/4 of a cup or 3/4 of a stick of butter?
Jules Grasekamp says
Hi Louise,
3/4 of a stick, so 85g.
3/4 of a cup would be double that amount. (170g)
Hope this helps!
Jules
Jody says
These definitely are too thin. I'm going to have to make cake pops from it instead. They actually came out only 1/2 inch thick. I weighed my flour and ingredients, as I always do for every recipe. I used a 9x9 inch pan. It would have been better in a 8x8.
Jules Grasekamp says
Hi Jody,
Ah I have just seen your second comment saying you did use a kitchen scale. It might have been down to overmixing, so I'm hoping that might be the fix for you!
Sorry they didn't turn out for you!
Jules
Jody says
No worries, we loved it anyway! Taste was absolutely delicious!
Jody says
I just took mine out of the oven. It didnt rise at all. It's only about 1/2 thick. Is that how it's supposed to be?
I wish I had made it in an 8x8 inch pan for a thicker brownie.
Not sure if this is how thin it's supposed to be?
Jules Grasekamp says
Hi Jody,
No they definitely shouldn't be thin like that! The two main causes of this are inaccurate measuring of ingredients (happens regularly if using cups to measure instead of a kitchen scale), or overmixing the batter.
Especially in a recipe like this, if the dry ingredients are not accurately measured it can make a huge difference to the end result, so I strongly recommend using a scale if you didn't already.
I hope this helps and that your next batch turns out perfectly!
Jules
Jody says
I did use a scale as I always do when baking.
Maybe I overmixed it then?not sure.
I ended up cutting in half and making it 2 layers with cream cheese in between and on top. The taste was fabulous so I give it 5 stars for that alone!
Ashley says
Mine came out very short.. looking like the first brownie in your comparison pic! They still taste great tho! Would you say that's probably a flour measuring issue? As I didn't use a scale just cups!
Jody says
Mine came out thin as well. I weighed my flour and butter so in my opinion this should be baked in an 8x8 inch pan.
Jules Grasekamp says
Hi Ashley,
Oh no I'm sorry to hear your brownies didn't turn out how you hoped!
Yes I would definitely say this was down to the flour measurement. The difference in the amount of flour in the recipe was quite small, so just the tiniest discrepancy can. make a big difference to the height and texture of the brownie. I highly recommend using a kitchen scale for baking to give more consistent results.
The other thing that could cause flat brownies is overmixing the batter.
I hope this helps and that your next brownies turn out beautifully!
Jules
Jennifer says
My husband saw this somewhere on the internet and forwarded me your recipe to make. They turned out perfect, and he loves them!
Jules Grasekamp says
Thanks Jennifer! I'm so glad to hear youa nd your husband loved the red velvet brownies!
Thank you for trying my recipe and for taking the time to let me know 🙂
Jules
Heidi Welch says
Oh my goodness! These are the absolute best red velvet brownies I have ever had. Sweet, chocolatey moist and dense at the same time . The chewiness is what really won me over though. My family loved these too.
Jules Grasekamp says
Hi Heidi,
I'm so happy to hear how much you love the red velvet brownies! I put a lot of time into getting that texture juuuust right so it's really nice to hear that it is appreciated!
Thank you so much for trying my recipe and for taking the time to let me know you and your family loved them!
Jules
Susan says
Could you make these using an egg replacer?
Robert says
How we know recipe is american????? Because it's overpounded w sugar, only things you taste is sugar ,like any other American made cookies or pastry, what rest of world just laughed about, use half of sugar and result be the same, just less adhd kids and less diabetes
Bry says
I’m screaming. She’s Scottish
Jules Grasekamp says
Haha thank you Bry, you beat me to it!
Yes Robert, as mentioned by another commenter, I am actually not American, but Scottish. I am sorry to hear you thought the brownies were too sweet. May I ask, did you bake them and dislike the flavor? Or are you just speculating about the sugar content based on the recipe? If you made them and thought they were too sweet, you are certainly welcome to make the recipe with less sugar to suit your taste next time 🙂
All the best,
Jules
P.S. I don't believe ADHD is caused by sugar consumption 😉
Belinda says
Hi Jules!
My husband sent this recipe to me and said instead of a birthday cake he wanted these red velvet brownies. I made them and he LOVED them! They were delicious!
Jules Grasekamp says
Hi Belinda,
I'm so happy to hear your husband loved the brownies! Thank you for trying my recipe and for taking the time to let me know you enjoyed it.
I hope he had a lovely birthday!
Jules
Carissa says
I’ve never put vinegar in brownies before. Curious what that does for the recipe?
Jules Grasekamp says
Hi Carissa,
The vinegar is in there because it is a classic ingredient in red velvet cake, which these brownies are based on. In red velvet cake, the vinegar interacts with baking soda to bubble up and act as a leavening agent to give red velvet cake its texture.
Thought this brownie recipe doesn't contain baking soda (so they can be nice and fudgy), the vinegar gives a very subtle tangy flavor as a nod to red velvet cake.
In the brownies it doesn't add anything but flavor, so if you want to you can leave it out and it won't be detrimental to the recipe.
Hope this helps!
Jules
Aia says
Haven’t tried it yet, but i was wondering, was it was intentional to leave out baking powder? Just that I very rarely see baking powder or soda skipped in a recipe and was wondering why. Thanks, and l’m excited to try this based on all the other comments!
Jules Grasekamp says
Hi Aia,
That's a great question! Yes it is very intentional to leave the baking powder out to help give these a fudgy brownie texture. Baking soda and baking powder are both leavening agents and their role in baking is to make things rise. Adding a leavening agent to this recipe would make them more fluffy and cakey. I wanted them to be a perfect mix between red velvet cake and fudgy brownies, rather than just squares of red velvet cake. That's why I left out the baking powder.
I hope that explains it well enough and answers your question!
Jules
Izzy says
More cake like than brownie… measured everything using the scales and made sure I didn’t over mix but somehow they look nothing like yours… might have to try again…
Jules Grasekamp says
Hi Izzy,
Aw I'm sorry to hear the texture didn't come out quite right. I'm happy to help you troubleshoot.
Did your batter look the same as in my video before it went into the oven?
Jules
Vee Vee says
Hi Jules! If I'll be making it into a red velvet cheesecake brownies, how long will be the baking time for? Also what will be the recommended multiplication of the recipe for a 9x13in pan?
Jules Grasekamp says
Hi Veevee,
If you are swirling the cheesecake into the top of the brownies the bake time shouldn't vary from the original bake time of the brownies.
As every oven is different though, I still recommend checking your brownies with a skewer or toothpick. Try to test in a spot without cheesecake. It should come out with just moist crumbs on it.
Enjoy the brownies!
Jules
Will says
I am making these tomorrow and my taste buds can't wait. I do have one question. Can I line my pan with aluminum foil instead of parchment paper? That's what I typically do with brownies, but I don't want to mess up your recipe if it drastically changes the time to bake or temperature.
Jules Grasekamp says
Hi Will,
You can totally use aluminium foil to line the pan! It shouldn't affect the bake at all, but it may be slightly more likely to stick to the brownies which is why I prefer parchment paper - but you can use whichever you prefer.
I hope you love the brownies!
Jules
Joy says
Hello I just made these brownies and I haven’t tried them yet but they took 1hour to fully bake and was wondering if there was something I did wrong or a reason why the only thing I know differed from the recipe was a circular glass pan instead of square but it took triple the time the recipe said so that doesn’t feel like it would make such a drastic change but I’m a new baker so I may be wrong and would love to learn what went wrong for next time
Jules Grasekamp says
Hi Joy,
I hope your red velvet brownies turned out beautifully! This is probably because you were using a glass pan rather than a metal one. Glass takes a lot longer to heat up than metal does, so it means things take longer to bake when using glass bakeware.
The good news is it sounds like you had great instincts by leaving them in there until they seemed done! Bake times will always vary depending on different ovens and bakeware, so learning how to tell when your baked goods are done by look and feel is an invaluable skill! Hope you love the brownies!
Jules