
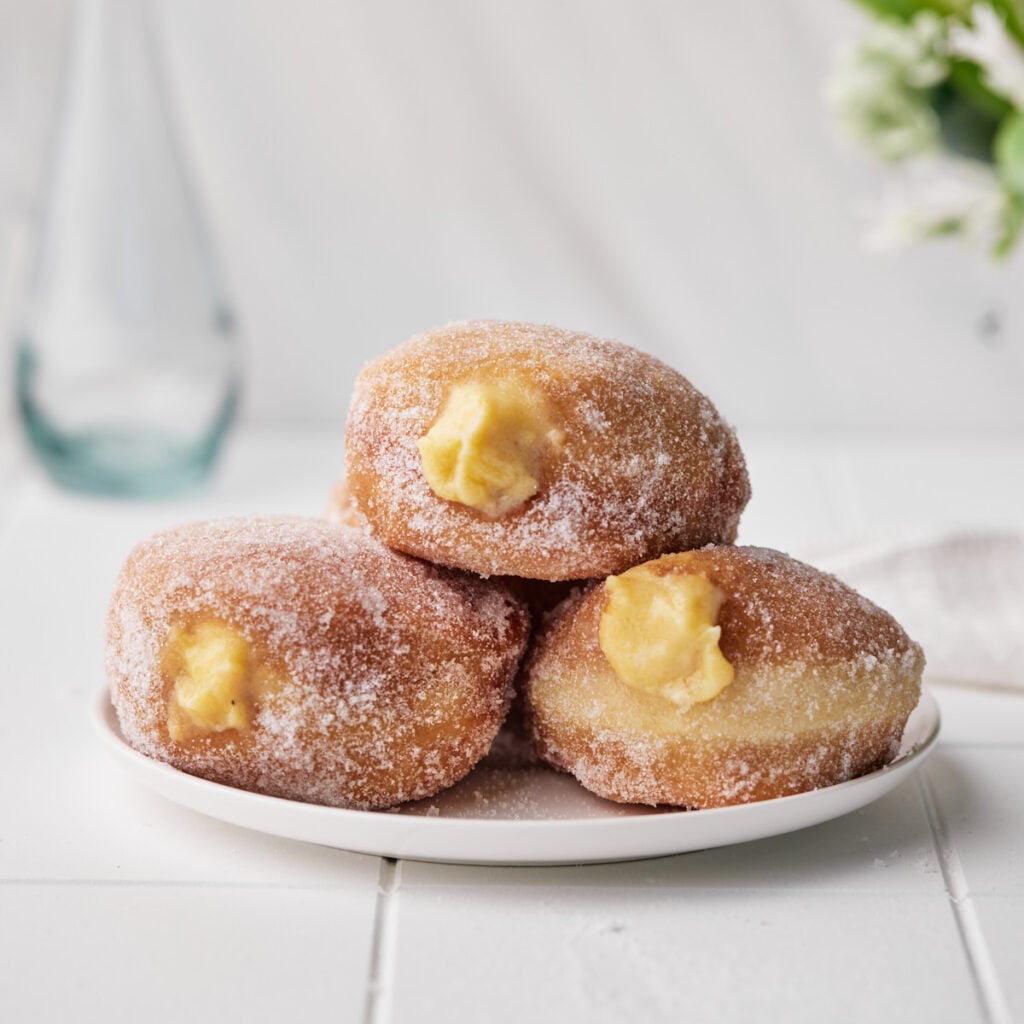
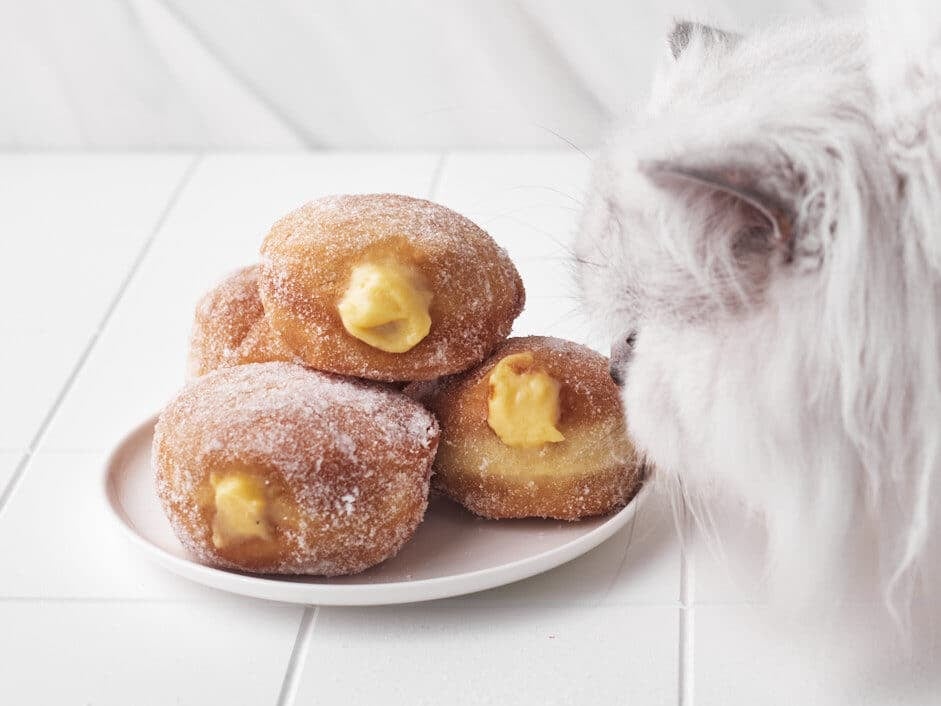
These homemade custard donuts are irresistibly soft and fluffy, fried until golden, rolled in sugar, and filled until bursting with silky vanilla custard. They take a little time, but that first bite is absolutely worth it!
Quick Look: Custard Donut Recipe
Fresh, fried donuts filled with vanilla pastry cream and rolled in sugar.
☆ Why make THIS version? This recipe goes beyond fixed timings, with clear visual cues for properly kneaded and proofed dough, controlled frying, and a tested pastry cream that stays silky but pipeable.
SUMMARIZE AND SAVE THIS POST ON
I put off making fried donuts for years because deep-frying seemed messy, complicated, and a bit of a faff. Once I finally tried it, though, I was surprised by how straightforward it actually was - and you don't even need a deep-fat fryer.
There's nothing better than freshly fried homemade donuts. They have an ultra-soft, fluffy texture that store-bought donuts just can't compare to. Add a silky homemade custard filling, and I'm in donut heaven!
There are a few key things to watch when working with yeasted dough and frying it, but I'll show you the visual cues at every stage so your donuts rise beautifully and fry evenly without becoming dense or greasy.
Jump to:
Key Ingredients
The dough and pastry cream share several ingredients, but these are the ones that make the biggest difference to the finished donuts.
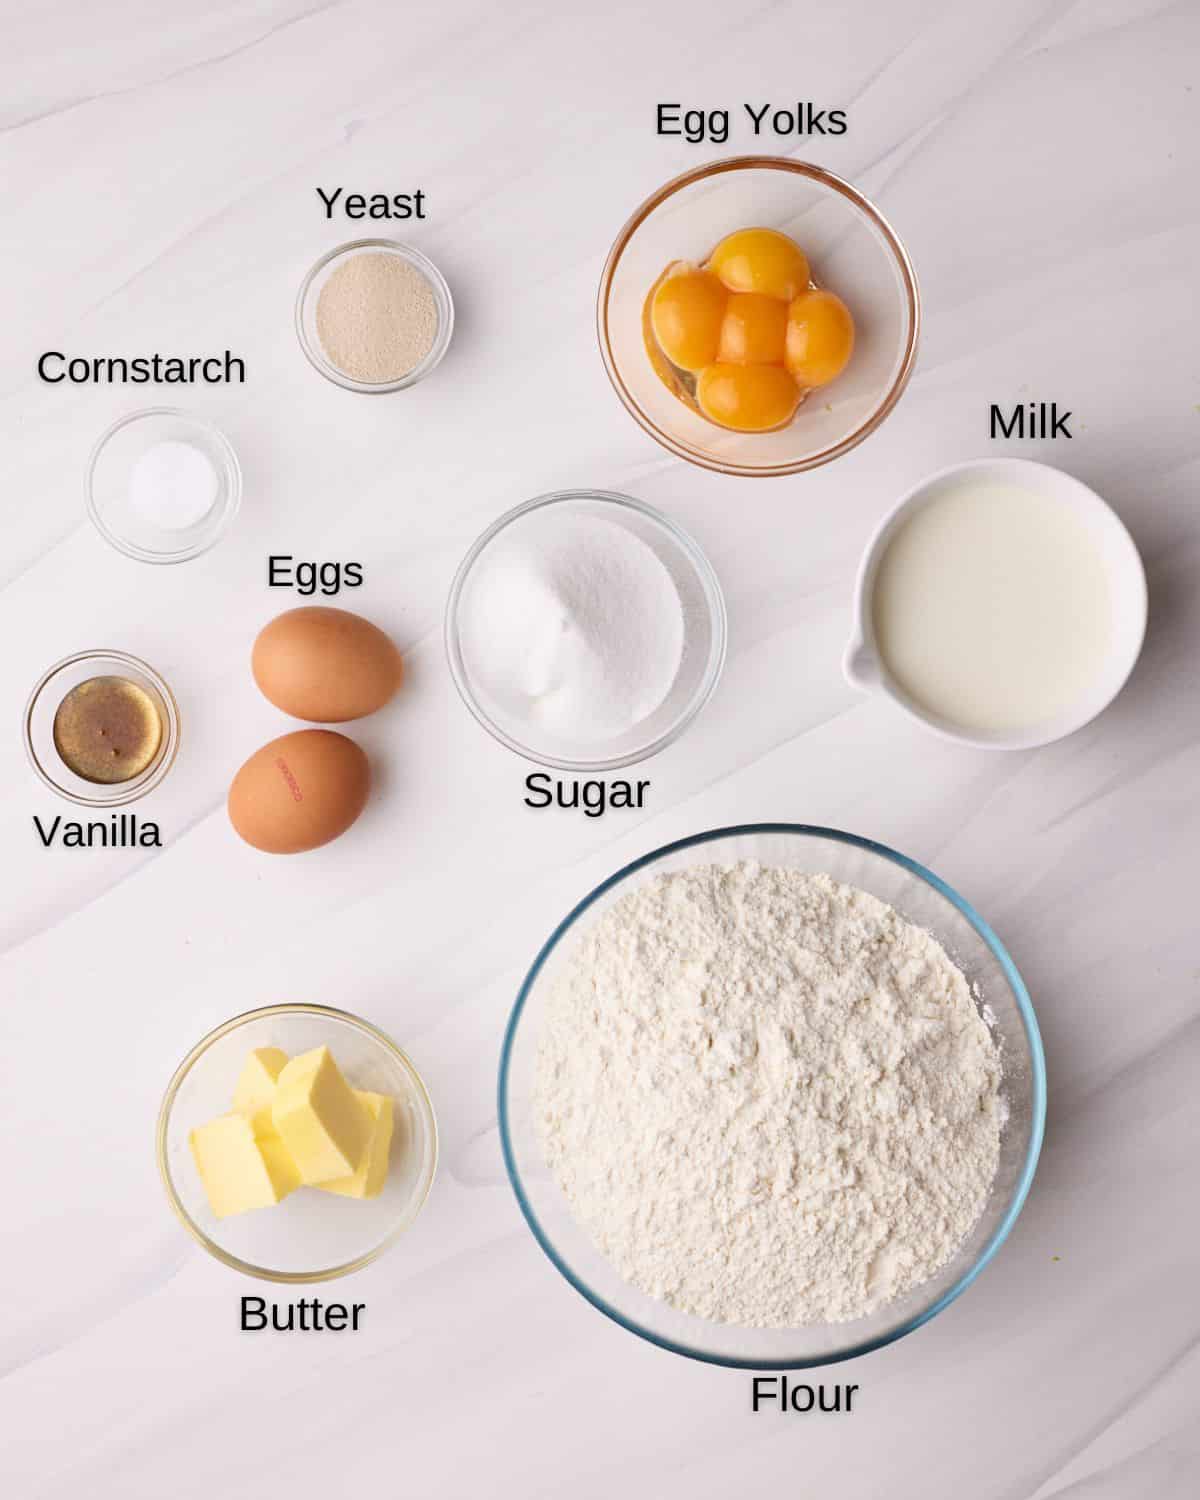
- All-purpose Flour - Plain flour in the UK. Weigh it if possible and resist adding too much extra flour; the dough should be soft and slightly tacky rather than dry.
- Whole Milk - Full-fat milk gives the pastry cream its rich, creamy texture.
- Active dry yeast should become foamy in the warm milk; instant yeast can be added without activating it first.
- Active Dry Yeast - It should become foamy in the warm milk; instant yeast can be added without activating it first.
- Eggs - Whole eggs enrich the donut dough, while egg yolks give the homemade pastry cream its rich flavour and colour. (See recipes to use leftover egg whites).
- Cornstarch - This thickens the pastry cream so it remains silky but is stable enough to pipe inside the donuts without oozing out.
- Oil for frying - Choose a neutral oil with a high smoke point, such as vegetable oil, sunflower oil, or canola oil. You will need enough to fill the pan by at least 2 inches.
See recipe card for quantities.
How To Make Custard Donuts

Plan Your Timing
Allow approximately 4-5 hours from start to finish, although only about one hour is hands-on. These stages overlap, so begin with the pastry cream and make the donut dough while it chills.
- Make the pastry cream: 20 minutes, plus at least 2 hours chilling
- Mix and first-proof the dough: approximately 1½-2½ hours
- Cut and second-proof the donuts: approximately 1 hour
- Fry, cool and fill: approximately 45-60 minutes
To break up the work, make the pastry cream the day before and keep it covered in the refrigerator.
How To Make The Custard Filling
Make the pastry cream at least two hours ahead so it has time to chill completely. You can also prepare it the day before for a richer vanilla flavour. For more detailed guidance and troubleshooting, see my full vanilla pastry cream recipe.
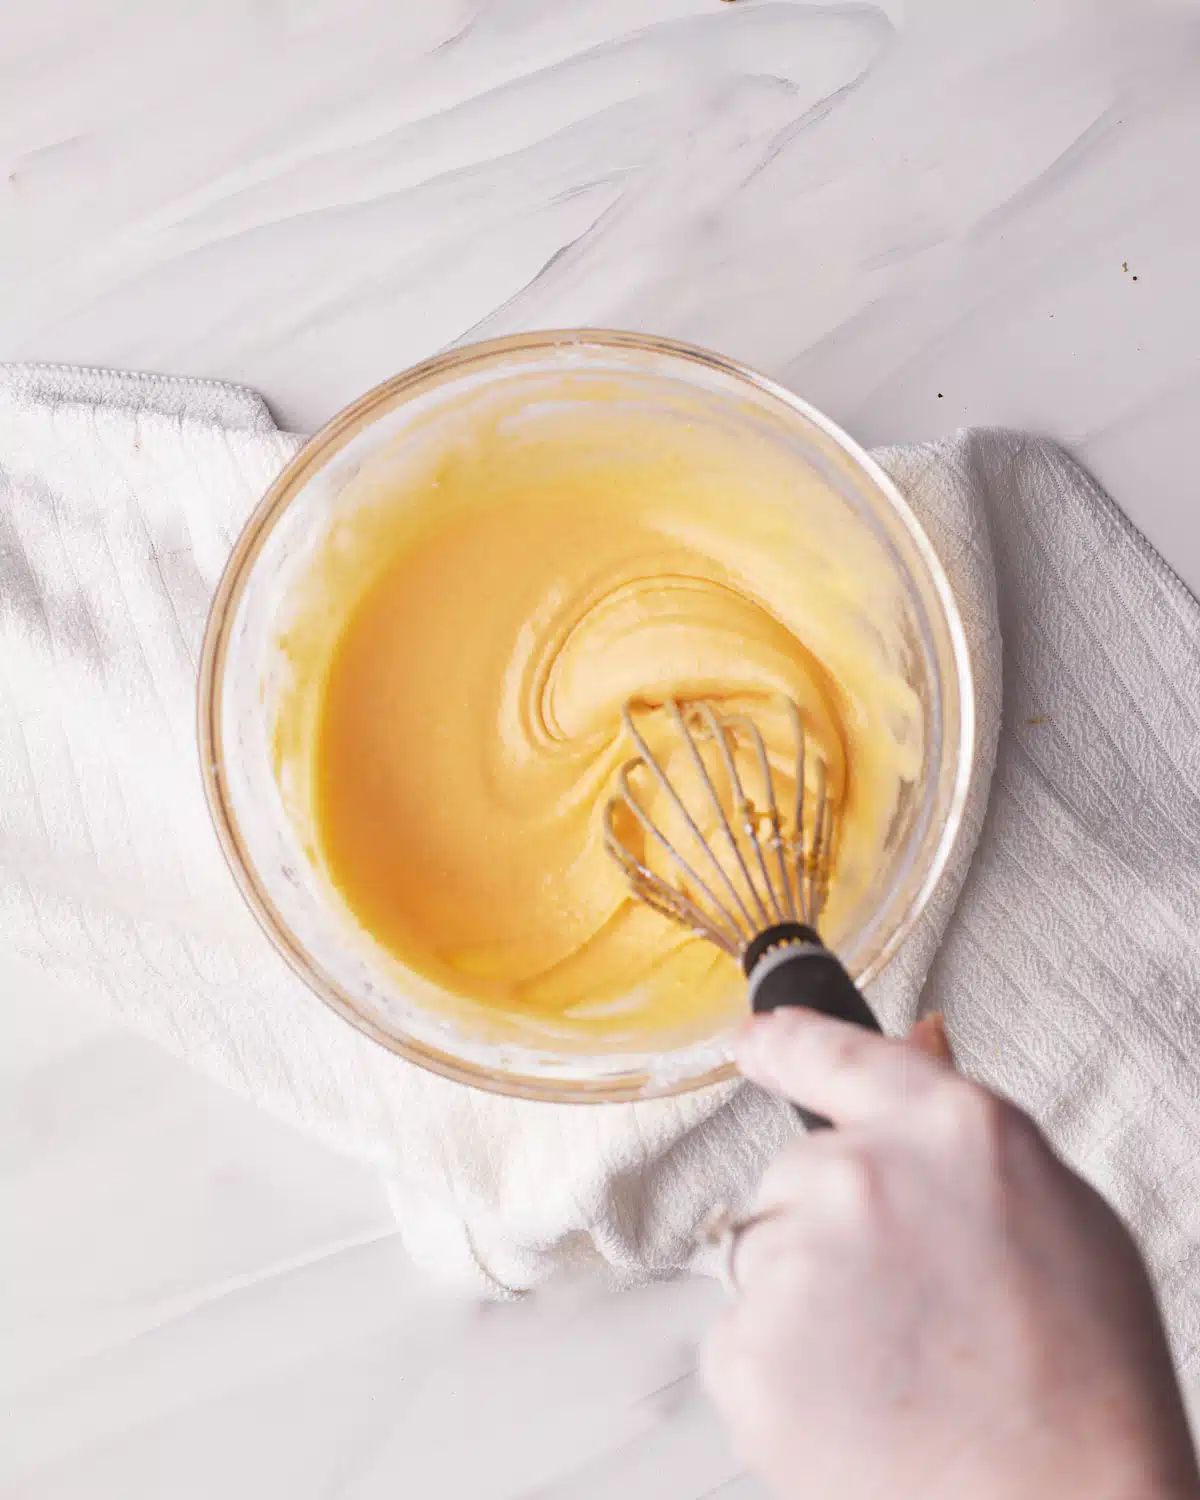
- Whisk the egg yolks, sugar and cornstarch until pale, thick and smooth.
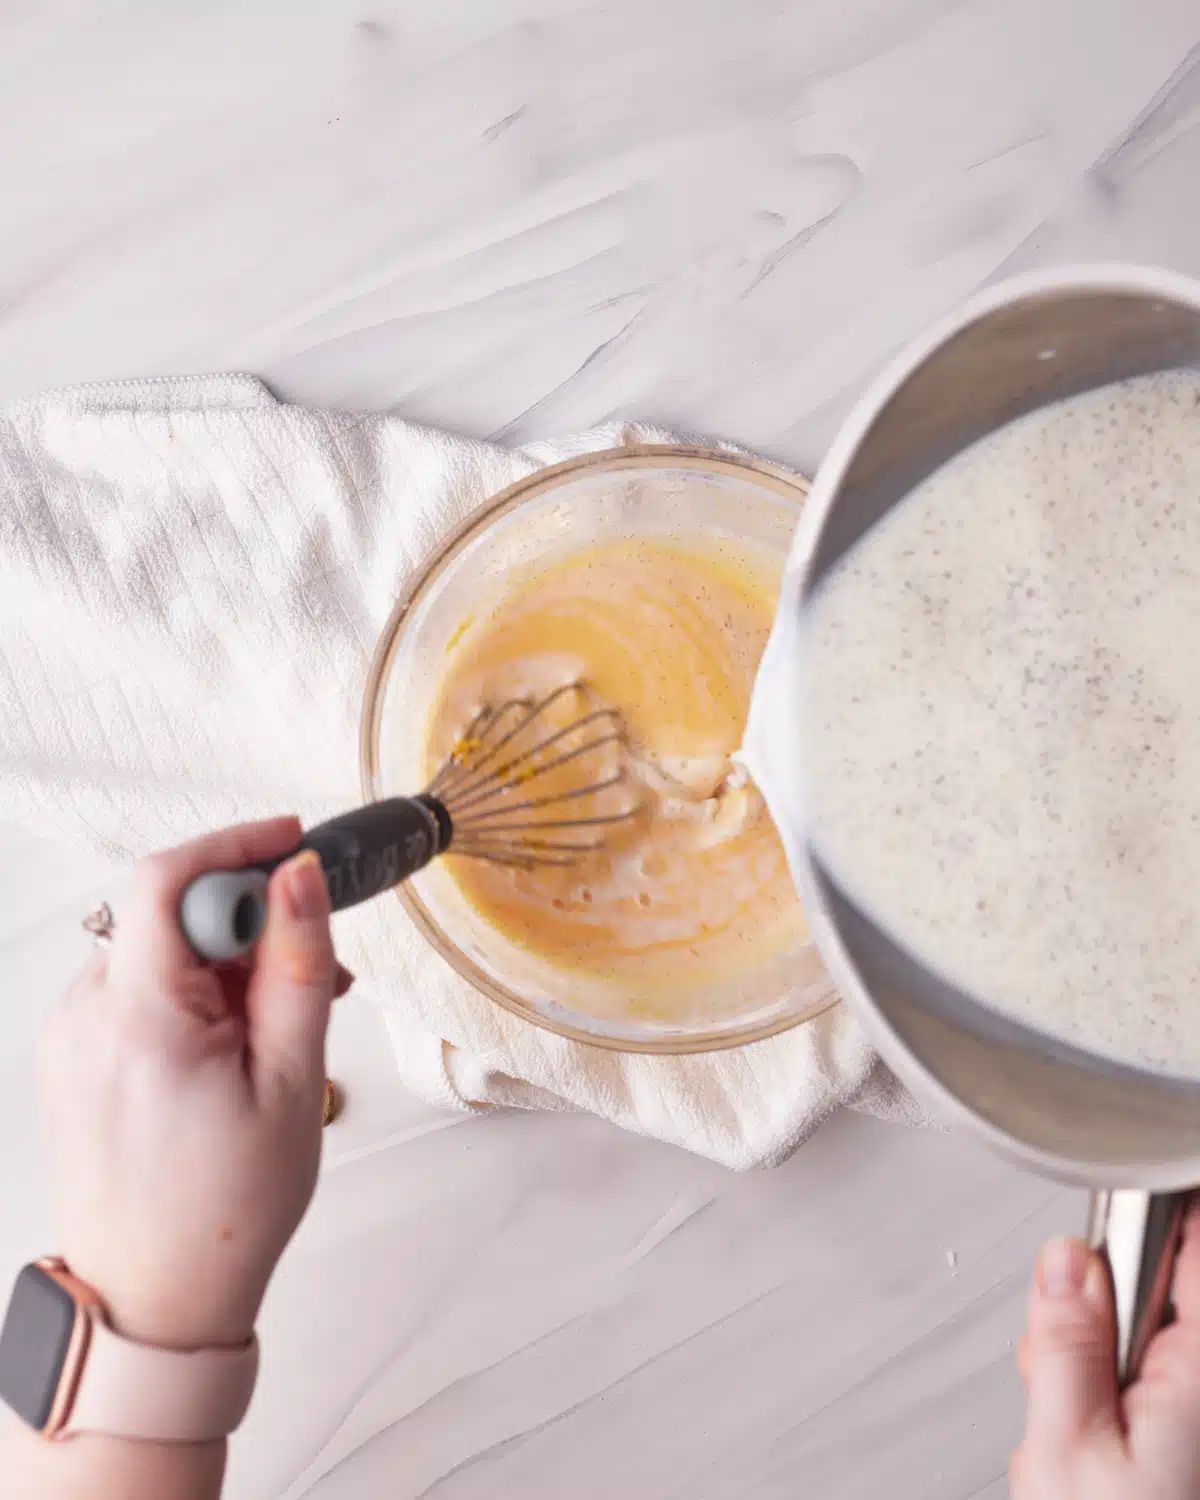
- Heat the milk until scalding, then gradually drizzle it into the egg mixture while whisking constantly.
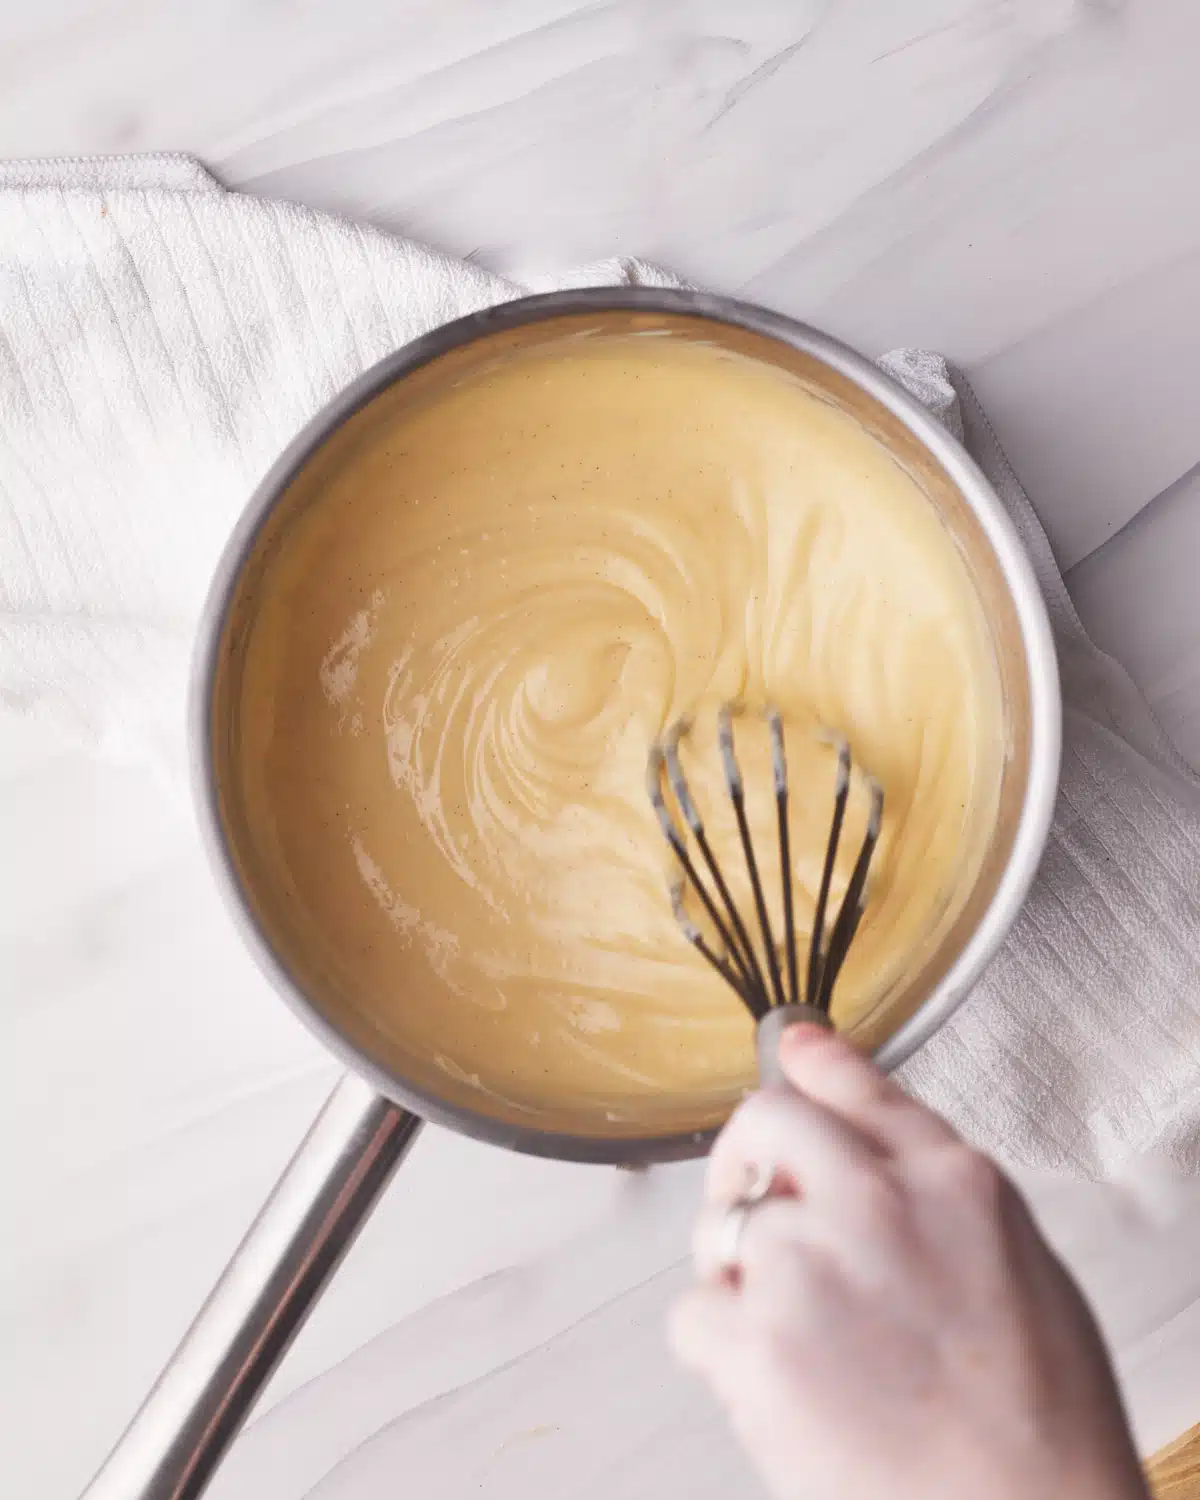
- Return everything to the saucepan and cook over medium-low heat, whisking constantly. It will thicken and begin to boil with thick bubbles on the surface. Let it boil for 1-2 minutes to activate the cornstarch fully.
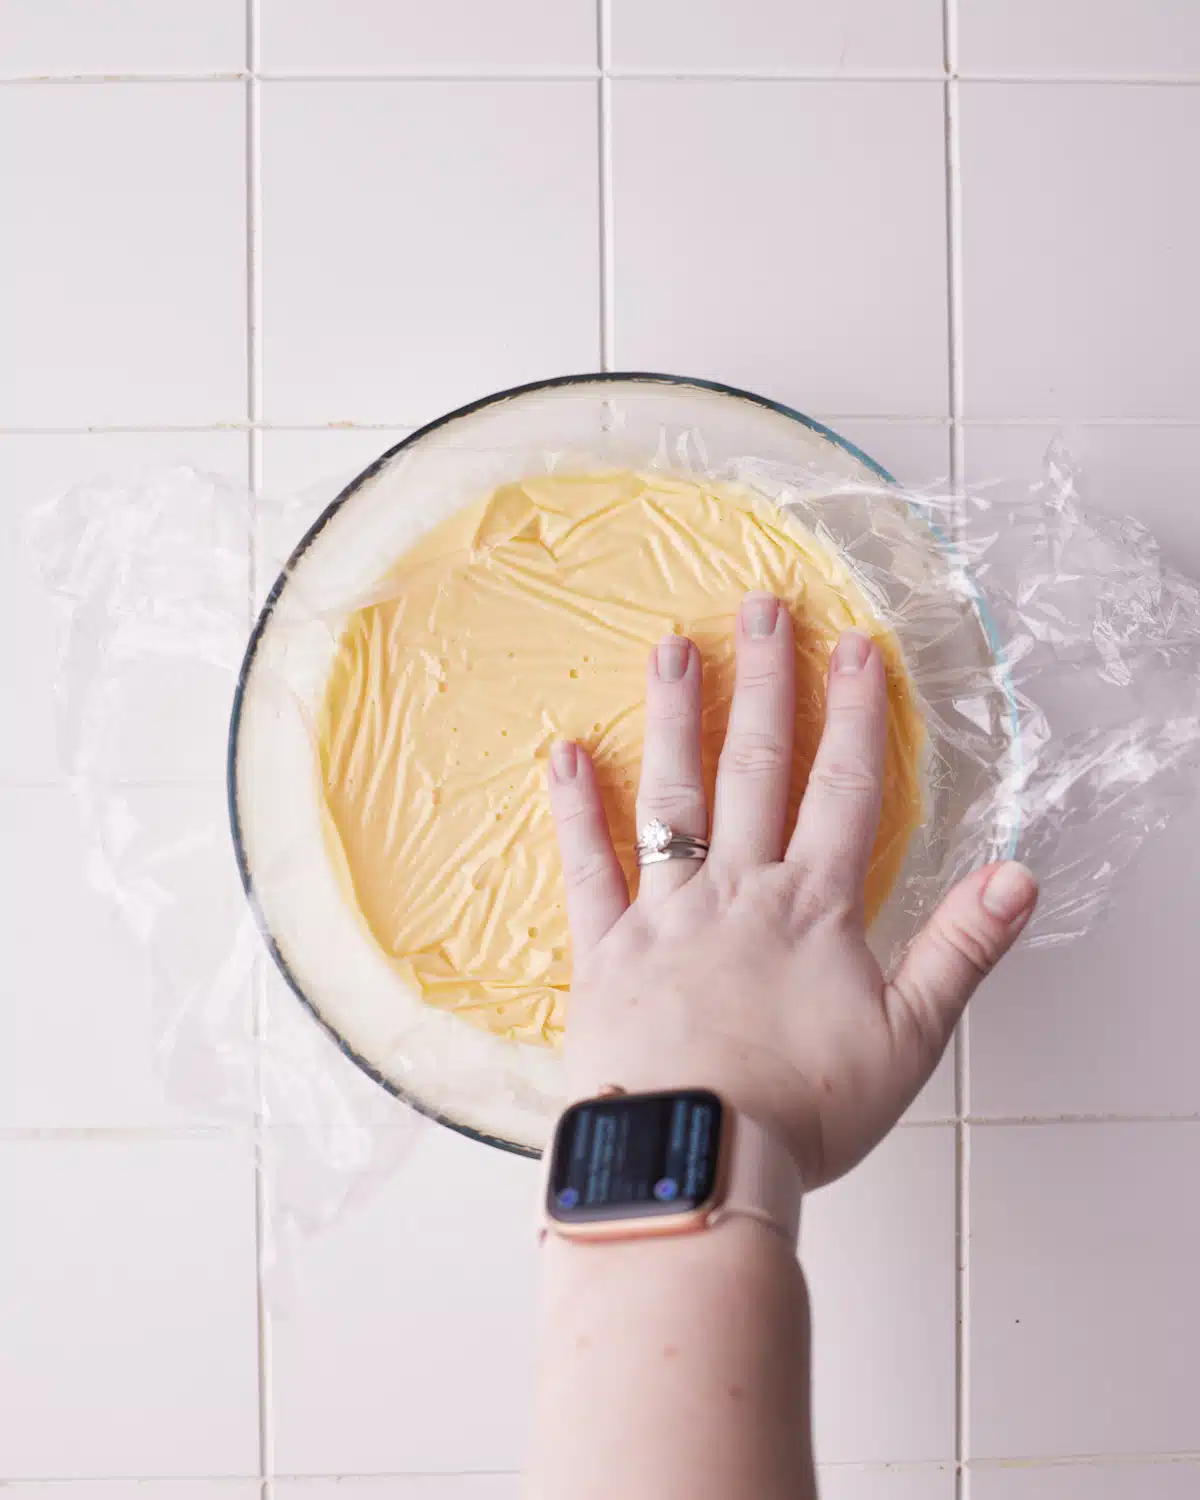
- Remove from the heat and whisk in the vanilla, salt, and butter. Cover with plastic wrap touching the surface of the custard, then chill in the fridge for at least two hours or until ready to use.
How to Make Yeast Donuts
This method was developed using a stand mixer, as the soft, enriched dough takes some work to knead. You can knead it by hand instead, but it will take longer - use the appearance of the dough and the windowpane test rather than relying on an exact kneading time.
Activate the Yeast
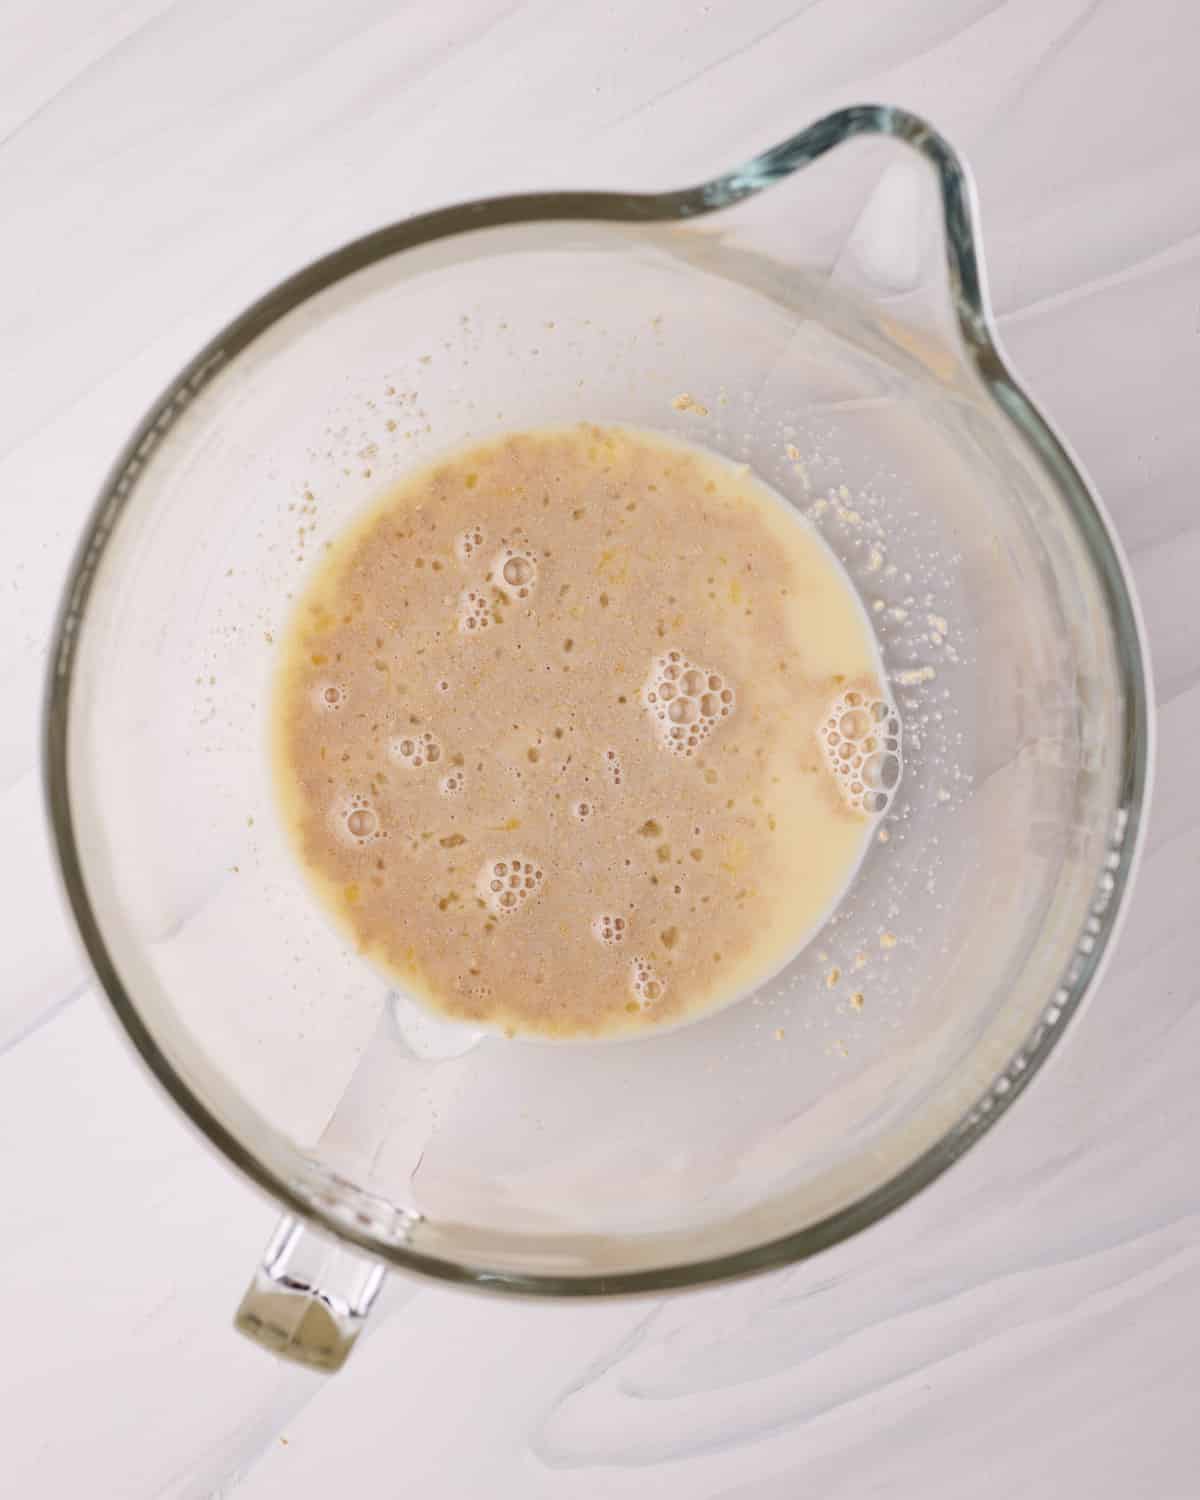
Warm the milk until it feels lukewarm, then stir in one tablespoon of the sugar and the active dry yeast. Leave it for 5-10 minutes, until a foamy layer forms on the surface - this tells us the yeast is alive and working. If nothing happens, the yeast may no longer be active or the milk may have been too hot.
If you are using instant yeast you can skip the activation and add it straight in with the flour.
Put the remaining sugar into the bowl of a stand mixer along with the eggs and salt. Once the yeast has activated, add the milk/yeast mixture to the bowl and mix everything together until combined.
Mix and Knead the Dough
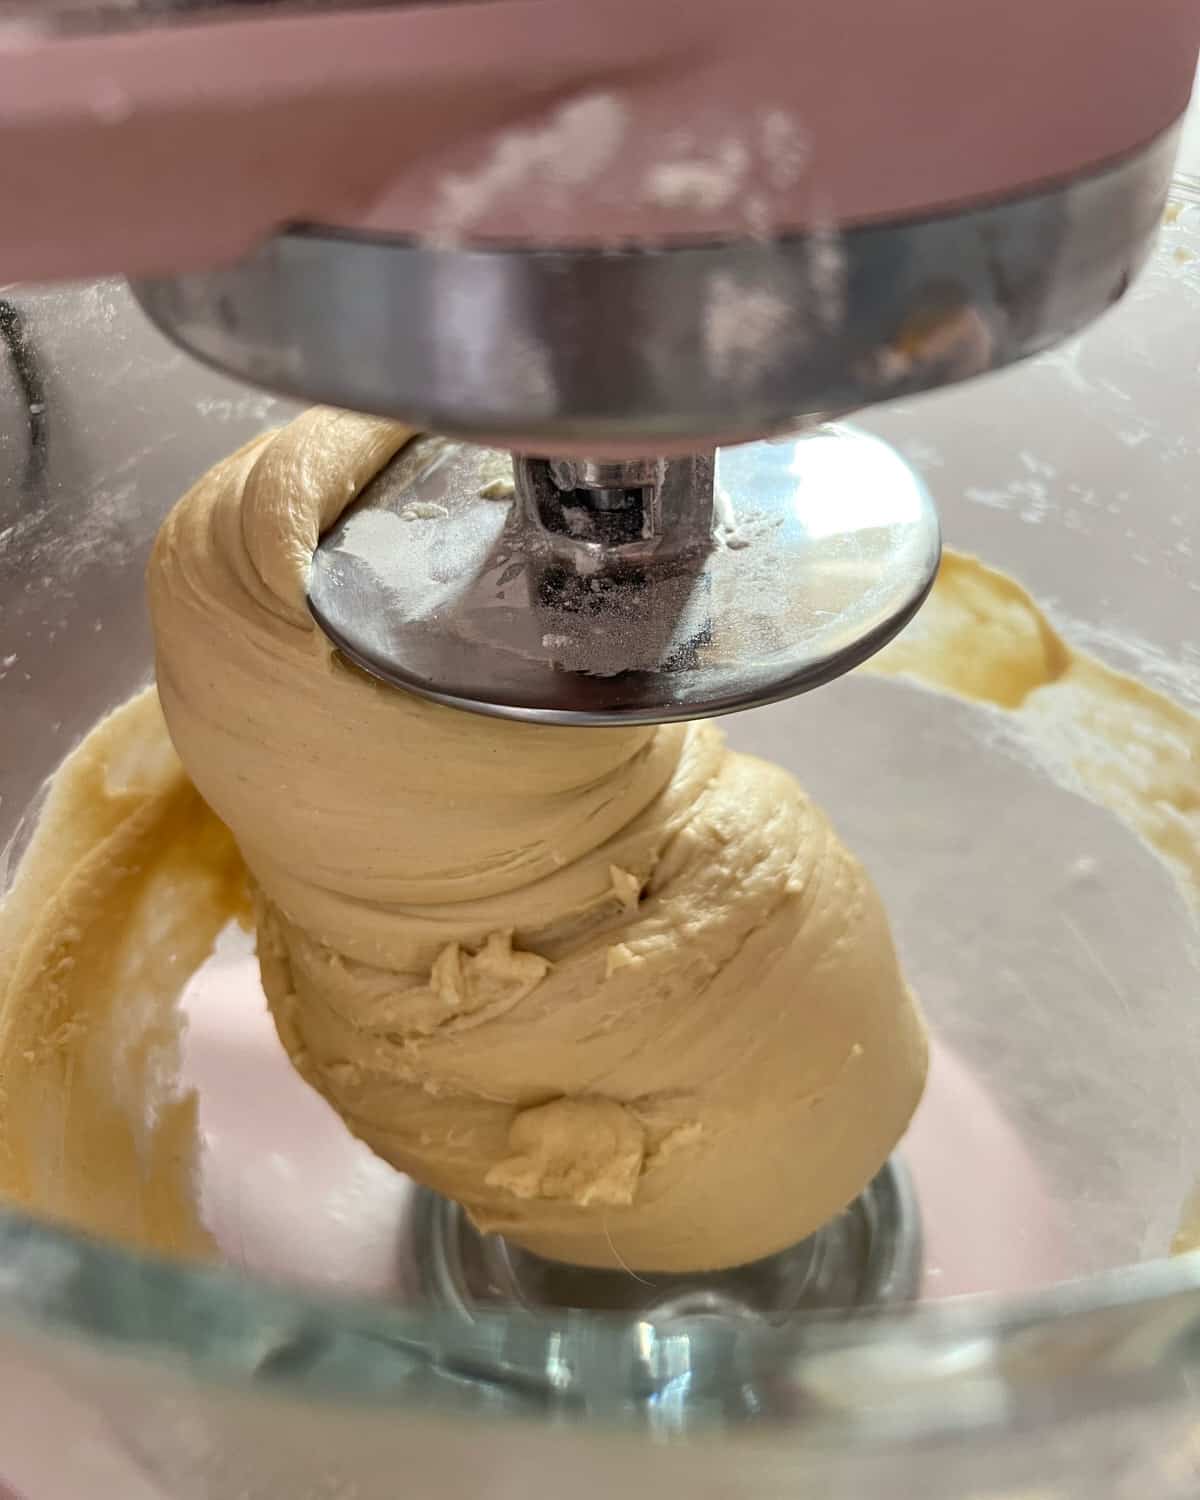
Add the flour to the bowl and mix on low speed until a rough dough forms, then slowly pour in the melted, cooled butter.
Knead on medium speed for approximately 5 minutes or until it looks smooth and is pulling away from the sides of the bowl. If it seems too wet, add an extra tablespoon of flour and keep kneading.
Tip the dough out onto a lightly floured surface and briefly knead it by hand until it is smooth and can form into a ball without sticking to your hands.
Use the windowpane test below to check whether the dough has been kneaded enough.
visual cue
The Windowpane Test
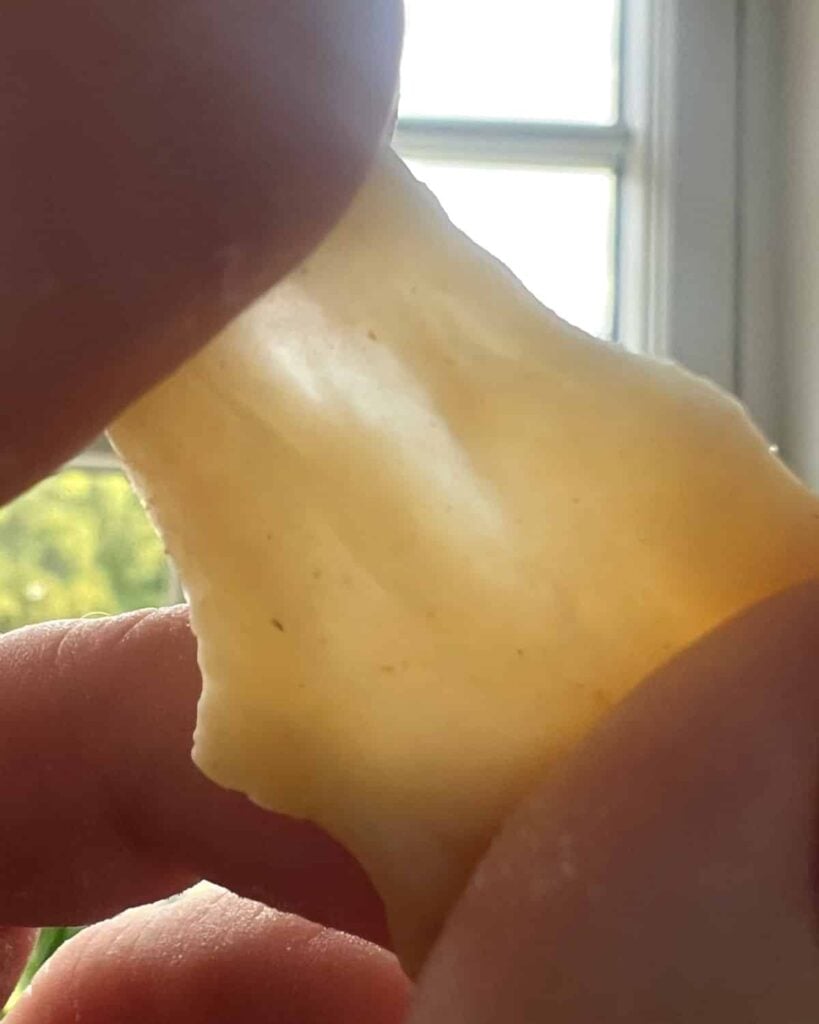
Kneading creates stretchy gluten strands that act like a little net, holding onto the bubbles made by the yeast. This is what helps the donuts puff up and stay light rather than spreading or collapsing.
To test if it's developed enough, pinch off a small piece of dough and gently stretch it between your fingertips. It is ready when you can stretch it thin enough to see light through it without it breaking.
If it tears straight away, knead for another minute or two and test again.
First Proof
Shape the dough into a ball and place it in a large bowl that has been greased. Cover with plastic wrap and leave on the counter to proof until it doubles in size (1-2 hours depending on the temperature of the room).
To check if the dough has proved enough, gently press it with one finger,
Press the dough gently with one finger to check it - once it's ready it will spring back slowly and leave a slight indentation.
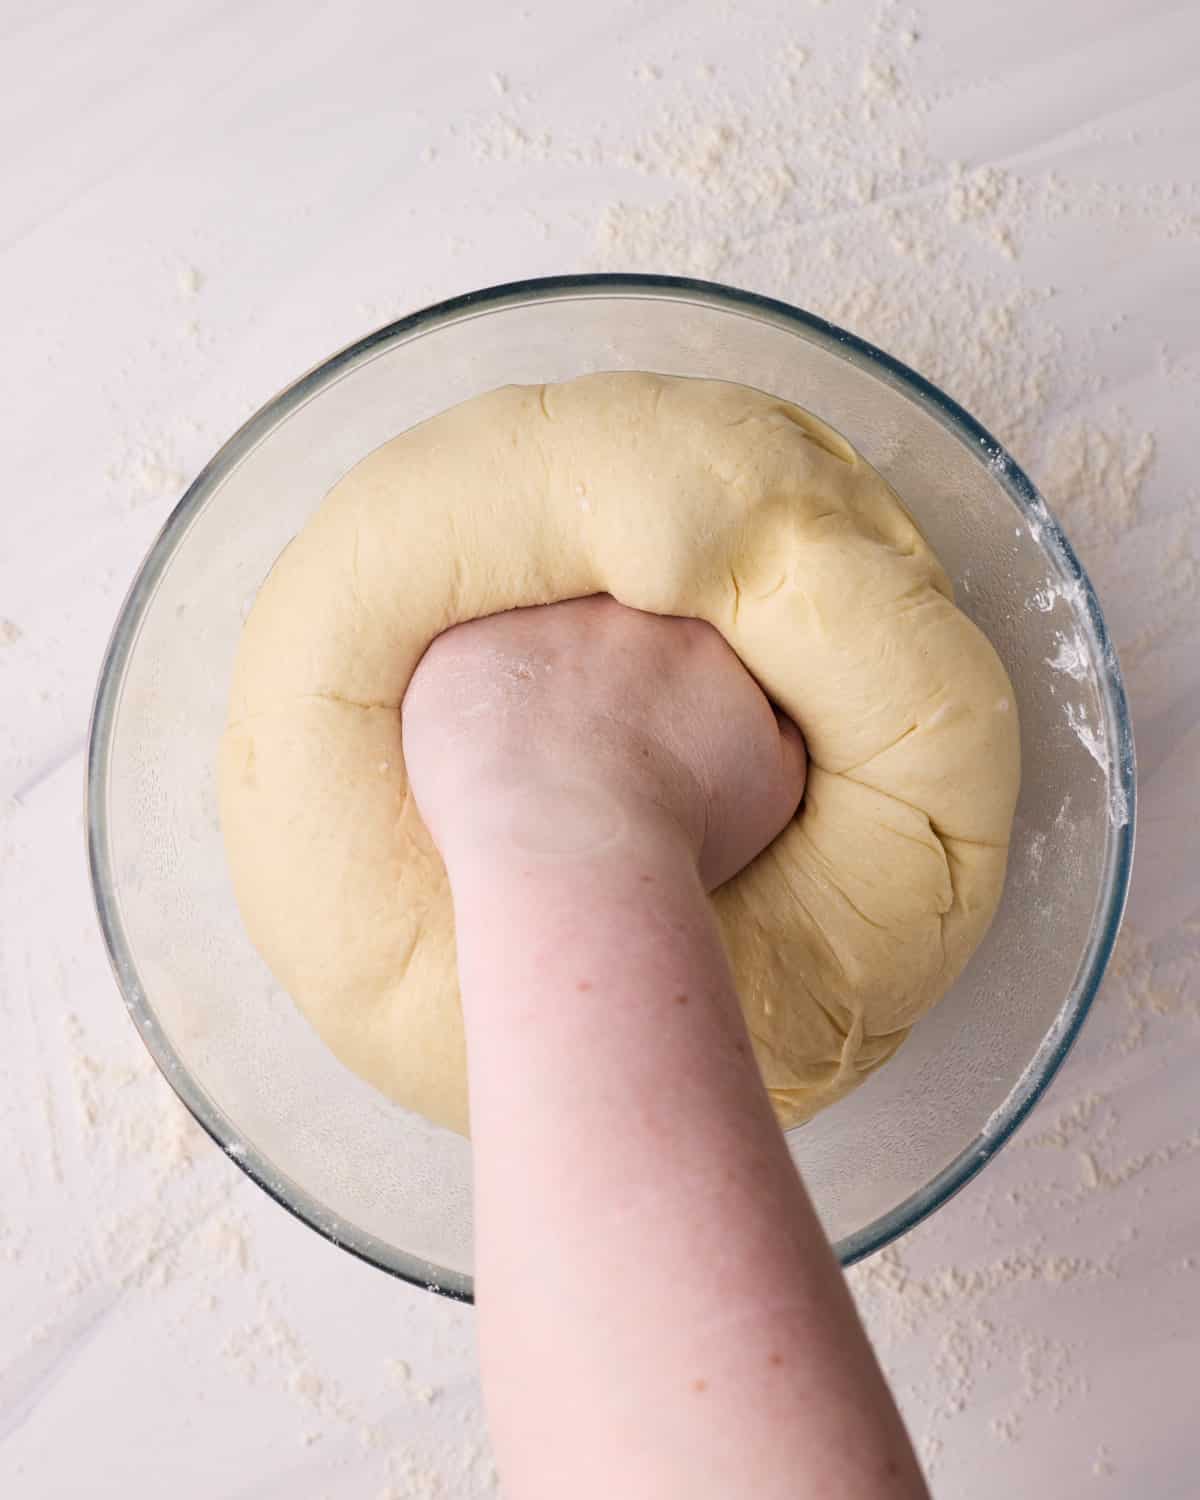
Once it's ready, give it a satisfying punch in the centre to release the built-up gas. Tip it onto a lightly floured work surface and gently press out any remaining large air pockets, then roll it to approximately ½ inch thick.
visual cue
How To Know When Dough Is Fully Proofed
Proofing times are only a guide, as the temperature of your kitchen can make the dough rise faster or slower. Gently press a lightly floured finger into the dough to check it.
- Underproofed dough will spring back immediately and the indentation will disappear.
- Perfectly proofed dough will spring back slowly while leaving a slight indentation.
- Overproofed dough won't spring back and may feel fragile or begin to deflate when touched.
Cut and Second-Proof the Donuts
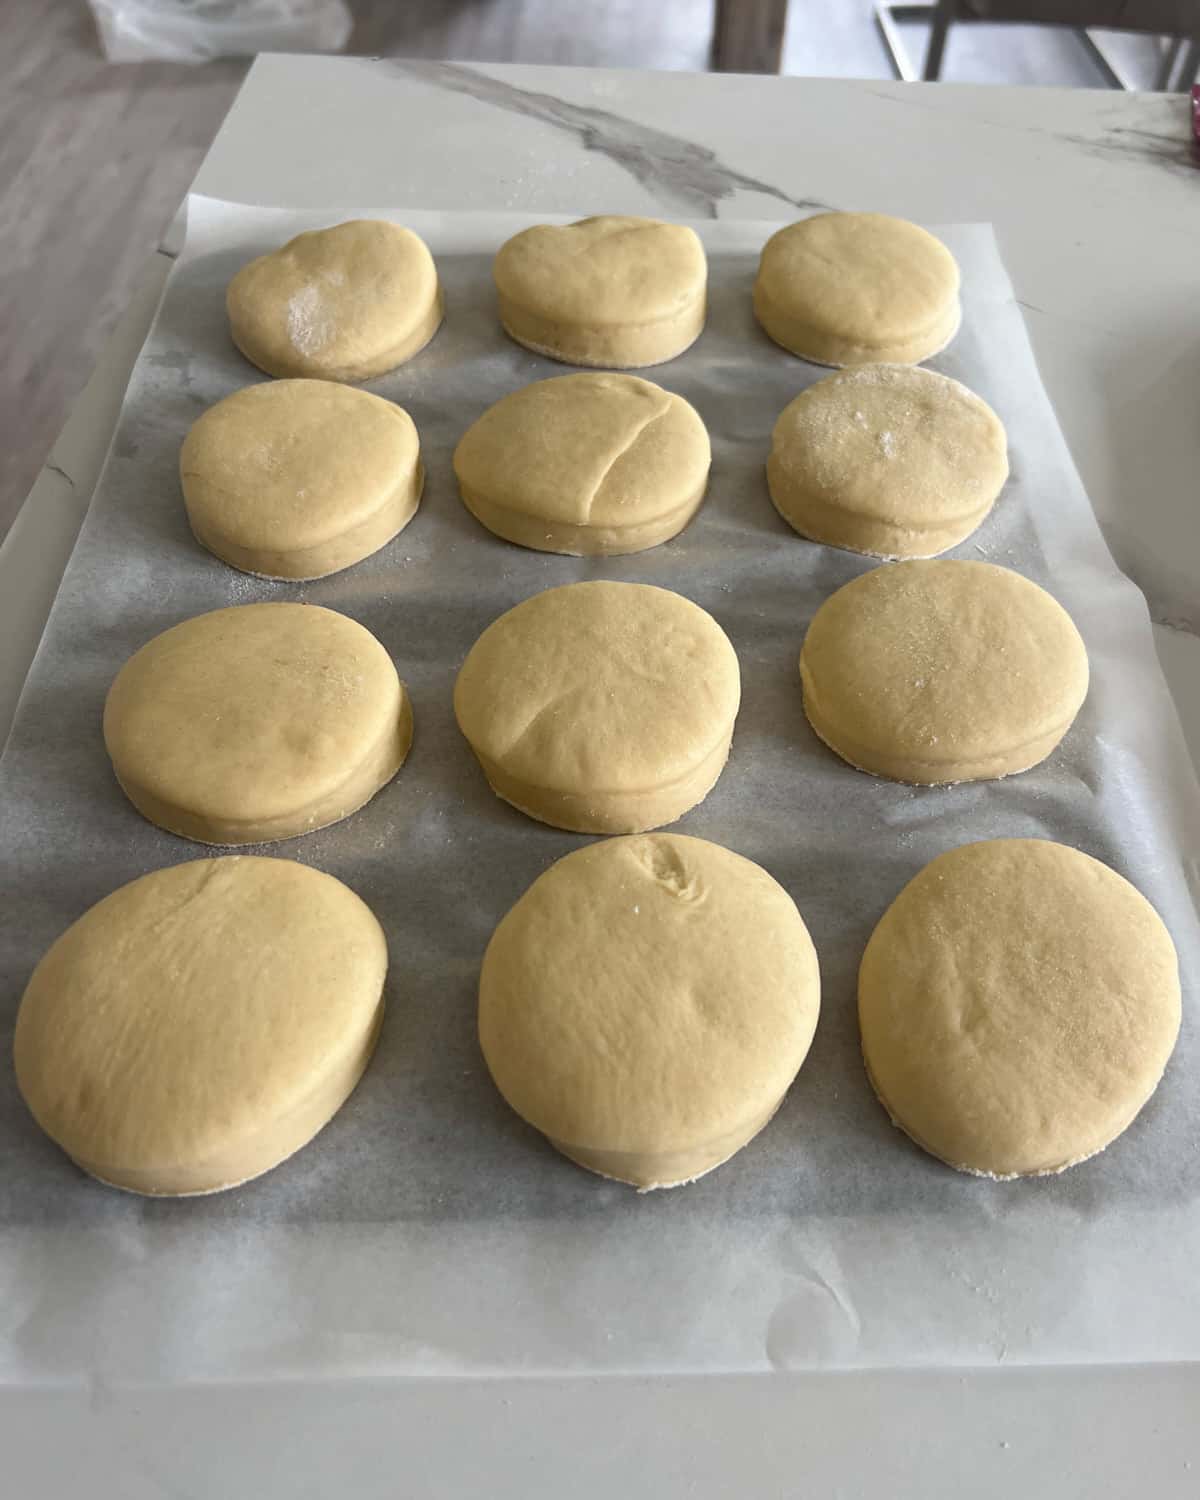
Cut out rounds with a 2½-3-inch cutter, pressing straight down without twisting. Place each donut on its own small square of parchment paper, leaving space between them. You can re-roll the scraps, but only once, as overworking the dough develops the gluten and makes the donuts tough.
Cover loosely with a kitchen towel or plastic wrap and leave to proof for approximately 45 minutes. You can use the same finger indent test from the first proof to check if they are ready to be turned into fluffy donuts.
Fry and Coat the Donuts
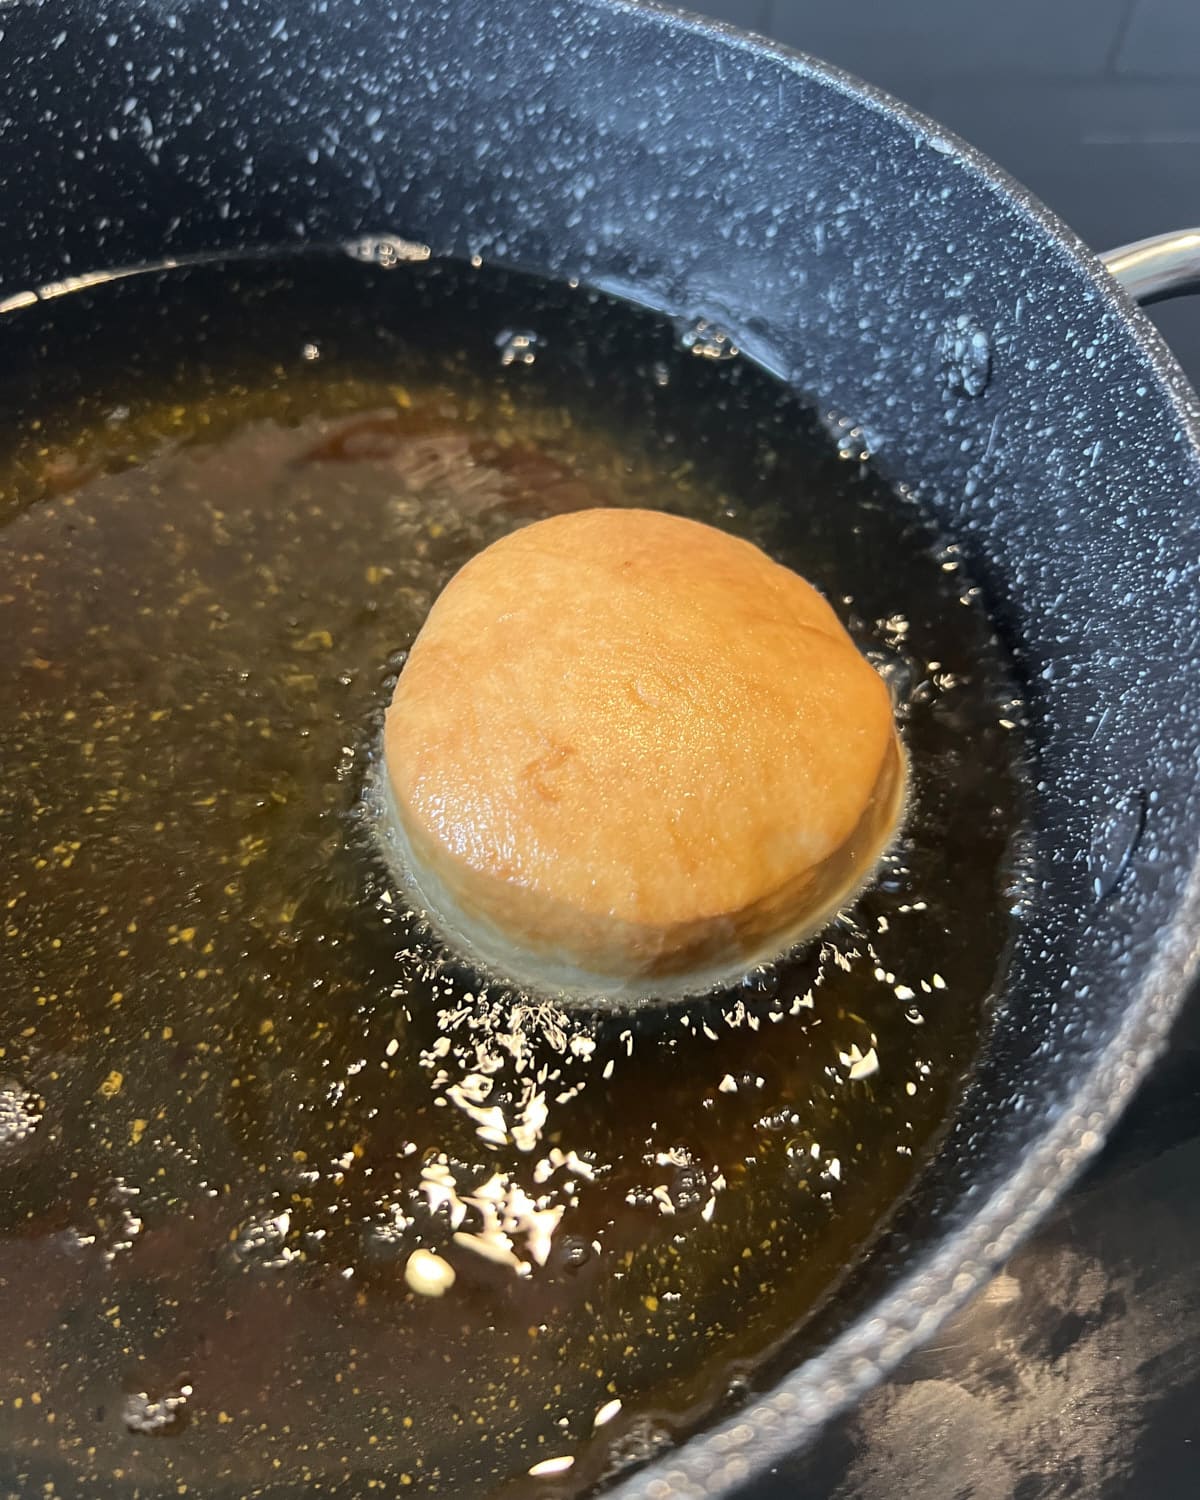
In the last 10 minutes of the proof, prepare your frying oil. Pour at least 2 inches of oil into a deep saucepan and heat to about 350°F (175°C).
Use the parchment squares to lower two or three donuts gently towards the oil, then carefully slide them off without pressing or deflating them. It's best to fry just 2 or 3 donuts at a time for better control and to stop the oil temperature from fluctuating drastically.
Let the donuts to bob around and fry for a minute or two, checking the underside regularly. Once the bottom looks lightly golden brown, flip the donut and fry the other side until the color matches.
Let the oil to reheat to 350°F (175°C) between batches. Fry one test donut first and cut it open after cooling slightly to check that the centre is cooked before continuing.
Coat the Donuts in Sugar
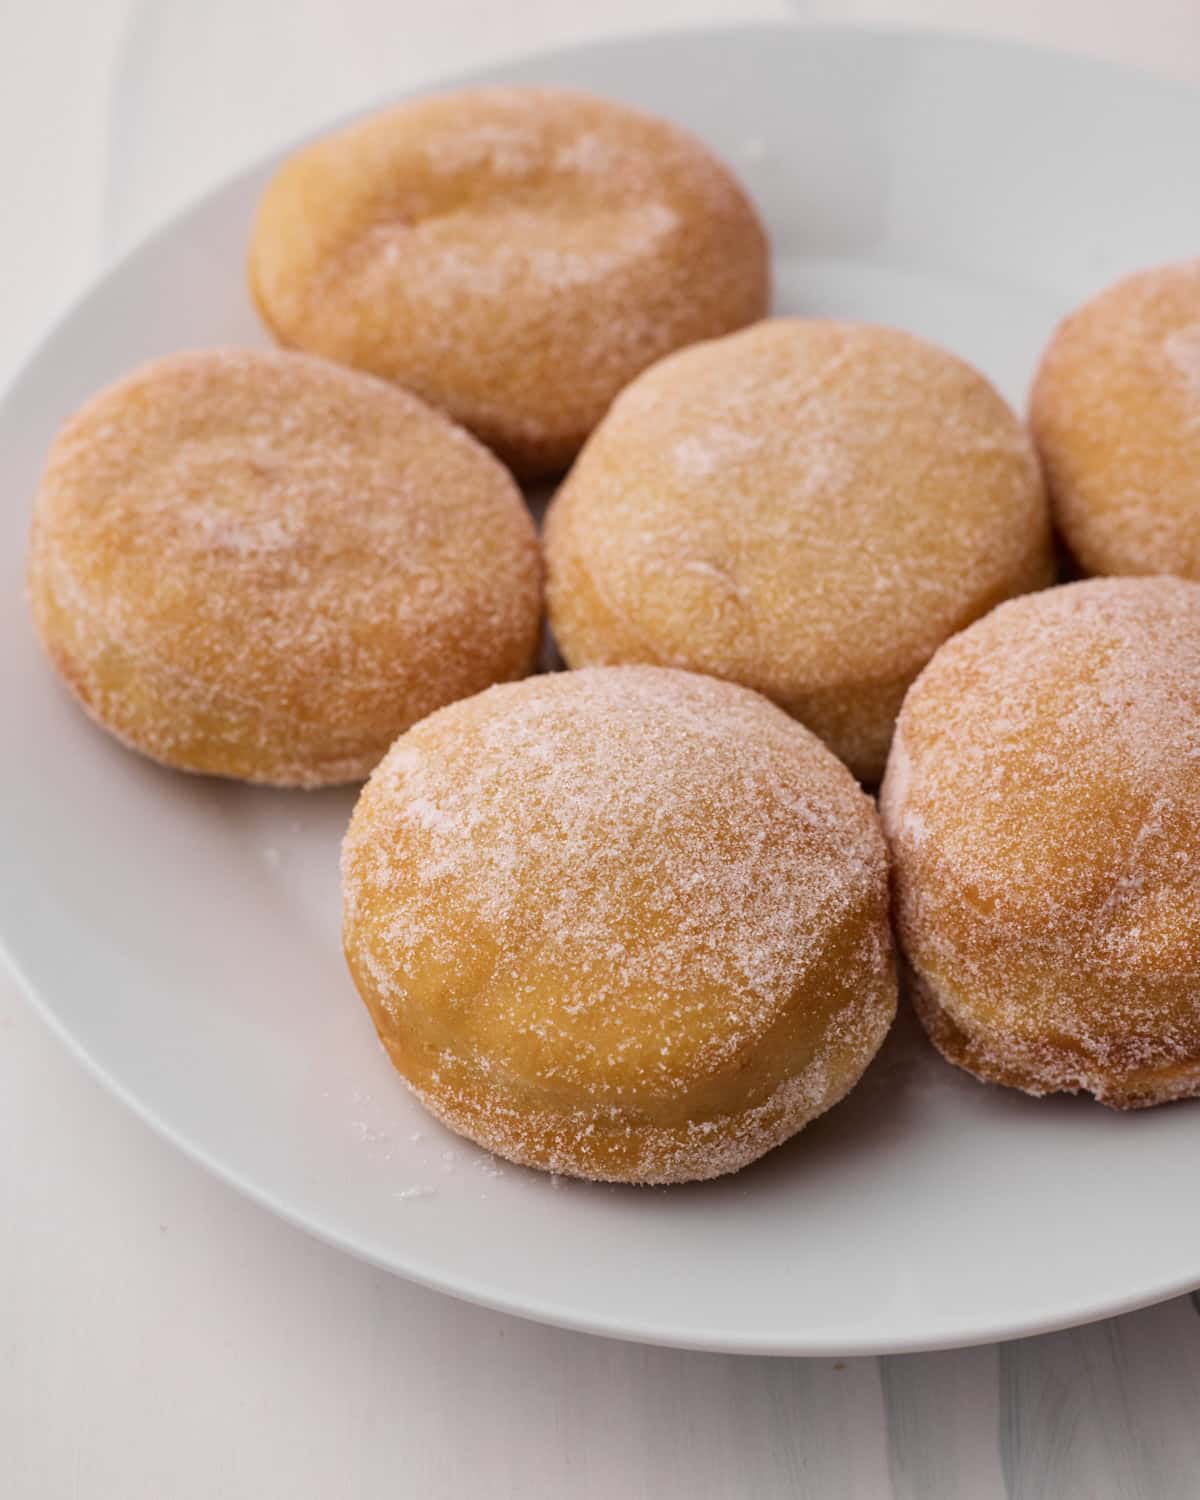
Once both sides are done, scoop them out with a metal slotted spoon and lay them on a wire rack lined with paper towels to absorb excess oil.
Let them cool for a few minutes then roll in a small bowl of granulated sugar or powdered sugar to coat them entirely. Then let them cool completely before filling.
Fill the Donuts with Custard
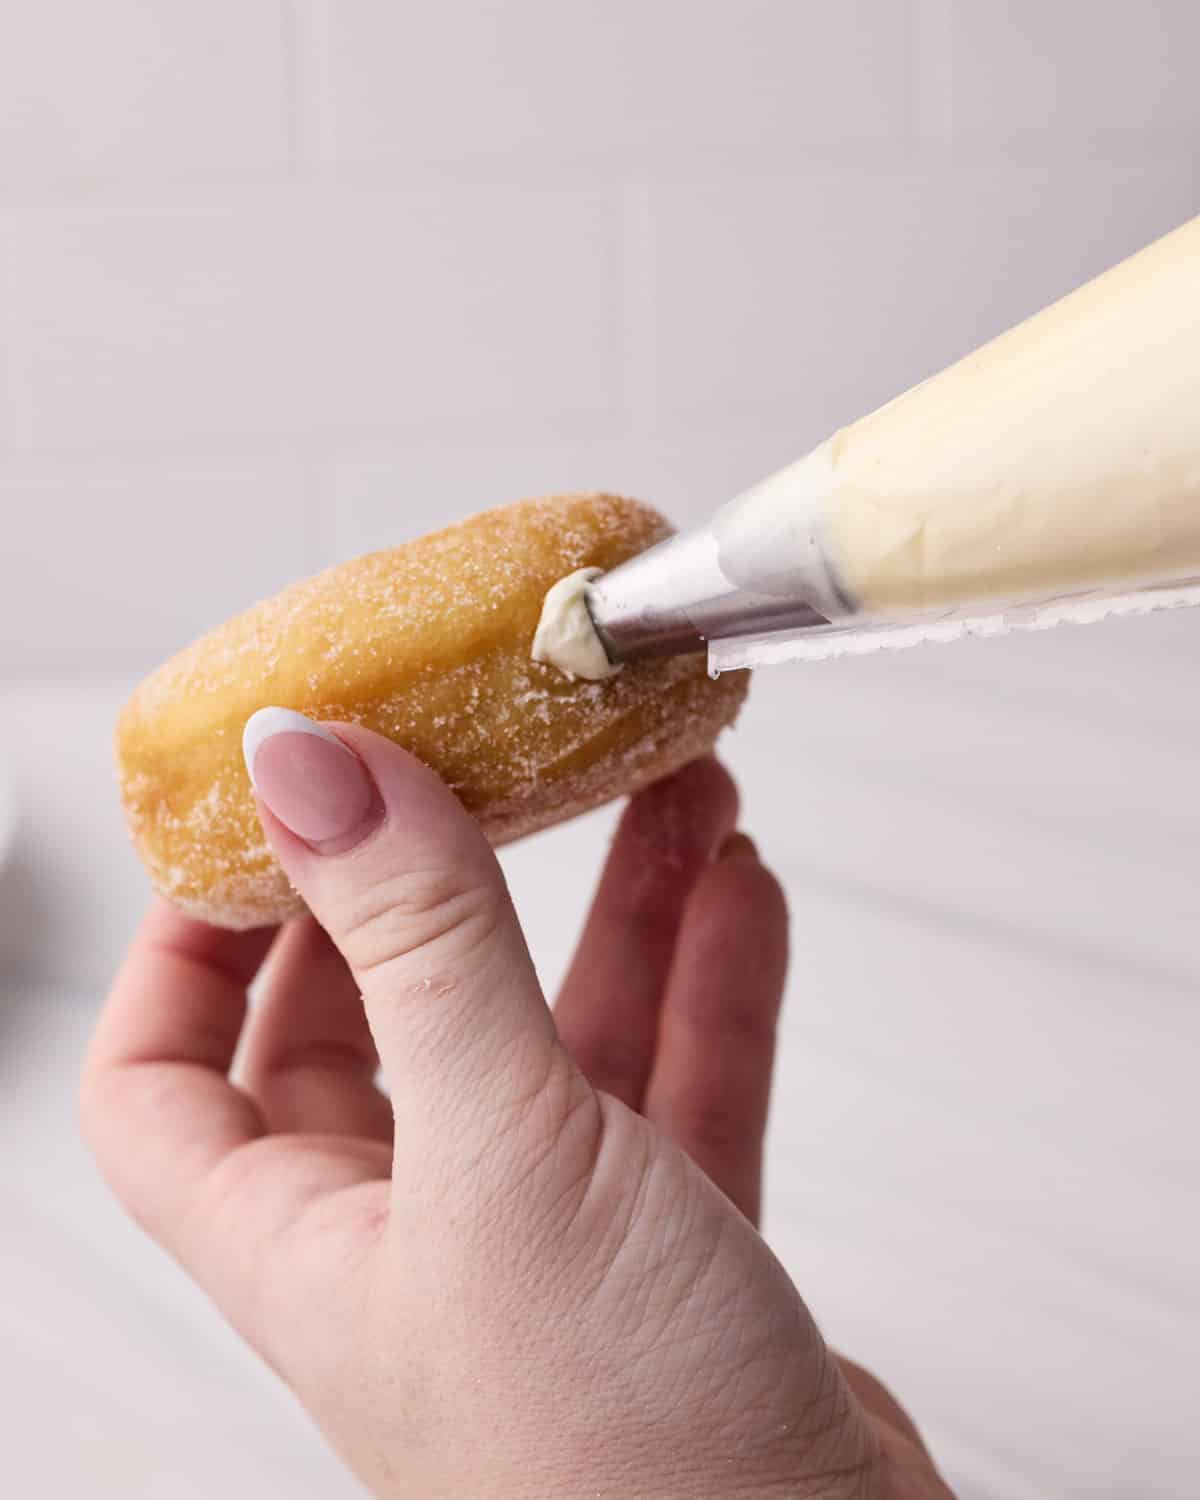
Stir the chilled pastry cream gently to restore its smooth texture, but avoid overmixing it, as this can make it runny. Transfer it to a piping bag with a round tip.
Use a chopstick, metal straw or similar narrow tool to make a hole in the side of each donut. Move it gently inside to create room for the filling without piercing the other side.
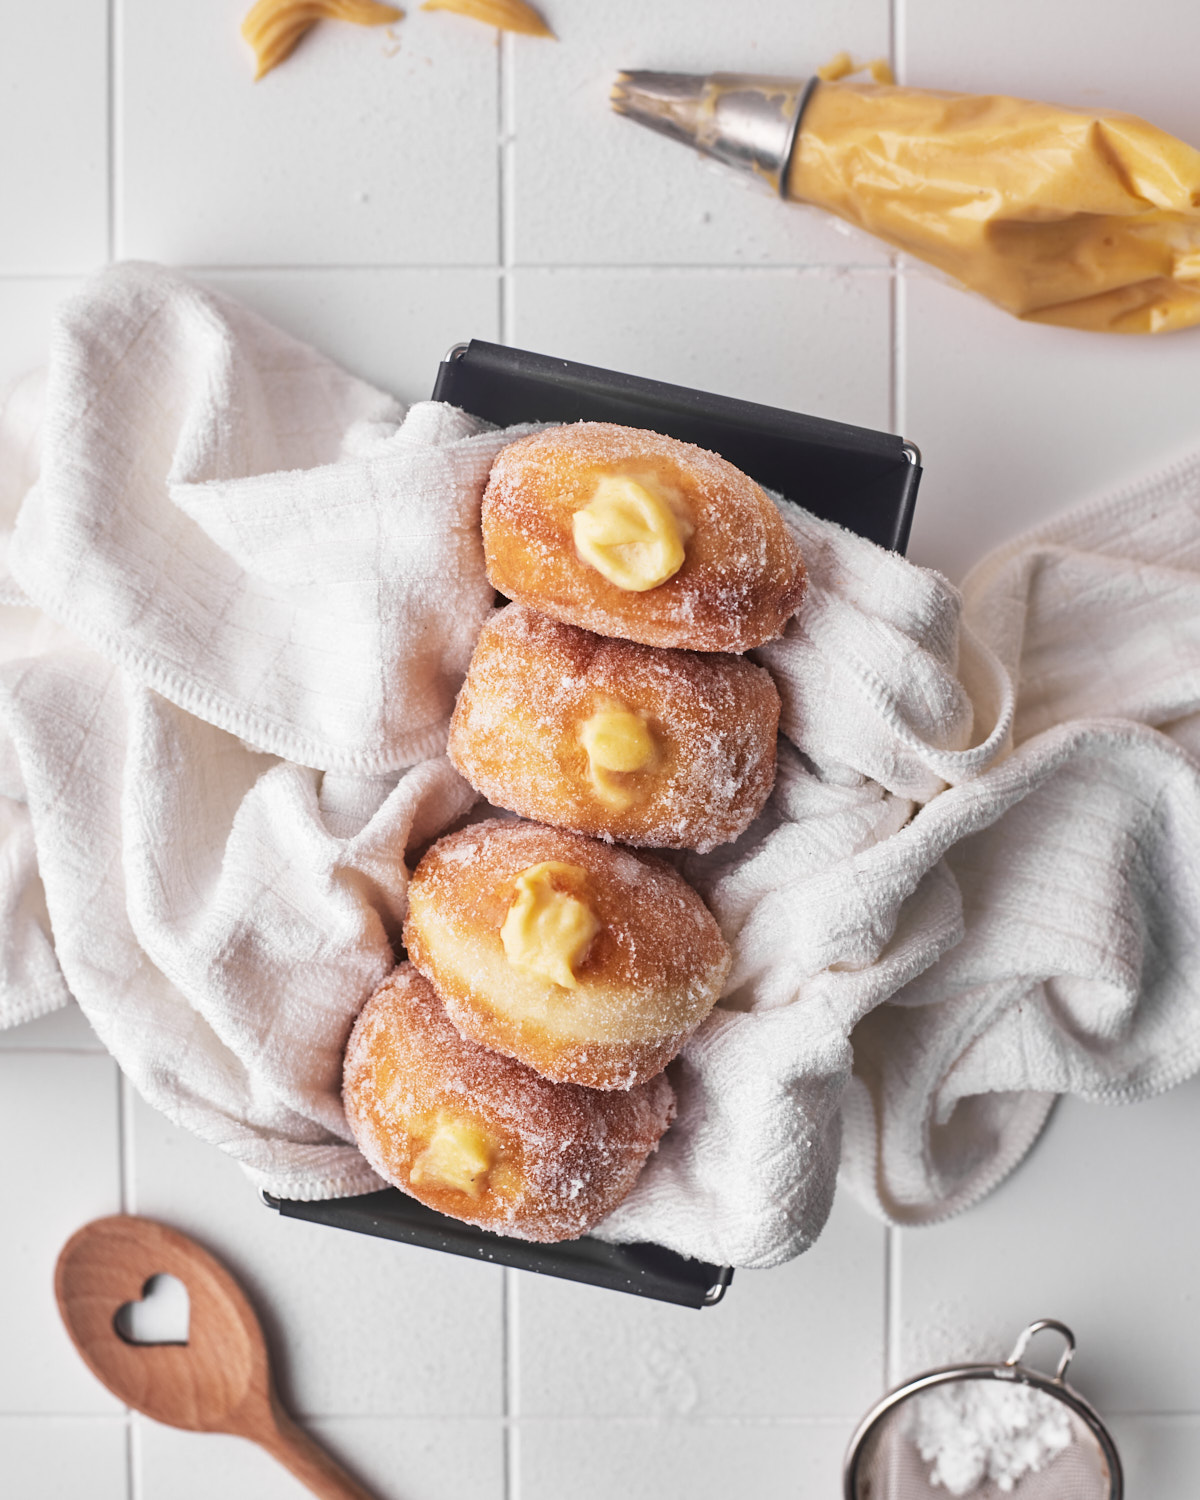
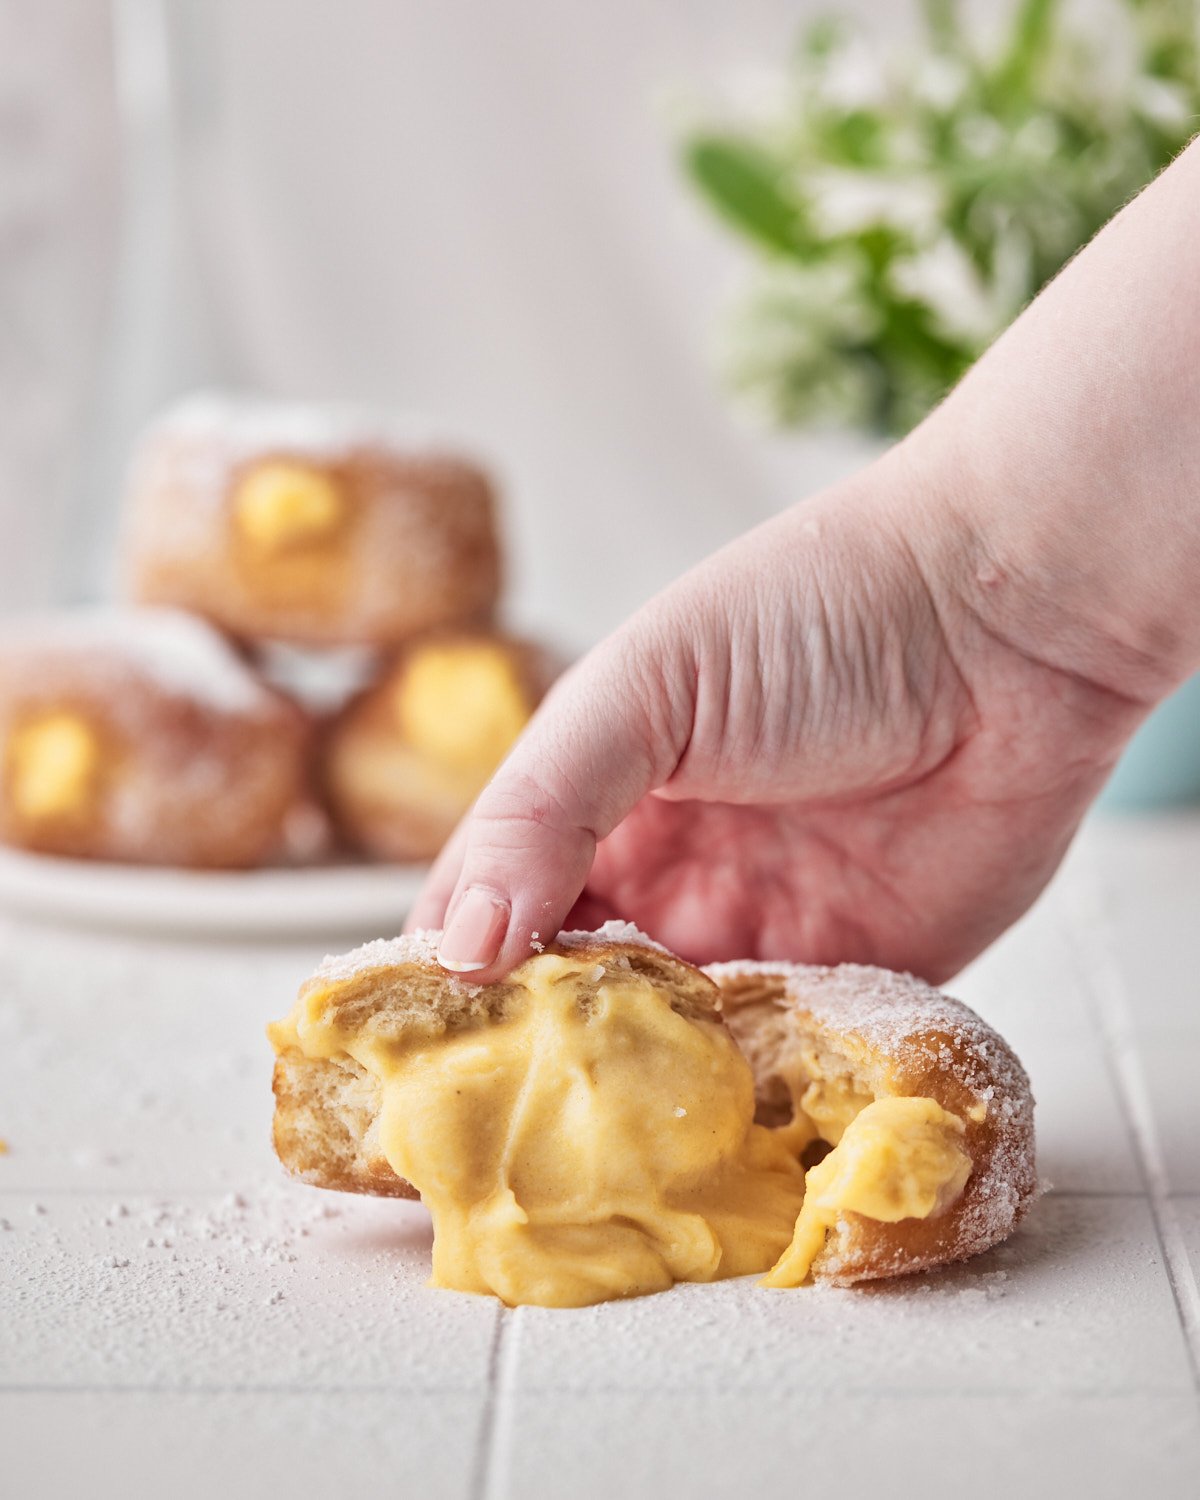
Push the piping nozzle into the hole and fill slowly. You'll feel the donut getting heavier as it fills. Slowly pull the nozzle out, leaving a little bit of custard peeking out at the opening.
Other Donut Filling Ideas
Once you have mastered the dough, you can pair it with all kinds of fillings and toppings to make your perfect donut combination!
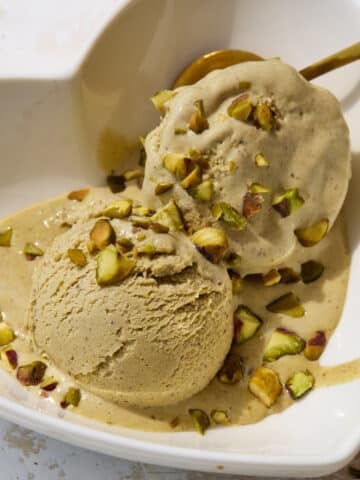
- Pistachio Donuts - My personal favorite - replace the vanilla filling with my pistachio pastry cream for a rich, nutty variation.
- Crème Diplomate - Fold stabilised whipped cream into the pastry cream to make the light, silky diplomat cream you find in Bavarian cream donuts.
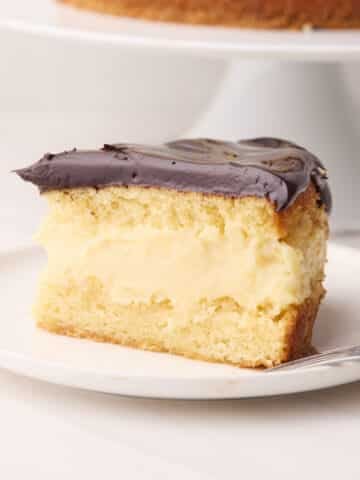
- Boston Cream Version - Instead of coating in sugar, top the donuts with a shiny chocolate ganache to make homemade Boston cream donuts.
- Fruit-filled donuts - Skip the custard and pipe in a sweet strawberry filling or tangy lemon curd.
- Chocolate Donuts - For a quick and easy chocolate-filled donut, fill them with an easy chocolate whipped cream.
Storage
Custard donuts are at their softest and freshest on the day they are fried.
- Filled donuts: Store in an airtight container in the refrigerator for up to 2 days. Let them sit at room temperature for 15-20 minutes before serving to soften slightly, but don't leave them unrefrigerated for more than 2 hours.
- Unfilled donuts: Store in an airtight container at room temperature for up to 2 days. They will still be safe to eat, but their light, freshly fried texture will gradually become firmer.
Make ahead: The pastry cream can be made up to 5 days in advance and kept refrigerated with plastic wrap touching its surface. I prefer to make it the day before so the vanilla flavour has time to develop.
Freezing: I don't recommend freezing the filled donuts, as the pastry cream and fried dough can both lose their smooth, soft texture.
Custard Donut FAQs
You can fry donuts without a thermometer, though it may take some trial and error to find the right temperature. Put the end of a wooden spoon into the hot oil to test it, there should be a light fizz of bubbles around the spoon. If there are no bubbles it's not hot enough, if it's a raging fizz then it is too hot.
No. A deep, heavy-based saucepan works well, provided it is no more than halfway filled with oil. I strongly recommend using a thermometer to monitor the temperature.
Ready-made custard is usually more of a pouring custard sauce, so it's too thin and will leak out of the donuts. The filling needs to be a thick, pipeable pastry cream; use homemade pastry cream or a ready-made custard specifically designed for filling pastries.
These donuts were developed for frying, so baking them will produce a more bread-like result. For a recipe designed for the oven, try my baked pumpkin donuts instead.
More Custard Desserts
If you love these custard-filled donuts, you may enjoy some of these other custard recipes:
Show Me Your Bakes!
If you tried this recipe, I'd love to know how it turned out in the comments!
Want to share a photo? You can send me a pic or tag @bonni_bakery on Instagram - I love seeing all your creations.
Custard Donut Recipe
Ingredients
- 5 Large Egg Yolks
- 100 g (½ cup) Granulated Sugar (Caster sugar)
- 40 g (⅓ cup) Cornstarch
- 480 ml (2 cups) Whole Milk
- 30 g (2 tablespoon) Unsalted Butter
- 2 teaspoon Vanilla Bean Paste or extract
- ¼ teaspoon Salt
- 600 g (5 cups) All-purpose Flour (Plain Flour)
- 100 g (½ cup) Granulated Sugar (Caster Sugar) plus extra for coating
- 1 teaspoon Salt
- 14 g (4½ teaspoon) Active Dry Yeast two 7g sachets
- 240 ml (1 cup) Whole Milk
- 2 Large Eggs
- 75 g (⅔ stick) Unsalted Butter melted and cooled
- Neutral Frying Oil enough to fill the pan at least 2 inches deep
Equipment
- Stand Mixewr with dough hook attachment
- Round Cookie Cutter 2½ - 3 inches
- Deep, heavy-based saucepan or deep fat fryer
- Heatproof Slotted Spoon
Instructions
- Make the custard at least a few hours in advance so it has time to cool before filling the donuts. If this is your first time making custard, I have a detailed tutorial, process pictures, and a video on my homemade pastry cream recipe.
- Whisk the egg yolks with the sugar and cornstarch until pale and thick.5 Large Egg Yolks, 100 g (½ cup) Granulated Sugar, 40 g (⅓ cup) Cornstarch
- Heat the milk in a pan over medium heat until it is scalding hot - this means there is steam rising from it and tiny bubbles appearing on the surface.480 ml (2 cups) Whole Milk
- Slowly drizzle the hot milk into the whisked egg yolk mixture, whisking as you go. Do this slowly so the temperature of the eggs rises gradually, avoiding scrambling.
- Pour everything back into the pan and cook, whisking constantly, until it thickens and starts to boil. Keep whisking gently and let it boil for 1-2 minutes to fully activate the cornstarch.
- Take off the heat and whisk in the vanilla, salt, and butter.2 tsp Vanilla Bean Paste, ¼ tsp Salt, 30 g (2 tablespoon) Unsalted Butter
- Cover with plastic wrap touching the surface of the custard and chill for at least two hours, preferably overnight, or until ready to use.
- Warm the milk to lukewarm and add the yeast and one tablespoon of sugar. Stir and let it sit for 5-10 minutes, it should form a layer of foam on the surface. This tells us that the yeast is alive and active. If you are using instant yeast, you can skip this step and add your yeast in at the same time as the flour.14 g (4½ teaspoon) Active Dry Yeast, 240 ml (1 cup) Whole Milk, 12 g (⅛ cup) Granulated Sugar
- In the bowl of a stand mixer with a dough hook attachment, add the remaining sugar, eggs, and salt. Once the yeast has activated, add the milk/yeast mixture to this bowl and mix everything to combine.1 tsp Salt, 2 Large Eggs, 88 g (3/7 cup) Granulated Sugar
- Add the flour to the mixing bowl and turn the mixer on low for one minute to let the flour mix in, then slowly drizzle in the cooled melted butter.600 g (5 cups) All-purpose Flour
- Turn the mixer up to medium speed and let it mix for about 5 minutes or until the dough looks smooth and is pulling away from the sides of the bowl. If it seems too wet, you can add an extra tablespoon of flour and knead for a bit longer.
- Tip your dough out onto a floured work surface and knead by hand for a couple of minutes until it is smooth, elastic, and no longer sticking to your hands.Use the windowpane test to check if it has been kneaded enough. Take a small piece of dough and stretch it out thinly with your fingers. If you can stretch it out thin enough to see light through it without it tearing, it's ready. (See image in the post above for an example).
- Form a smooth ball with the dough and place it into a lightly greased bowl. Cover with plastic wrap and let proof on the counter until it doubles in size (about 1-2 hours, depending on temperature).
- Once the dough has doubled in size, check if it's ready by pressing it lightly with your finger. If it springs back immediately, it needs longer. Once it is ready, it will spring back slowly and leave a slight indent.
- Give the dough a satisfying punch in the centre to release the built-up gas. Tip it onto a lightly floured work surface and gently press out any large air pockets, then roll it to approximately ½ inch thick.
- Cut rounds out of the dough with a cookie cutter that is 2½ - 3 inches wide. Press straight down with the cutter, don't twist it - this will help them to rise tall. Place each donut on a little square of parchment paper, on a cookie sheet, with a little space between them.
- Cover the tray of donuts loosely with plastic wrap or a kitchen towel and let them proof for another 45 minutes. You can use the same finger indent test to check when they are done proofing.
- In the last 10 minutes of the 45-minute proof, you can start to prepare your frying oil. Pour at least 2 inches of oil into your saucepan and heat to about 350°F / 175°C.Neutral Frying Oil
- Gently place your donuts into the oil*, and they should start bubbling at the sides. I like to do only 2 or 3 at a time, depending on the size of the saucepan. They fry super fast and this allows you to have more control.
- Let the donuts to bob around and fry for a minute or two, checking the underside from time to time. Once the underside looks golden brown, flip the donut and fry the other side until the color matches. As there are so many variables (oil temperature, donut size, etc), it is impossible to give you an exact time to fry the donuts for - you really have to do it by eye and see when they look ready.
- Once both sides are golden brown, scoop the donuts out with a heatproof slotted spoon and lay them on a wire rack lined with paper towels to soak up the excess oil. Fry 2-3 donuts at a time and let the oil come back up to temperature in between batches.
- Let the donuts sit for a few minutes, then roll them in a bowl of sugar while still warm to coat them. Let them cool completely before filling.
- Once the donuts are completely cool, use a long thin object (like a metal straw or a chopstick) to poke a hole in the side of the donuts and move it around to create extra space for your custard - we want these babies to be FULL of custard, so you need to give it somewhere to go.
- Remove your pastry cream from the fridge and give it a mix to restore the texture. Put it in a piping bag with piping tip.
- Push the nozzle into the hole you created earlier and squeeze gently. You will feel the donut start to feel heavy, which means it's full of delicious custard! Pull the nozzle slowly out of the donut, leaving a pretty little blob of custard on the outside to show the delicious custard filling.








John says
What are the instructions for the custard
Jules Grasekamp says
Hi John,
There are step-by-step instructions in the post, but if you'd like more detailed instructions for custard, along with process pictures and a tutorial video, you can click on the custard post. I'll paste a link here for you as well 🙂 - https://bonnibakery.com/creme-patissiere-vanilla-pastry-cream/
Hope this helps
Jules
Caz P says
1/3 butter equals 75g but you have it posted as 2/3 butter???
Jules Grasekamp says
Hi Caz,
The recipe says 2/3 of a stick which is equal to 75g. You may be thinking of 1/3 of a cup which is 75g.
Either way, I recommend weighing your ingredients with a kitchen scale as grams are always far more accurate.
I hope you enjoy the donuts 🙂
Jules
Lisa Pratte says
I can't wait to make, custard filled donuts are my absolute favorite donut of all donuts!
A says
Is this 2x 14g packs of yeast or 14g of yeast total?
In NZ the sachets size is 8g!
Jules Grasekamp says
Hi A,
It's 14g of yeast total. Our packs in the UK at 7g each. Thank you for this question, I will make it more clear in the ingredients list!
Hope you love the donuts!
Jules
A says
Thank you, these were SO good!!
Definitely best eaten as soon as possible, don't stay fresh very long but still taste amazing!
Kristine says
Storing the sugared donuts ? I used jam to fill. Seem good. Good rise. Burns quickly.
Jules Grasekamp says
So glad you liked the donuts Kristine - jam filling sounds lovely!
There is a whole section on storage instructions in the post above 🙂
Jules
Esther says
Hi, I just made this dough and it was toughhhh. So I'm not sure if I used the wrong amount of milk. The recipe list says 1 cup and then in the recipe instructions it says 2.5 cups. I'm going to try a bit of a halfway mark to see because I sadly already lost my first dough. I hope when I come back to this recipe for the next time I can see which was the right milk amount!
Thanks!
Jules Grasekamp says
Hi Esther,
Thank you so much for pointing this out! The recipe card had saved the 2.5 cups milk from the custard to the dough instructions - I have fixed the error now, thank you so much and I'm sorry about that!
How did your donuts turn out in the end? So sorry for the confusion!
Jules
Shakera says
Hi there. Tried it out and it was an absolute hit! Thank you so much. Just wanted to know, would it be okay to replace the yeast with fresh/wet yeast and if so, how would one go about doing that?
Thanks
Jules Grasekamp says
Hi Shakera,
Thank you for trying my recipe, I'm so glad you liked it!
You can definitely use fresh yeast for these. You'll need to use twice as much fresh yeast (by weight) and dissolve it into the warm milk. Then continue the recipe as normal.
Hope this helps!
Jules
Cecile says
Hi Jules
These didn’t come out like I’d hoped . Everything seemed to be going well until the second rise - quite a few of them flattened out instead of rising upwards so maybe I didn’t knead enough? (Though I kneaded them by hand and did a windowpane test to check gluten formation) When I fried them they browned really quickly no matter what temperature I used and didn’t puff up (I don’t know if this is because I used an induction hob) – they still tasted good, but I can hardly call them doughnuts. Now I just have a bowl of custard in the fridge and what looks like a bunch of fried crunchy fritters.
Jules Grasekamp says
Hi Cecile,
I'm so sorry to hear that you donuts didn't turn out! Donuts collapsing in the second prove is typically due to them being a little too warm, which can lead to overproofing and then collapse.
I will actually be updating this recipe soon with more details and tips to help people have success with them - including a full video tutorial.
I hope you can still enjoy the 'fritters' and that your next batch turns out perfectly!
All the best,
Jules
Cecile says
Hi again!
So I tried again with a half batch and I found that the issue was indeed over proofing on the second rise! I usually turn the oven on low heat for a little bit and then turn it off to create an ideal environment for the dough to rise. I must have left it on for too long the first time because I didn’t have that issue on my second and third tries.
They came out really well! But now my only issue is the browning. I think my stove just runs hot but I might try rolling out the dough flatter to make sure it cooks through without getting too dark.
Thanks so much for the recipe and your help Jules!
Hayley says
Can the dough be made overnight? If so what things, if any, would I need to change? I want to try making these for my coworkers, but don't have the time before work to do all of the proofing and then frying.
Eve says
They were good but for the love of God please just put the actual amount of time that it will take in the recipe. 23 minutes? Try 7 hours.
Jules says
Hi Eve,
Glad you liked the donuts! Sorry if that was misleading, I tend to put the amount of time spent actually working on the recipe and don't include resting, chilling and proving time - especially since some recipes need to chill overnight! I hope you enjoyed making them anyway and thanks for giving my recipe a go 🙂
Shakera says
Hi there. Tried it out justuh it was an absolute hit! Thank you so much. Just wanted to know, would it be okay to replace the yeast with fresh/wet yeast and if so, how would one go about doing that?
Thanks
Kris says
What size cutter did you use?
Jade says
Doughnut dough didn’t work, the yeast didn’t activate using the method. I tried twice and both failed via this method.
Rajesh says
your yeast is dead, buy new yeast
Yaya says
Agree.
Cecile says
I think part of the problem is that the recipe doesn’t mention that the milk should be warm when adding the yeast
Hannah says
I saw these on your stories! They looked absolutely amazing
Can't wait to try them out!
Chris Radwanski says
Cover anything in custard and I'm sold, but jam it into a nice fluffy homemade donut, cover it in sugar, and im beyond elated! I have never had homemade donuts before this and my goodness they are so much better than store bought!