
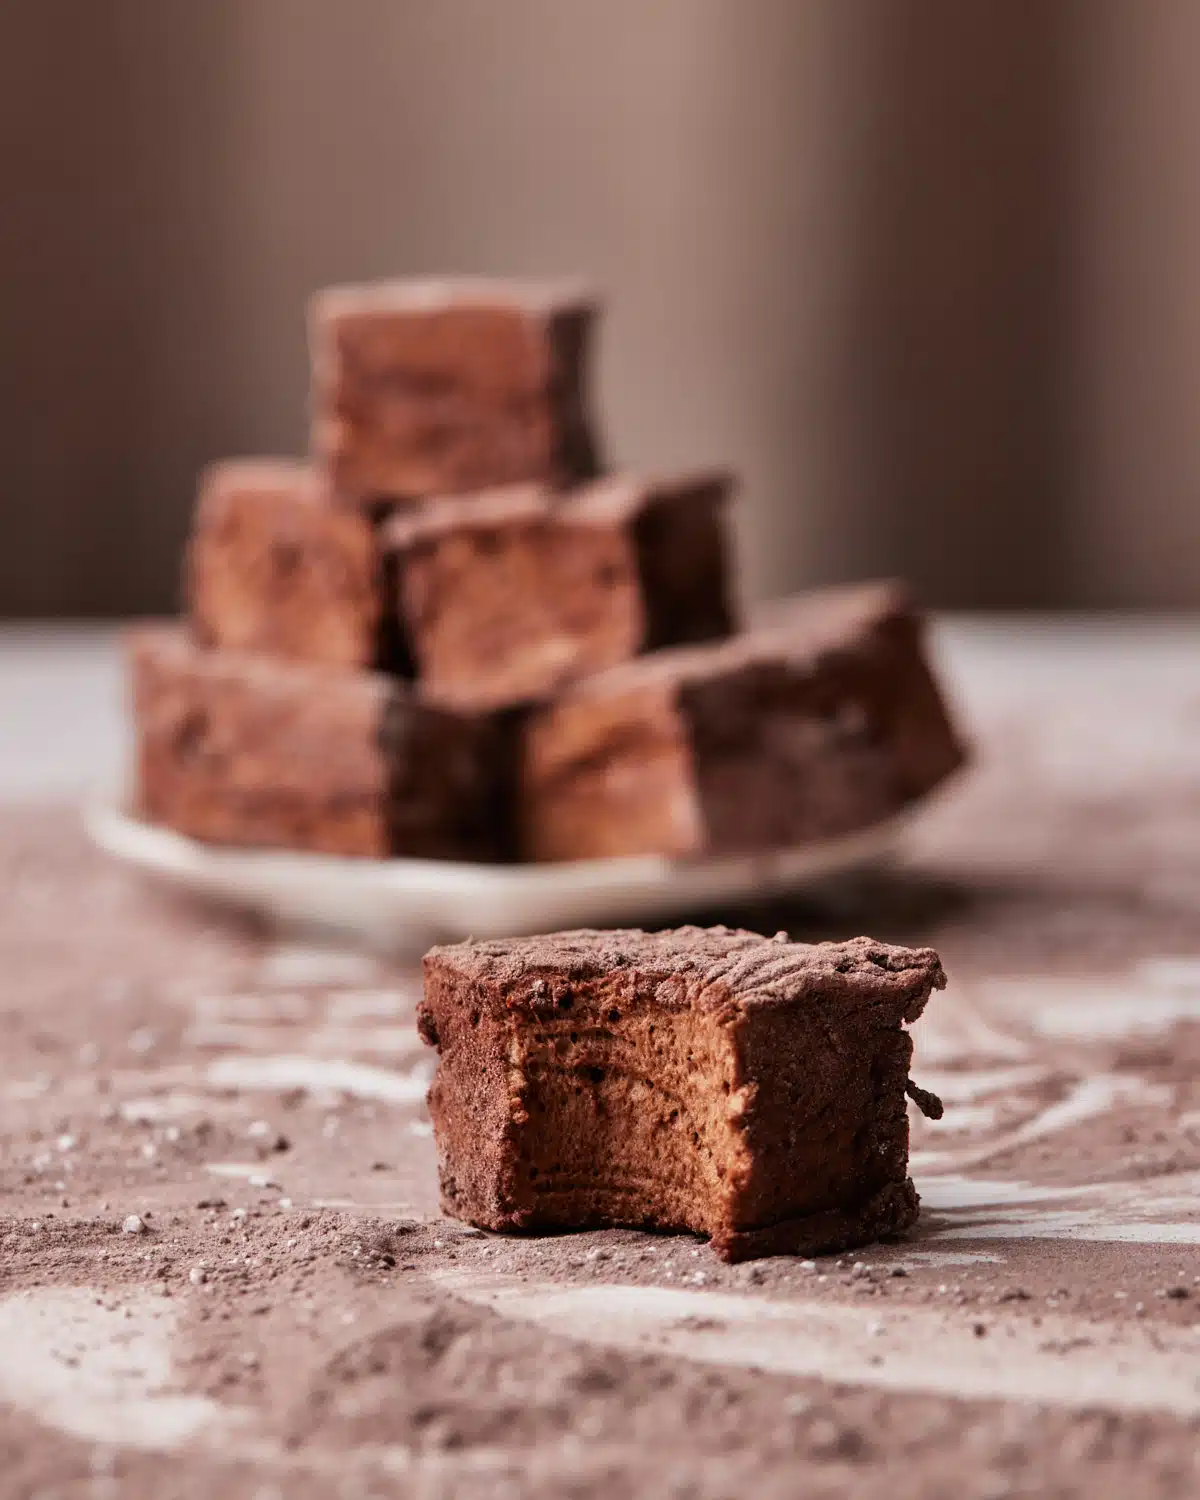
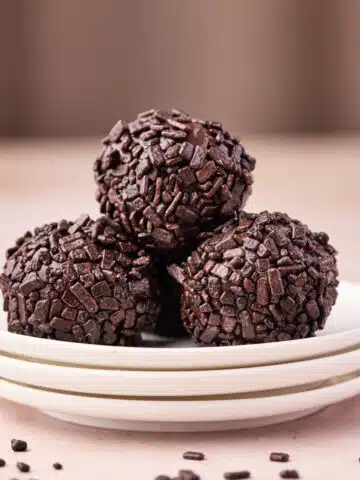
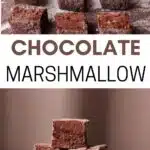
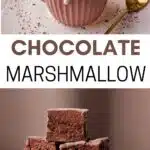
Homemade chocolate marshmallow - fluffy and gooey marshmallows infused with decadent chocolate - a match made in heaven!
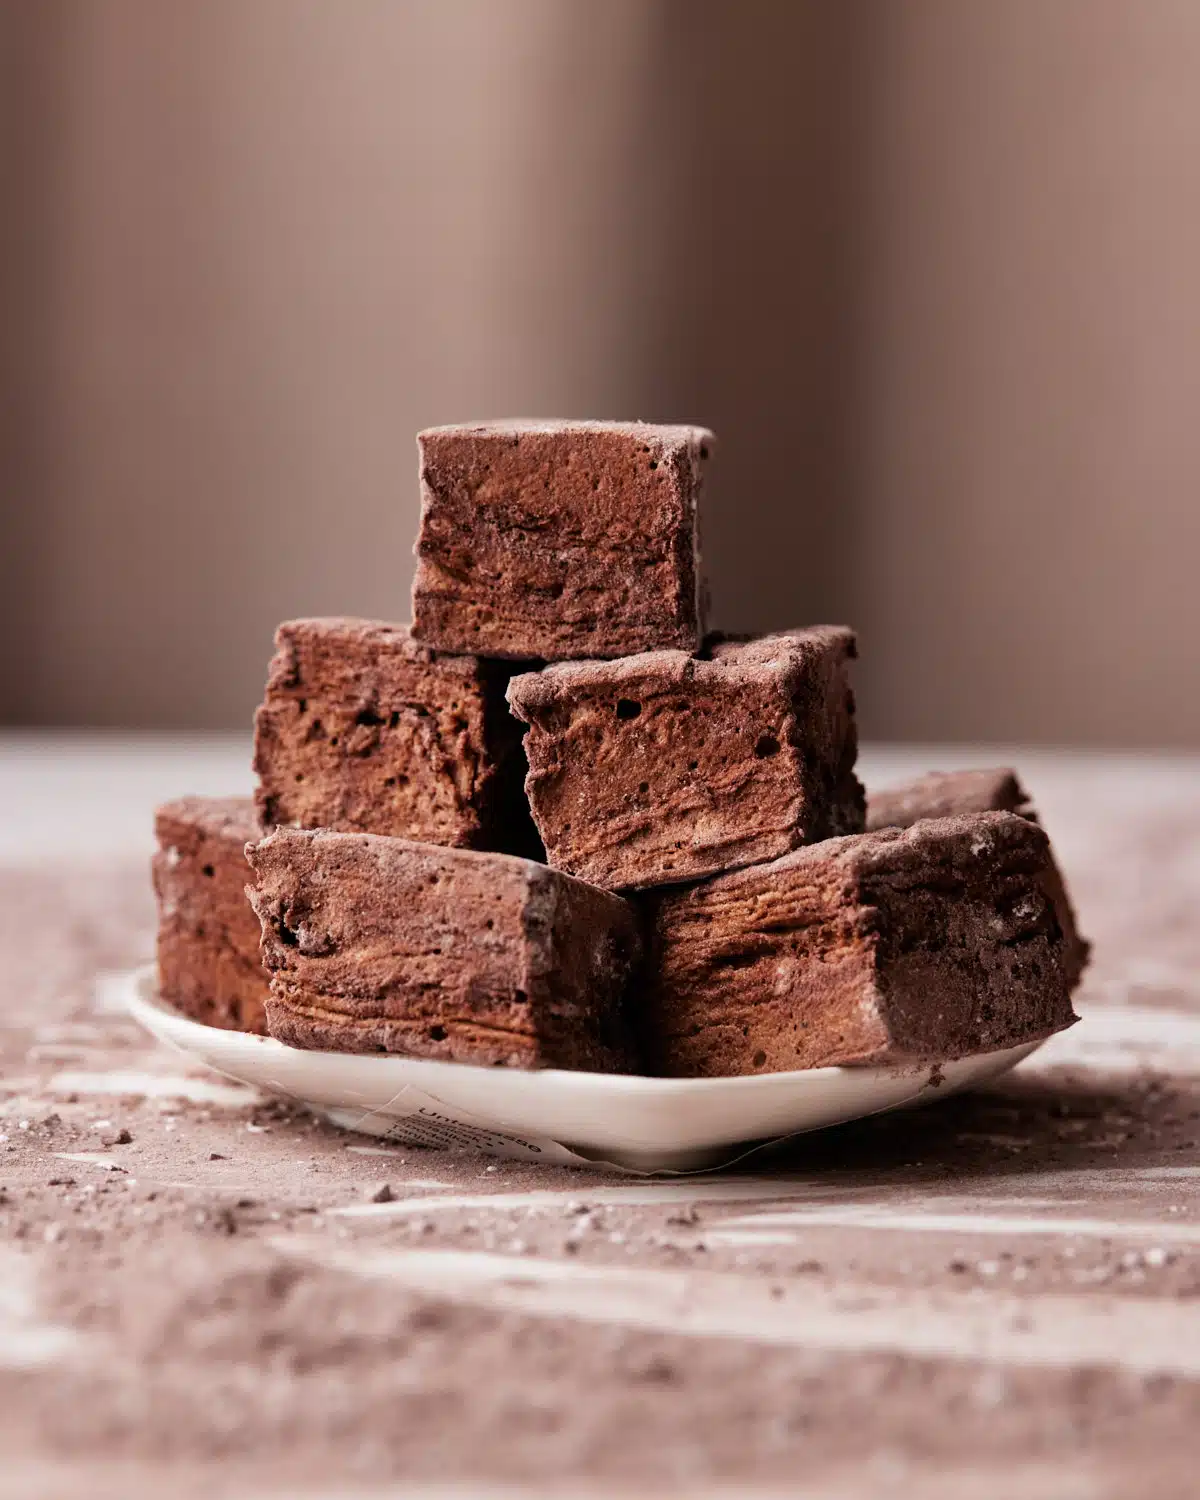
There are many advantages of making your own marshmallows at home - better flavor, better texture, and just an all-around better marshmallow. But an added benefit of homemade marshmallows is that you can make them all sorts of fun and delicious flavors! Nothing against a traditional vanilla marshmallow - but if you can have a chocolate-flavored marshmallow, why wouldn't you?!
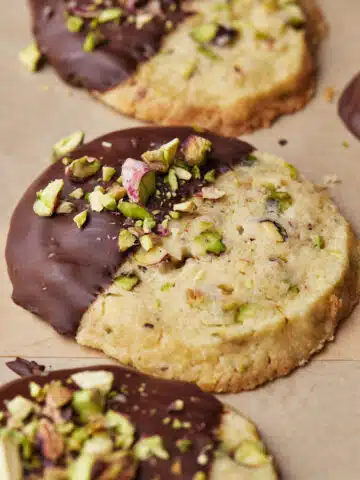
If you're a marshmallow fan, you may also like my S'mores Brownies or my Triple Chocolate Marshmallow Cookies!
Lots of people are either intimidated by the idea of making marshmallows, or they just don't know that it's possible. The truth is, not only is it possible but it's actually a lot easier than you think! Okay, the process can be a little bit messy, but if you don't mind getting slightly sticky, then the end result will be the most delicious, melt-in-your-mouth chocolate marshmallows that everyone will be begging you to make time and time again! The perfect sweet treat for chocolate lovers!
Reader Review:
I made these today and they turned out fantastic - wish I could share the photo. Thank you so much for the great recipe. The instructions are easy to follow. Looking forward to trying more of your recipes.
⭐⭐⭐⭐⭐ - Cyndi
Jump to:
Ingredients for Chocolate Marshmallow
Chocolate marshmallow uses the same basic ingredients as in regular marshmallow recipes, but with some extra ingredients for the chocolate magic.
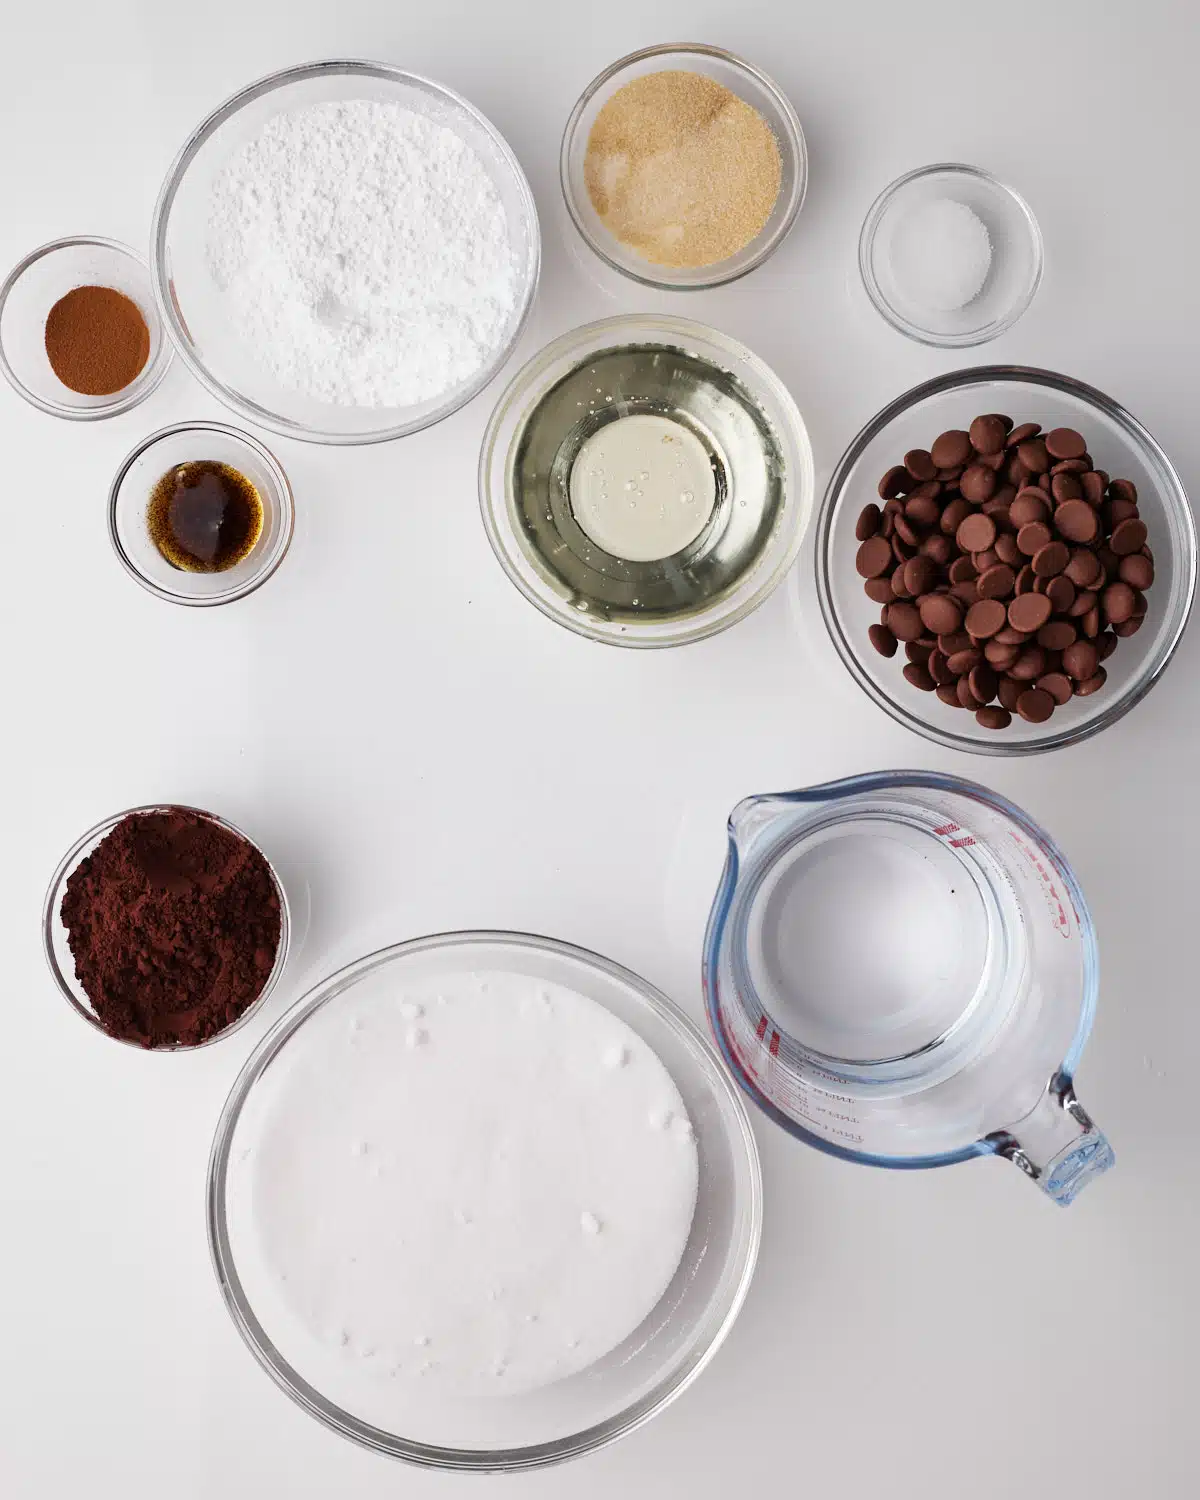
- Sugar - Marshmallows are made of mostly sugar. You want to use extra-fine white sugar (caster sugar in the UK).
- Corn Syrup - You're looking for clear, light corn syrup. If you can't find that, look for glucose syrup. If you really can't find either, golden syrup will do the trick but may alter the flavor slightly
- Gelatine Powder - Make sure you use gelatine powder for this marshmallow recipe. I often use leaf gelatin sheets in my recipes, but for marshmallows, you really want the powder - it usually comes in little sachets and you can find it in most supermarkets.
- Cocoa Powder - It's best to use dutch-process cocoa powder - the texture and flavor will be better than with natural cocoa powder, though either will work in the recipe.
- Espresso Powder - This is optional, but I find it really helps to deepen the chocolate flavor of the marshmallows. It won't taste like coffee, it will just enhance the natural flavor. Make sure you use espresso powder and not instant coffee granules. Espresso powder can usually be found in the same section of the grocery store, but it is a lot finer.
- Chocolate - We'll swirl some melted chocolate into the marshmallow for extra chocolate flavor - you can use milk chocolate or dark chocolate, whichever you prefer. Make sure to use real chocolate and not chocolate chips - as they won't melt properly!
- Vanilla - Use vanilla extract or vanilla bean paste - try to avoid vanilla essence.
- Powdered Sugar - We'll mix powdered sugar with cocoa powder to make the coating for the marshmallows. This will stop them from being sticky.
See recipe card for quantities.
Equipment
- 10" Square Cake Pan - If you don't have a 10" pan, an 8" or 9" pan will also work, the marshmallow will just be taller. You could also use a rectangular pan or a deep baking sheet.
- Candy Thermometer - I wouldn't advise trying to make these chocolate marshmallows without a thermometer as they do need to get to a very specific temperature. Candy thermometers are great because they clip onto the side of the pan, but any thermometer that can reach the appropriate temperatures will do.
- Saucepan - You'll need a medium-sized saucepan to make the sugar syrup.
- Stand Mixer - A stand mixer with a whisk attachment is best for making chocolate marshmallow. You could use an electric whisk, but they have to whip for a long time and your arm may get quite tired.
How to Make Chocolate Marshmallow
The process of making chocolate marshmallow is a little different than making regular marshmallows. It's just a couple of extra steps but it will be so worth it!
- Before you begin, line a 10" square cake pan with plastic wrap or parchment paper. Make sure every bit of the inside of the pan is covered - otherwise, your marshmallow might get stuck.
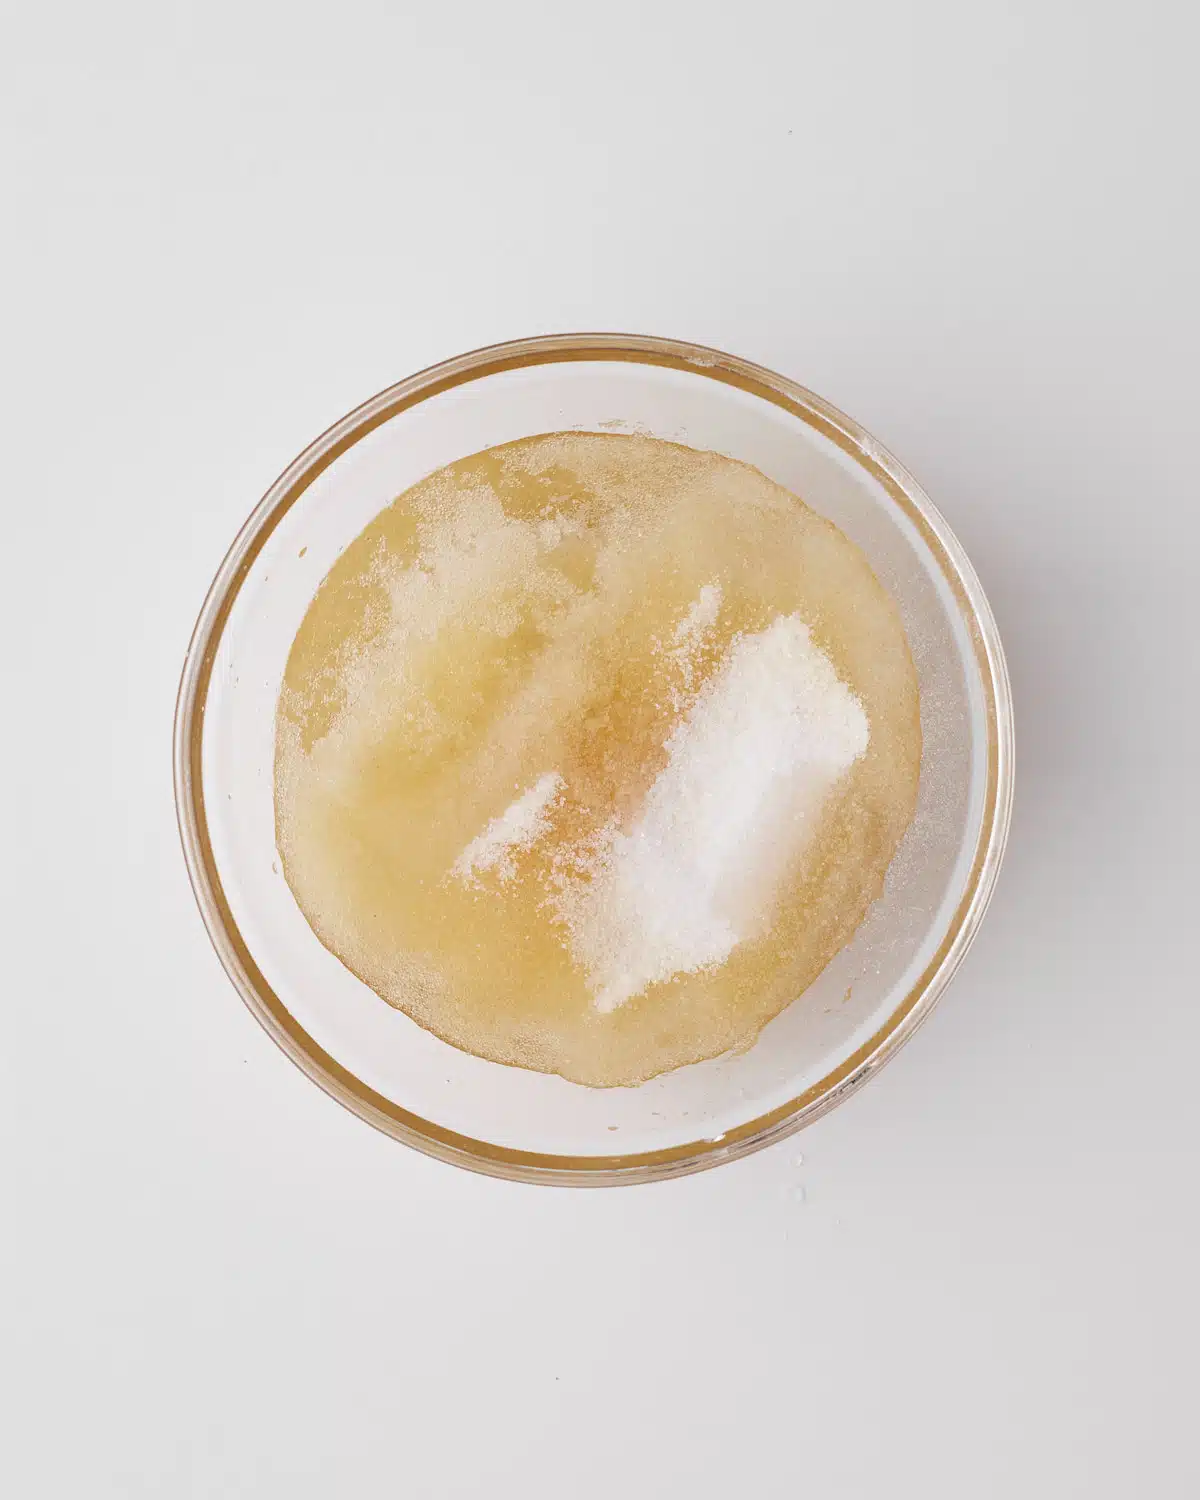
- Now we want to bloom the gelatin. Pour half of the cold water into a medium bowl and sprinkle the gelatin powder and salt on top. Don't stir it, just let it sit there and do its thing while you prepare the rest of the recipe. As it sits it should start to absorb the water and form into a puck.
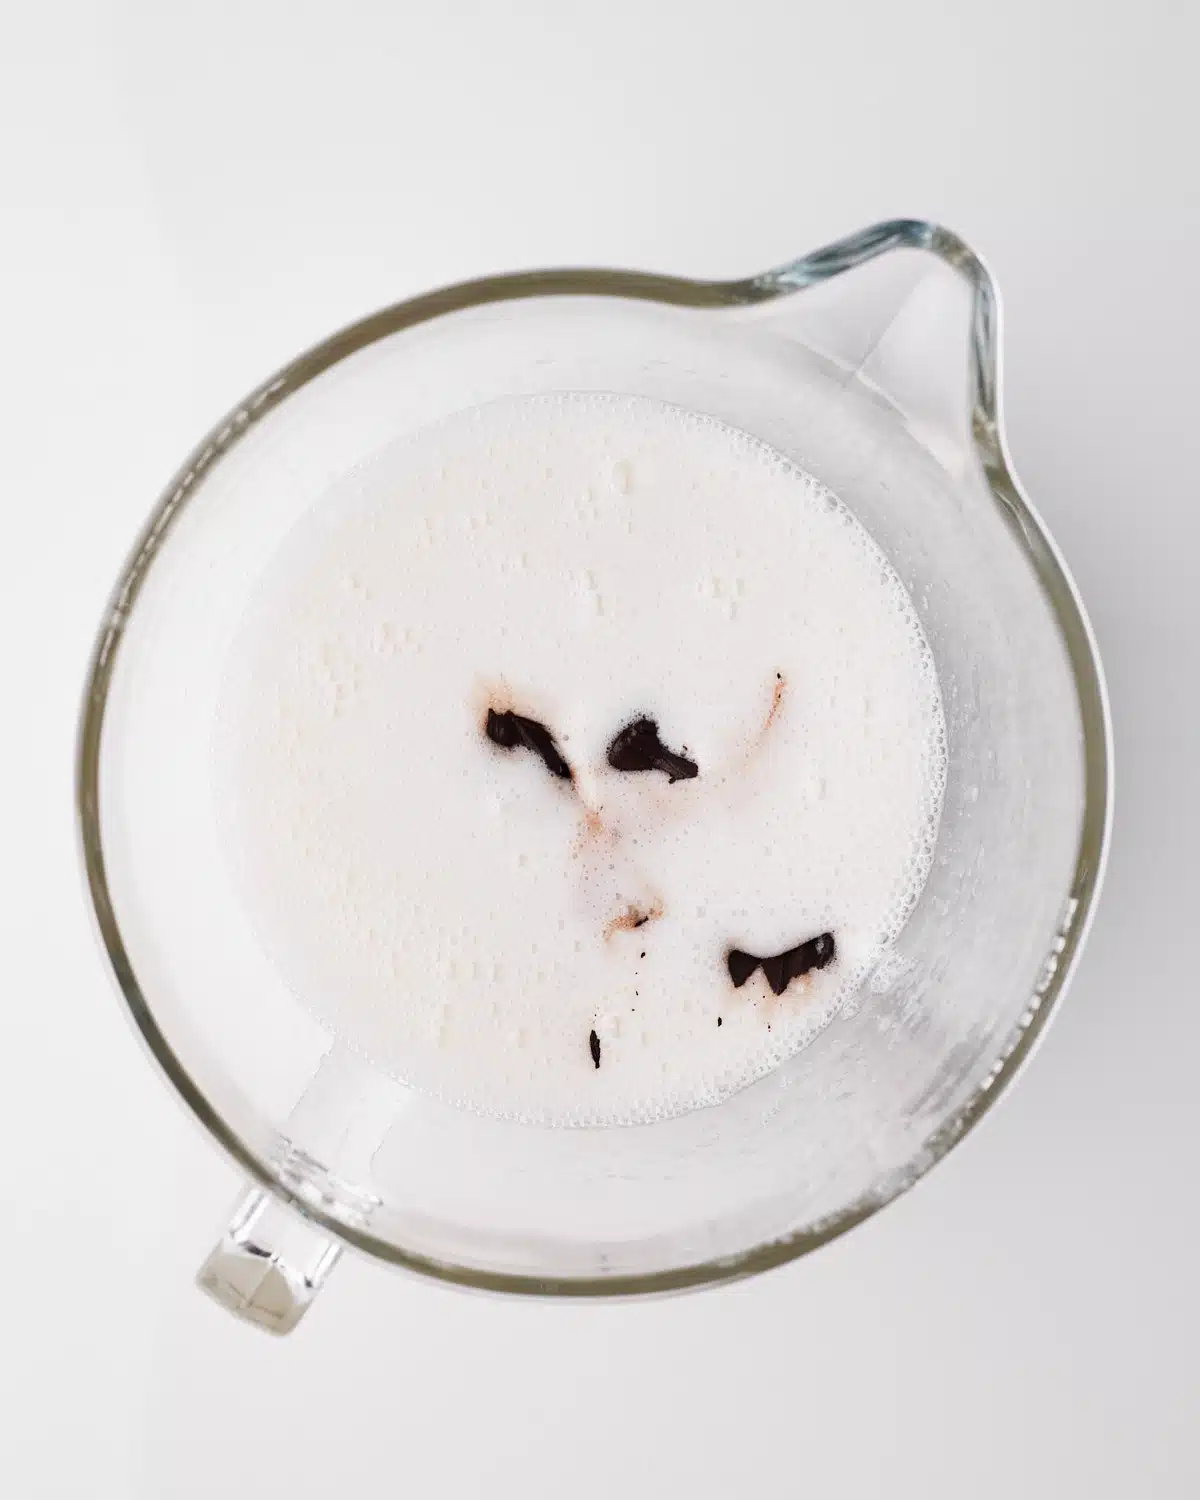
- In a separate bowl, mix the boiling water with the cocoa powder, vanilla, and espresso powder. The heat from the water will bloom the cocoa powder and help to bring out a deep chocolate flavor. It should form a thick, glossy paste. Set the small bowl of cocoa paste aside until you need it later.
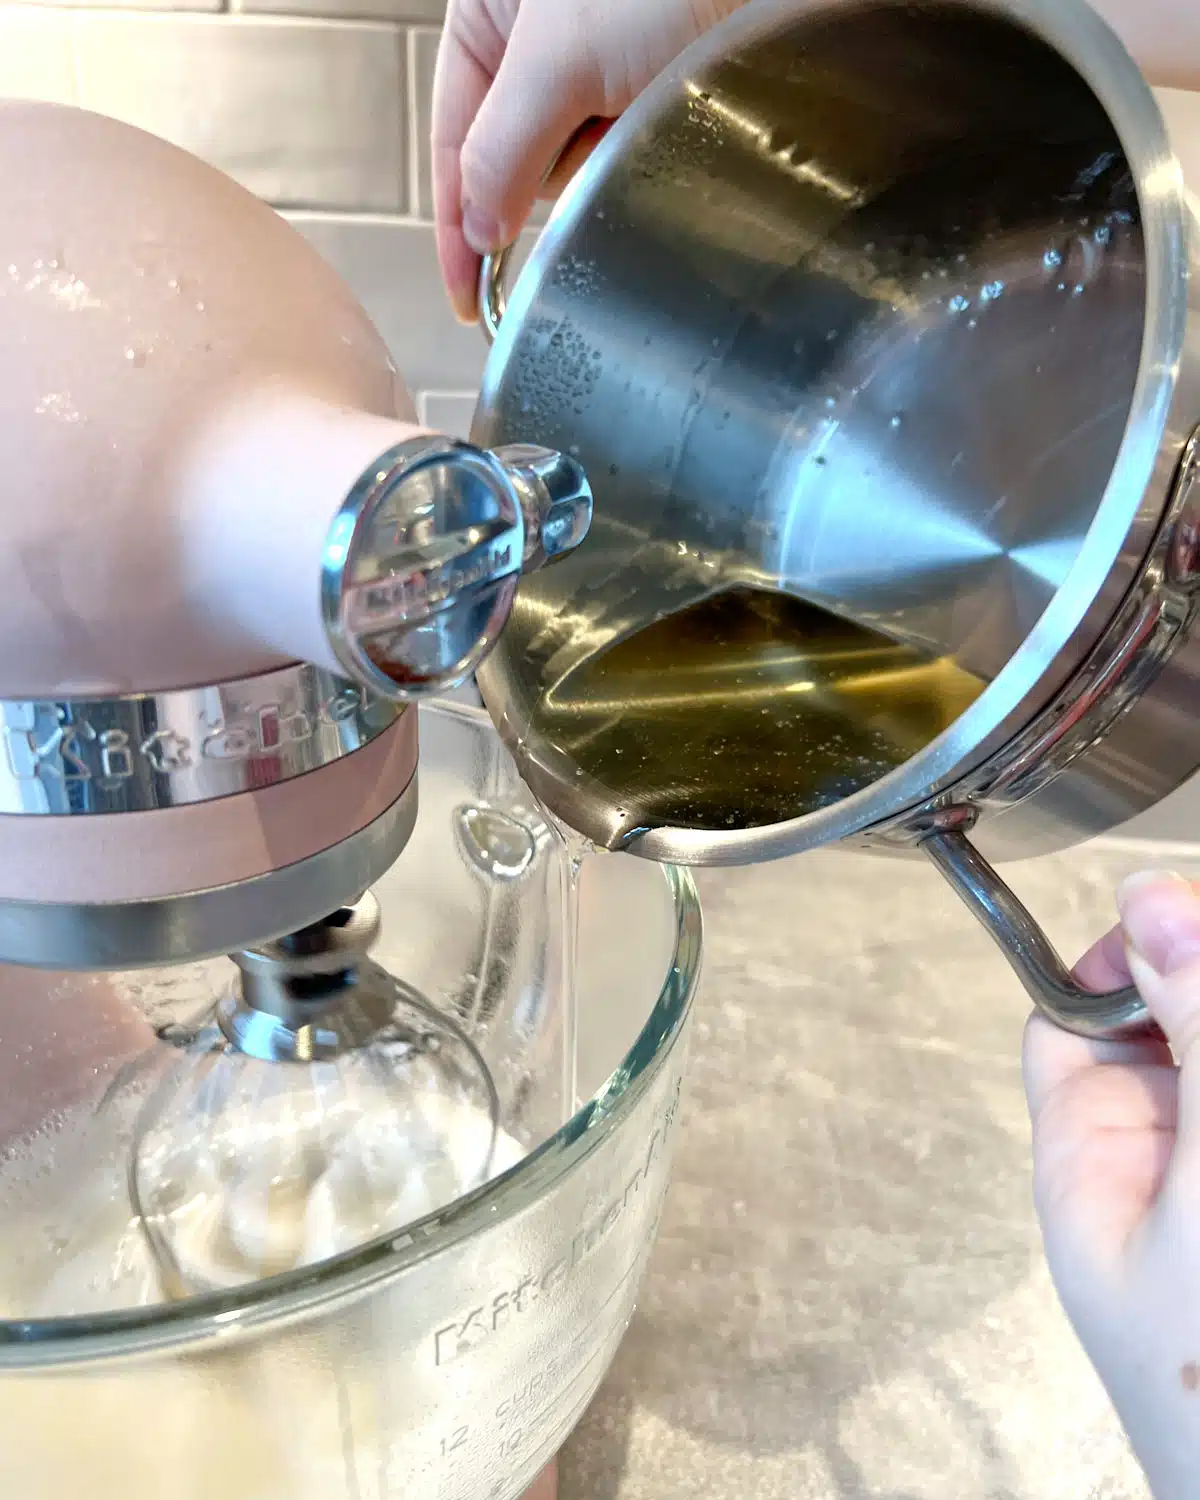
- For the marshmallow base, in a medium saucepan, add the remaining water, the sugar and the corn syrup. Mix everything together and then put it on medium heat with a candy thermometer inserted. Once it's on the heat, don't stir it or move it around, just let it sit still and slowly turn into sugar syrup. As it boils, and the sugar dissolves, it will turn clear and thick.
- Let the sugar mixture boil until it reaches a temperature of 250°F / 121°C. With regular marshmallows, we would normally boil until just 240°F / 115°C, but we need the chocolate marshmallow to be able to take the extra moisture in the cocoa mixture, so it needs to be taken to a slightly higher temperature.
It might seem like your syrup takes a while to get to temperature and is hovering around the same spot for ages - do not turn up the heat - this is just the water evaporating from the mixture, it won't be able to get any hotter until all the water is gone, so just be patient. Once the water is gone though, it will rise very quickly so don't walk away - watch it very closely.
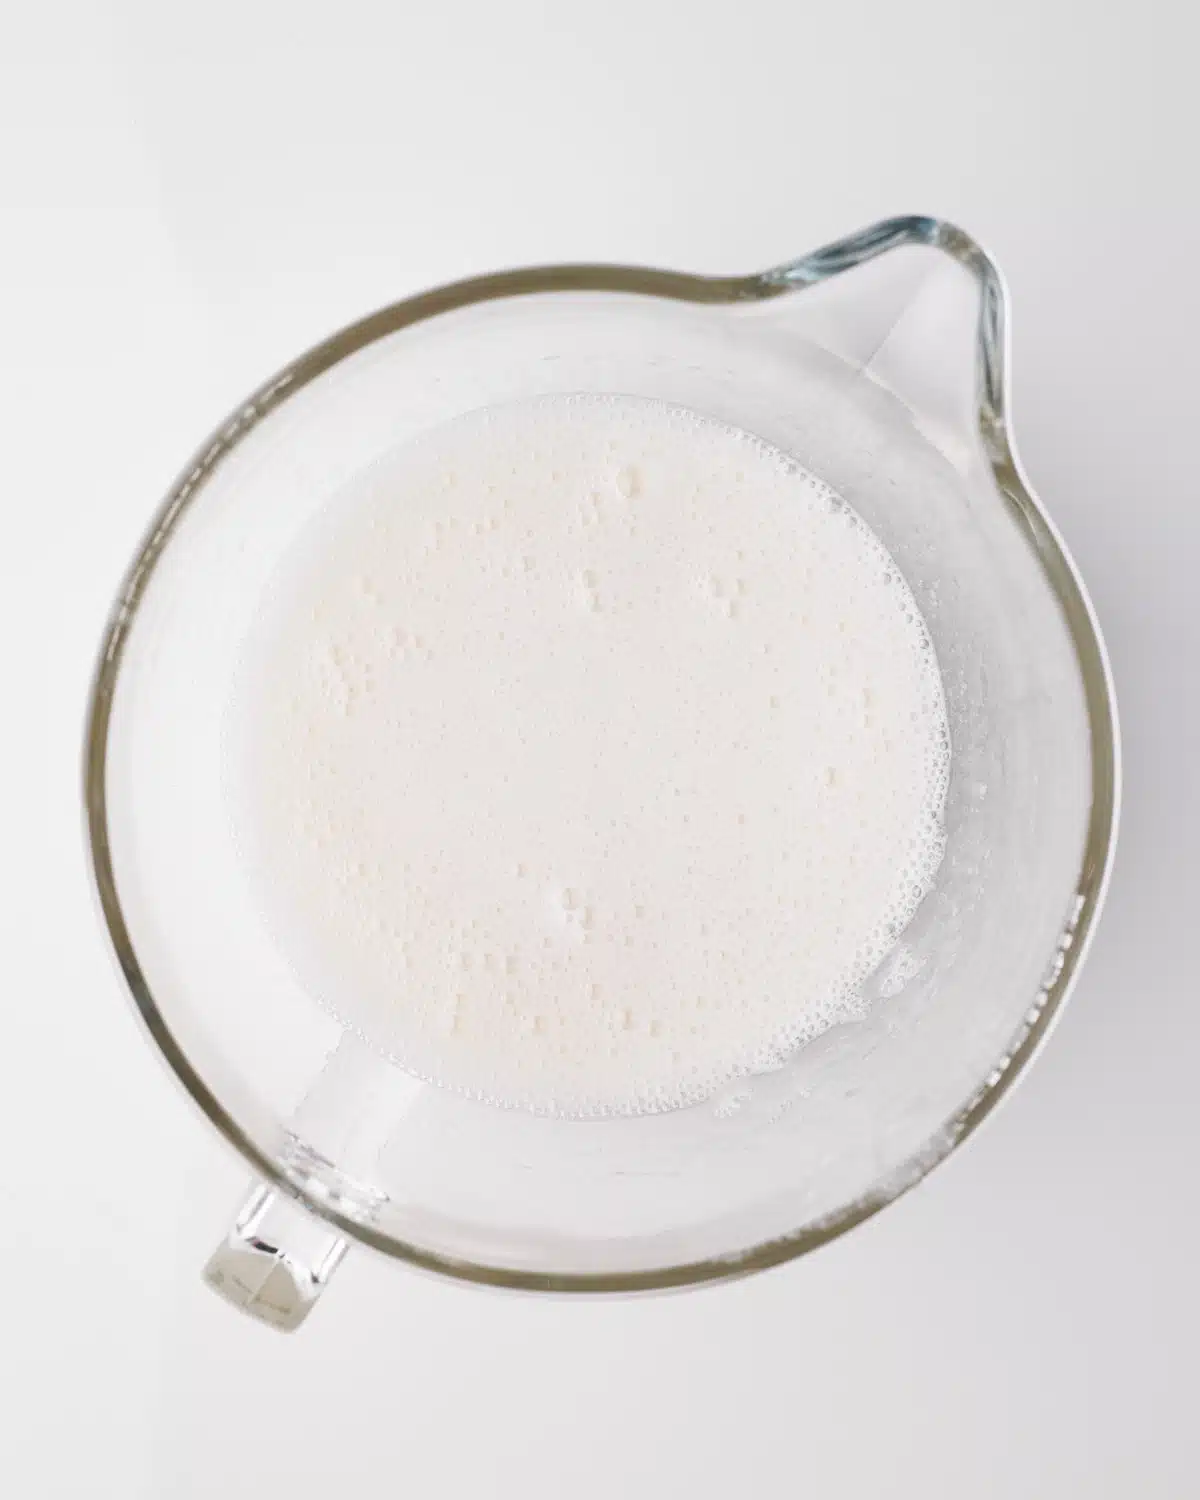
- While you are waiting for the syrup to come to temperature, put the bloomed gelatin into the bowl of your stand mixer with a whisk attachment on it (don't turn it on yet). You could technically do this with an electric whisk, but it takes a long time to whip up and your arm may get very sore, so I recommend a stand mixer if you have one.
- As soon as the thermometer reads 250°F / 121°C, remove the pan from the heat immediately. Start your mixer on medium speed to break up the gelatin and begin pouring the sugar syrup in in a slow and steady stream. Try not to hit the side of the bowl or the whisk with the stream, just get it in between if you can. Add it slowly as it is whipping, until all the sugar syrup is in.

- Stop the mixer, add the cocoa powder mix, then turn the mixer up to high speed and whip for 10 minutes.
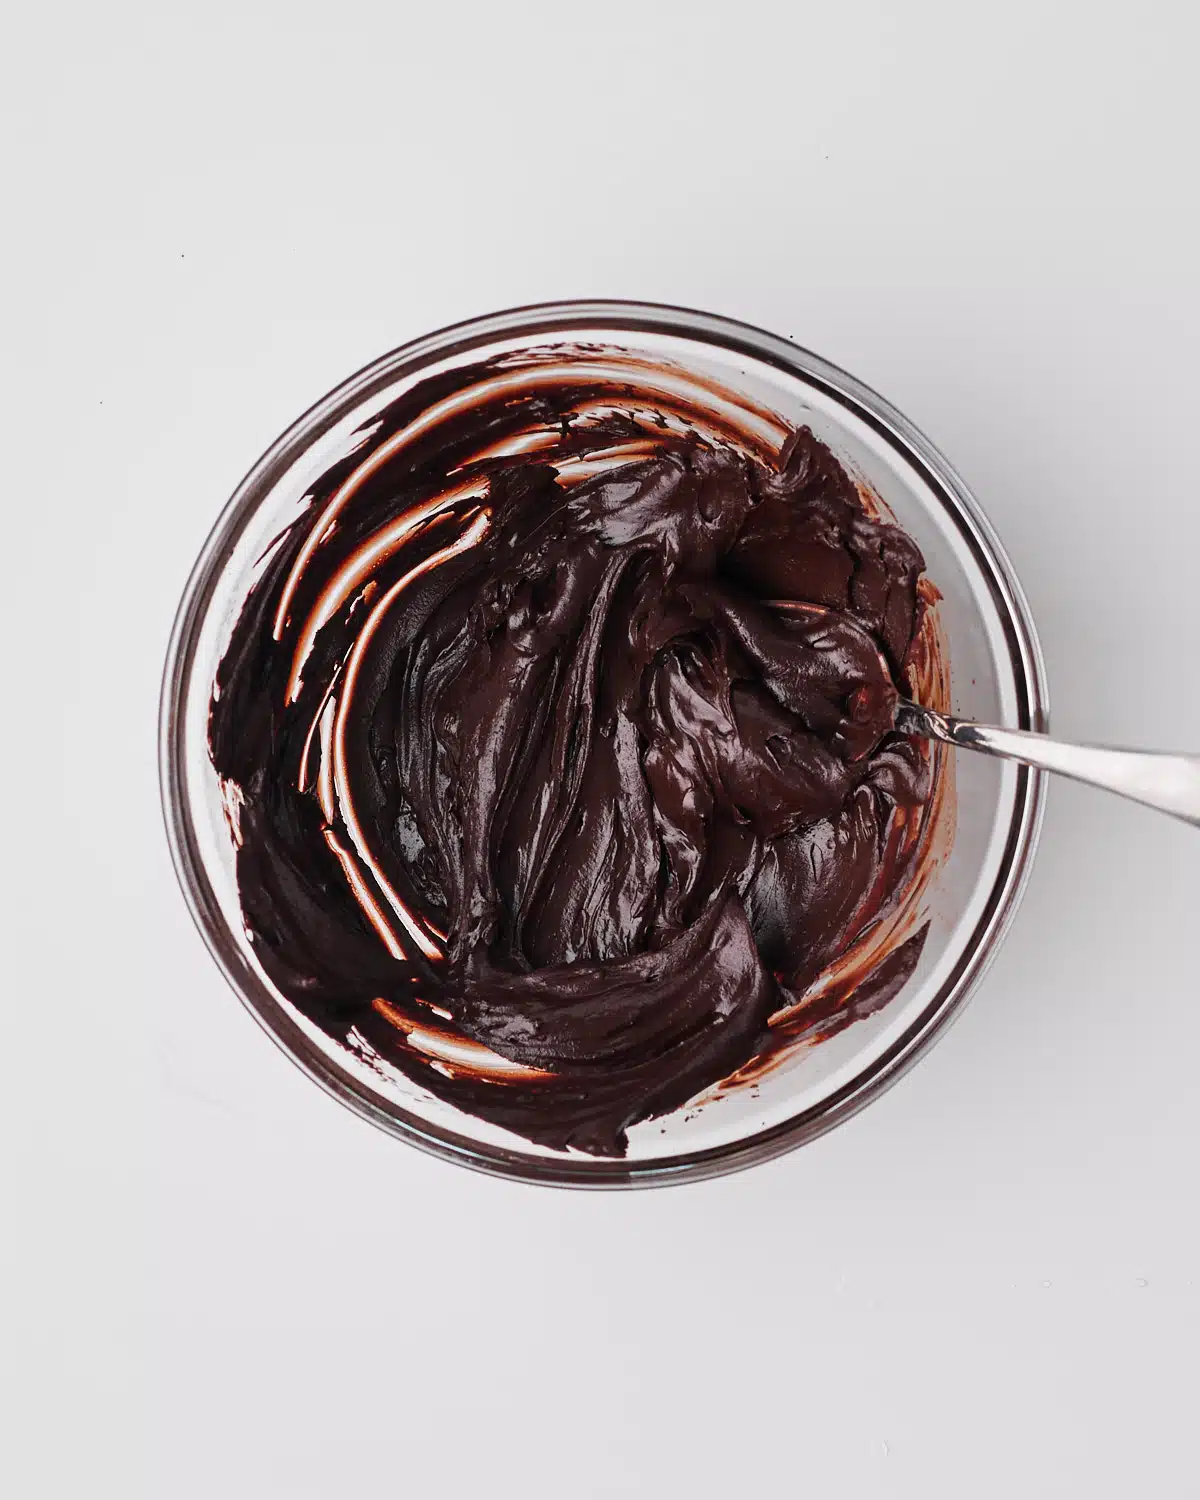
- Toward the end of the 10 minutes, break the chocolate up into small pieces in a microwave-safe bowl. Microwave in 30-second increments, stirring in between, until the chocolate is completely melted. Set aside.
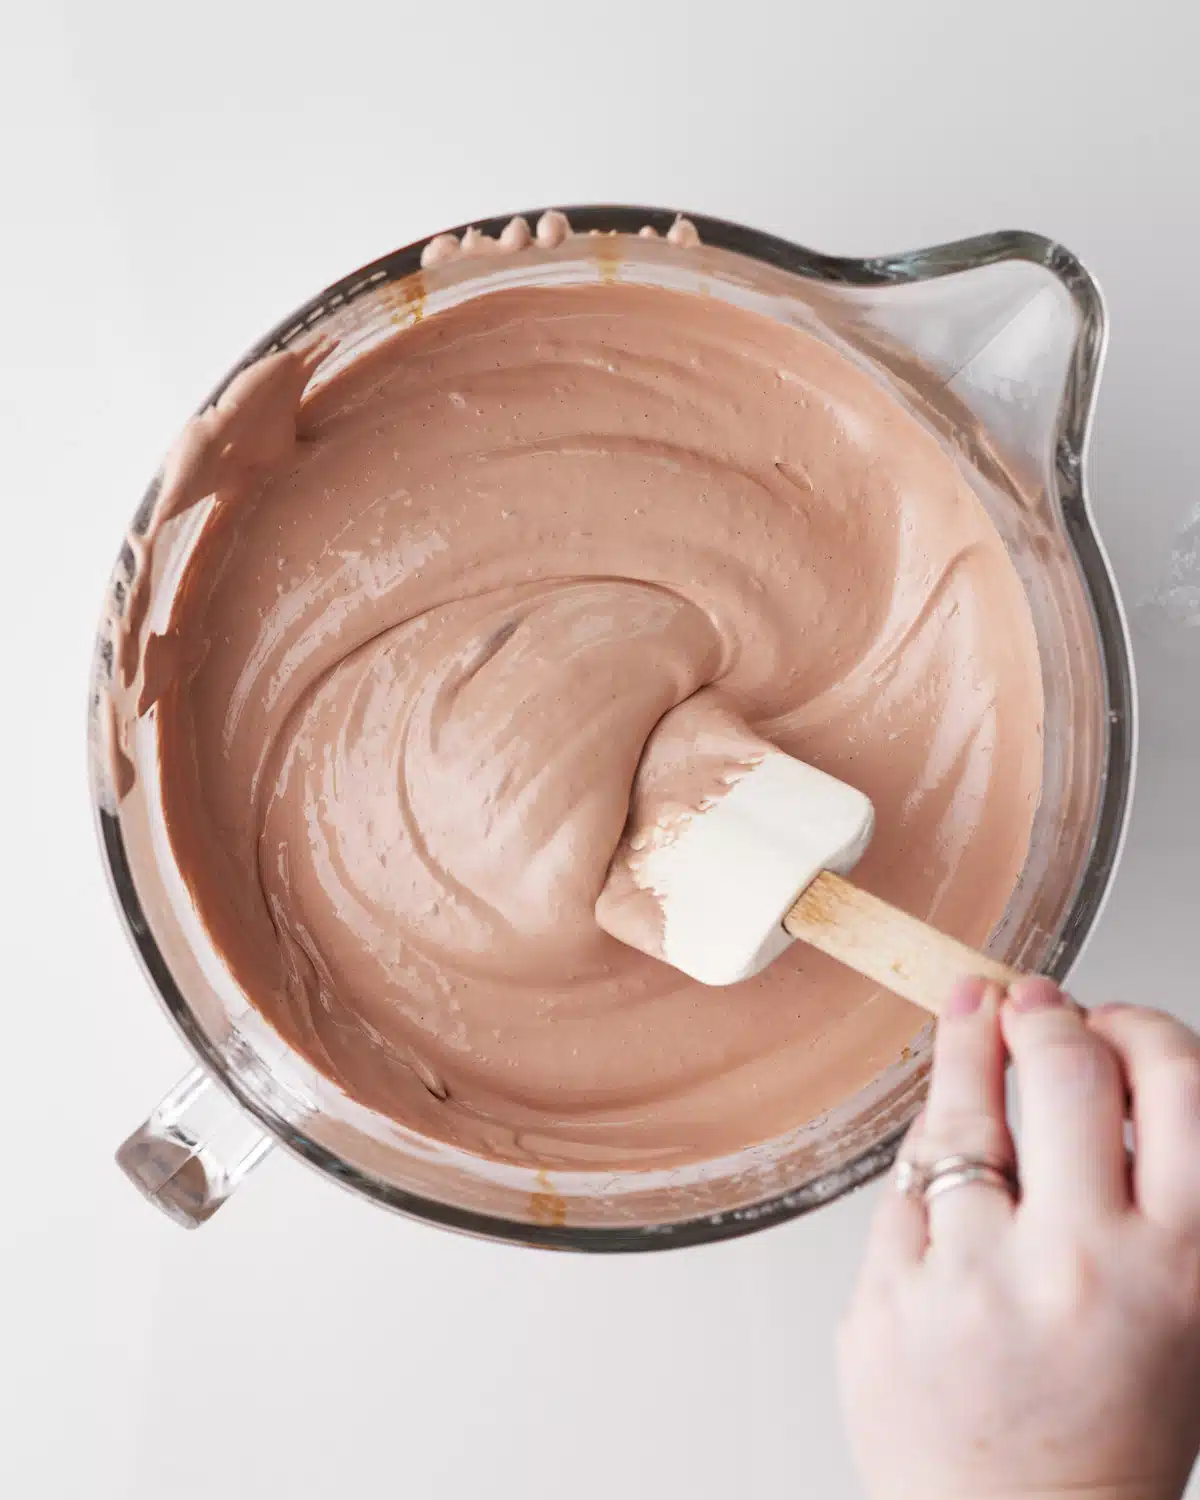
- After 10 minutes of whipping, the marshmallow should be thick and glossy, like marshmallow fluff. It should be making shapes as the whisk goes around, as meringue or whipped cream would. If it doesn't look like this, keep whipping at high speed for another few minutes until it thickens up.
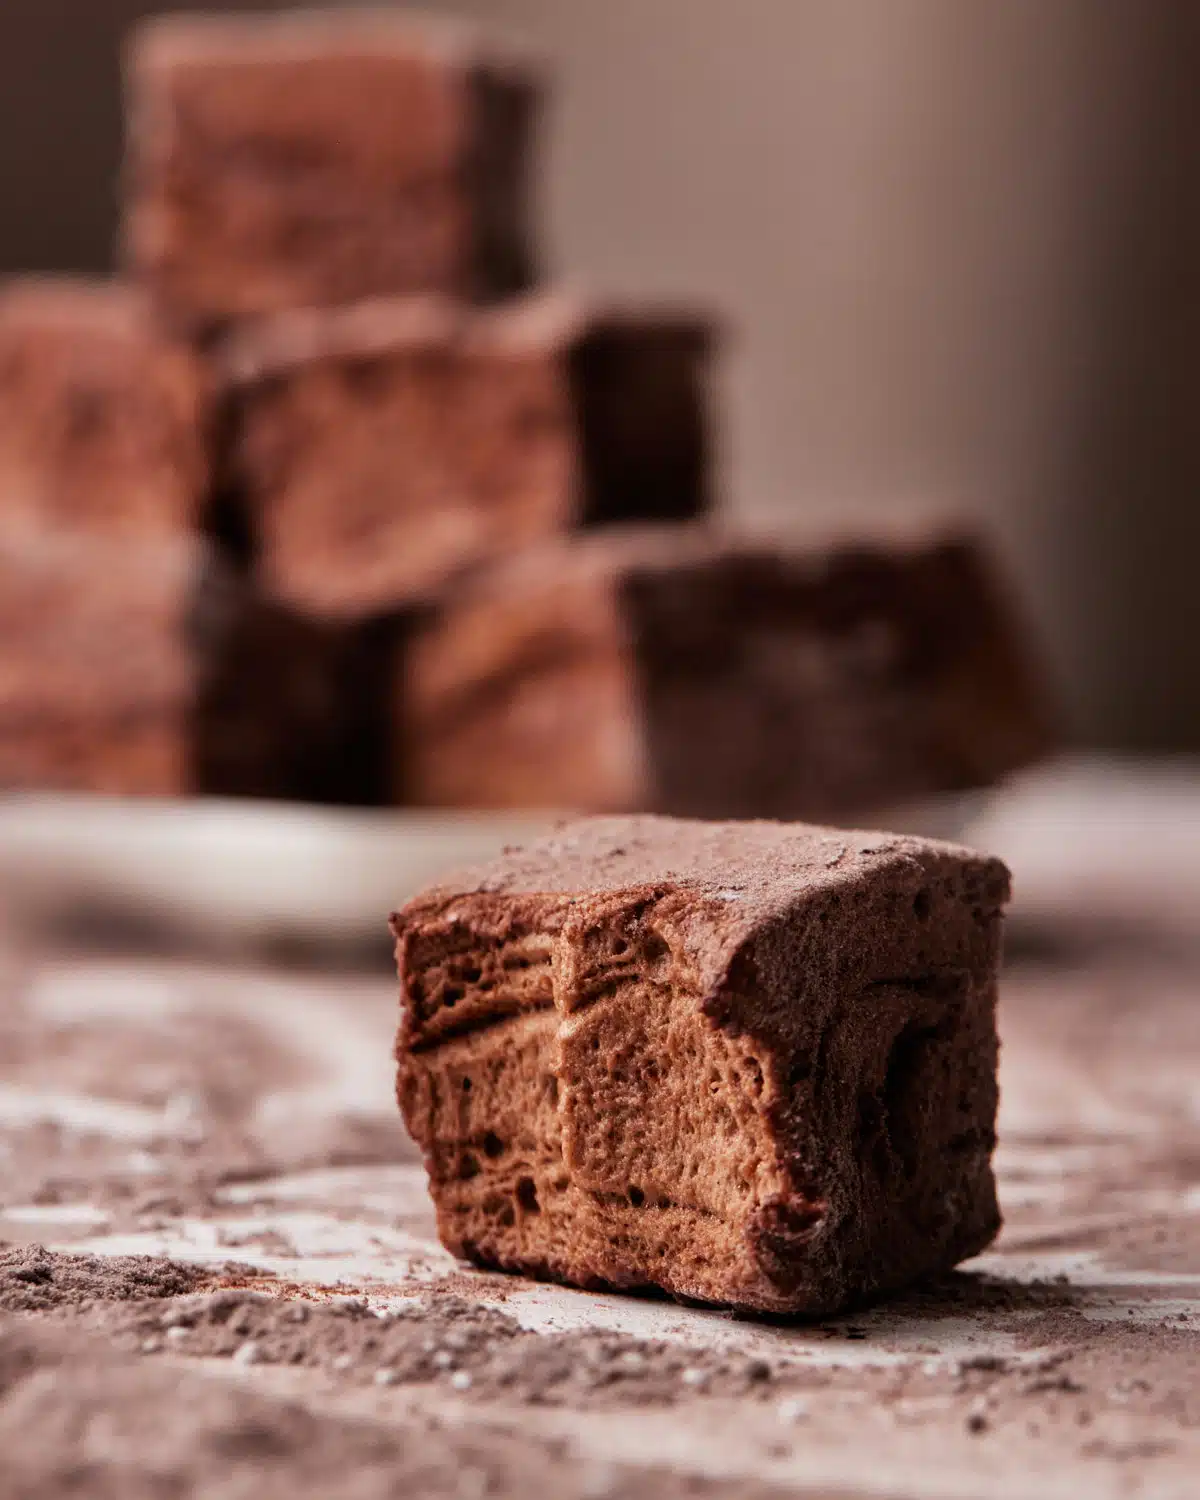
- As soon as it is thick enough, pour the melted chocolate into the sweet marshmallow and swirl it around a little. We don't want to incorporate it, just a few turns to make a pretty chocolate swirl design.

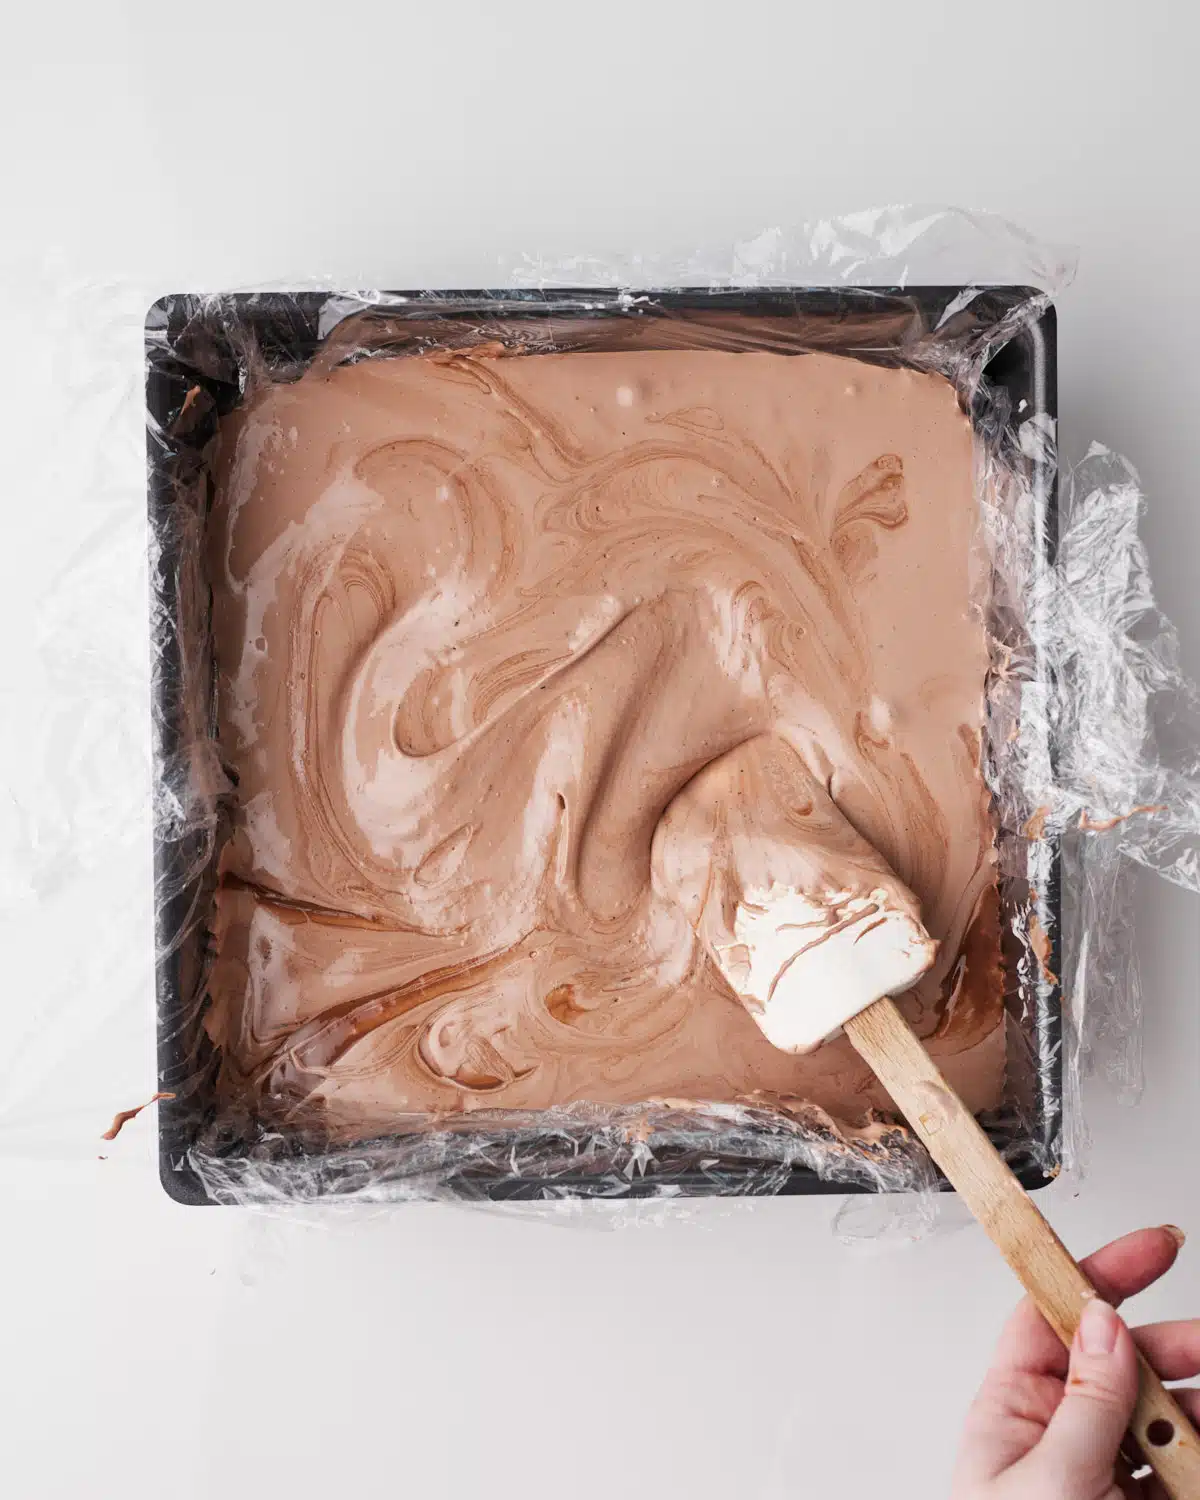
- Immediately pour the chocolate marshmallow mixture into your prepared cake pan. You need to work quickly as the marshmallow will start setting up right away. The marshmallow is very sticky, so it can help to use a spatula with a little bit of flavorless oil on it. Spread the marshmallow out to all four corners of the pan and smooth it out as much as possible.
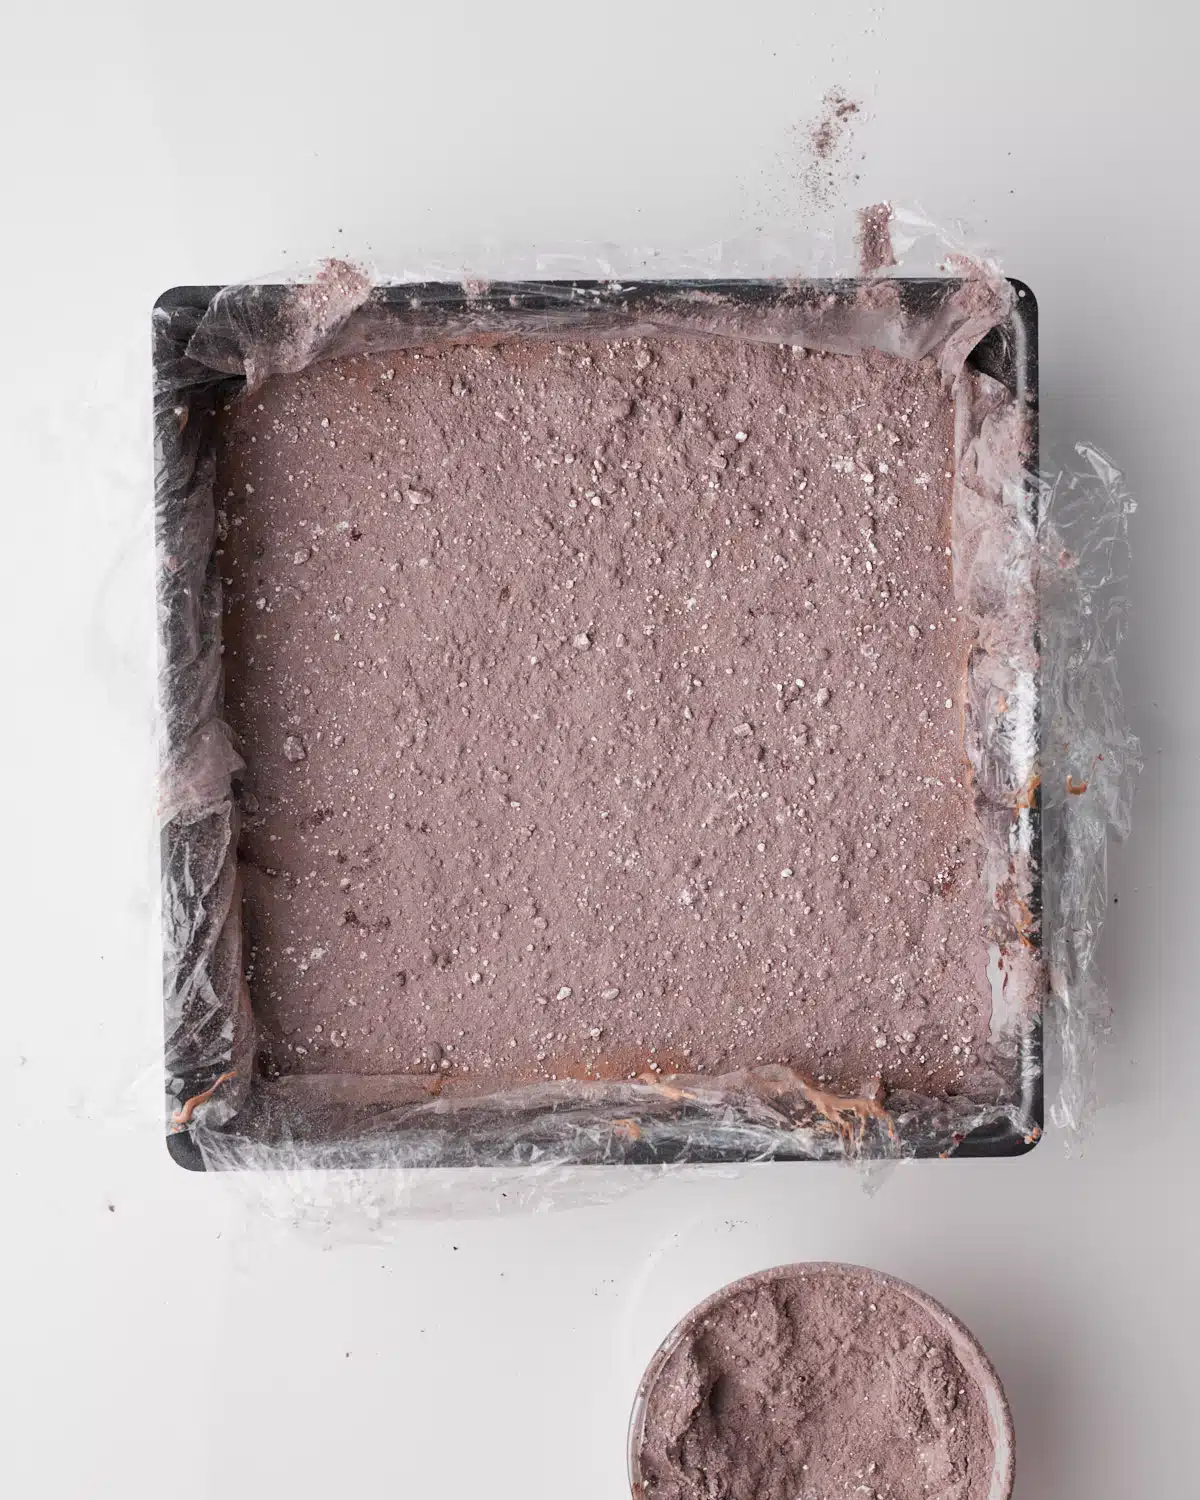
- In a large bowl, mix together the dry ingredients (powdered sugar and cocoa powder) for the topping until well combined. Sprinkle some of this generously over the top of the marshmallow, covering it entirely.
- Let the chocolate marshmallow sit out at room temperature overnight or for at least 8 hours. Don't cover it up with plastic wrap or anything - we want the air to dry out the marshmallow a little.
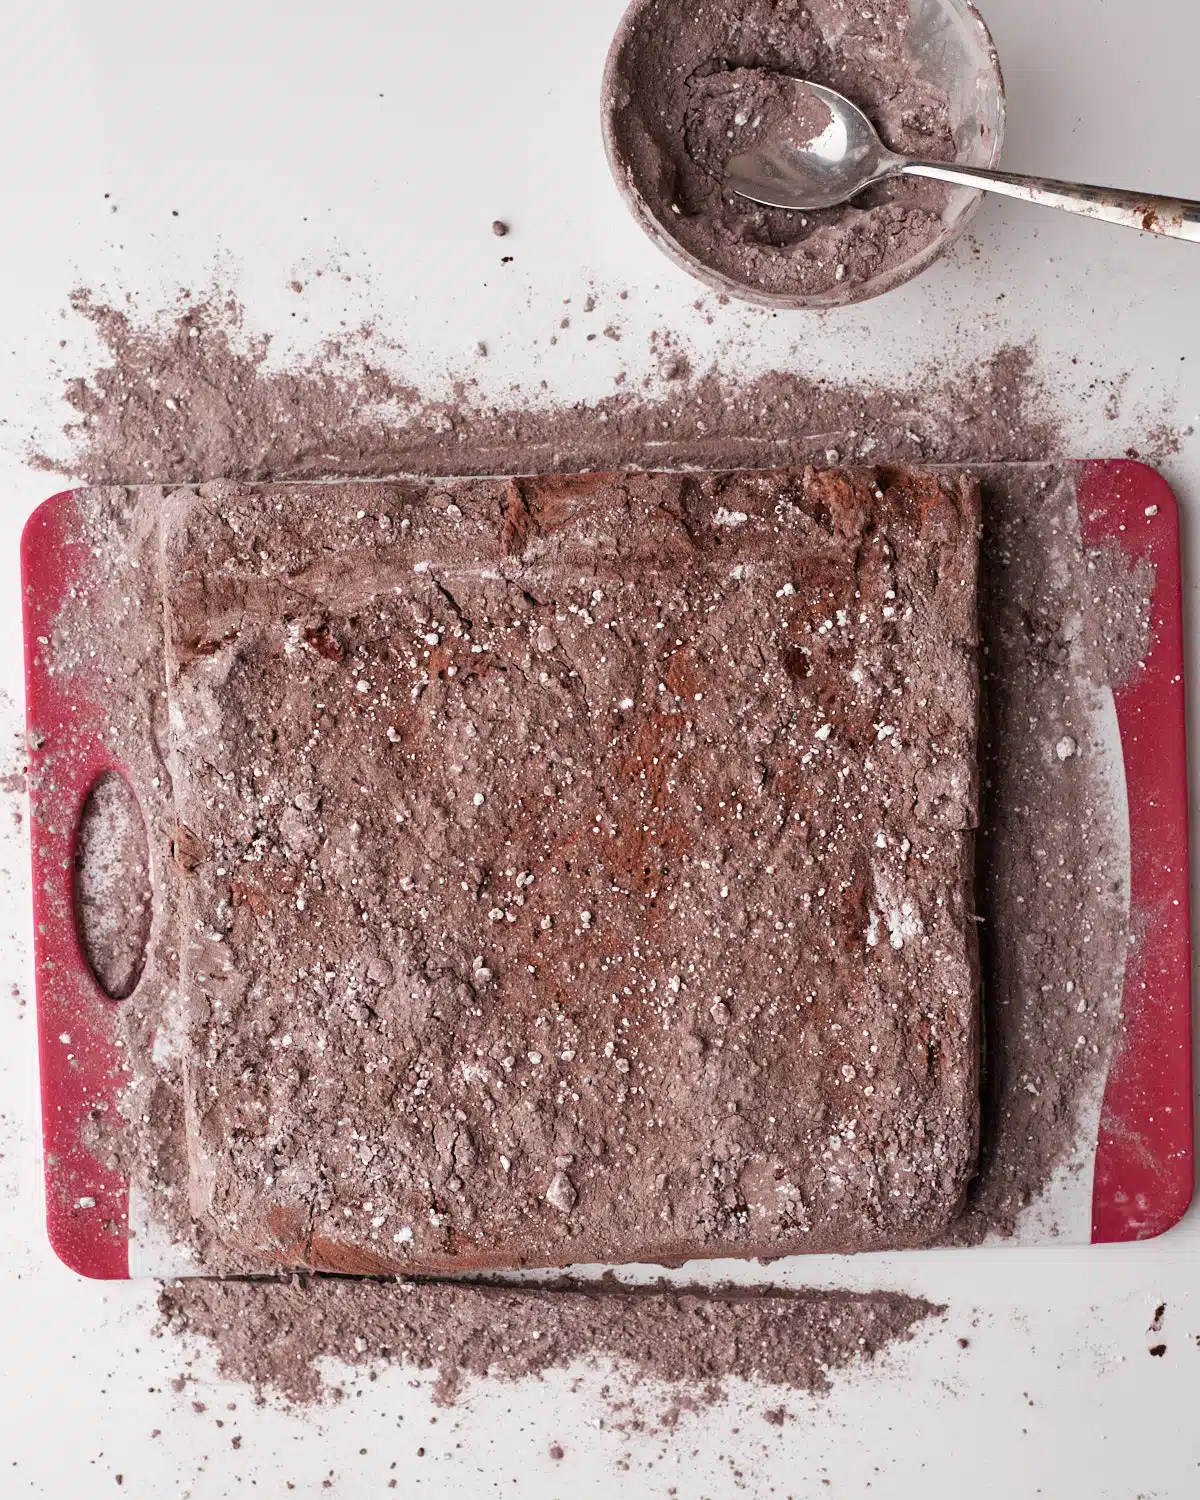
- The next day, flip the cake pan upside down so that the marshmallow is tipped out onto your work surface. Peel off the plastic wrap or parchment paper and then coat the rest of the visible marshmallow with more of the powdered sugar/cocoa powder mixture. Let it sit like this for another 2-3 hours.
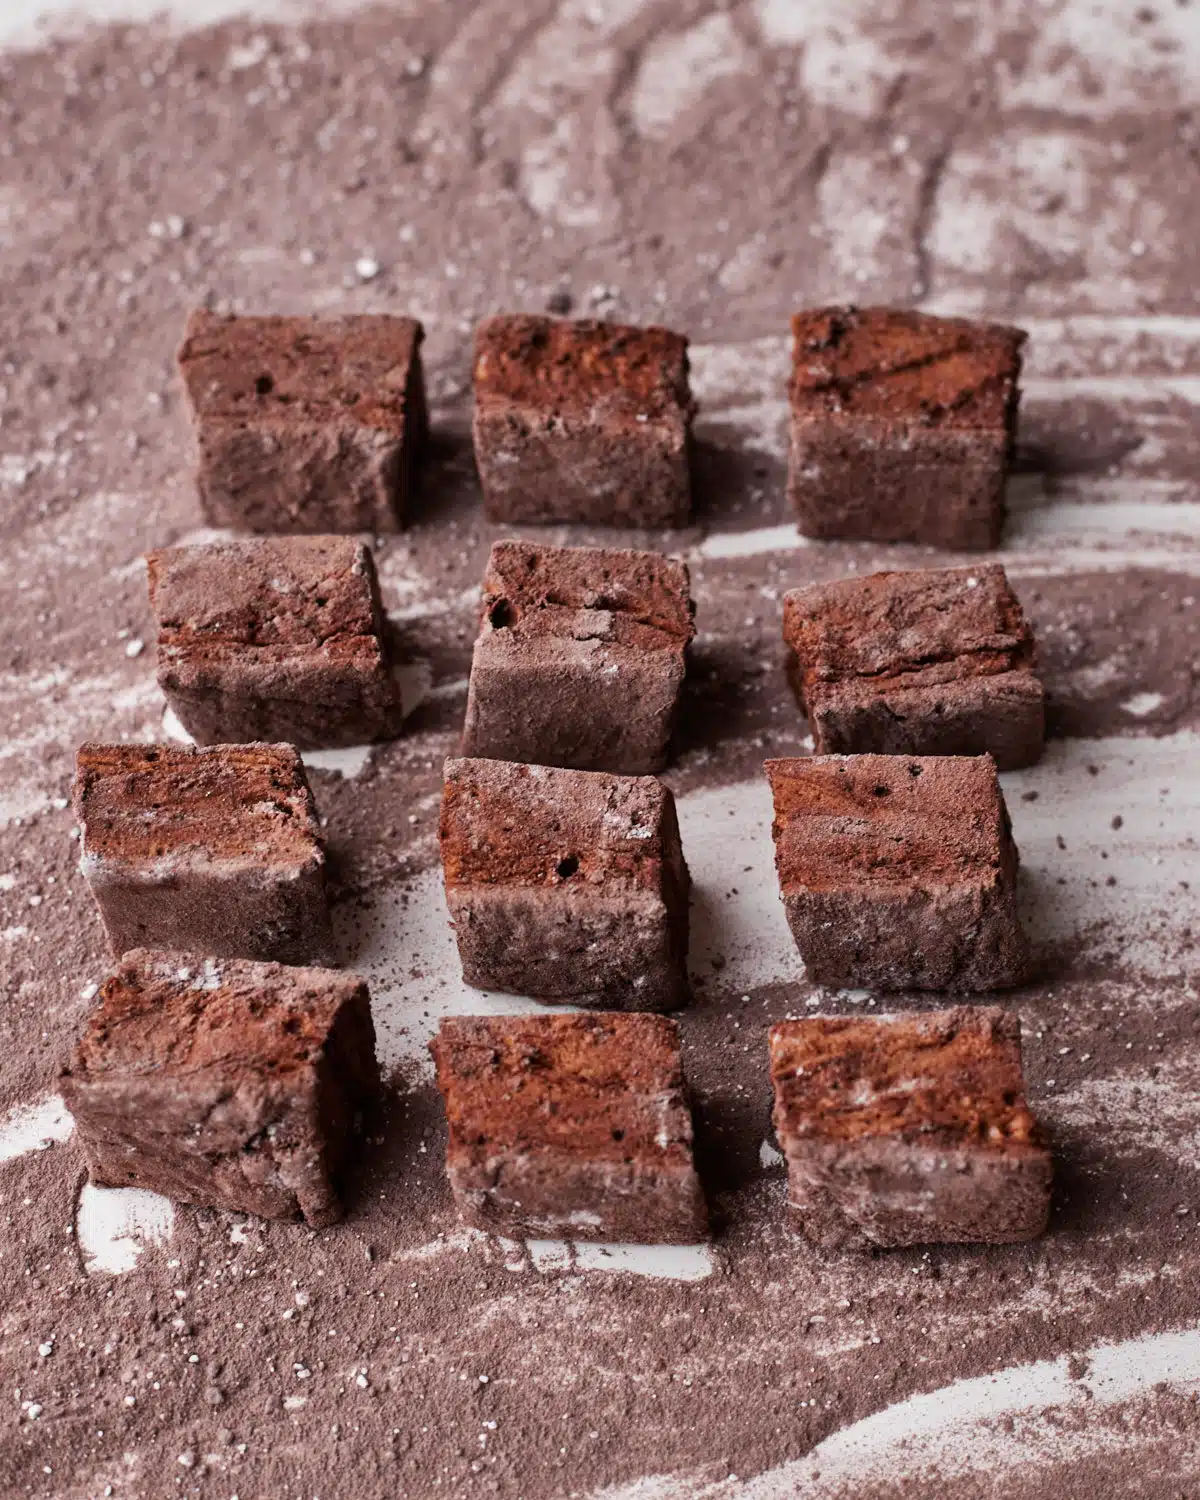
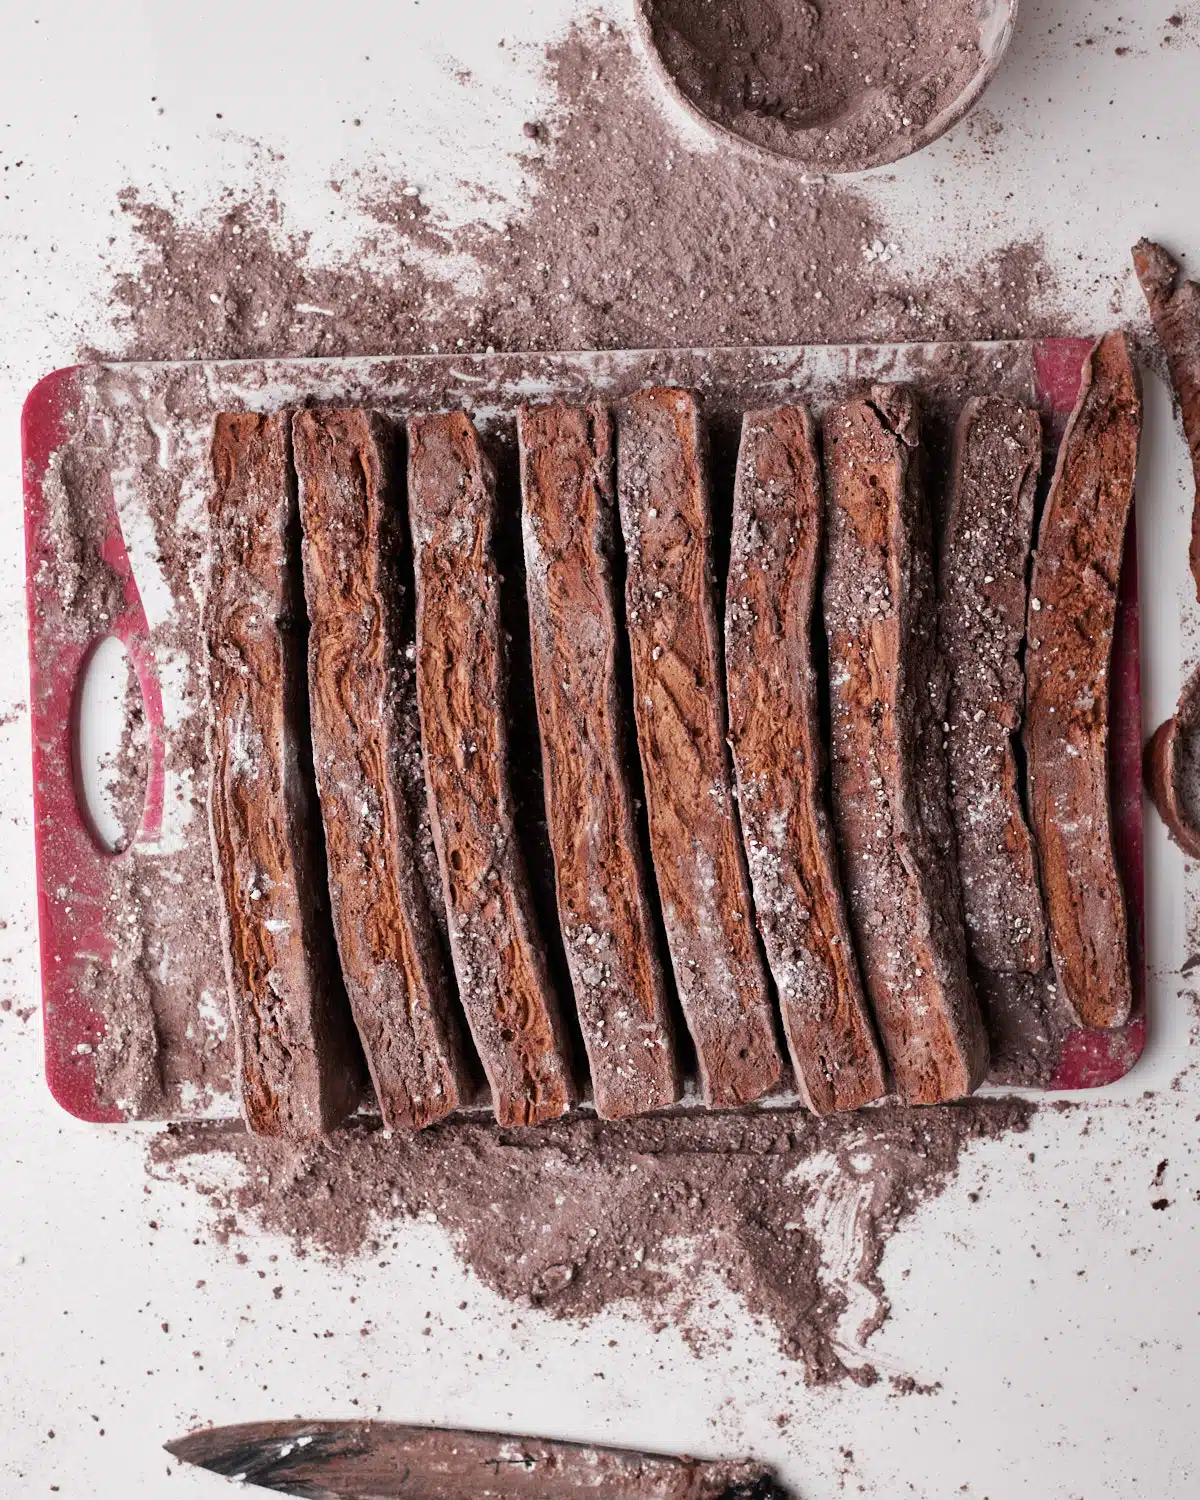
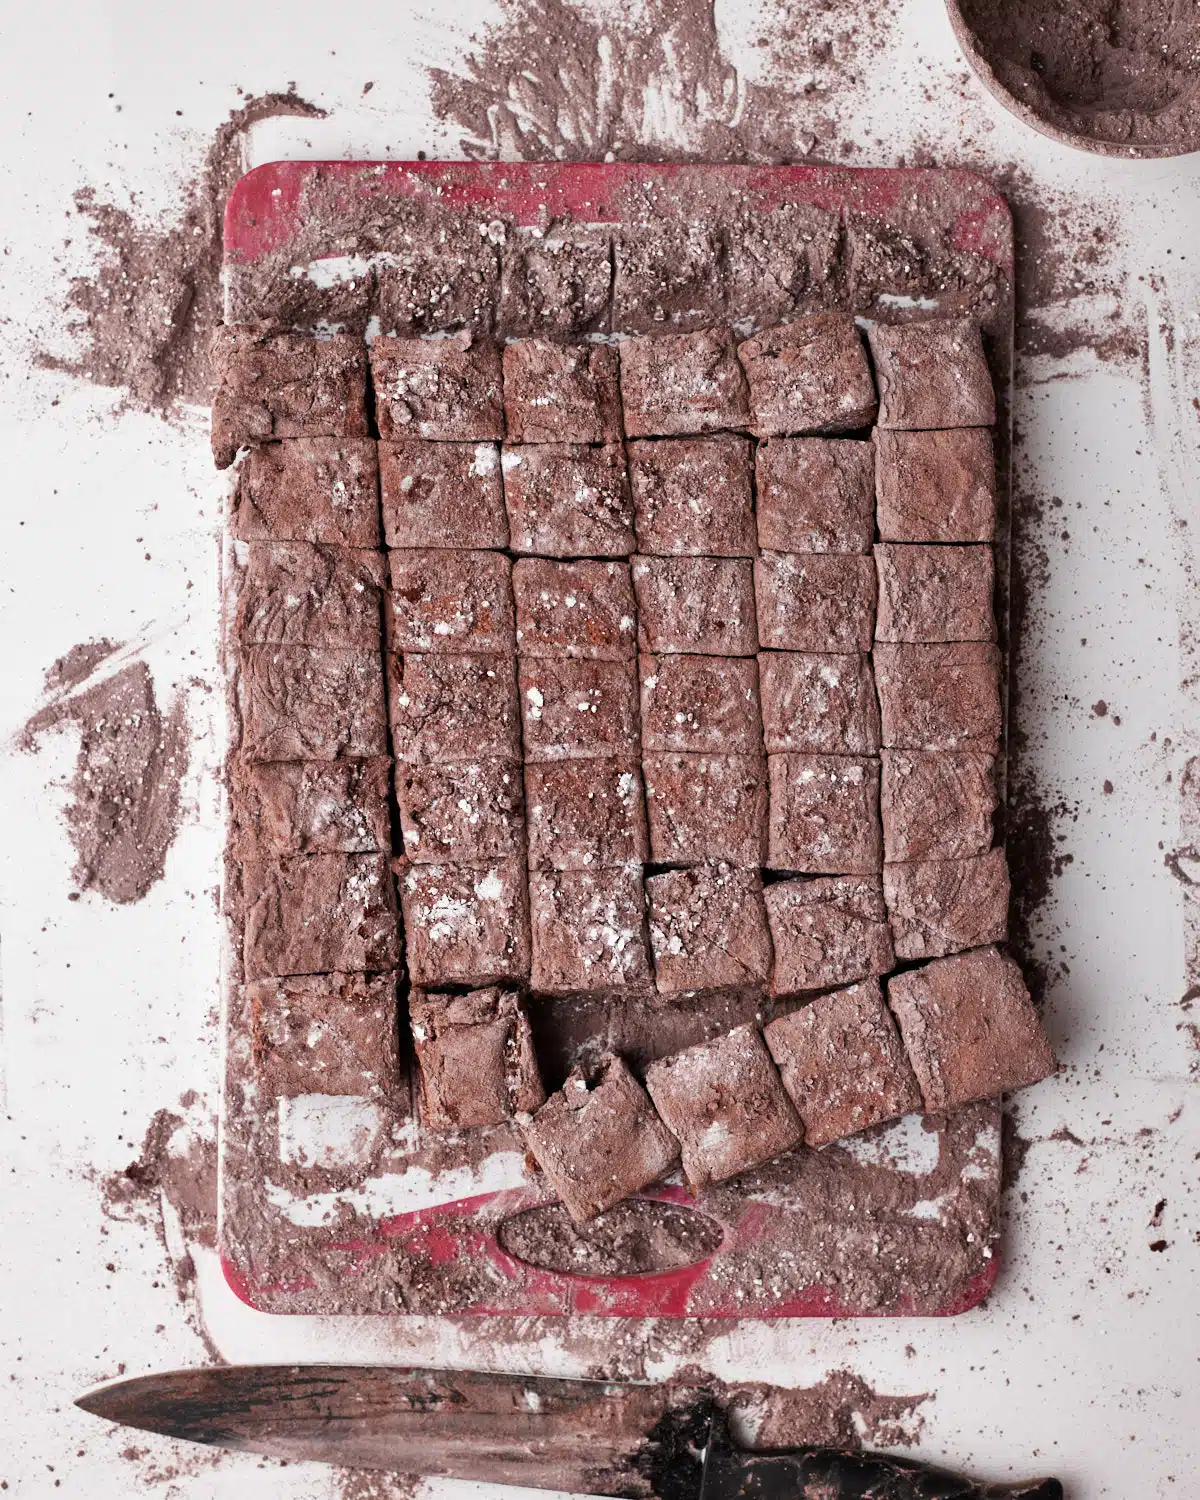
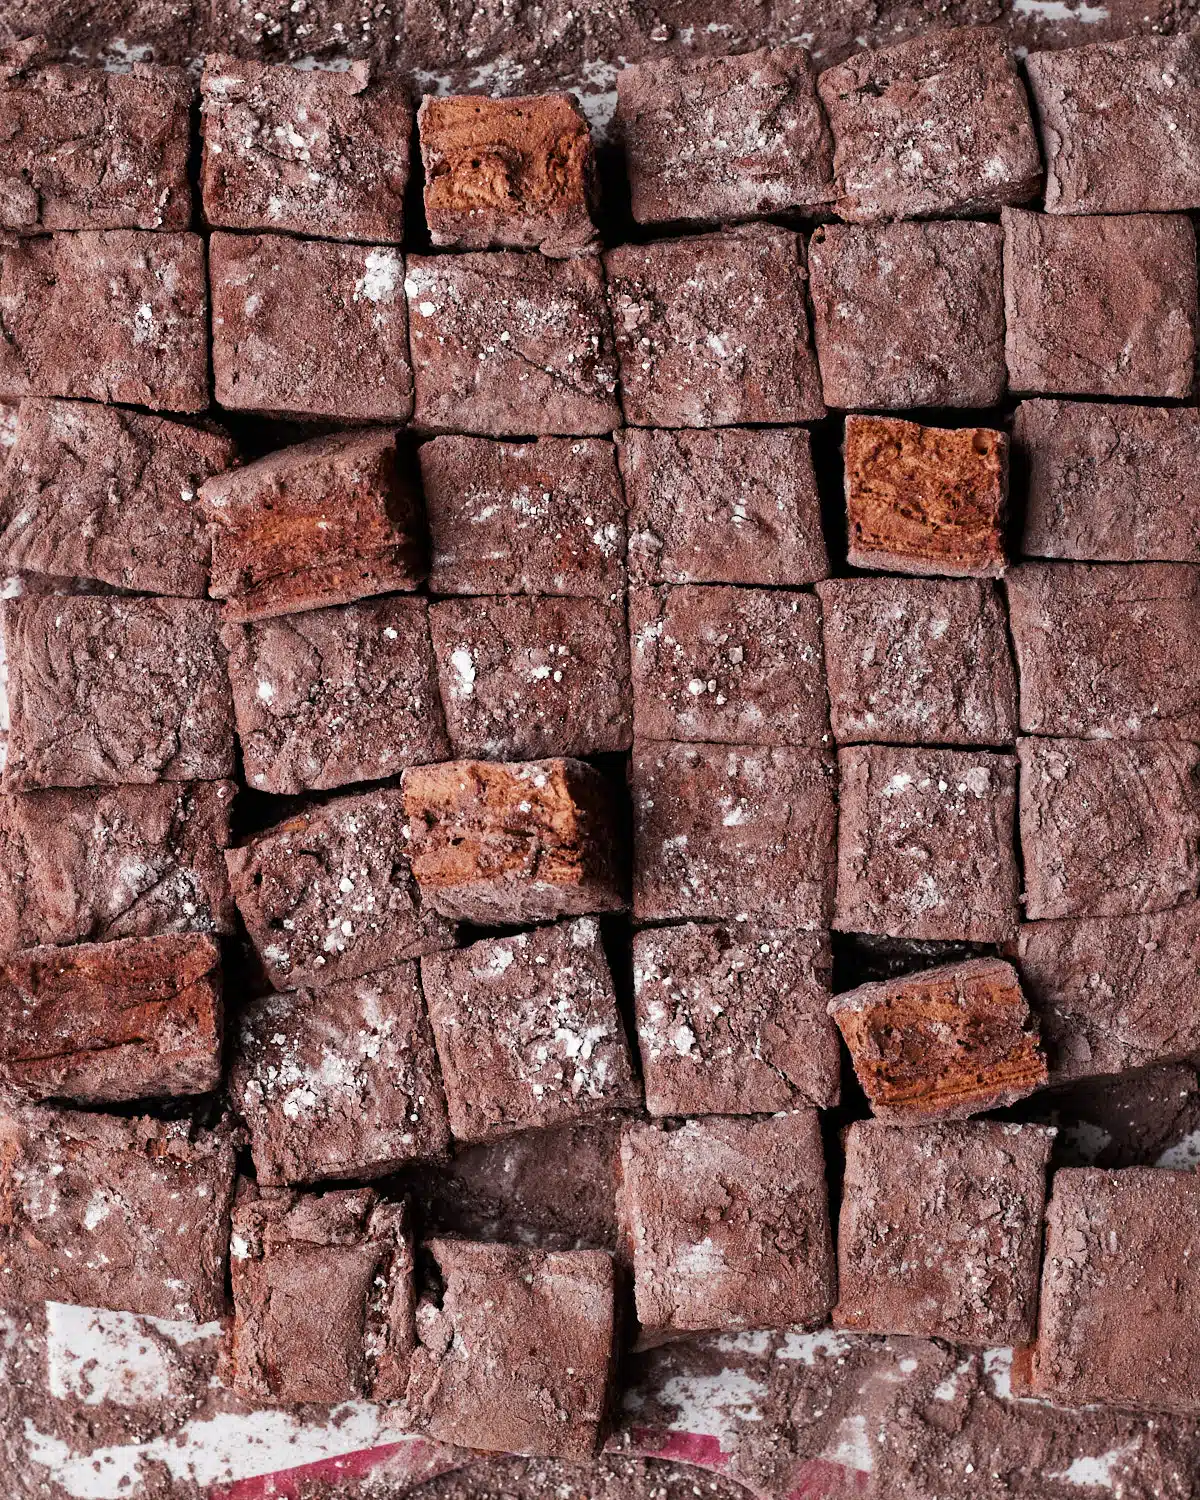
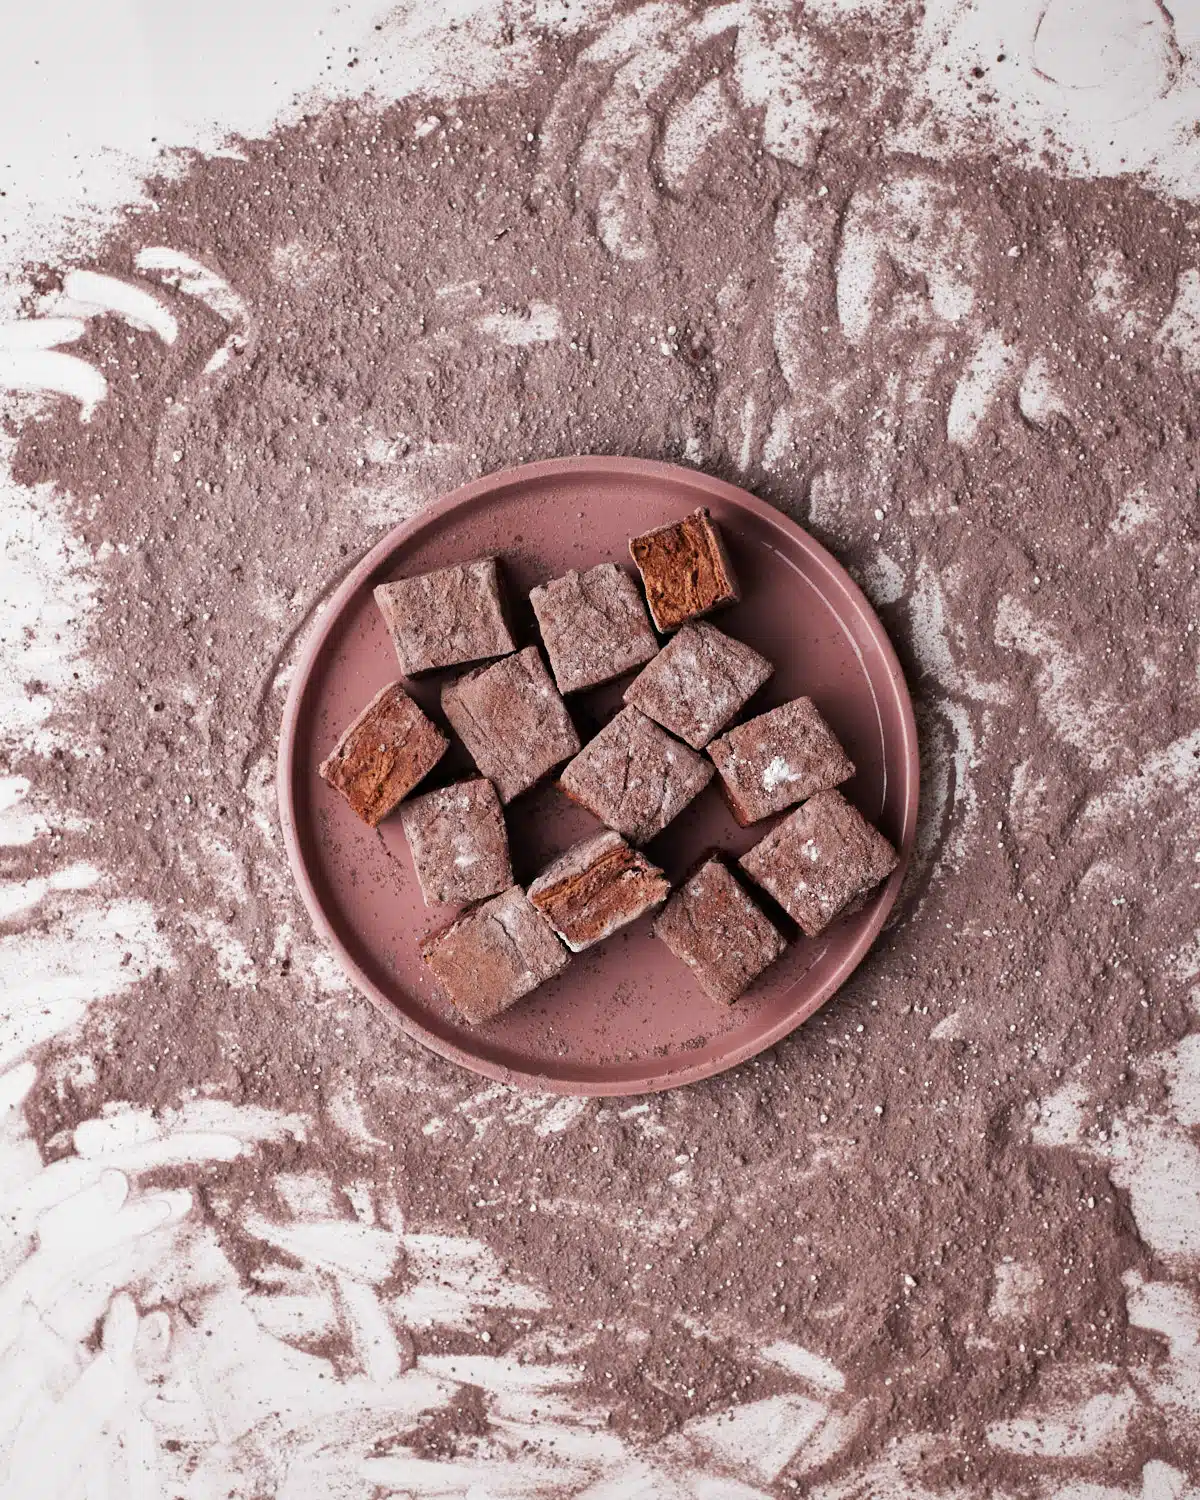
- When you are ready to cut the marshmallow, coat a large sharp knife with flavorless oil or cooking spray and some of the powder coating mixture. Start by trimming off the edges so you'll have nice, clean sides to your marshmallows.
- Cut into whatever size marshmallows you like - whether you want large marshmallows or mini marshmallows.
Reader Review:
Great recipe - as always 🙂 Love all the options for what you can do with these tasty treats, too! Thank you.
⭐⭐⭐⭐⭐ - Tara
What To Do With Homemade Chocolate Marshmallows
- Eat them as they are - Chocolate marshmallows are delicious treats just as they are - have them as a snack or pop them into lunch boxes.
- Double Chocolate S'mores - These toast up so beautifully, put them in between some graham crackers with a little extra chocolate for a gooey chocolate marshmallow s'mores treat!
- Bake with them - You could use these in any recipe that uses regular marshmallows, such as my gooey chocolate marshmallow cookies.
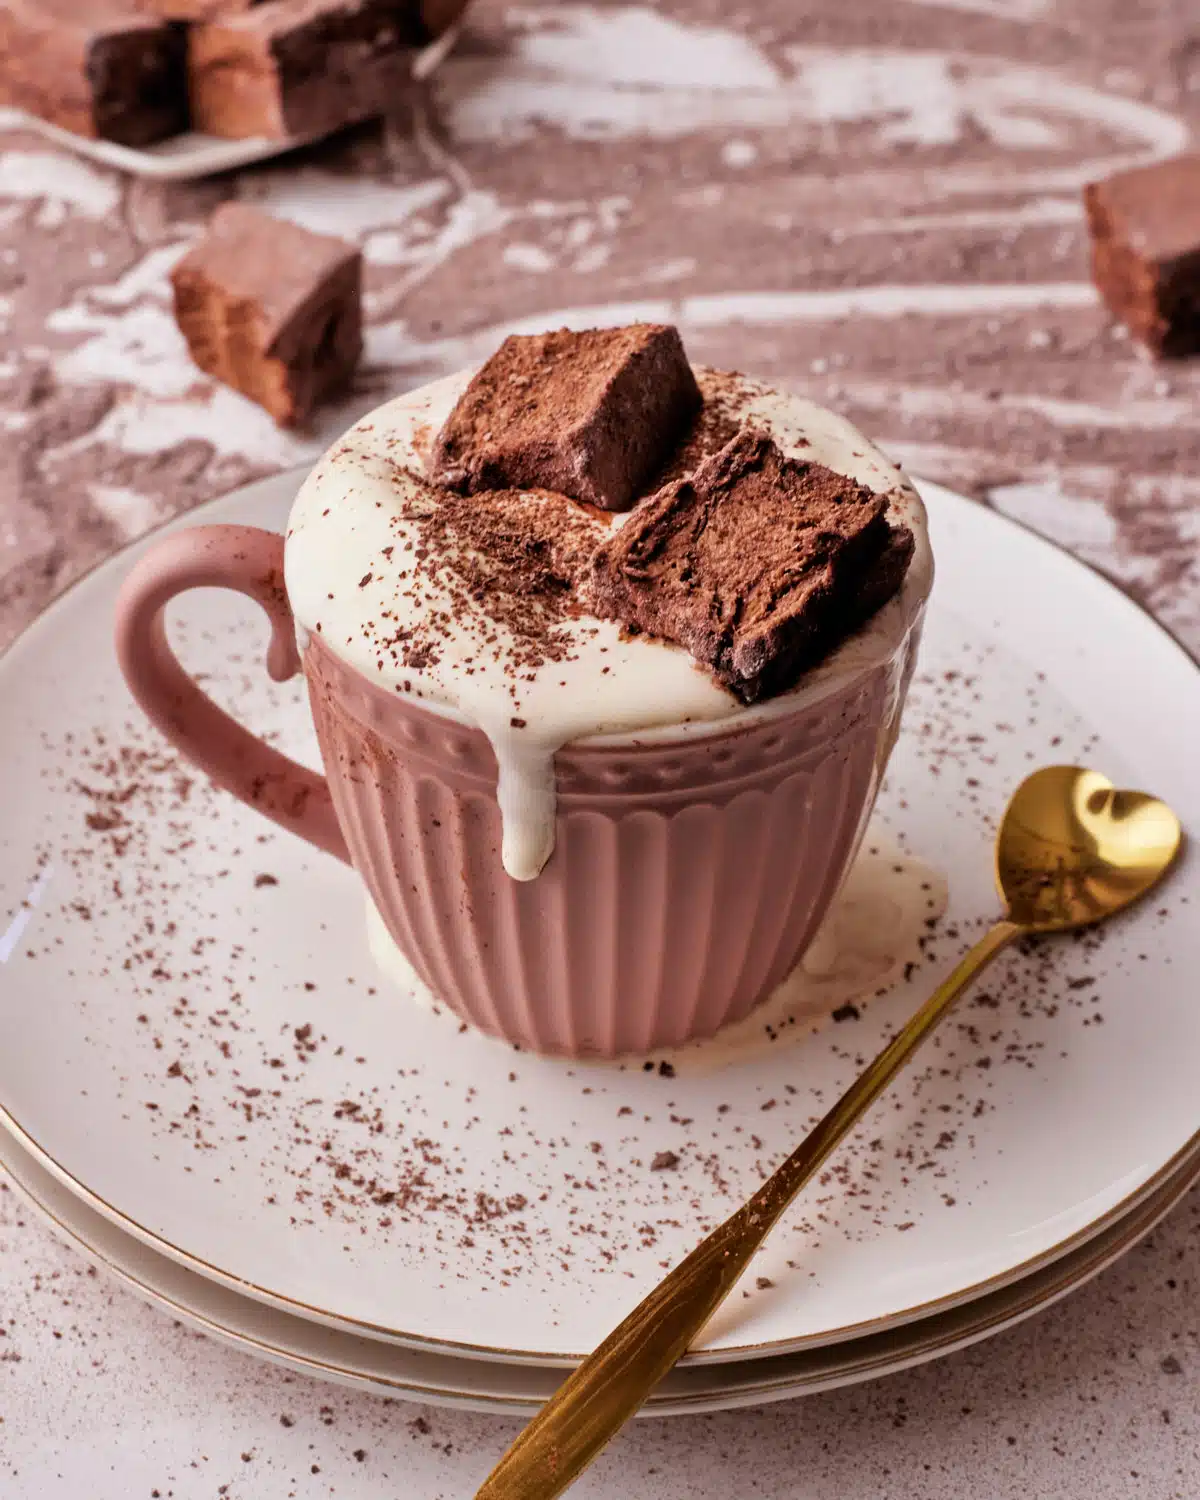
- In Hot chocolate - Of course, pop a couple of chocolate marshmallows into your mug of hot chocolate for an extra indulgent drink.
- Marshmallow Pops - Stick the chocolate marshmallows with some cake pop sticks and coat in chocolate or candy melts for an easy treat.
Substitutions
Vegan Marshmallows - if you want to make vegan chocolate marshmallow, you can substitute the gelatin powder for agar agar, but just know it won't have quite the same fluffy marshmallow texture.
Brown Sugar - If you prefer not to use white sugar, you can use brown sugar instead in equal measurements. It will also add a slight molasses flavor.
Cocoa Powder - If you can't find the Dutch-processed cocoa powder, you could also use any other regular cocoa powder you can find. Dutch-processed cocoa powder will give the best flavor and texture, but the recipe will still work with other kinds. Just try to use high-quality cocoa powder if you can find it.
Chocolate Marshmallow Recipe Variations
The possibilities are really endless with this homemade marshmallow recipe! You can add whatever you like from your favorite flavors to mixins. Here are some ideas:
Mocha Marshmallows - For a stronger coffee flavor, double or triple the amount of espresso powder you add to the cocoa paste to make a delicious mocha marshmallow.
Extra Chocolate - If you want even more of a chocolate hit, try throwing in some mini chocolate chips into the marshmallow mixture before stirring in the chocolate swirl.
Chocolate-Covered Marshmallows - Try dipping your finished chocolate marshmallows in some melted chocolate! For tips on tempering your chocolate, check out my chocolate tempering guide. You could even try a white chocolate drizzle on your chocolate-dipped marshmallows as well for extra style points.
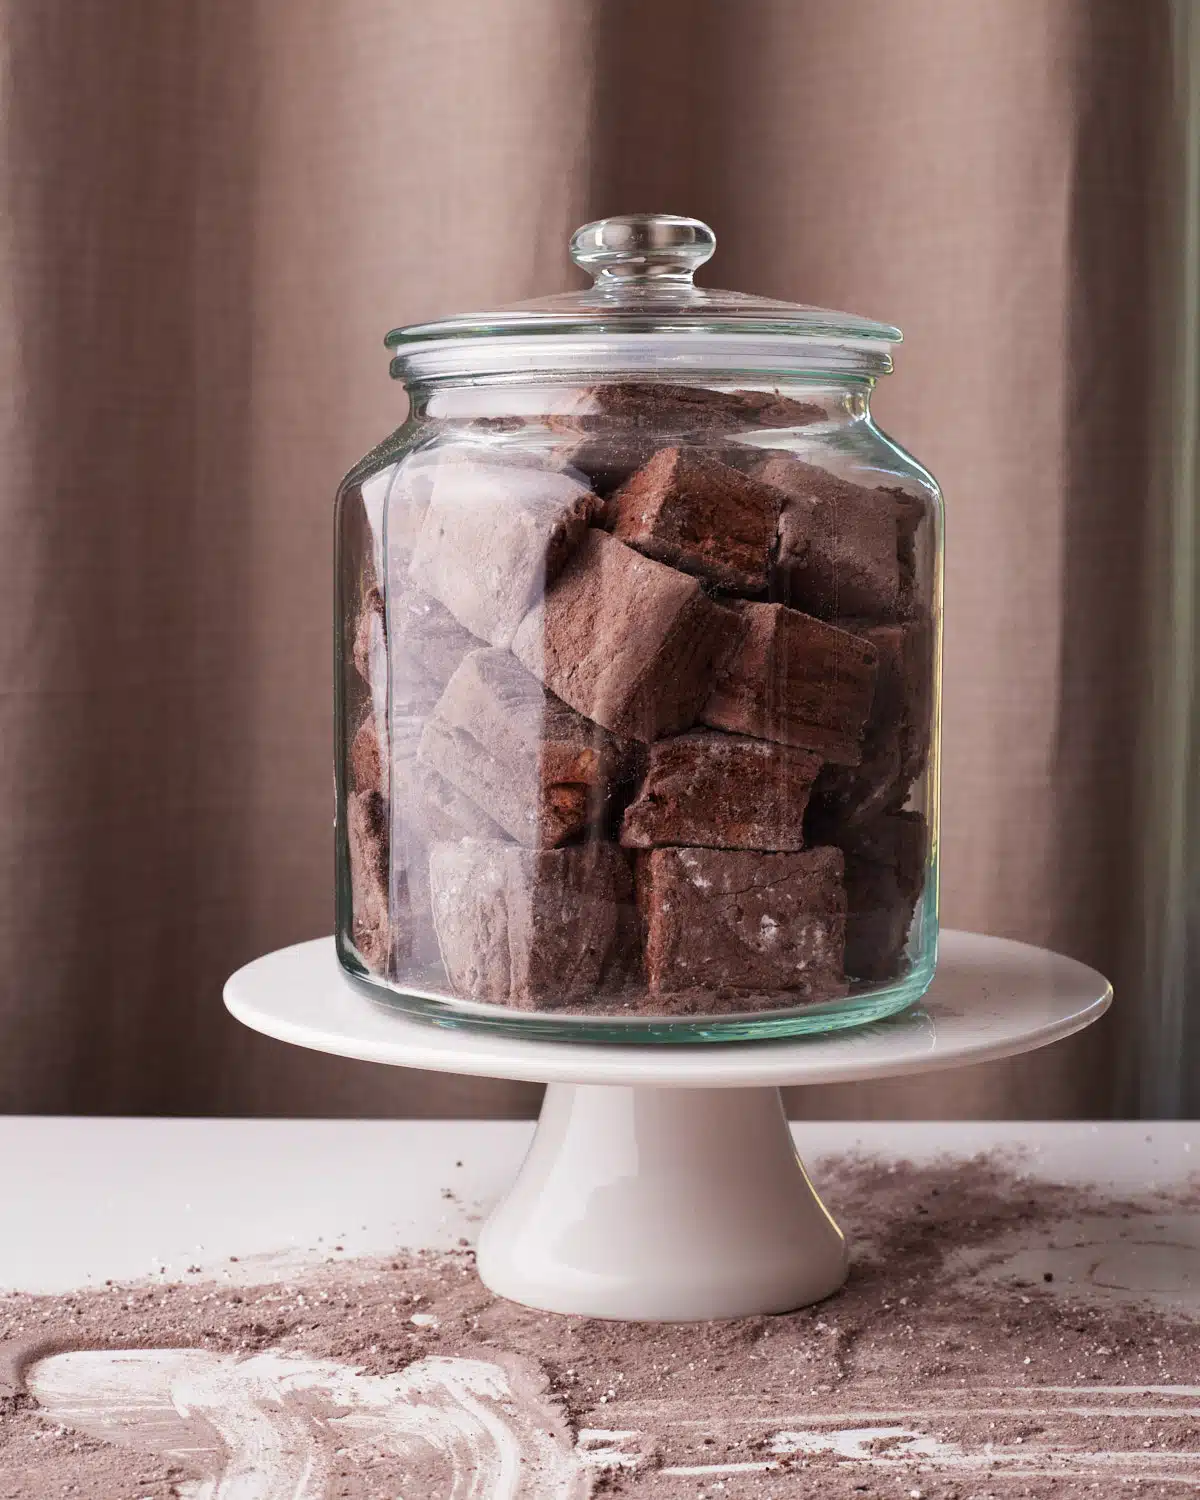
How To Store Chocolate Marshmallows
Store your chocolate marshmallows in an airtight container at room temperature. They will keep like this for about a month. Don't ever store them in the fridge as they will go all gooey (and not in a good way!). They also look super pretty stored in jars on the kitchen shelf!
Show Me Your Bakes!
If you make this recipe, please tag @bonni_bakery on Instagram or send me a photo - I love seeing all your creations.
Want your bake featured on the blog? You can also upload a photo here.
Your Bakes

More Edible Gift Recipes
If you love this chocolate marshmallow recipe, you might also like these:

Chocolate Marshmallow
Ingredients
- 320 ml (1 ⅓ cups) Water 320g / 320ml
- 28 g Gelatin Powder (4 x 7g packets)
- 1 teaspoon Salt
- 60 ml (¼ cup) Hot Water 60g / 60ml
- 35 g (⅓ cup) Cocoa Powder 35g (Dutch Processed)
- 2 teaspoon Vanilla Extract
- 1 teaspoon Espresso Powder
- 450 g (2 ¼ cups) Granulated Sugar 450g
- 185 g (½ cup + 1 tbsp) Corn Syrup 185g (or Glucose Syrup)
- 140 g (5 oz) Chocolate 140g (milk or dark)
- 90 g (¾ cup) Powdered Sugar 95g (for the coating)
- 35 g (⅓ cup) Cocoa Powder 35g (for the coating)
Equipment
- Stand Mixer with whisk attachment
Instructions
- Line a 10" square baking pan with plastic wrap, being sure to cover all of the inside of the pan.
- Divide the water equally into two bowls, and set one of them aside. In the other bowl, sprinkle the powdered gelatin and salt over the top of the water. Do not mix, let it sit and bloom while you prepare the other ingredients.28 g Gelatin Powder, 320 ml (1 ⅓ cups) Water, 1 tsp Salt
- In a separate bowl, mix together the hot water, cocoa powder, vanilla, and espresso powder into a chocolatey paste. Set aside.35 g (⅓ cup) Cocoa Powder, 1 tsp Espresso Powder, 60 ml (¼ cup) Hot Water, 2 tsp Vanilla Extract
- Pour the reserved bowl of water into a saucepan along with the sugar and corn syrup and mix together. Put the pan over medium heat until it reaches a temperature of 250°F / 121°C. Do not stir the mixture while it heats - it will boil and the sugar will dissolve into a clear syrup.450 g (2 ¼ cups) Granulated Sugar, 185 g (½ cup + 1 tbsp) Corn Syrup
- While you are waiting for the sugar syrup to come to temperature, get your stand mixer ready with a whisk attachment. Put the bloomed gelatin into the bowl of the mixer.
- As soon as the sugar syrup reaches 250°F / 121°C, remove it from the heat right away. Turn the mixer on medium and let it break up the gelatin for a few seconds, then start pouring the sugar syrup into the bowl in a slow, steady stream. Try not to drizzle the syrup down the side of the bowl or hit the whisk, just aim for the space in between and let it flow in gradually.
- Once all the sugar syrup is added, add the chocolate paste mixture, then turn the mixer up to high speed and whip for 10 minutes.
- Towards the end of the 10 minutes, melt the chocolate in the microwave in 30-second increments until completely melted. Set aside until needed.140 g (5 oz) Chocolate
- After 10 minutes, the marshmallow mixture should be thick and glossy, and should be forming shapes as you whisk it, like meringue or whipped cream would do. If it's not thick enough, keep beating on high speed until it thickens. When it's done, feel the side of the bowl - it should have cooled significantly, but still be very slightly warm to the touch.
- Once the marshmallow is ready, remove the bowl from the mixer and pour in the melted chocolate, swirl it into the marshmallow a little, but not so much that it incorporates - a few turns with a spatula should do the trick. Make sure you work quickly at this point, as the longer you wait to pour the marshmallow, the harder it will be to get out of the bowl!
- Pour the chocolate marshmallow into the prepared cake pan and use a spatula to spread it out to the corners. It can make it easier if you coat your spatula with a little flavorless oil beforehand to help you get it out of the bowl without too much sticking.
- Mix together the powdered sugar and remaining cocoa powder in a bowl until thoroughly combined. Sprinkle some of the mixture generously over the top of the marshmallow so it is completely covered.90 g (¾ cup) Powdered Sugar, 35 g (⅓ cup) Cocoa Powder
- Leave the marshmallow out at room temperature overnight to set (or at least for 8 hours). Do not cover it with plastic wrap as we want it to dry out a little.
- Once the marshmallow has set, flip the cake pan upside down to turn it out onto your work surface. Remove the plastic wrap and then dust all the exposed marshmallow with more of the powdered sugar/cocoa powder mix. Let it sit to dry out like this for a further 2-3 hours.
- Coat a sharp knife with a flavorless oil and some of the powder mixture, then cut the very edges off the marshmallow to get nice straight edges. Slice the marshmallows into whatever sized squares you like.


Rusty Briggs says
What a lovely recipe! If I might offer one bit of advice: you'll enjoy better results if you don't undertake marshmallows on days when the humidity is high. On bright sunny days you can expect the lushest, puffiest chocolate marvels you've ever created.
One entire batch lasted less than hour when a couple of friends popped in. Try these!
Jules Grasekamp says
Hi Rusty,
Thank you for your kind words, I'm so glad to hear you loved my recipe!
That is an excellent point about the humidity - I will make sure to put a note about that when I come to update this post in the future!
Thank you,
Jules
Trish says
Be careful with the amount of water. It’s 1 1/3 divided by 2. The way the steps are broken down it is easy to use double the water.
Jules Grasekamp says
Hi Trish,
Thank you for your feedback, this is really helpful to hear. I will update the instructions to make this a little clearer.
It's sometimes hard to view the recipe from the eyes of the reader so comments like this are always very much appreciated!
I hope you loved the marshmallows?
Jules
Jules Grasekamp says
I have now updated it, please let me know if that is clearer.
Thank you!
Jules
Cyndi Thompson says
I made these today and they turned out fantastic - wish I could share the photo. Thank you so much for the great recipe. The instructions are easy to follow. Looking forward to trying more of your recipes.
Jules Grasekamp says
I'm so happy to hear that Cyndi - thank you!
And thank you for your lovely comment on instagram too!
If you like, you can upload a photo here, or you can share with me on instagram if you prefer - I'd love to see them!
Jules
Tara Fernough says
Great recipe - as always 🙂 Love all the options for what you can do with these tasty treats, too! Thank you