
Eating the cookie dough is always more fun than eating the cookies! This edible cookie dough is safe for everyone to eat raw, no matter where you are in the world.
Edible Cookie Dough Recipe Snapshot
What it is: Delicious raw cookie dough made with heat-treated flour and without eggs, so it's safe to eat.
Why you'll love it: It has the same soft texture as traditional cookie dough and is super versatile.
How to make it: Cream the butter, then add the dry ingredients, milk, and chocolate chips and stir to combine.

Let's be honest, the best part about making chocolate chip cookies is munching on the cookie dough before it even makes it to the oven!
In the UK, our eggs are safe to eat raw, but I often get comments from other parts of the world asking how to make recipes containing raw eggs safe to eat. So here it is - the tastiest edible cookie dough recipe for you to roll into balls, cover in chocolate, use in other desserts like Cookie Dough Cheesecake - or simply eat straight out of the bowl (my personal favorite...)
Reader Review:
These are adorable! Think it would be hard to stop after one though. Willing to take that risk though 😀
⭐⭐⭐⭐⭐ - Anita
Jump to:
Ingredients
To make the cookie dough edible, we leave out the eggs and heat-treat the flour, so the raw dough is totally safe to eat.
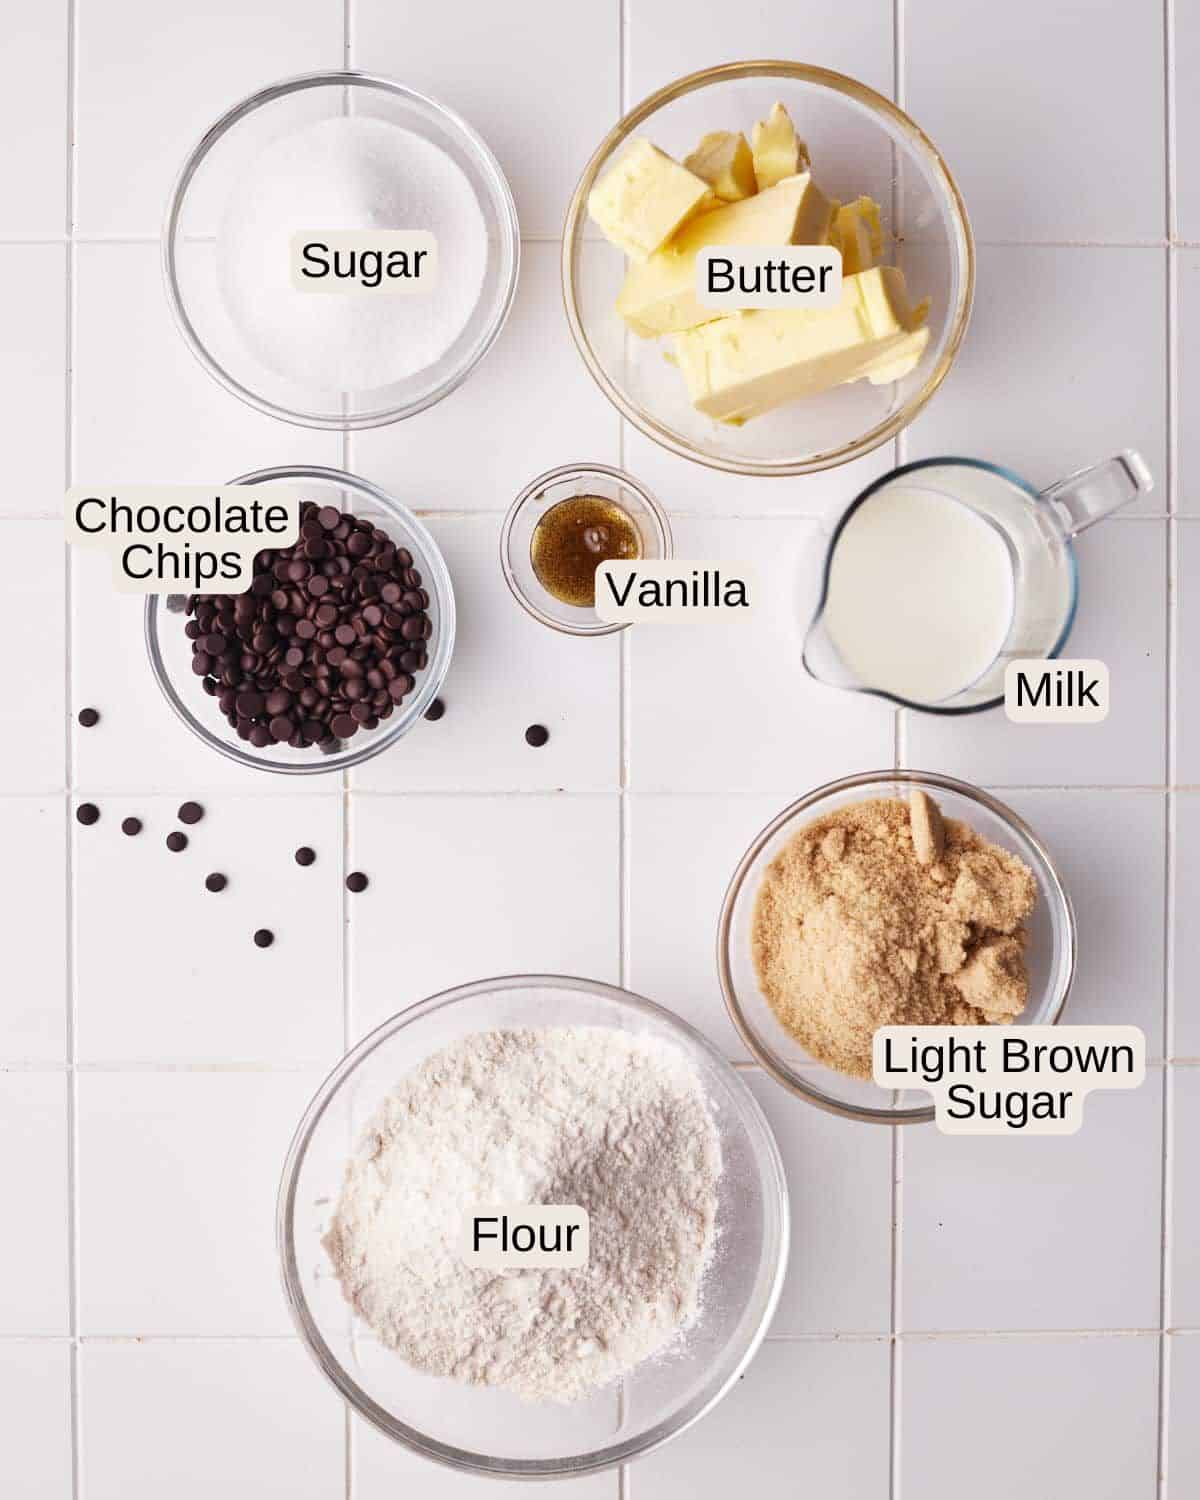
- Butter - Use unsalted butter, room temperature.
- White Sugar - Superfine sugar (caster sugar in the UK) is best, as it will dissolve easily, but US granulated sugar will also work.
- Light Brown Sugar - We'll also use light brown sugar; the natural flavor of the brown sugar will make a deeper, slightly caramel flavor to the cookie dough. You could also use dark brown sugar if you like, but this will have a stronger molasses flavor.
- Flour - Use all-purpose flour (plain flour). See below for how to heat treat the flour.
- Milk - The milk helps to make this a super soft cookie dough that has a luxurious, smooth feeling when you bite into it. I used whole milk, but you can use any kind of milk you like.
- Salt - The salt really adds something to this cookie dough, bringing out the flavor and making the bites very moreish!
- Vanilla - Use vanilla extract or vanilla bean paste.
- Chocolate Chips - I like to use mini chocolate chips for these, but you can use regular-size chips too. You can use any kind of chocolate - milk chocolate is my favorite.
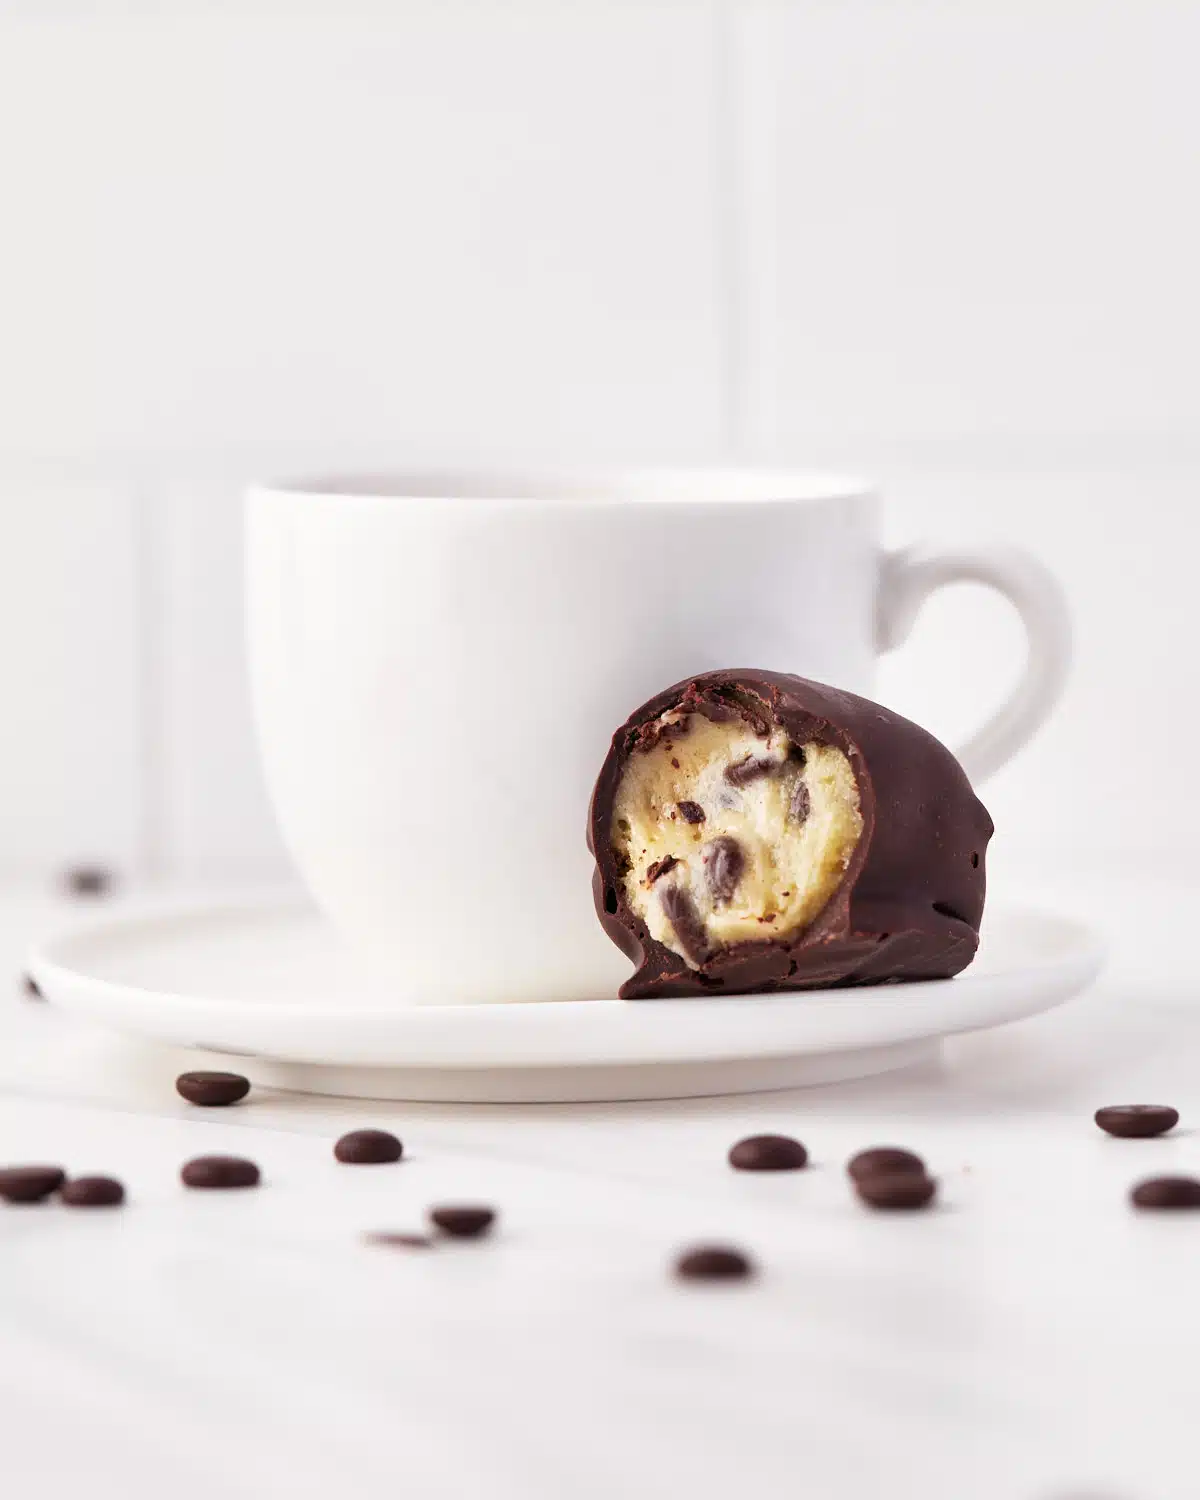
- Chocolate - If you want to dip or coat your cookie dough balls, make sure you use real chocolate, not a chocolate candy bar or chocolate chips as these both have extra ingredients which will stop the chocolate from melting and setting properly.
See the recipe card for measurements in both grams and cups, though I always recommend using a kitchen scale for best results.
Heat Treating The Flour
Uncooked flour can contain traces of bacteria that can give you foodborne illness, especially for those who are immunocompromised. If you are concerned about this, you can heat-treat the flour; it's a quick extra step to ensure it's totally safe.
- Put the flour in a microwave-safe bowl and microwave it on full power for 30 seconds.
- Stir and microwave for a further 20 seconds.
- For extra reassurance, check that the temperature of the flour is at least 70°C / 160°F all over.
- Let the flour cool completely before using.
How to Make Edible Cookie Dough
This super-easy edible cookie dough recipe comes together in just 3-4 minutes. Perfect to whip up for the whole family for movie night! Fair warning - once you get a taste, it's quite hard to stop!
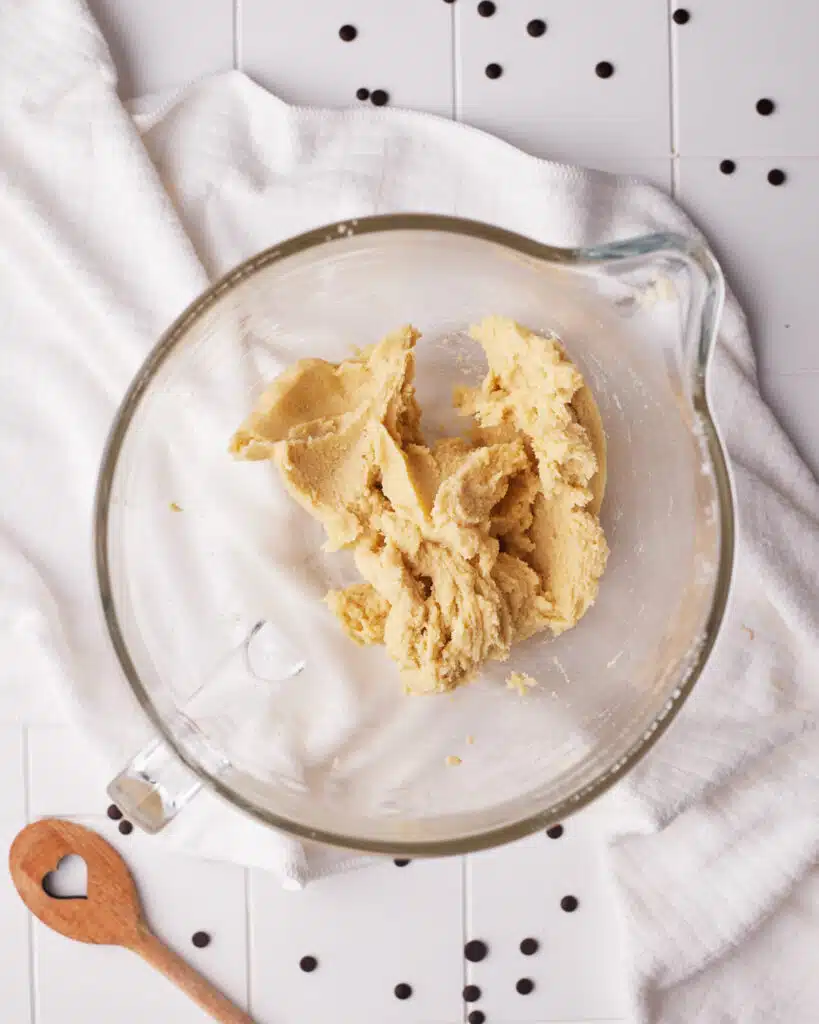
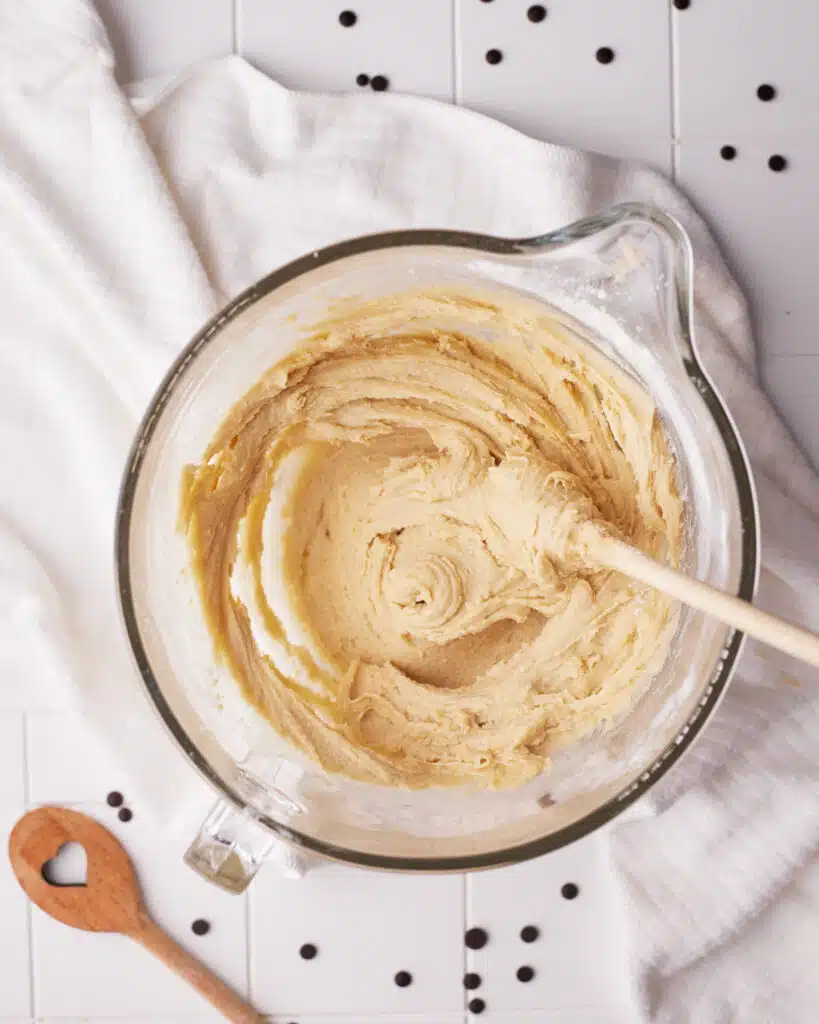
Cream Butter
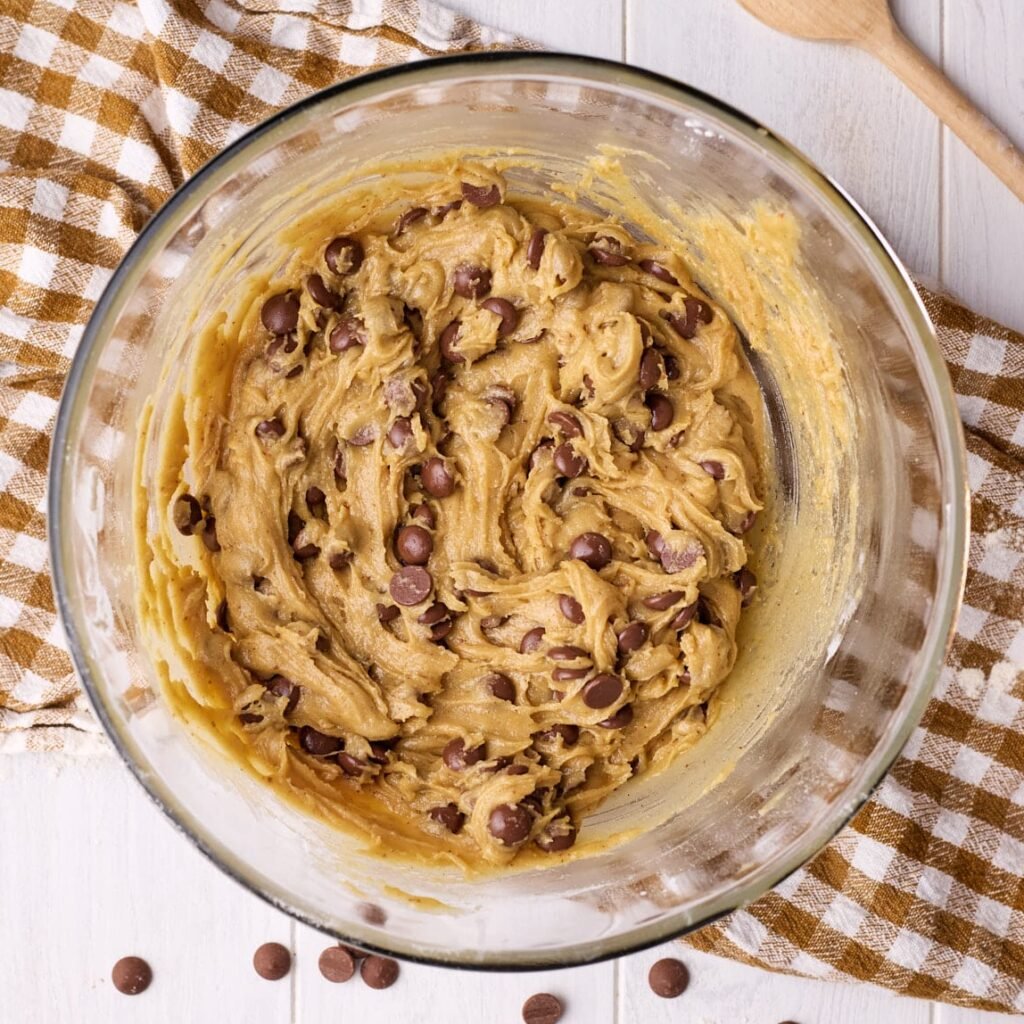
Put the butter, white sugar, and brown sugar into a large mixing bowl and mix together until fluffy. You can use a stand mixer, hand mixer, or just a wooden spoon.
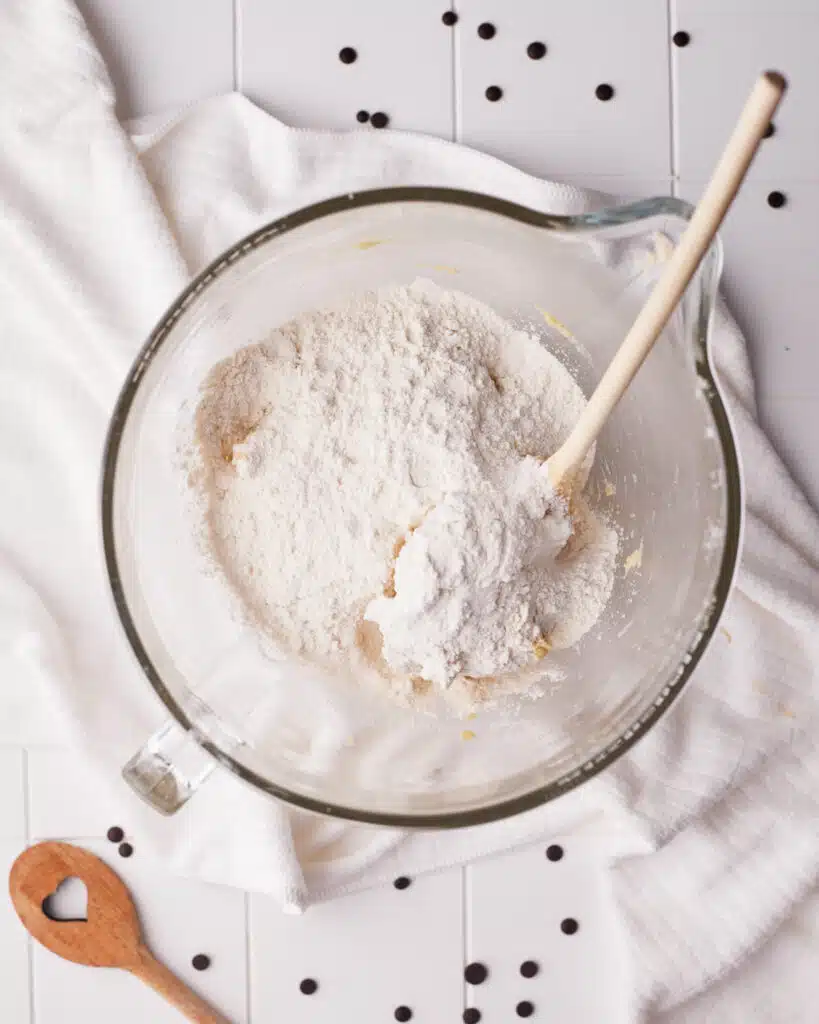
Dry Ingredients
Add the vanilla and mix it in. Then, add the dry ingredients, including the heat-treated flour and salt and mix until a dough forms.
Incorporate Milk
Add the milk, a little at a time, stirring until the cookie dough reaches the consistency you would like. If you don't want to cover them in chocolate, use less milk so that the cookie dough balls can hold their shape.
If you will be dipping them, you can add all of it to make a nice, smooth, creamy center for the cookie dough truffles.
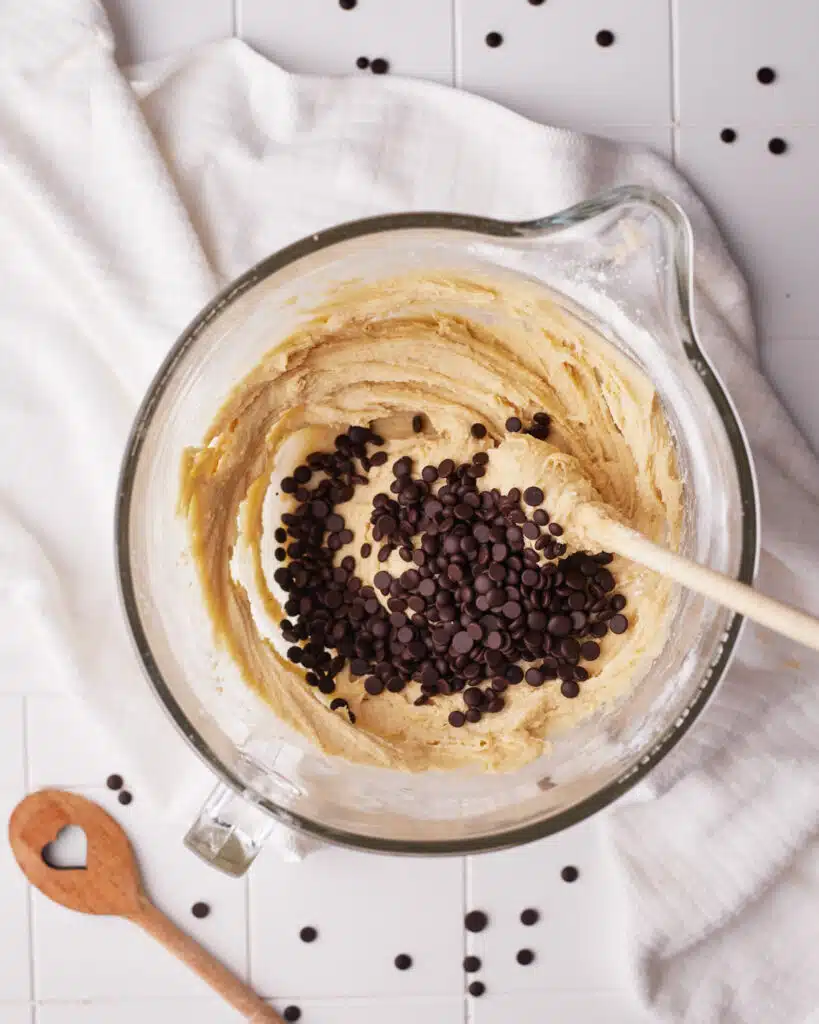
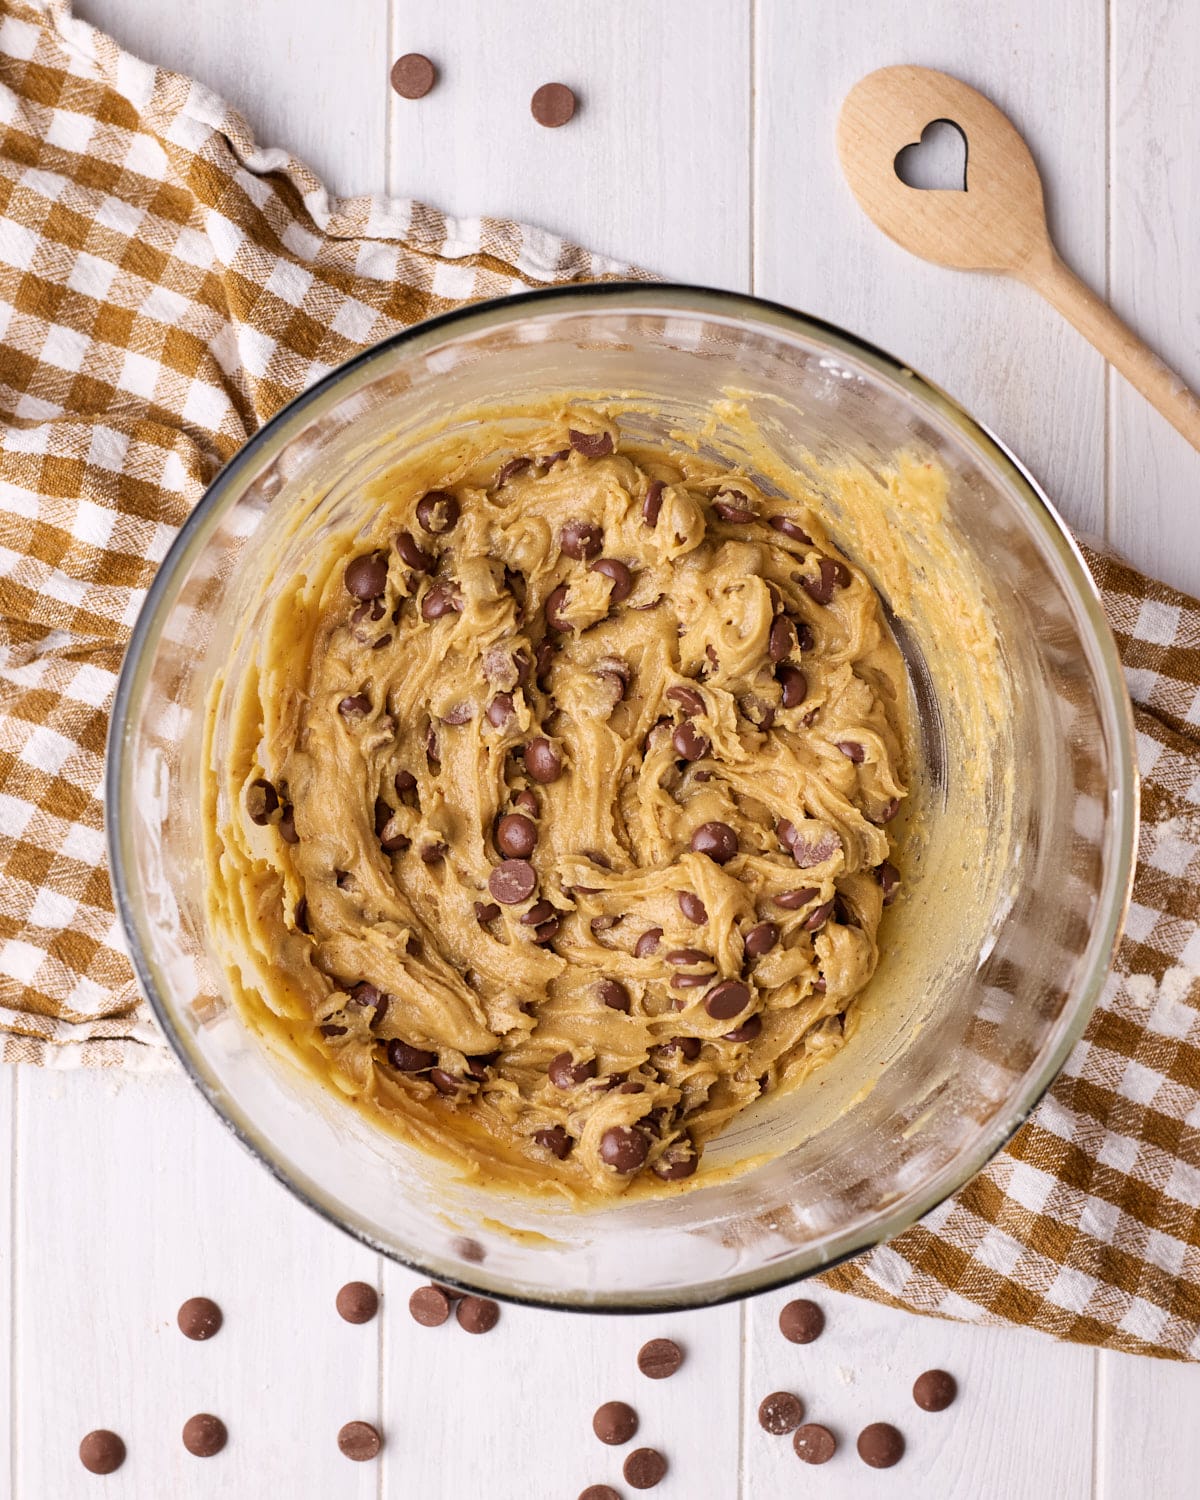
Chocolate Chips
Once the dough is the thickness you would like, add the chocolate chips and mix until evenly dispersed.
If the cookie dough got too soft, you can chill it in the refrigerator for 15 minutes before moving on to the next step, just to make it easier to handle.
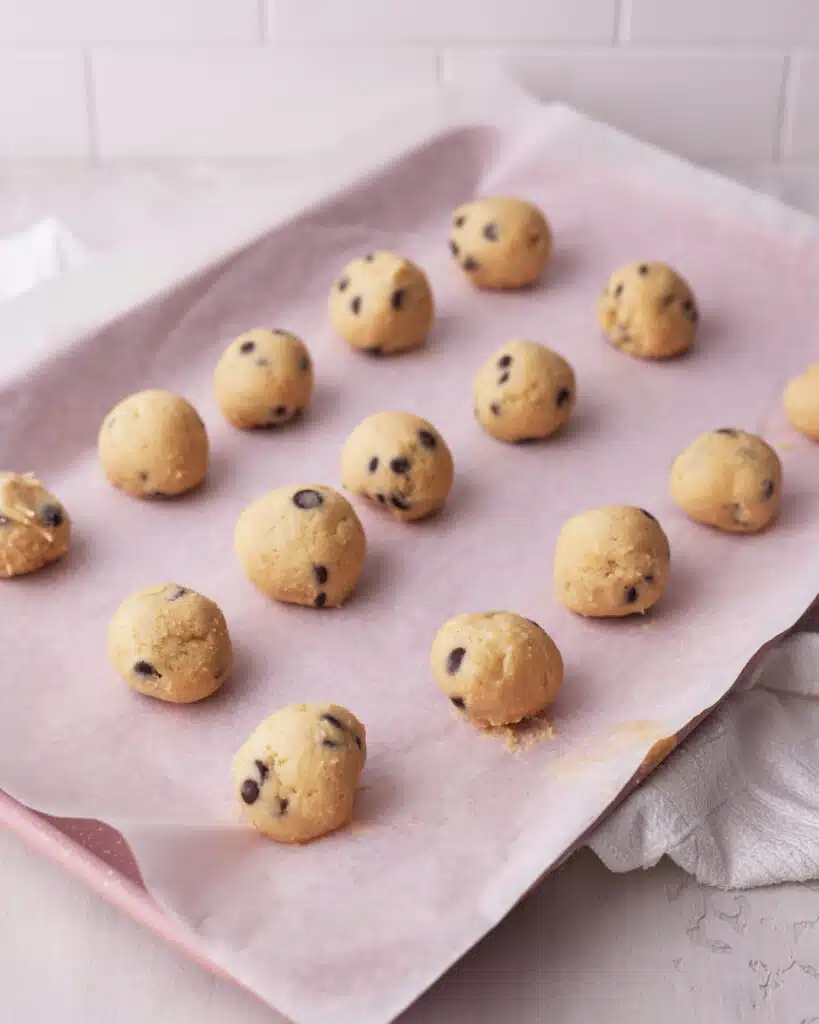
Form Dough Balls
Line a baking sheet with parchment paper.
Using a small cookie scoop or a spoon, take a small scoop of cookie dough, roll it into a ball in your hands, and place on the cookie sheet. Repeat until all the cookie dough is used up.
Ways To Enjoy Edible Cookie Dough
Let's pretend for a second that we're not going to just eat this right out of the bowl. There are a few other hypothetical ways you can enjoy cookie dough.
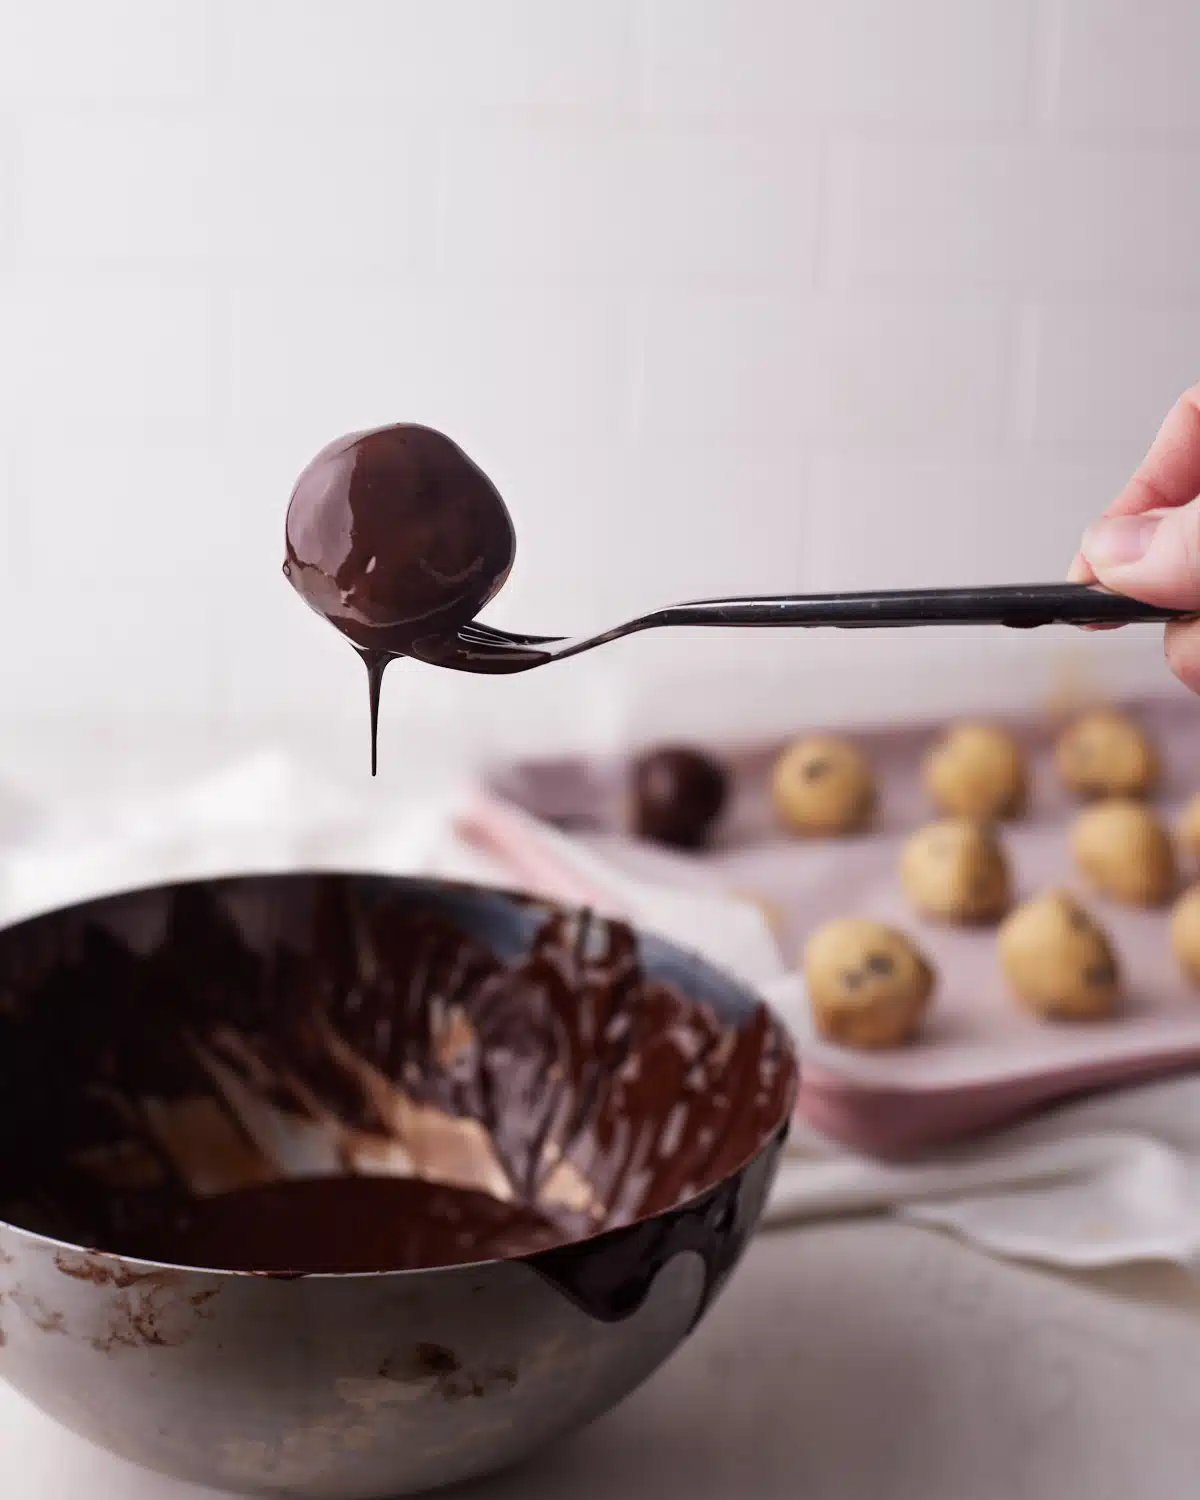
Chocolate Dipped: What every cookie dough needs - more chocolate! Dip in your favorite melted chocolate for a decadent coating.
Right out of the bowl: I can't pretend this isn't the best option. Just grab some spoons and dig in!

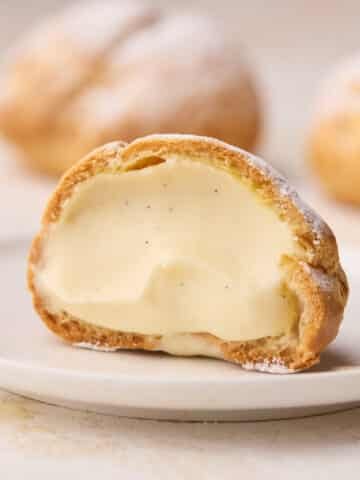
In other desserts: This edible cookie dough recipe was actually first developed for the filling and topping for this no-bake cookie dough cheesecake. You can roll mini dough balls and add them to brownies, cupcakes, pies, or even make homemade cookie dough ice cream.

Filled Chocolates: To make these fancy, use a chocolate mold and fill the chocolates with cookie dough - it's soft enough to do this easily. Temper your chocolate for a professional finish.
Storage
Store the cookie dough bites in an airtight container. You can keep them at room temperature or in the fridge, depending on your preference. If you don't do the chocolate coating, I recommend storing them in the fridge. They will be good like this for a week.
You can also freeze the cookie dough bites for up to a month in a Ziploc bag and enjoy them whenever the cookie dough cravings hit!
FAQs
This edible cookie dough is safe to eat because it doesn't contain any eggs, and the flour is heat-treated to kill any bacteria.
This recipe has been specifically formulated to be eaten as cookie dough. Technically, you could bake it, but it wouldn't give as good results as an actual chocolate chip cookie recipe.
Yes you can! Edible cookie dough bites are the perfect treats to make in big batches and save for when you're craving something delicious. Freeze in a ziplock bag for up to 1 month, and let them defrost before eating.
Classic cookie dough contains raw eggs which could contain Salmonella or E. coli.
These days, most eggs that you can buy in the supermarket in the UK are actually safe to eat raw. I use raw eggs in many of my recipes, such as my Baileys Chocolate Mousse. I've also been licking the cake batter off the spoon for 30 years and have never once gotten sick from it.
However, if you are reading this from outside the UK and want to use one of my raw egg recipes, you'll have to check your egg carton to see if they have been pasteurized (have a P on the package), or substitute for carton eggs - any egg products in the US that are out of their shell have to be pasteurized by law.
The chances of getting sick from raw eggs are quite slim these days, but if you are baking for someone who is pregnant, immuno-compromised or elderly, it's always better to err on the side of caution. That's why this recipe is completely safe to eat with no raw eggs at all.
The other potential risk factor is the raw flour. In some cases, flour can contain some harmful bacteria which may cause an upset stomach. This is usually not an issue as the flour is heated in the baking process, killing any potential risks.
But since this is a no-bake recipe, you can heat-treat the flour before beginning, in order to protect your digestive health. It's super quick and easy, you can just microwave the flour in the microwave for 50 seconds, then let it cool completely before using it in the recipe.
You don't have to but...why wouldn't you?! If you would prefer to skip the chocolate outer shell, you can just roll the cookie dough into balls and serve them as they are. In this case, I would add less milk to the dough so they will be a bit sturdier and more likely to hold their shape.
I do highly recommend the chocolate-covered cookie dough though - they're pretty, easy to handle, and who doesn't love anything covered in chocolate?
Show Me Your Bakes!
If you make this recipe, please tag @bonni_bakery on Instagram or send me a photo - I love seeing all your creations.
Want your bake featured on the blog? You can also upload a photo here.
More Bite-sized Treats
You might also enjoy these mini desserts:


Edible Cookie Dough Recipe
Ingredients
- 227 g (2 sticks) Unsalted Butter room temperature
- 150 g (¾ cup) Superfine Sugar (Caster Sugar)
- 165 g (¾ cup) Light Brown Sugar
- 250 g (2 cups) All-purpose Flour (Plain Flour)
- 80 ml (⅓ cup) Whole Milk
- 1 teaspoon Salt
- 1 teaspoon Vanilla Extract
- 120 g (⅔ cup) Mini Chocolate Chips
Instructions
- Before beginning, heat treat the flour by microwaving it on full power for 30 seconds, stirring well, then microwaving for a further 20 seconds. For extra precaution, you can use a thermometer to check the the flour has reached at least 70°C / 160°F all over. Let it cool completely before using.
- Beat the butter and both sugars in a bowl until fluffy.227 g (2 sticks) Unsalted Butter, 150 g (¾ cup) Superfine Sugar, 165 g (¾ cup) Light Brown Sugar
- Add the vanilla and mix in.1 tsp Vanilla Extract
- Add the flour and salt and stir in until a dough forms.250 g (2 cups) All-purpose Flour, 1 tsp Salt
- Add the milk, a little at a time, mixing in between additions, until the cookie dough is as soft as you would like it. For a soft, gooey cookie dough, add all of the milk, for something firmer, add less.80 ml (⅓ cup) Whole Milk
- Add the chocolate chips and mix them in until evenly dispersed.120 g (⅔ cup) Mini Chocolate Chips
- Your cookie dough is ready to eat! You can roll it into balls, dip in chocolate, use to fill chocolates or other desserts (like cookie dough cheesecake), or just enjoy it with a spoon right out of the bowl!

Linda Smart says
These bites look amazing, all of your valentines day treats on your table in the photo look perfection itself, thank you so much ❤️
Chloe says
Hi, just wanted to check, you say you can keep for a week - is this if they are not covered in chocolate? Do they keep longer than a week when chocolate covered… doesn’t take much to confuse me
Jules Grasekamp says
Hi Chloe,
Sorry for not clarifying! The chocolate definitely stops them from drying out so you can probably get a little longer out of them when they are covered. Either way they are still safe to eat for at least a week.
Hope this helps,
Jules
David Mitchell says
Do you think that because you have a web site and are publishing an article that you can just make up and write anything you want? All eggs sold in a supermarket are NOT pasteurized, and you have no business telling people that they are. That is patently false and you need to retract that statement.
Jules Grasekamp says
Hi David,
First of all, this recipe does not contain any eggs at all, so they are perfectly safe to eat.
Secondly, if you look, I am actually writing from the UK, where all supermarket eggs ARE safe to eat. I have recently reached a wider US audience and will make updates to older posts to reflect information over there - but please keep in mind that there are countries outside of the US where things might be different to how you know them.
Lastly, I appreciate your reaching out to offer some advice, but let's try to keep the internet a friendly place. Just because we are both behind computer screens doesn't mean we have to let decency and respect fall out the window. It doesn't cost anything to be kind 🙂
I wish you a lovely day and happy baking.
Jules
Mike says
They are not perfectly edible to eat . Salmonella can also come from flour which needs to be heat treated if you are eating raw. Seriously get a clue.
Jules Grasekamp says
Hi Mike, thanks for your comment. You’re absolutely right, that’s why there is a whole section in the post about heat treating the flour. Hope this helps 🙂
Jules
B says
Your right there is a section 4, how to heat treat the flower but it’s not in the directions or listed in what you should do. Also you can’t heat treat the flour for 50 seconds that’s not enough time and it’s much better to (bake) the flour on a pan.
Grandma x says
These look amazing juliane, a lovely little bite with an Earl Grey tea, x
Anita P says
These are adorable! Think it would be hard to stop after one though. Willing to take that risk though 😀