
Perfect Brandy Snaps are all about timing - here's how to make deliciously crunchy snaps that roll without cracking.
Brandy snaps will humble you if you're not paying attention. I still remember the first time I made them - confident, distracted, and suddenly left with a tray of either unbendable discs or sticky puddles. Since then, I've made them in professional kitchens, in my own bakery, and countless times at home while testing and refining this recipe.
This version is the result of learning brandy snaps the hard way. I've dialled in the thickness, baking time, and shaping window so they're crisp, deeply caramelised, and actually roll without cracking. I'll show you exactly what to look for at each stage, so you can make beautiful, crunchy brandy snaps at home and impress everyone at the table.
What To Know Before You Start
- Timing is everything - there are a matter of seconds between these being underbaked and burnt - so watch them like a hawk!
- Roll immediately - roll when they are still warm and flexible but not too hot to touch.
- Work in batches - these set quickly, so bake in small batches so you can roll them before they get too firm.
- Limit size - don't use more than one teaspoon of dough per cookie, or they will be too thick.
Why You'll Love This Recipe
- Customizable with all your favorite fillings.
- No special equipment required - just a saucepan and baking sheet.
- Can be made ahead and filled right before serving.
Jump to:
What are Brandy Snaps?
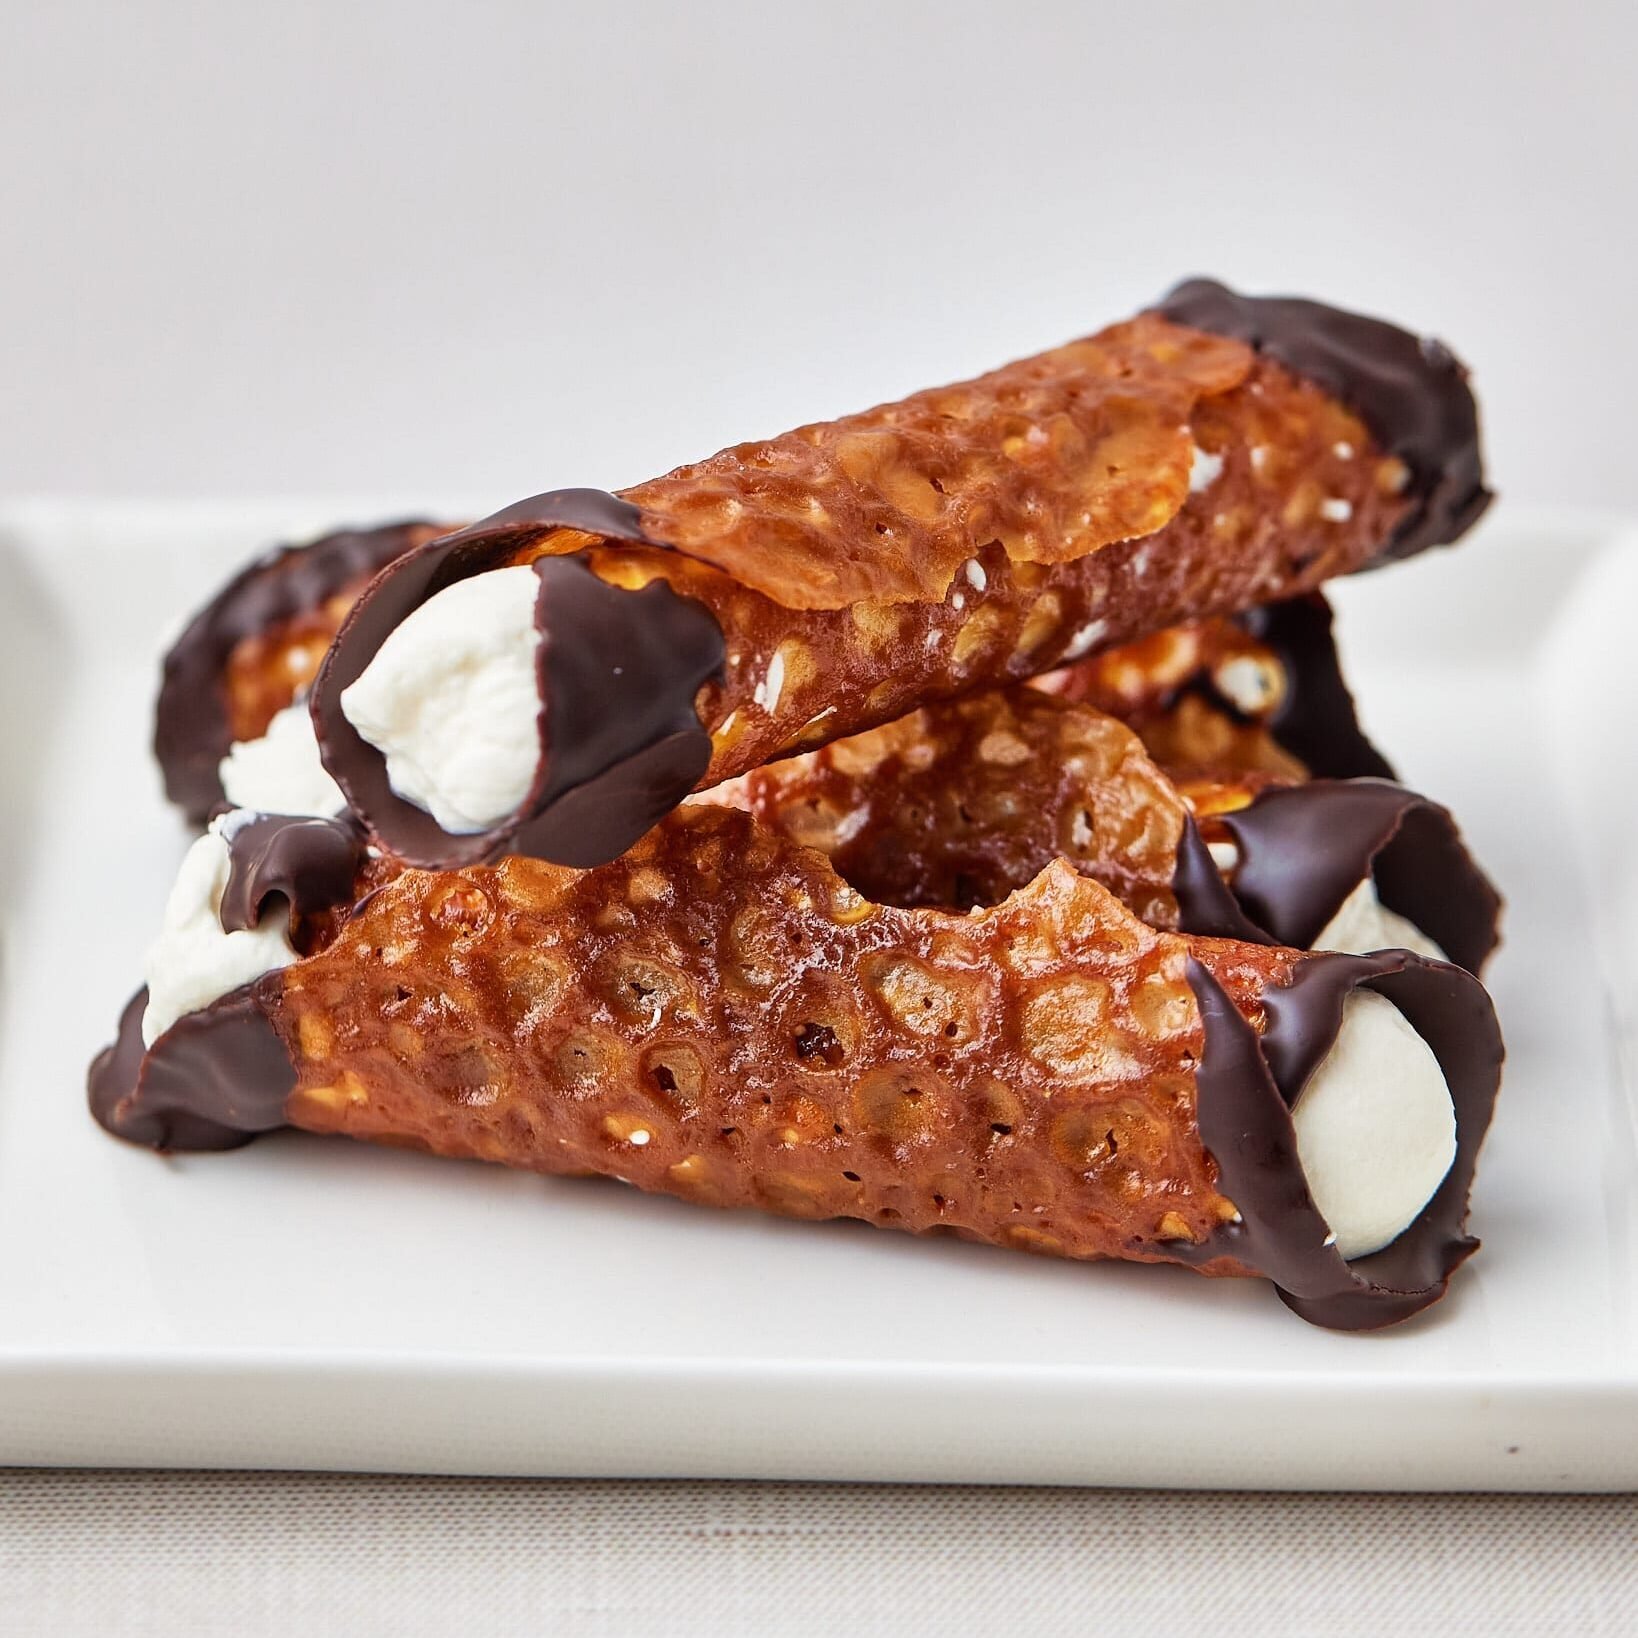
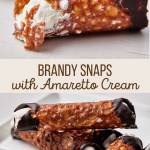
Brandy snaps are crisp, caramel-thin lace cookies that are rolled into delicate tubes and filled with cream. The lacy texture comes from the way the mixture spreads out and bubbles up in the oven.
Ingredients
Despite the name, brandy snaps don't usually contain any brandy, but get their name from the gorgeous color they turn while baking. I still like to add a boozy kick of amaretto in the cream, though!
- Butter - Use unsalted butter so you can control the salt levels in the snaps. If you only have salted butter at hand, skip adding the salt later on.
- Light Brown Sugar - This adds a deep, caramel flavor and golden brown color to the brandy snaps. It also helps the baked snaps stay flexible before they are rolled into shape.
- Flour - All-purpose flour creates a strong structure with a crispy 'snap' in every bite.
- Golden Syrup - If you can't find golden syrup, light or dark corn syrup also works well. You can also substitute with molasses, but the flavor will be a little more intense.
- Ginger - Mixing a little ground ginger into the snaps works wonders for the overall flavor profile! It goes perfectly with the amaretto filling.
- Dark Chocolate - Use real, good-quality chocolate to coat the ends of the brandy snaps. Avoid chocolate chips or candy bars as they won't melt properly.
See the recipe card for the measurements and full brandy snap recipe.
What You'll Need
- Cookie sheet
- Saucepan
- Wooden spoon
- Silicone baking mat - or parchment paper
How to Make Brandy Snaps
The key to making the perfect brandy snaps is timing! Heat the mixture slowly in the saucepan, and roll the snaps fast once they're out of the oven.
There are four stages to making brandy snaps: making, baking, rolling, and filling. They are all fairly easy, but each one has its own critical timing, which you must pay attention to for successful, crunchy, and well-shaped brandy snaps.
- Heat the sugar, butter, and golden syrup in a saucepan over a low heat, stirring gently. Don't rush it or it may crystallise. Enjoy this step, it's the only part of the process where you don't have to move quickly!
- Keep heating gently and stirring until the sugar entirely dissolves - this should take about 10 - 15 minutes. You'll know it's done when you can't feel any grains of sugar with your spoon and the mixture looks shiny.
- Remove from the heat and let sit for 1-2 minutes, then add in the flour, ginger, and salt and stir vigorously until smooth and silky.
- Take a teaspoon of the mixture at a time and dollop it onto the baking sheet. Make sure they are well spaced - as they will spread substantially. Though normally we want to avoid cookie spreading, in this recipe, it's a good thing! It's best to only do 3 or 4 at a time so you can roll them quickly after each batch.
- Bake the brandy snaps for about 9 minutes, watching very closely. Once they have bubbled up and spread out, they will start to darken quickly. As soon as they turn a beautiful, deep golden color, take them out of the oven.
- Let the lace cookies sit for 30 seconds and then roll them into shape.
Tip: Multiple Batches
It's best to only bake 3 or 4 brandy snaps at a time so you can roll them before they cool down and harden too much. If you have two baking trays, you can have one in the oven while you roll another to save time.
How to Shape Brandy Snaps
Once the brandy snaps come out of the oven, you need to work quickly. Have a thick-handled wooden spoon or similar ready, lightly greased with cooking spray or neutral oil.
- Let the snaps cool for about 30 seconds - they're ready when you can lift the edge with a knife without it squishing.
- The brandy snaps will still be quite hot to the touch when they are ready to roll. A little finger burning is almost unavoidable, so handle them with care.
- They cool fast, so if a snap hardens before you wrap it, pop it back in the oven for a few seconds to soften.
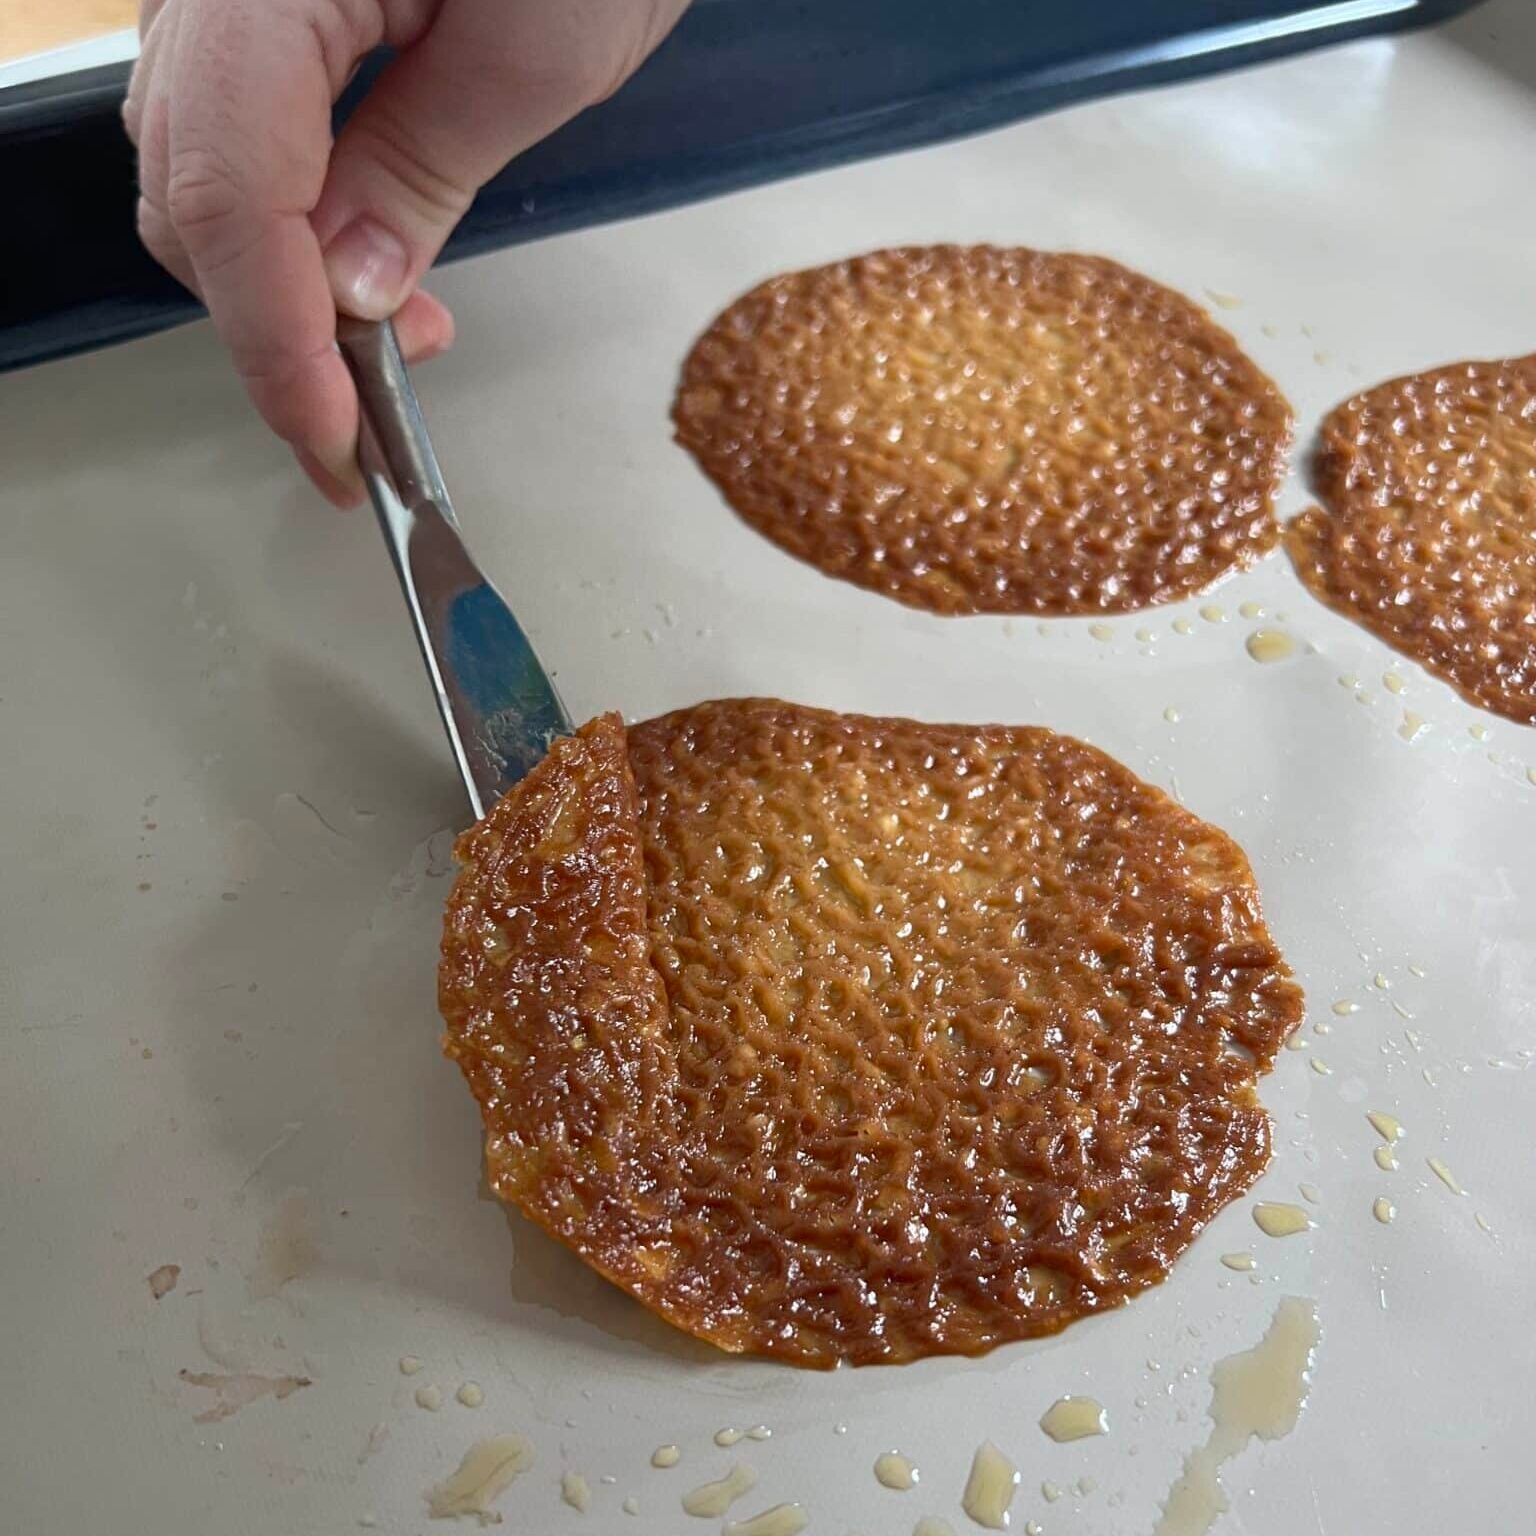
- Step 1: Gently run a knife under one of the lace cookies to loosen it from the tray.
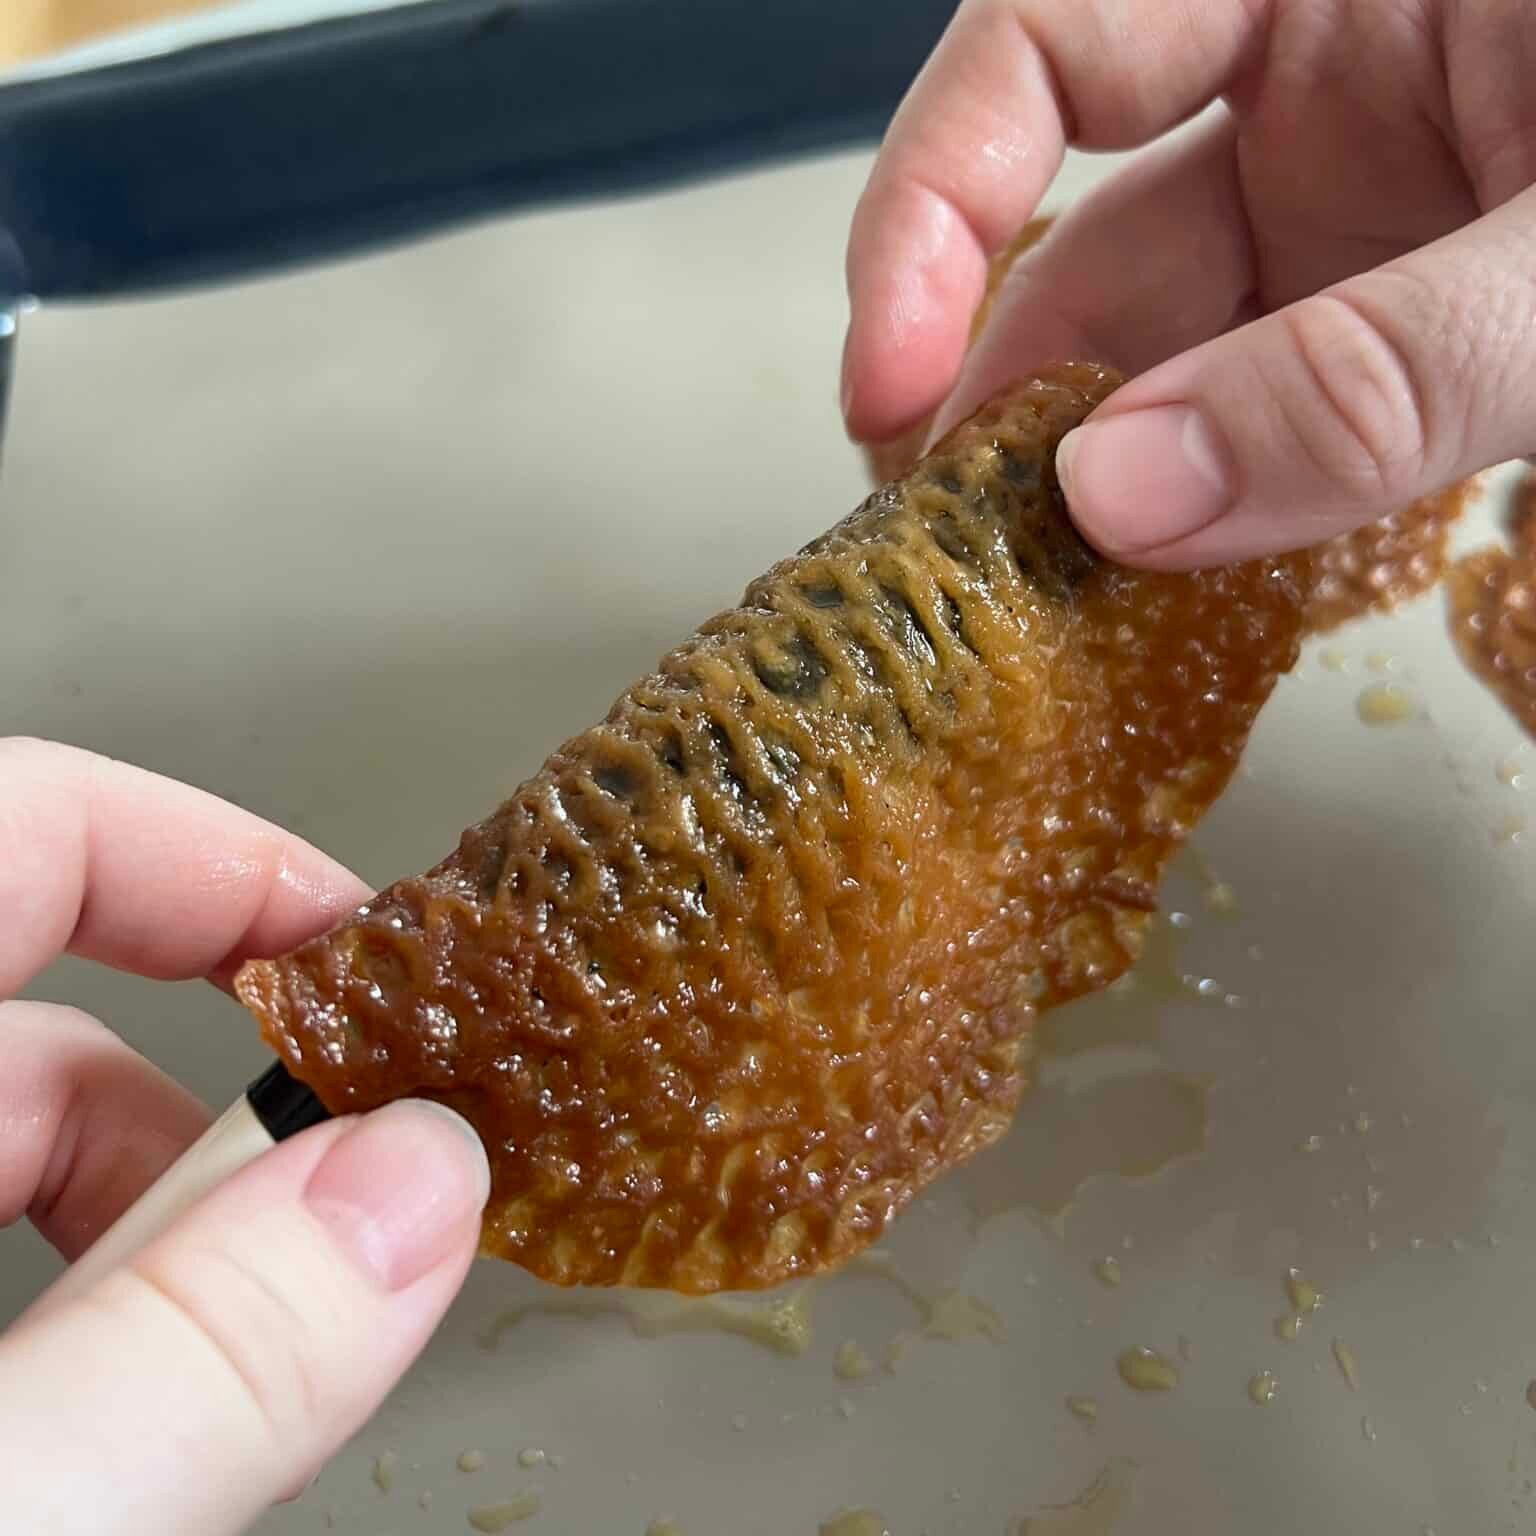
- Step 2: Lift carefully and wrap it around the handle of a wooden spoon with the lacy side facing out.

- Step 3: Let it sit and cool for a few seconds while you loosen the next one.
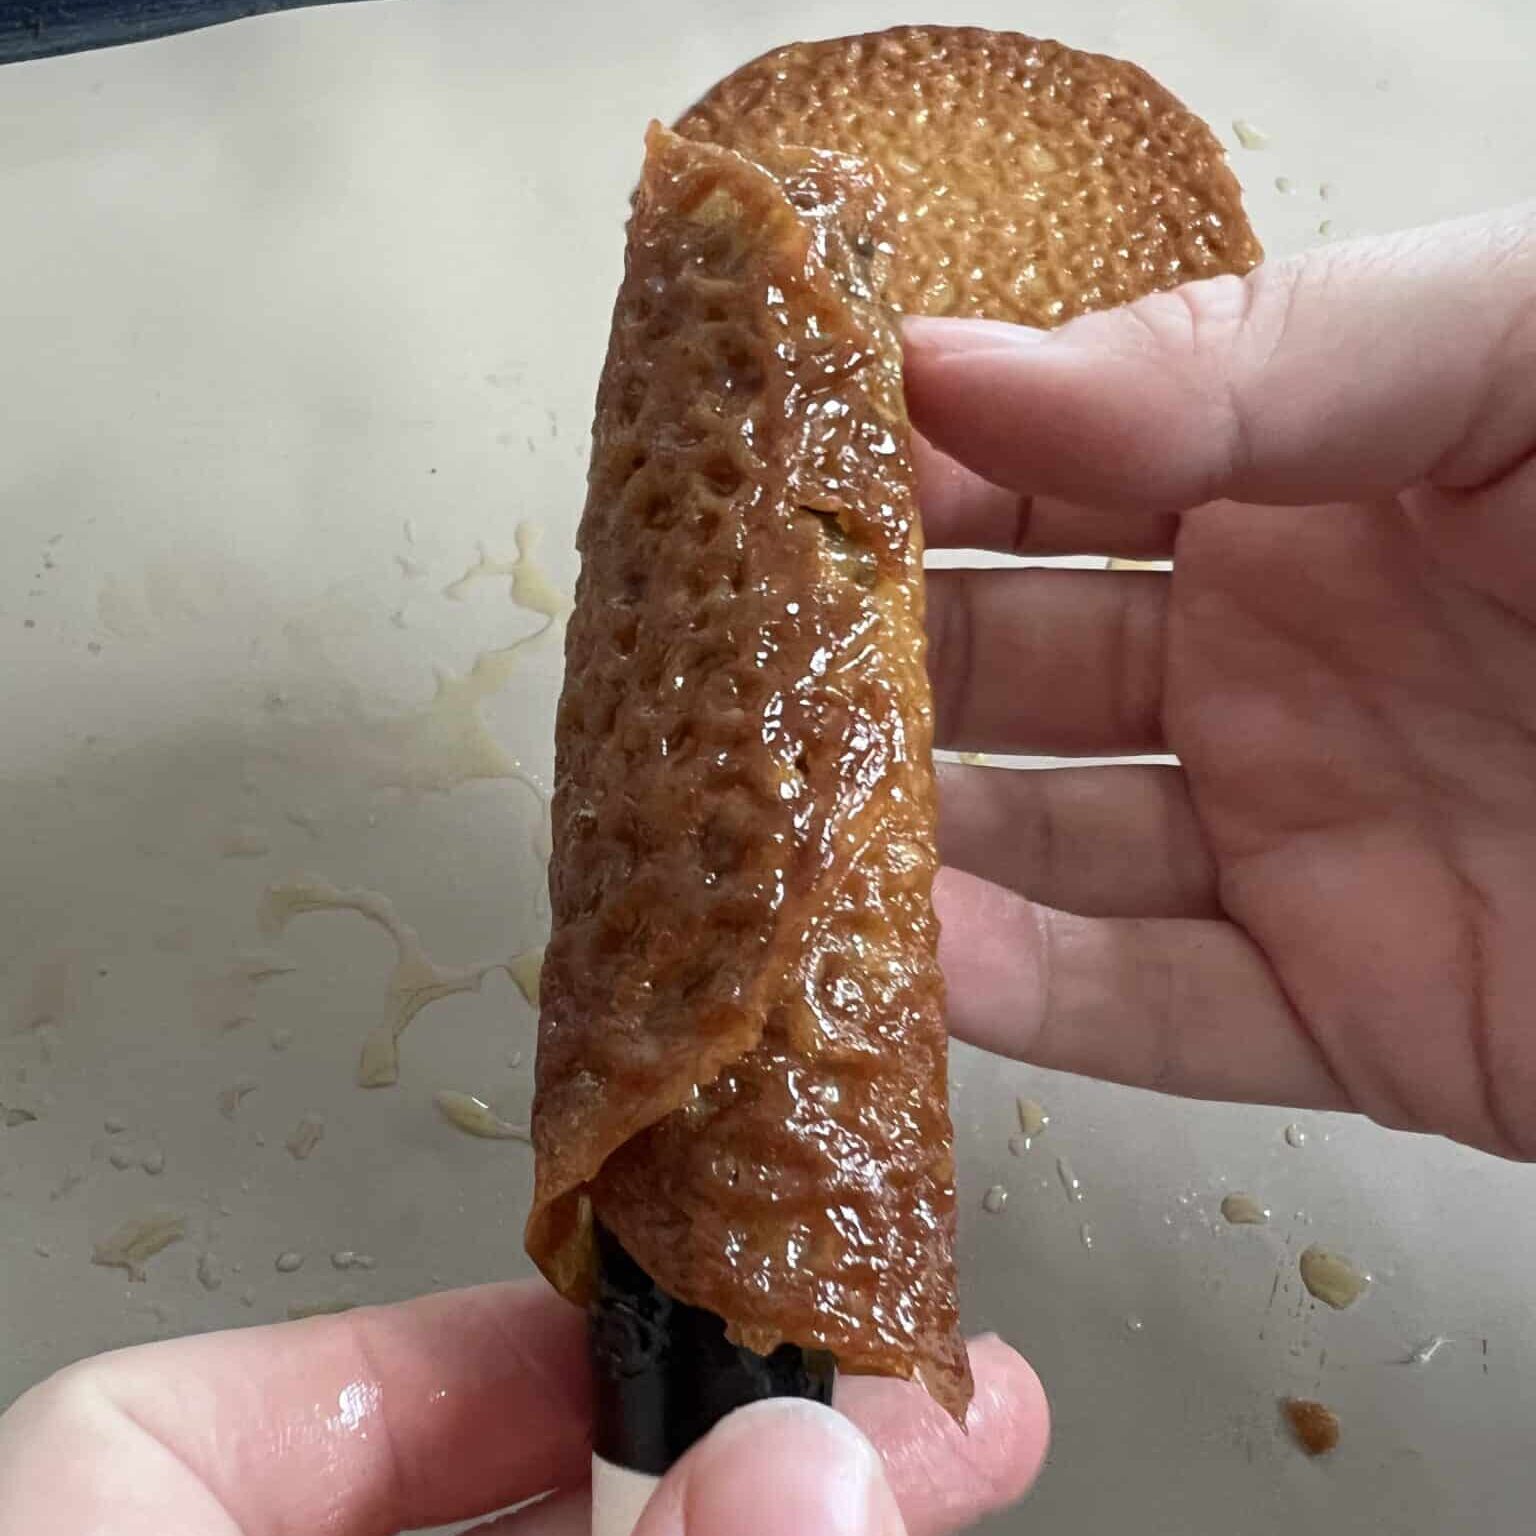
- Step 4: Slide the brandy snap off and set it down to cool, then shape the next.
I also have a video walk-through of how to roll brandy snaps - you'll find it right above the recipe card.
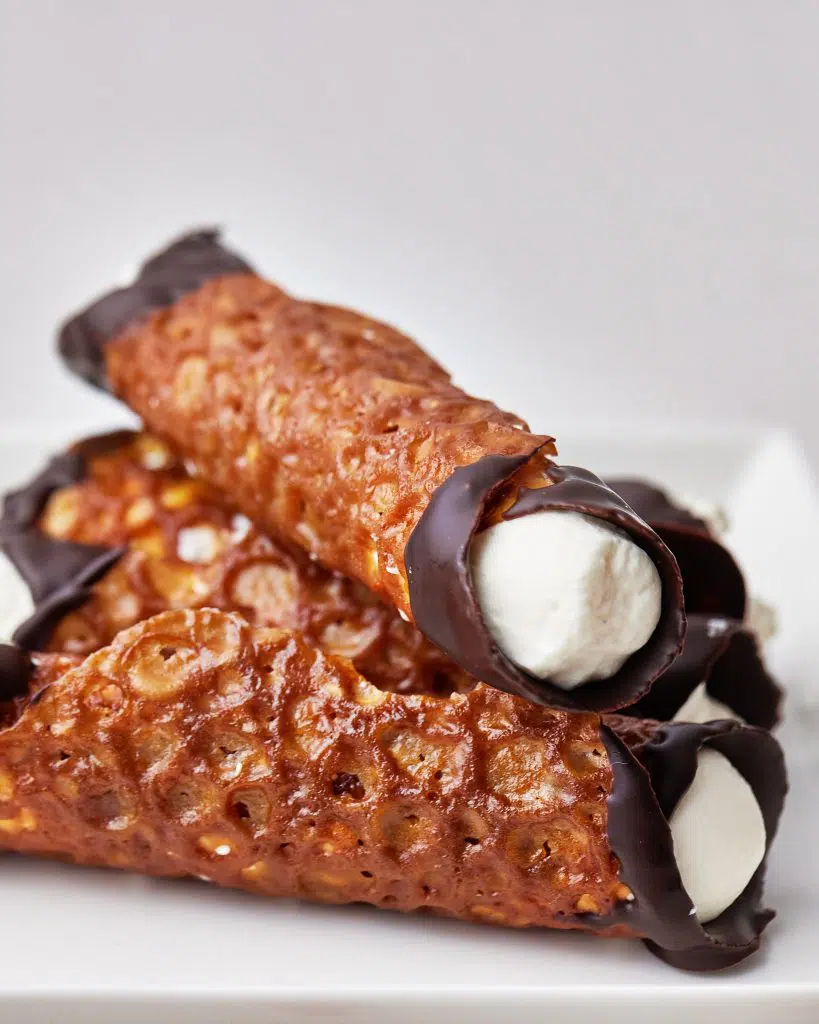
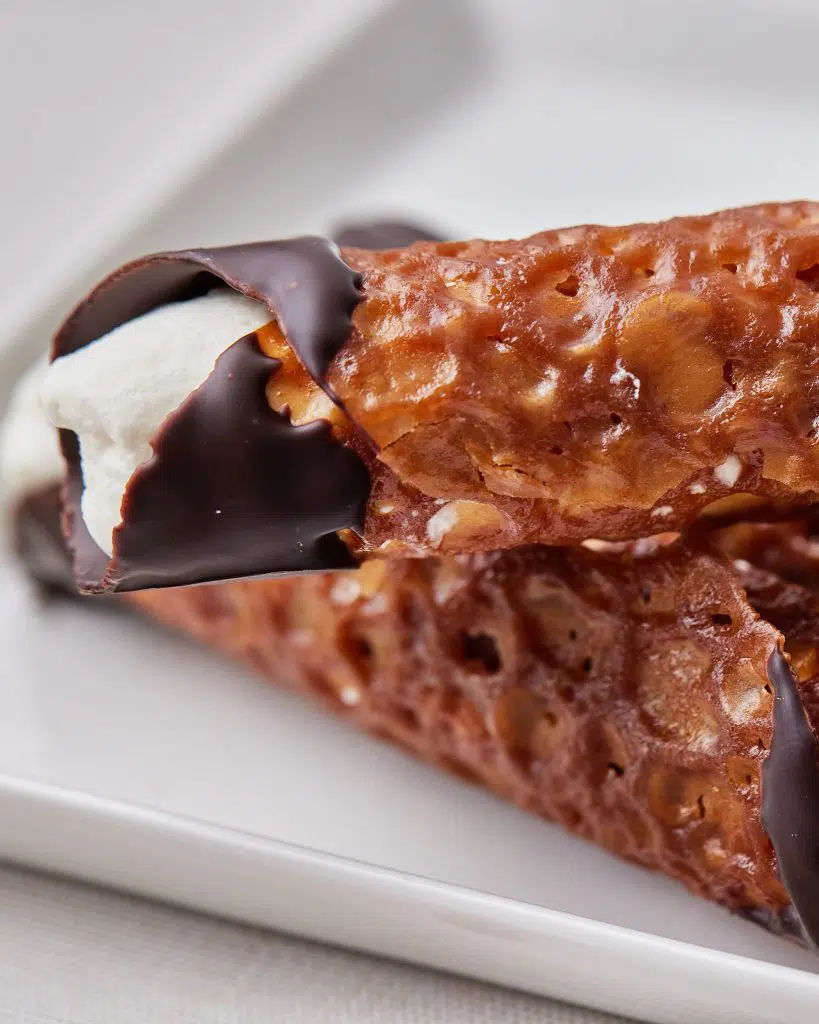
Chocolate Dipped Brandy Snaps
For an extra touch of decadence, dip the ends of your brandy snaps in a little dark chocolate and let it set before filling. Temper the chocolate for the best results.
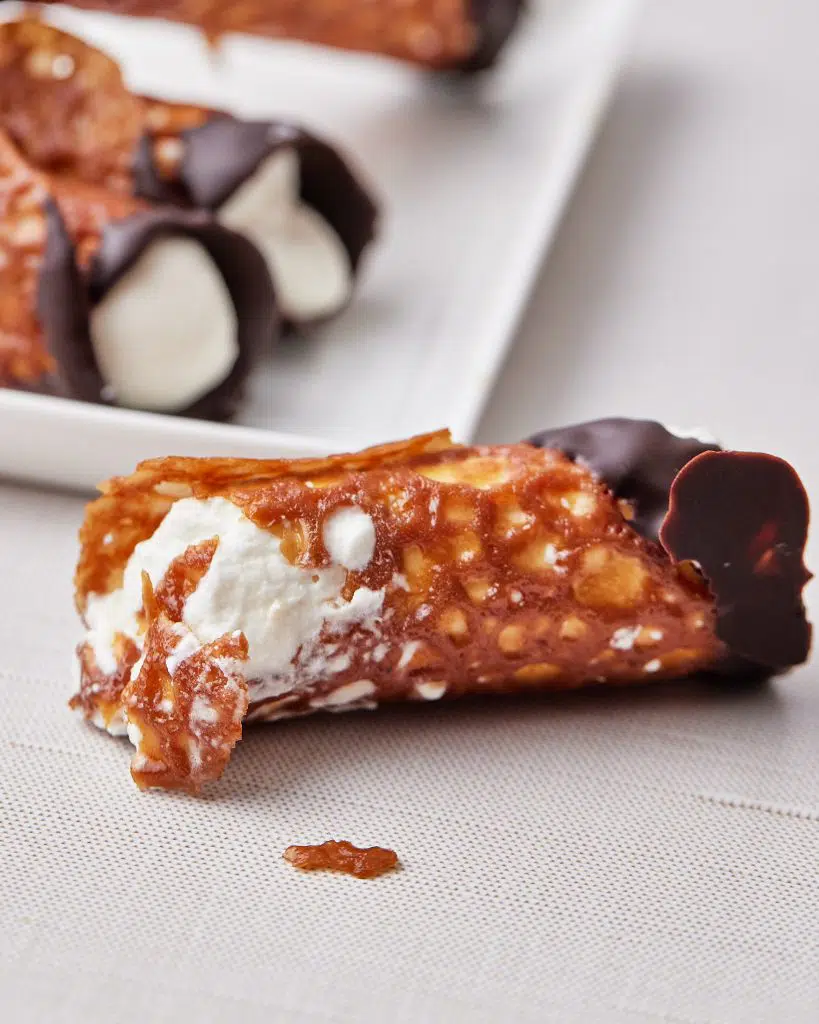
Filling Brandy Snaps
Brandy snaps are classically filled with chantilly cream, which is a sweetened whipped cream. I like to add a dash of amaretto or brandy to mine for an extra kick, but that is totally optional.
Once the snaps have completely cooled, pop your filling into a piping bag and snip off the tip - no fancy nozzle needed. Stick the end into the brandy snap and squeeze gently as you pull it back, keeping the pressure steady. Don't go too hard, or the cream will sneak out of the lacy holes like little worms. If that happens even with a gentle hand, your cream may just need a bit more whipping.
It's best to fill the snaps right before serving, as they can start to go soggy once filled.
Variations and Filling Ideas
- Basket brandy snaps - Rather than rolling your brandy snaps, you can create little baskets! Brush some oil on an upside-down muffin pan or the base of a small ramekin, and drape the warm lace cookies over the cup. Press it down gently on the base and around the sides, and hold in place until it firms. You can fill your baskets with a thin layer of melted chocolate (to stop the snaps from going soft), amaretto cream filling, and fresh berries.
- Chantilly Cream - A classic filling of sweetened whipped cream is delicious and simple. I like to add a dash of amaretto or brandy to mine for an extra kick.
- Flavored cream filling - To add some extra punch to your whipped cream filling, stir in some delicious flavors like lemon zest, orange zest, cocoa powder, strawberry puree, pistachio paste, or mascarpone, like in my Berry Chantilly Cake.
- Custard filling - For a richer dessert, try filling your brandy snaps with some creme patissiere (vanilla pastry cream).
Storage
Store your unfilled brandy snaps in an airtight container at room temperature; they'll keep for about a week, so they are a great option for a make-ahead dessert.
Troubleshooting and FAQ
If your brandy snaps are soft and/or soggy, they may have been filled for too long. Only fill your snaps with cream immediately before serving.
They could also be underbaked - bake your snaps for about 9 minutes until they turn a deep golden brown color, and store them unfilled in an airtight container once completely cooled. Do not refrigerate.
If your brandy snaps are breaking or cracking while you are trying to roll them, you waited too long to shape them. They need to be rolled about 30 seconds after coming out of the oven, while they are still warm and pliable. I recommend only baking 3 or 4 at a time so you can roll right away. If they harden up too much before you can roll them, put them back in the oven for a few seconds to soften up.
No, most brandy snaps don't contain any brandy. The name 'brandy snaps' comes from the word 'branded', referring to their burnt appearance. Sometimes there is brandy in the filling though.
More Cookie Recipes
Looking for more easy cookie recipes? Try some of these:


Watch How To Make Brandy Snaps
In this video, I show you exactly how to roll and shape your brandy snaps and how to dip them in chocolate. Plus, there's a satisfying bonus shot of them baking in the oven!
Recipe

Brandy Snaps Recipe
Ingredients
- 56 g (½ stick) Unsalted Butter
- 55 g (¼ cup) Light brown sugar
- 55 g (2½ tablespoon) Golden Syrup (or corn syrup)
- 50 g (⅓ cup) All-purpose Flour (plain flour)
- ½ teaspoon Ground Ginger
- ¼ teaspoon Salt
- 50 g (2 oz) Dark Chocolate for dipping (optional)
- 1 batch (1) Chantilly Cream Chantilly Cream Recipe
- 4 tablespoon Amaretto (optional)
Equipment
- Silicone Baking Mat or parchment paper
- Wooden Spoon or similar - with a thick handle (for forming the snaps)
Instructions
- Preheat oven to 350°F / 180°C (160° fan-assisted) and line a baking sheet with parchment paper
- Heat the sugar, butter and golden syrup in a saucepan over a low heat, stirring gently56 g (½ stick) Unsalted Butter, 55 g (¼ cup) Light brown sugar, 55 g (2½ tbsp) Golden Syrup
- Keep heating gently and stirring until the sugar entirely dissolves - this should take about 10 - 15 minutes. You'll know it's done when you can't feel any grains of sugar and the mixture looks shiny
- Remove from the heat and let sit for 1-2 minutes, then add in the flour, ginger and salt and stir vigorously until smooth and silky50 g (⅓ cup) All-purpose Flour, ½ teaspoon Ground Ginger, ¼ teaspoon Salt
- Take about a teaspoon of mixture at a time and dollop onto the baking sheet. Make sure your dollops are very well spaced, as they will spread substantially. It's best to only do 3 or 4 at a time so you can roll them quickly after each batch. If you have two baking trays you can have one batch ready to go into the oven as soon as the first comes out, so you can roll while they bake.
- While the snaps are baking, spray the handle of a thick wooden spoon (or something similar in shape) with cookie spray or brush lightly with neutral oil, ready for shaping the snaps around.
- Bake for about 9 minutes, watching very closely. Once the brandy snaps have spread and turned a deep golden colour, remove them from the oven.
- Let sit for 30 seconds until you can lift the edge of the snap with a knife without squishing it. Run a knife underneath one of the snaps to loosen it and lift it from the tray.
- Carefully wrap the snap around the wooden spoon handle, with the lacy side facing outwards. Set it down to cool for a few seconds while you loosen the next snap off of the tray, then gently slide it off the spoon and lay it down to cool, then shape the next snap. Repeat with all the snaps.You need to work quickly as the snaps cool and harden very fast. That's why I reocmmend only baking 3 or 4 at a time. If they cool too much and start to break, put them back in the oven for a few seconds to soften them up.
- For extra indulgence, dip the ends of the cooled brandy snaps in tempered chocolate before filling.
- Fill with chantilly cream - I like to add a dash of amaretto or brandy to my cream for an extra kick too!
Nutrition
Notes
- Timing is everything - there are a matter of seconds between these being underbaked and burnt - so watch them like a hawk!
- Roll immediately - roll when they are still warm and flexible but not too hot to touch.
- Work in batches - these set quickly, so bake in small batches so you can roll them before they get too firm.
- Limit size - don't use more than one teaspoon of dough per cookie, or they will be too thick.


Kathryn Phillips
The butter separated out when I started whipping the flour in♂️
Susan Theodoropoulos
Why are they called brandy snaps when brandy is not an ingredient?
Jules Grasekamp
They have had this name since Victorian times! I believe that it was a reference to their color once baked which resembles the color of brandy.
Jillise Anson
LOVED making these. But is it normal that these don’t save well? I tried saving them filled and they went soggy. Is it saving them *unfilled that’s the trick?
Jules
Hi Jillise, Yay! I'm so glad you enjoyed the recipe!
Yes that's totally normal, I do recommend filling right before serving and storing them unfilled, but I could probably make this clearer in the post - I will update it this week so nobody else ends up with soggy snaps!
Thank you for your comment 🙂
Jillise Anson
LOVED making these. But is it normal that these don’t save well? I tried saving them filled and they went soggy. Is it saving them I filled that’s the trick?
Andrea
Everyone I made these for were so impressed! The look so elegant and taste amazing