

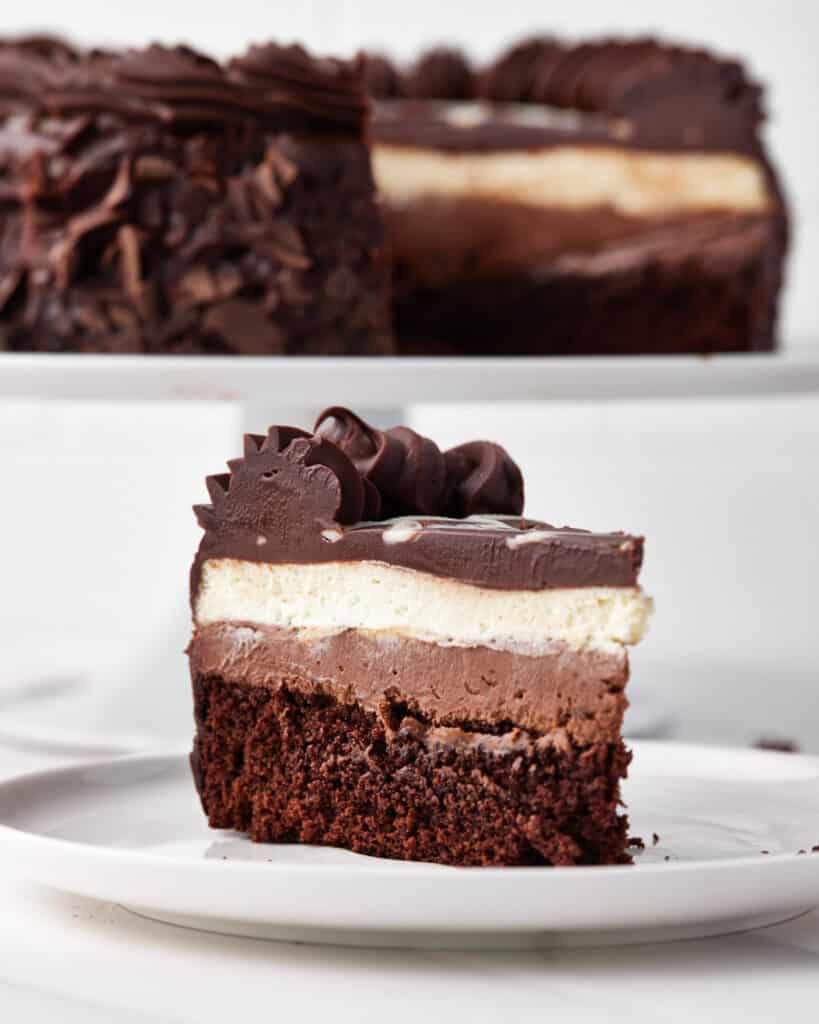
Four layers, three kinds of chocolate, and one seriously impressive slice - this Black Tie Mousse Cake was made for proper celebrations!
Quick Look: Black Tie Mousse Cake
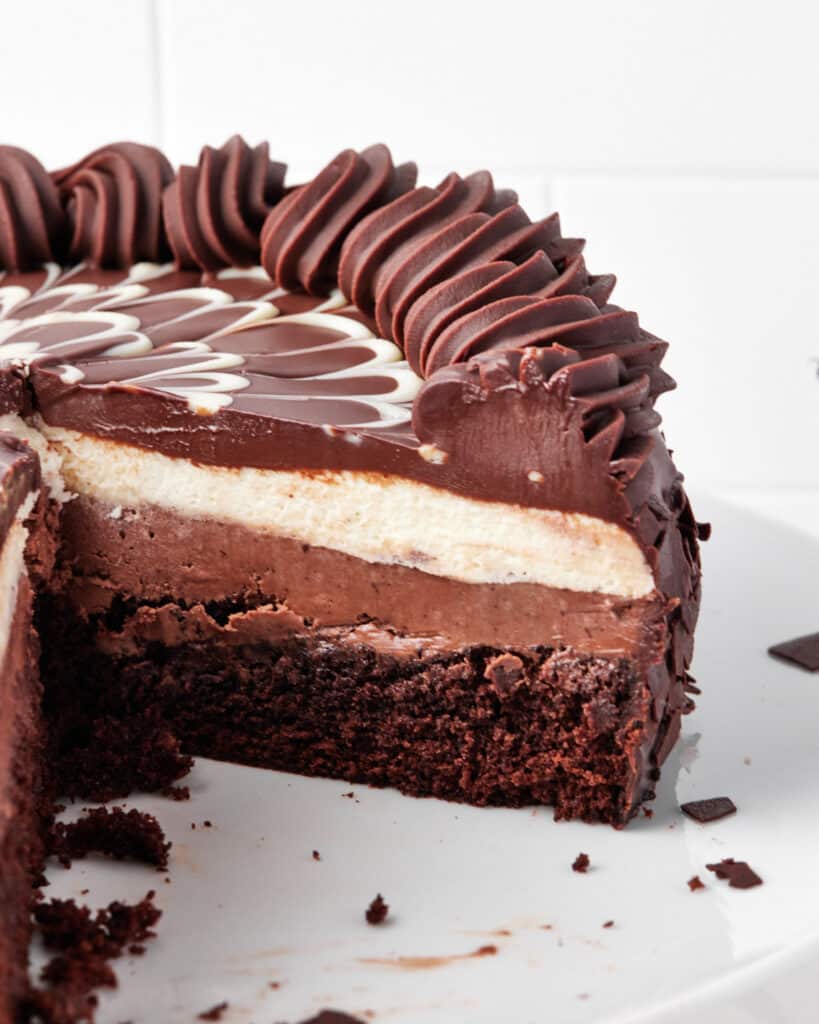
A four-layer chocolate dessert consisting of chocolate cake, chocolate cheesecake, white chocolate mousse, and chocolate ganache.
☆ Why make THIS version? I've made each element as simple as possible without compromising on indulgence, plus it uses one ganache to coat the whole cake and then pipe the decorations on top.
SUMMARIZE AND SAVE THIS POST ON
Olive Garden made the Black Tie Mousse Cake famous, and honestly, I can see why. It takes everything good about a rich chocolate dessert and stacks it into one spectacular cake. My homemade version keeps the dark chocolate cheesecake but uses a light white chocolate mousse in place of the traditional custard-style layer, giving you a lovely contrast against all that deep chocolate.
I won't pretend this is a 20-minute dessert, but it is much more manageable than it looks! Each individual layer is straightforward, and a lot of the time is just spent waiting for things to cool or set. I'll walk you through the order, the visual cues that really matter, and how to get those beautifully clean, defined layers when you slice it.
Black Tie Mousse Cake is sometimes confused with the Costco Tuxedo Cake because of its contrasting chocolate layers, but the fillings are quite different. I have a homemade Tuxedo Cake recipe too if that's your jam!
Reader Review:
This cake was amazing. It got rave reviews from all that enjoyed it. Highly recommend for the WOW's you will get. Lots of steps but overall very easy.
⭐⭐⭐⭐⭐ - April
Jump to:
Key Ingredients
There are quite a few ingredients across the four layers, but these are the ones where choosing the right product really matters. See the recipe card for quantities.
- All-purpose Flour - Plain flour in the UK. Stick with all-purpose flour rather than cake flour, as the base needs enough structure to support the mousse layers.
- Cocoa Powder - Dutch-processed cocoa powder gives the cake its deep colour and smooth chocolate flavour.
- Chocolate - Dark and milk chocolate. Use chopped chocolate bars or couverture, not chocolate chips as they are designed to hold their shape, not melt.
- White chocolate - Choose real white chocolate containing cocoa butter, not compound coating or "white baking chips." White chocolate is particularly sensitive to heat, so melt it gently to prevent it from seizing.
- Cream Cheese - Use full-fat cream cheese and let it come completely to room temperature so it blends smoothly into the cheesecake layer.
- Heavy Cream - Heavy whipping cream or double cream containing at least 35% fat will whip firmly enough to support the mousse layers. Keep it cold until you are ready to whip it.
- Vegetable Oil - To keep the cake layer super moist. You can substitute with any neutral oil, like canola or sunflower.
See recipe card for quantities.
How To Make Black Tie Mousse Cake
There are four components to this mousse cake: the chocolate cake base, no-bake chocolate cheesecake, white chocolate mousse, and the chocolate ganache topping. We'll break down each element step-by-step.
Make the Chocolate Cake Base
This chocolate cake is the same base recipe I use in a lot of my layer cakes because it is so foolproof and reliable, and comes together really easily by hand. For a full-sized version, try my chocolate espresso layer cake.

- Sift the dry ingredients, including flour, sugar, cocoa powder, baking powder, and salt, together into a large mixing bowl and stir to combine.
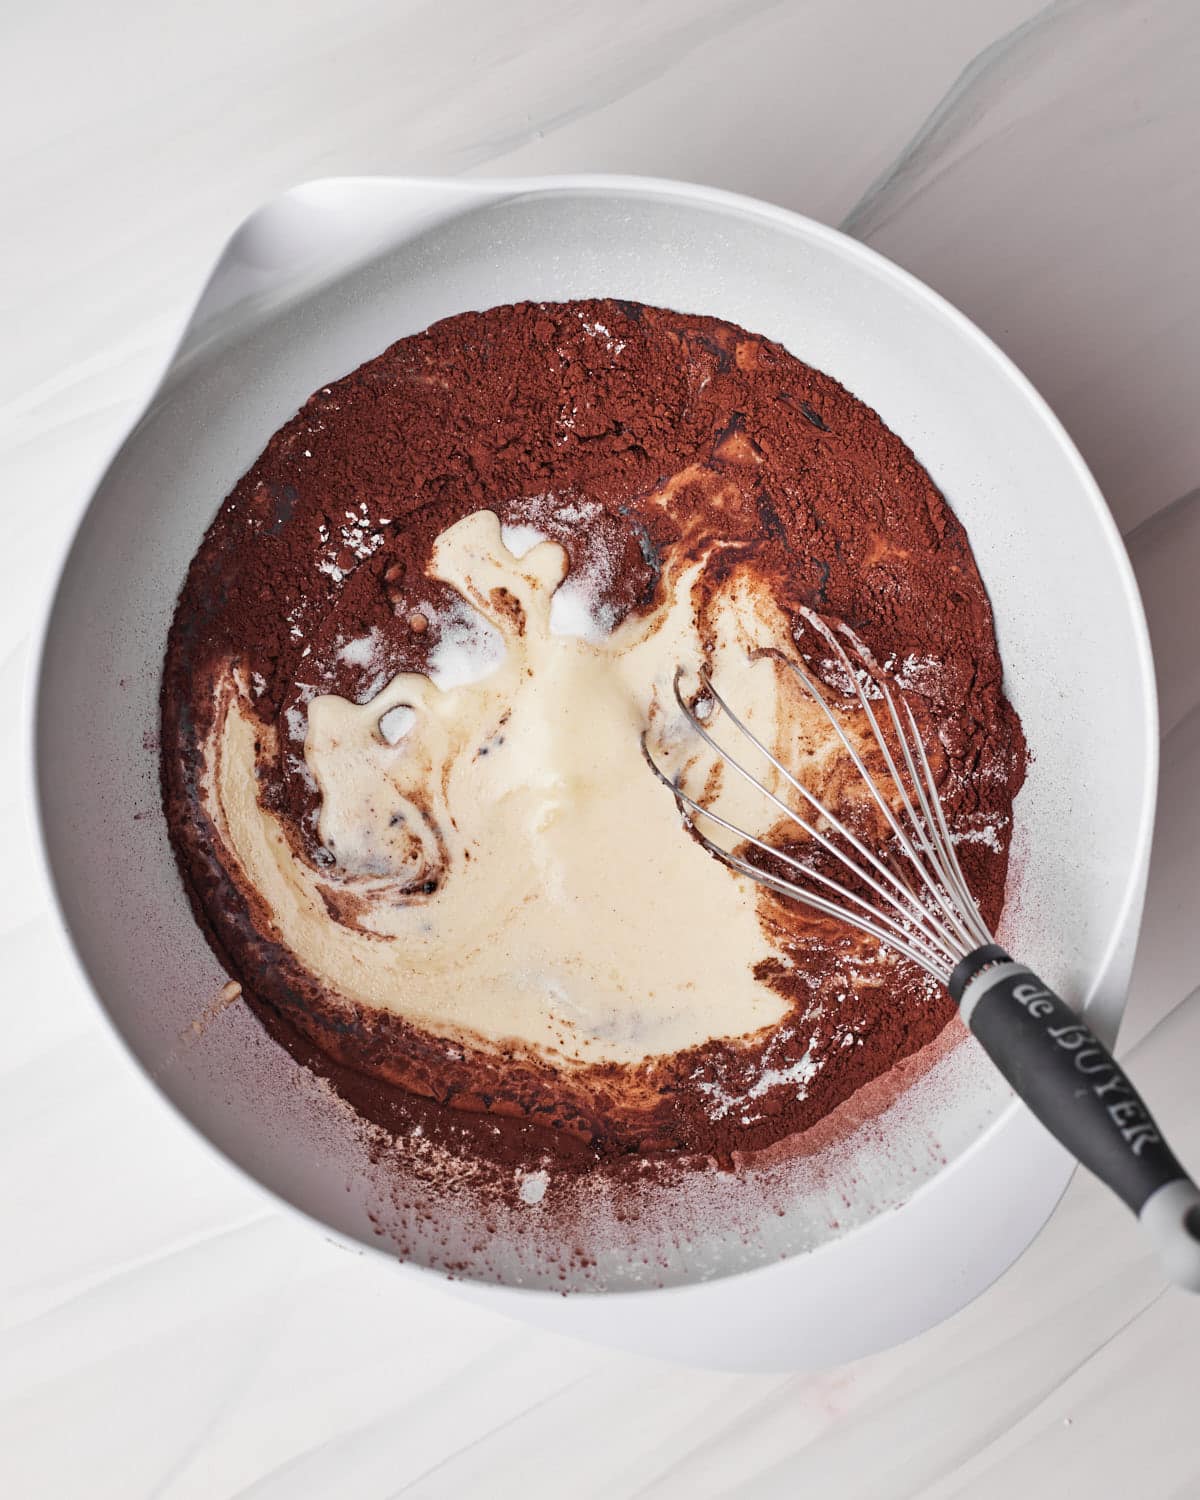
- In a separate bowl, beat the eggs and mix with all the wet ingredients (except the hot water). Whisk until smooth, then pour into the dry ingredients and whisk just until combined.

- Add the hot water to the chocolate cake batter and stir just until combined.
Then pour the batter into a prepared cake pan and bake for 30-35 minutes or until a toothpick comes out clean.
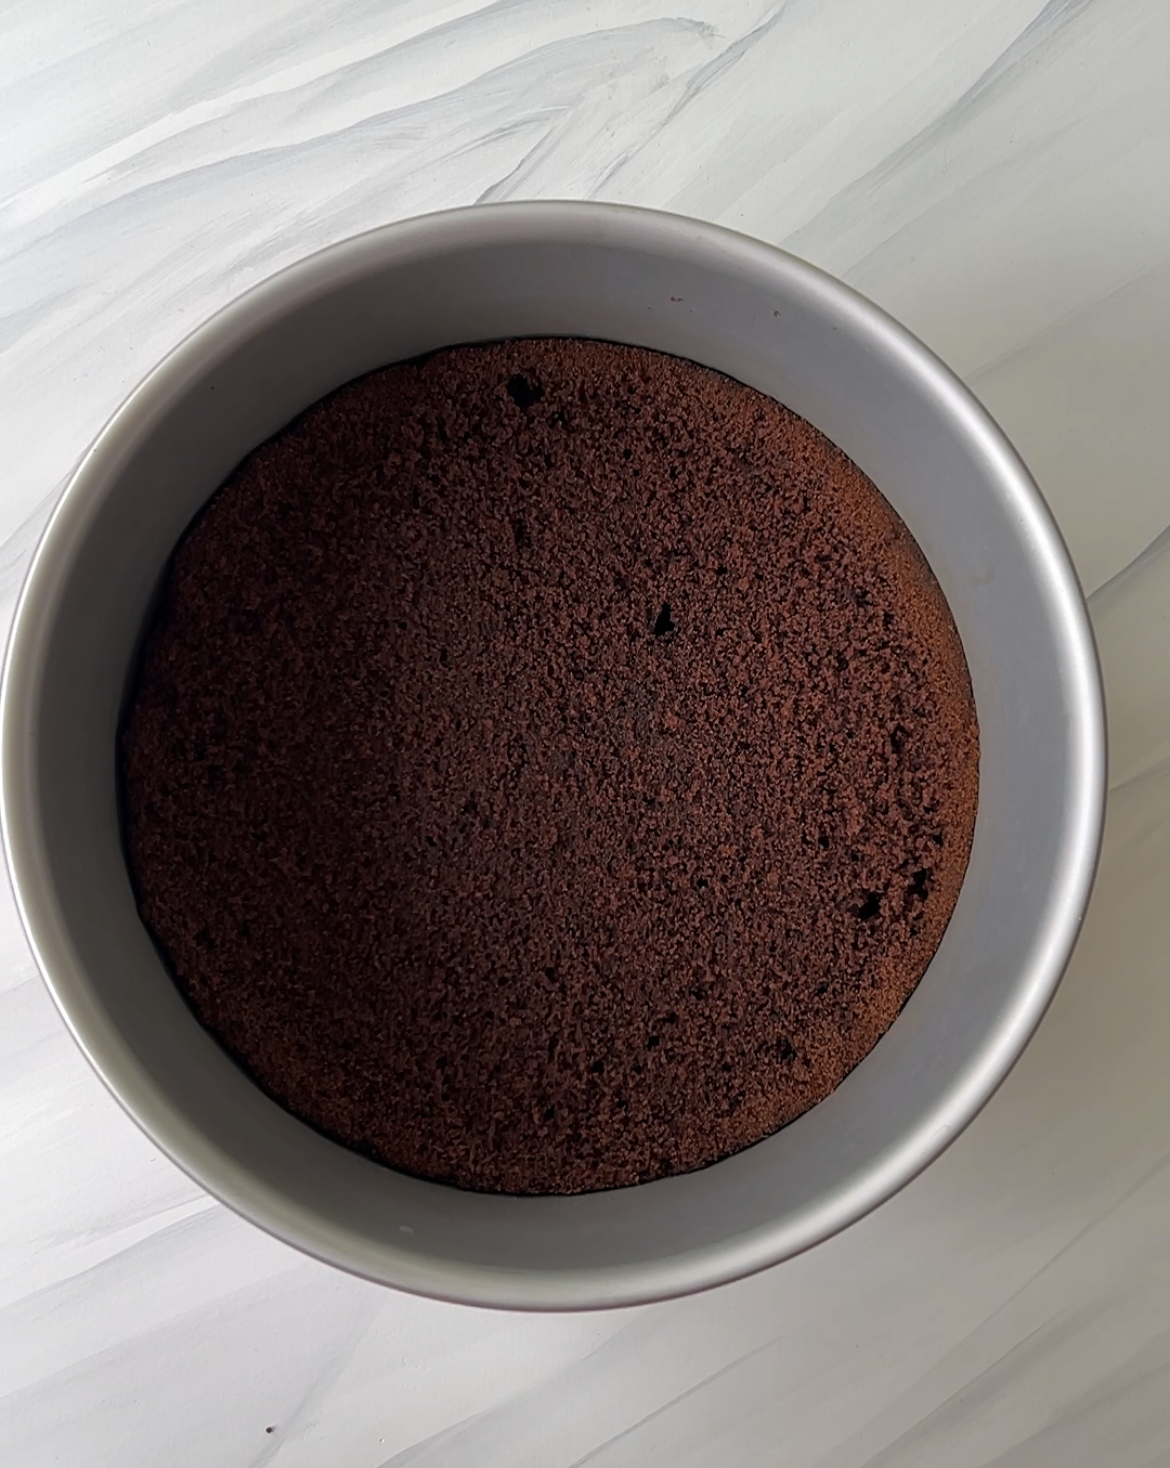
- Let the cake cool completely, then use a cake leveler or serrated knife to slice the top to make it completely flat.
Place it into the bottom of the pan you will be building the black tie mousse cake in.
Make the Chocolate Cheesecake
This layer is a light, no-bake chocolate cheesecake. If you're looking for a full-sized baked version, try my rich and creamy chocolate cheesecake with an Oreo crust.
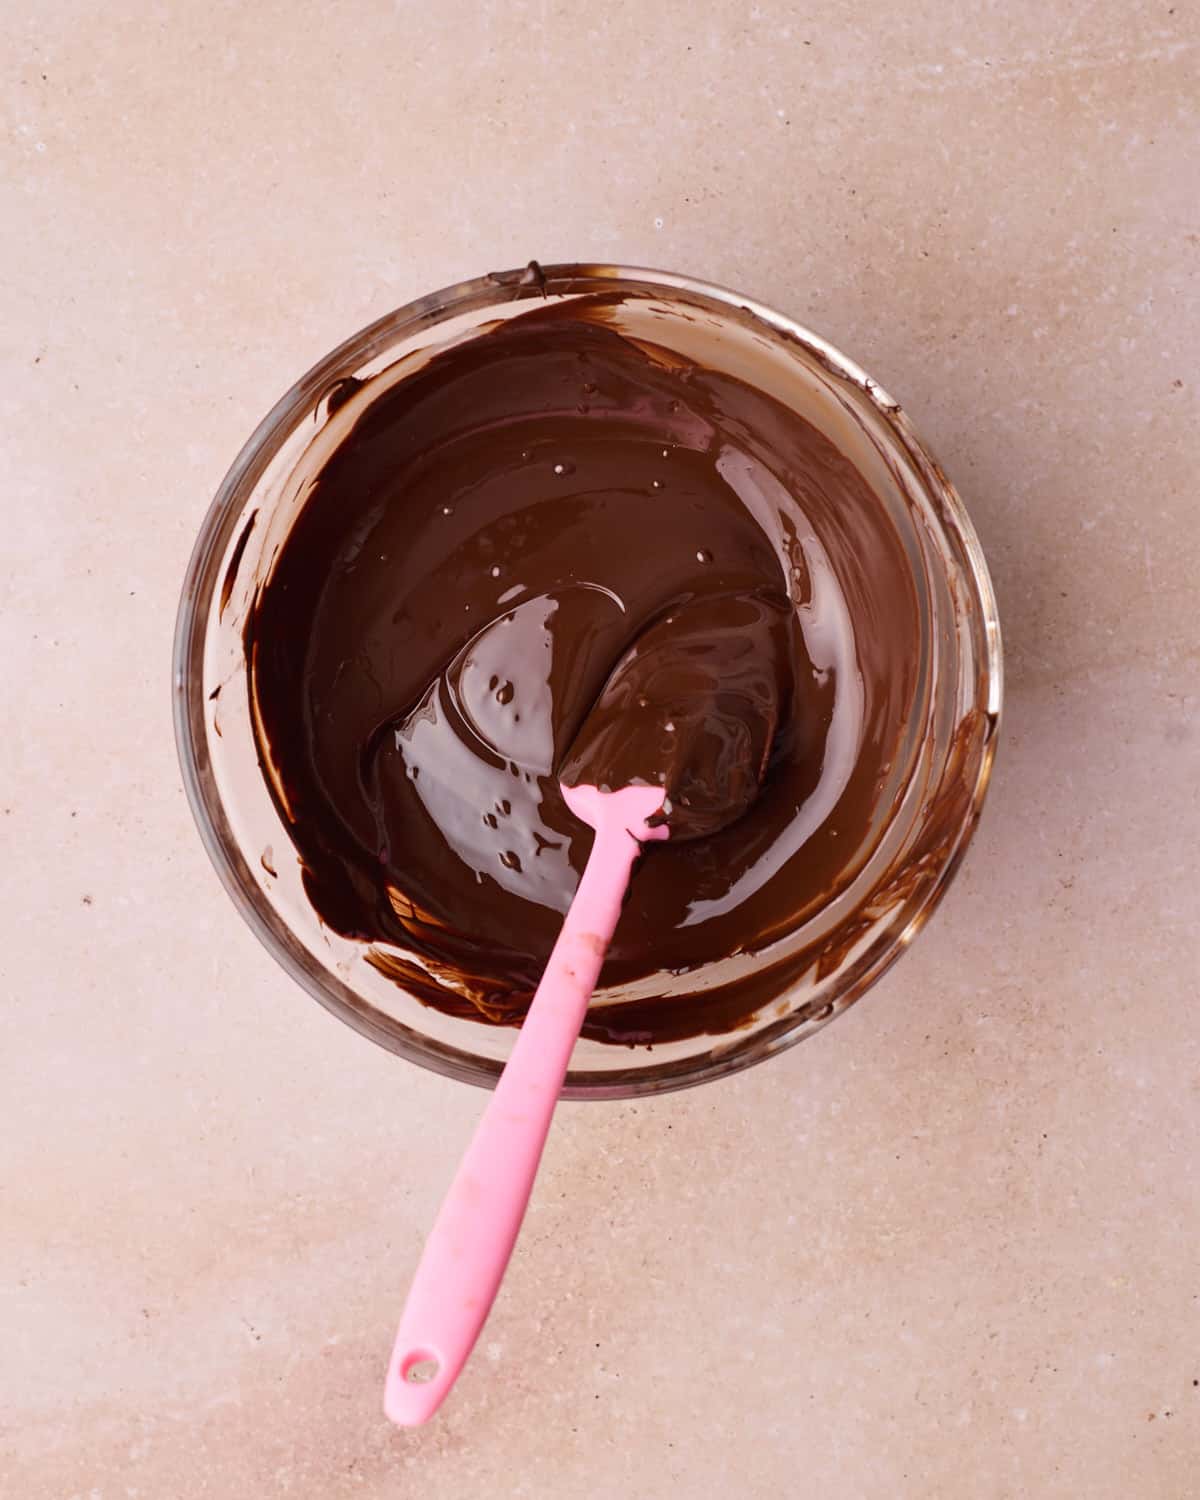
- Melt the dark chocolate gently in the microwave using 20-30-second bursts, stirring between each one. Set it aside until it is still fluid but no longer hot.
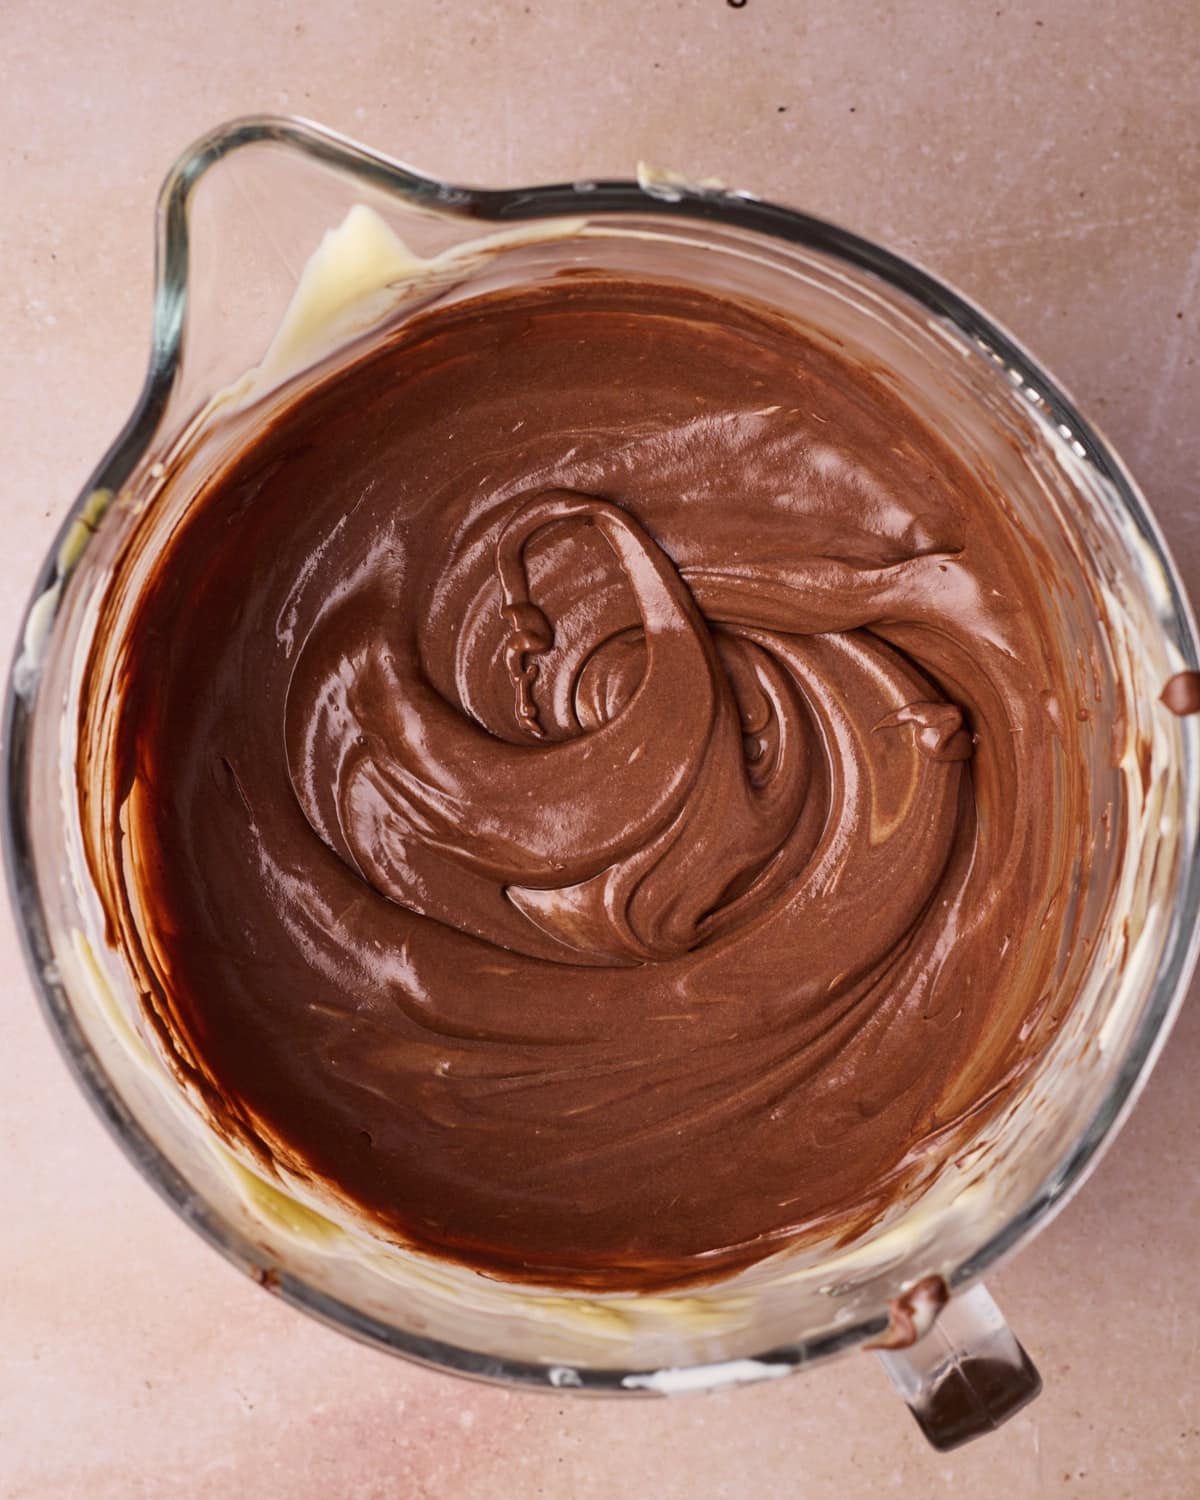
- Beat the room-temperature cream cheese, powdered sugar, and vanilla until completely smooth.
Add the cooled melted chocolate and mix until evenly combined.
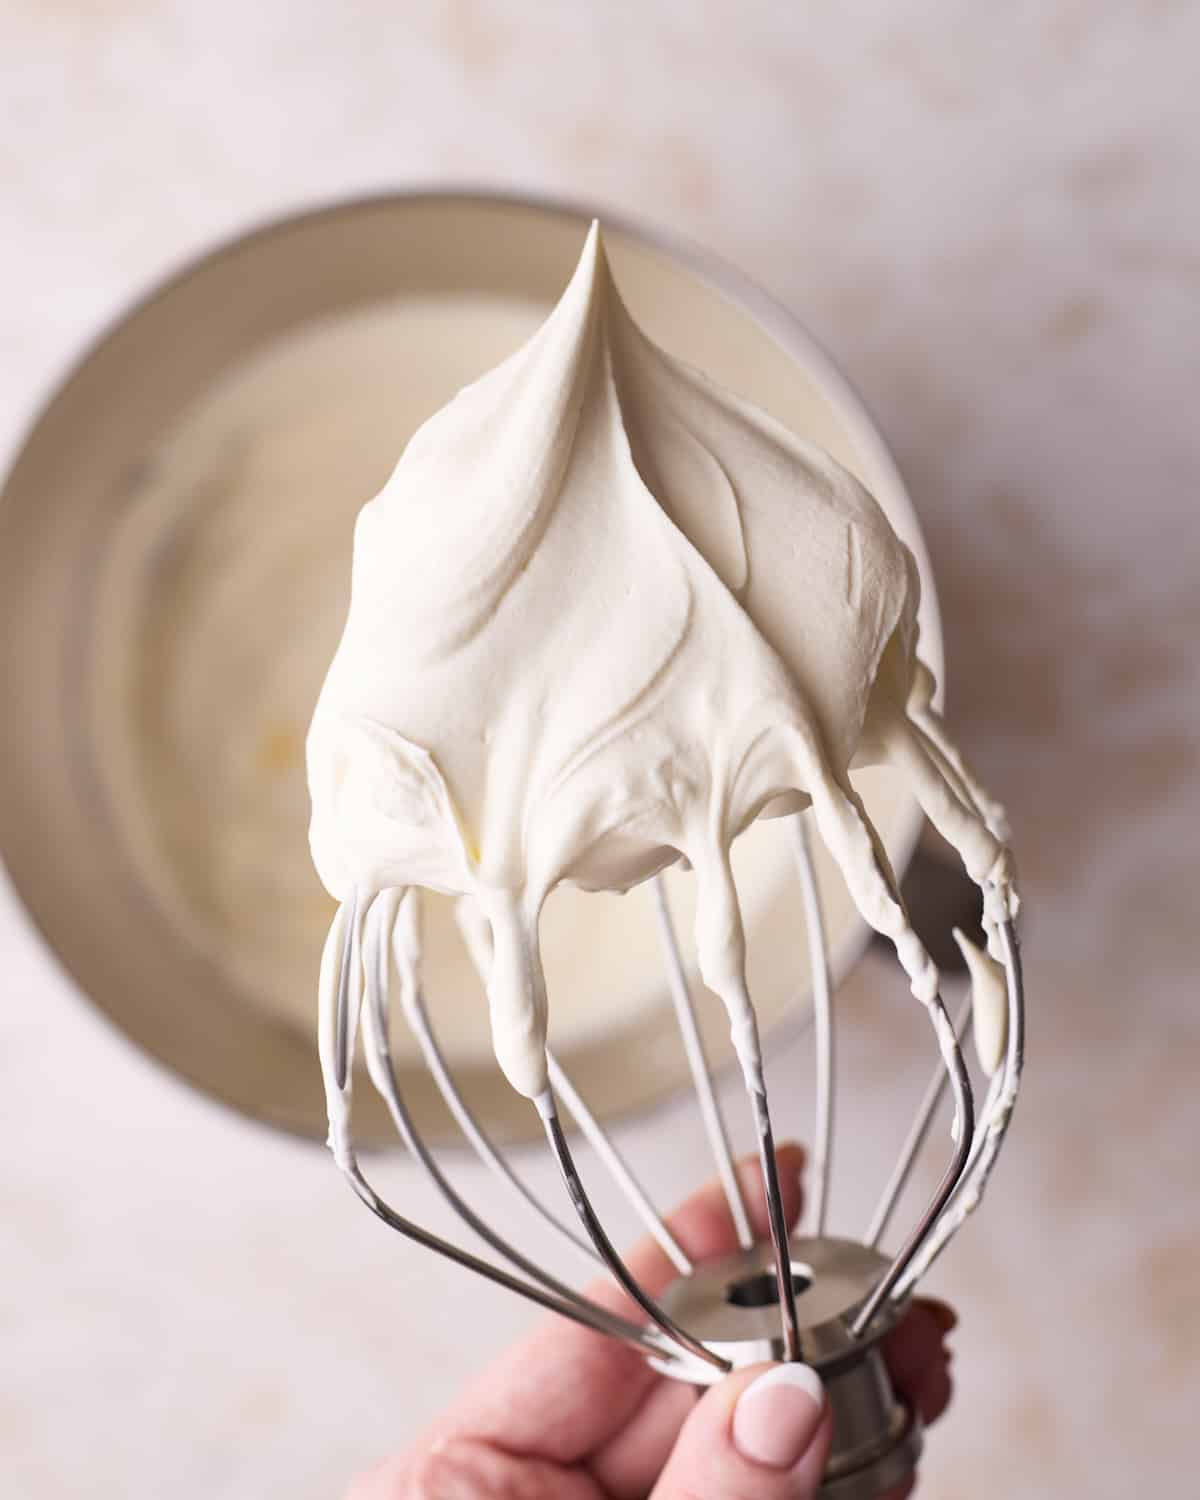
- Whip the cream with the powdered sugar and vanilla until it reaches medium peaks.
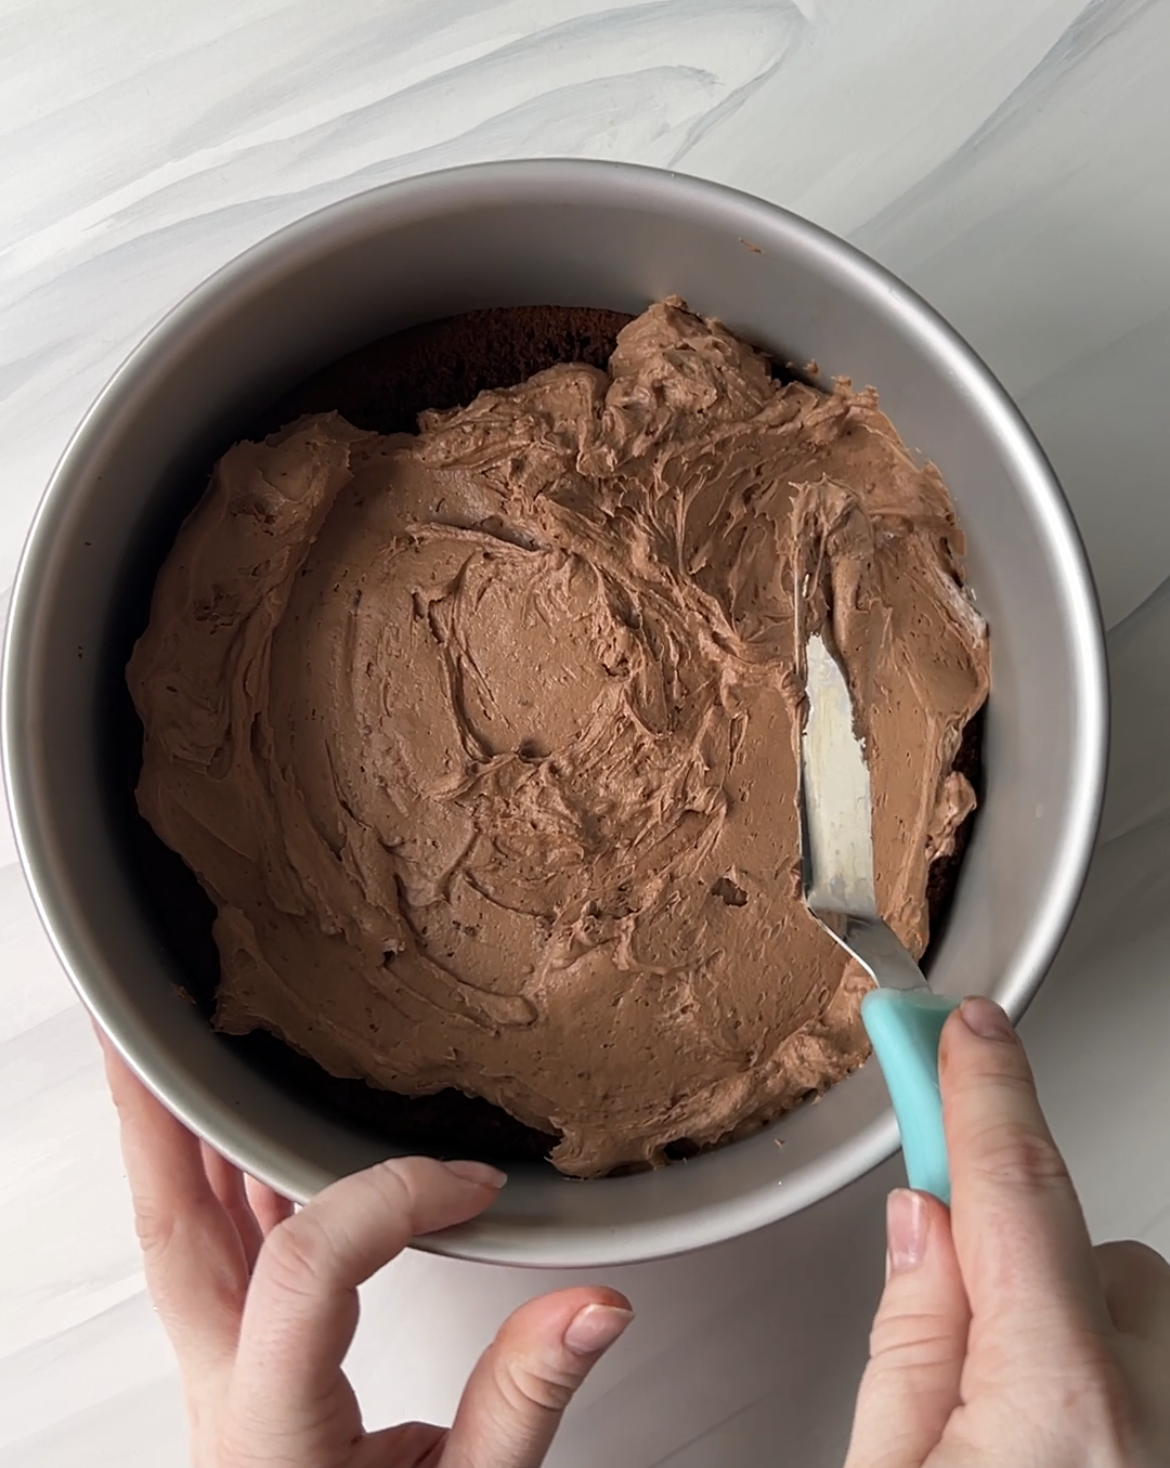
- Gently fold the whipped cream into the chocolate mixture, just until combined. Then spread it evenly on top of the chocolate cake base and chill for 20 minutes while you prepare the white chocolate mousse.
time saving tip
I like to whip all of the cream for the cheesecake and mousse layers at the same time, just to save myself an extra step. Then you can just use roughly ⅓ of it for the chocolate cheesecake layer and use the rest for the mousse.
Make the White Chocolate Mousse
The third layer of white chocolate mousse is probably the easiest to make and has only three ingredients.
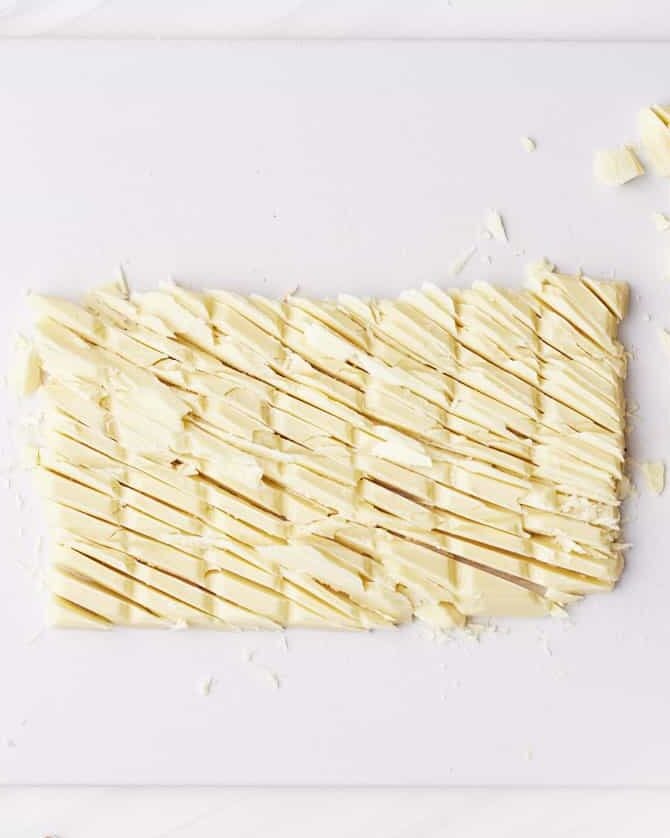
- Chop the white chocolate finely, then melt it very gently either over a double boiler or in the microwave in 20-second bursts, stirring in between. White chocolate is a lot more prone to overheating than milk or dark, so be careful not to let it get too hot.
Once melted, let it cool until it is no longer warm to the touch.
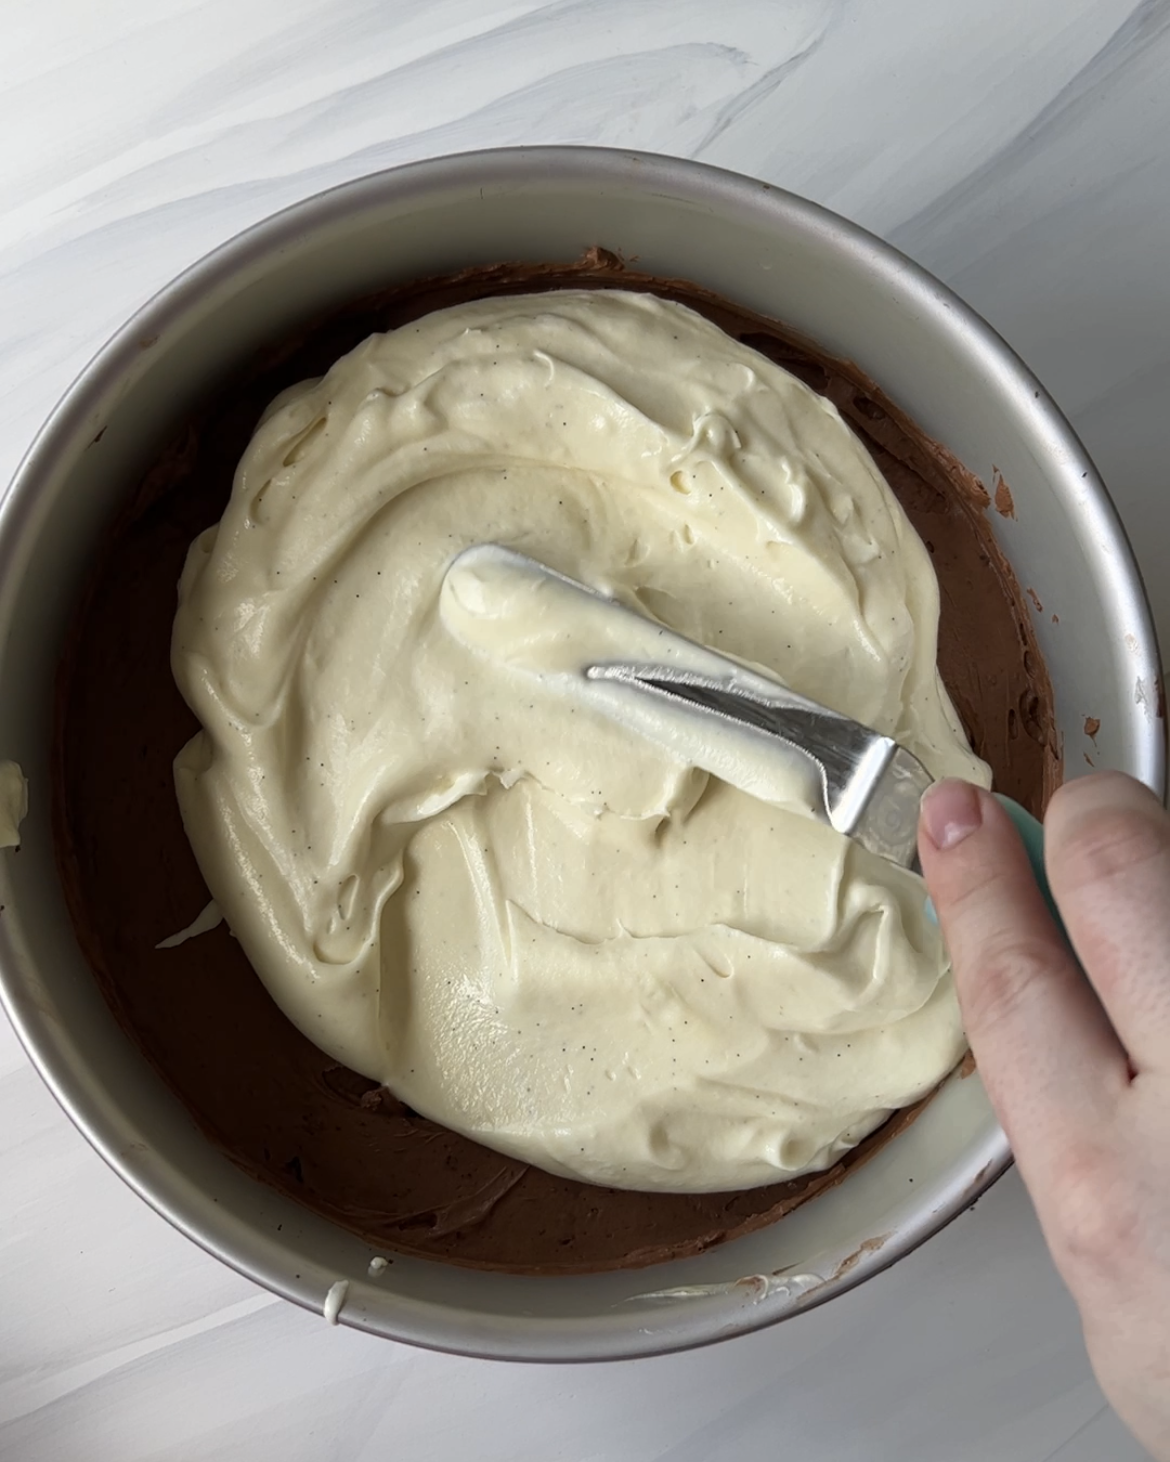
- Carefully fold the cooled, melted white chocolate into the reserved whipped cream.
Then pour it over the top of the chocolate cheesecake layer and smooth it out.
Put the whole cake back in the fridge to set for at least 3 hours.
Technique guide
What does 'medium peaks' mean? If you're unsure what medium peaks should look like, my guide to whipped cream stages includes pictures of every stage and how to avoid overwhipping.
Decorate
The fourth layer is glossy chocolate ganache. We are going to make one large batch of ganache and pour ¾ of it over the cake, like in my Prinzregententorte recipe. Then the rest we will let cool further to pipe on top of the cake.
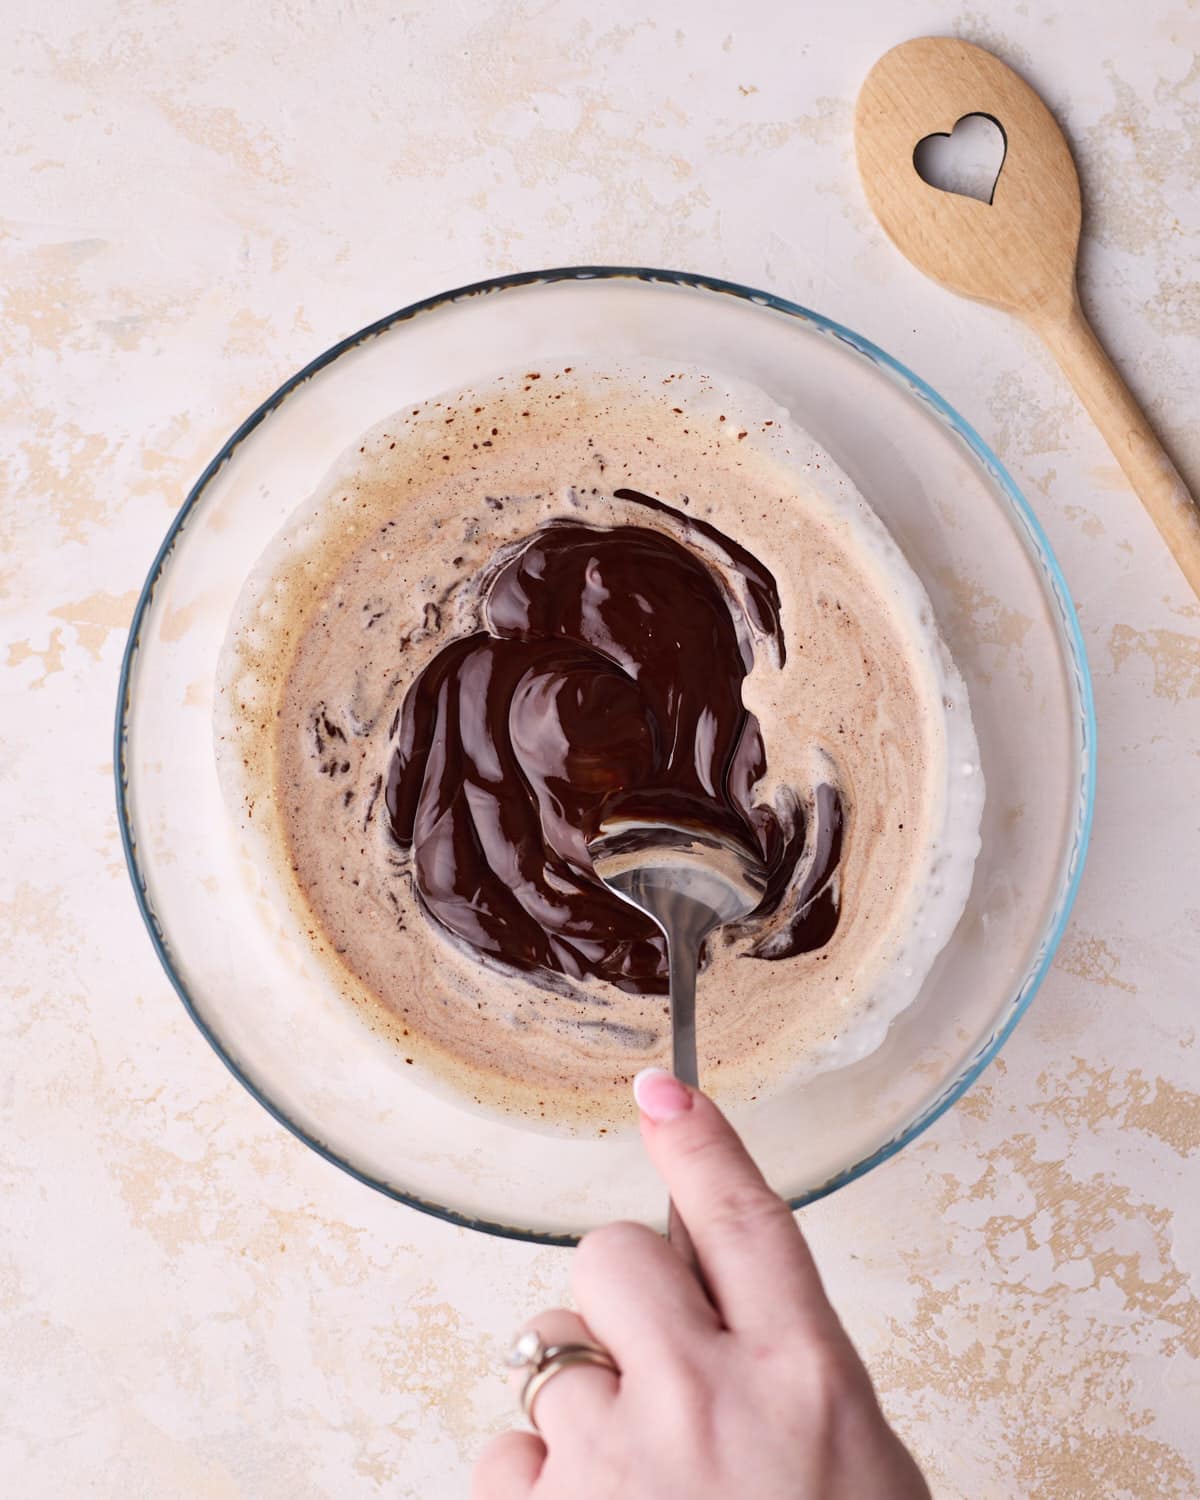
- Heat the cream in a pan over medium heat until is starts to steam, then pour over the chopped chocolate and let it sit for 1 minute before stirring in the middle until totally smooth and melted.
Let it cool until it is thick enough that it flows easily but leaves a slight trace when drizzled back into the bowl.
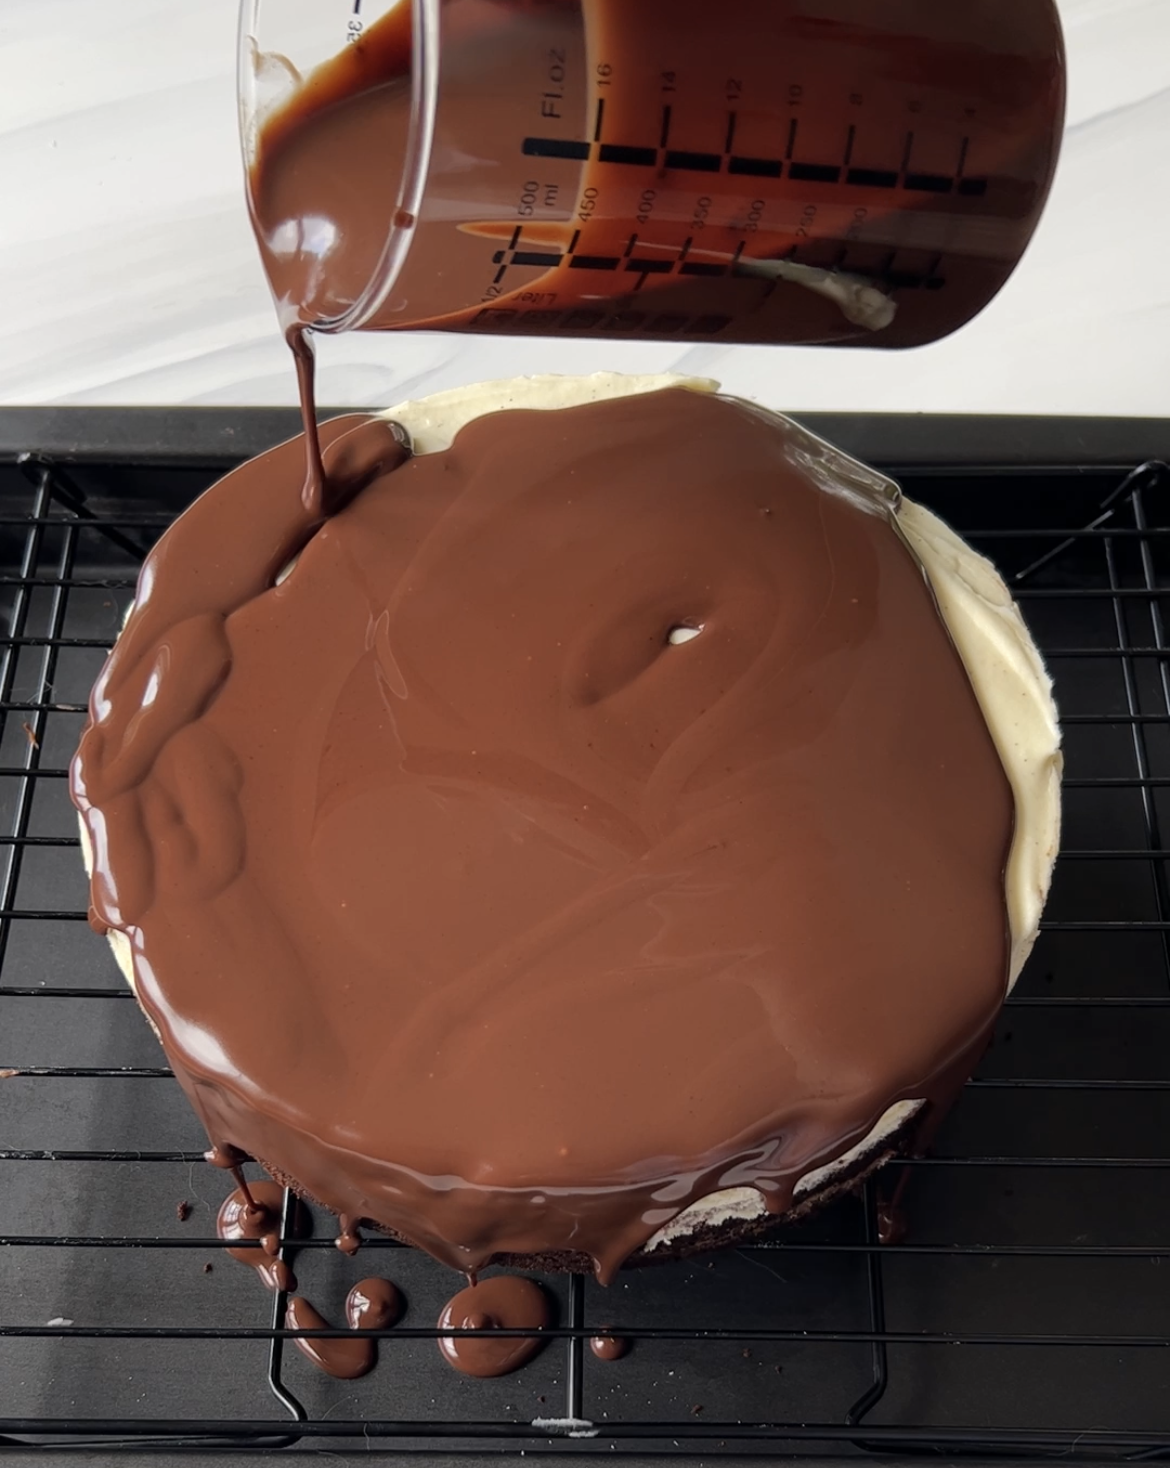
- Carefully remove the chilled cake from its pan and place it on a wire rack set over a tray.
Reserve roughly ¼ of the ganache for piping, then pour the remainder over the cake, working from the centre outwards and allowing it to run down the sides.

- While the dark ganache is still wet, pipe a little melted white chocolate in concentric circles over the top. Drag a toothpick from the centre towards the edge to make the feathered pattern, working quickly before the ganache begins to set.
Or for an easier design, just pipe some random blobs and swirl them with a knife or toothpick to make a pretty pattern.
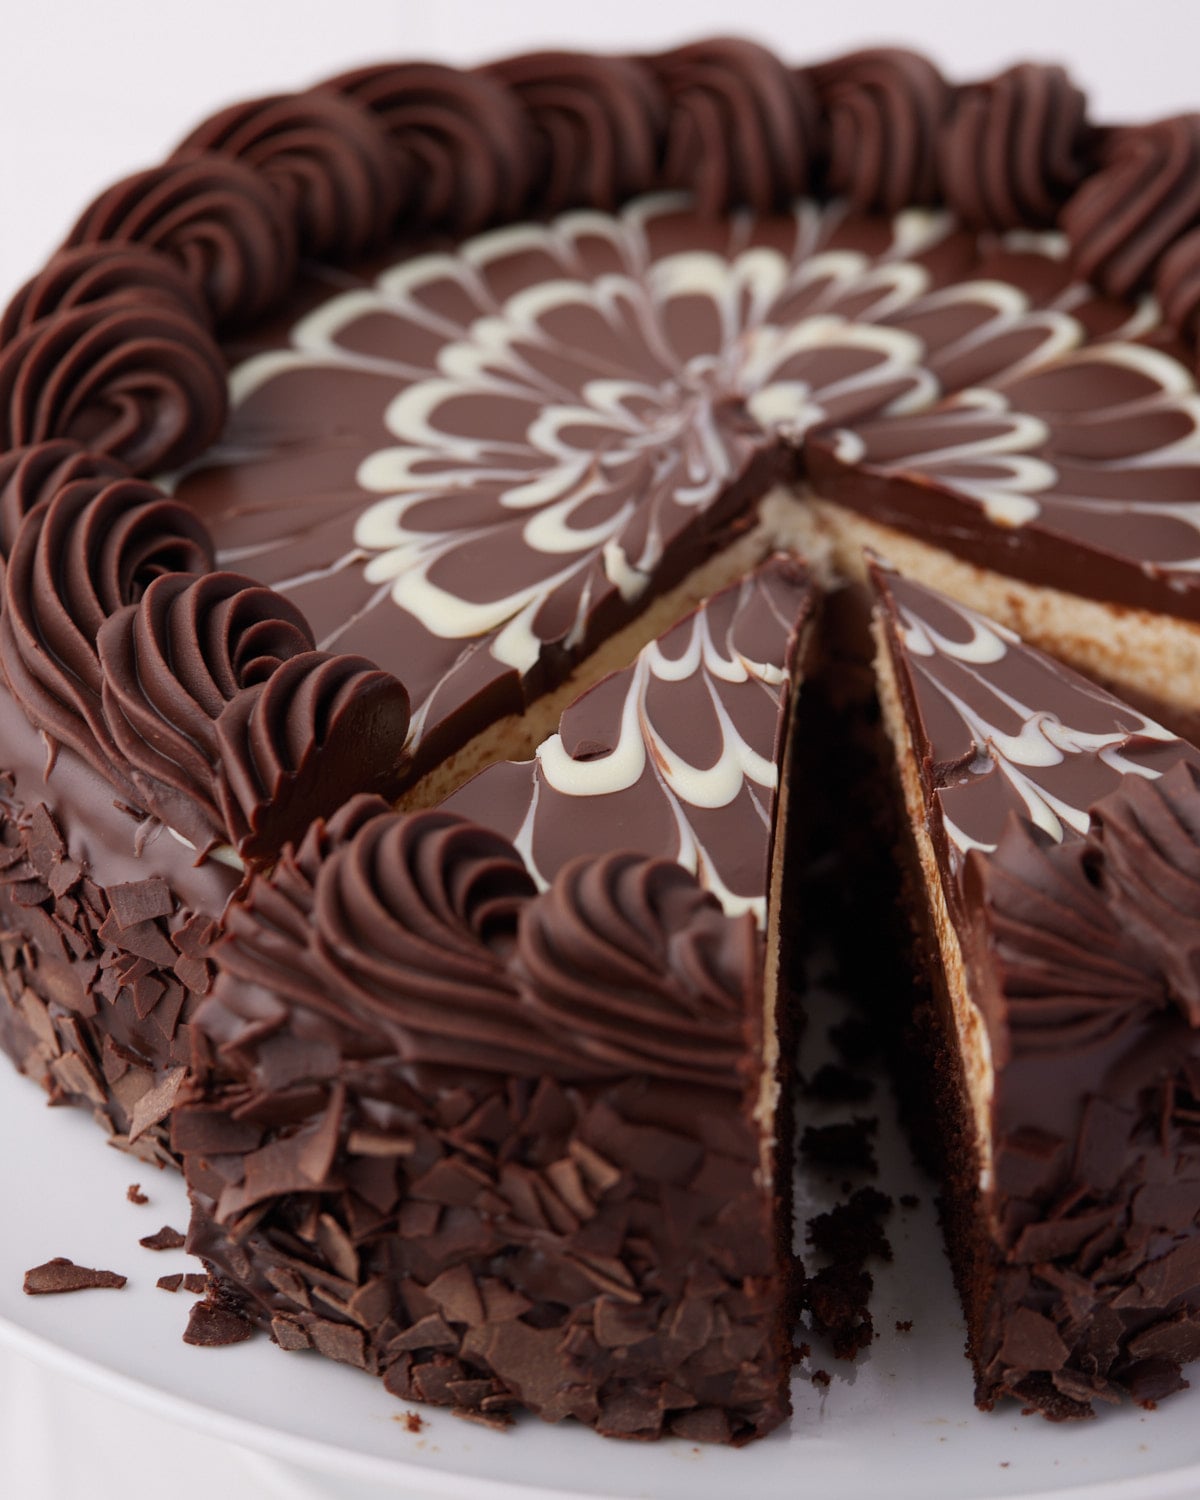
- Press the mini chocolate chips or flakes onto the sides while the coating is still wet.
Leave the reserved ganache until it cools completely - it should become thick enough to hold its shape. Put it into a piping bag with a star tip and pipe around the outer edge of the cake.
Chill the cake for another 15 minutes or until ready to serve.
bakery tip
How To Get Perfect, Clean Slices
Cut the cake while it is thoroughly chilled using a large, sharp knife warmed in hot water. Dry the blade, press it straight down through the cake, and clean and rewarm it between every cut - this prevents the ganache from dragging through the mousse and keeps each layer beautifully defined.
Storage + Make Ahead
Keep the finished cake covered in the refrigerator and enjoy it within 3 days. Serve it chilled but let it sit at room temp for 10-15 minutes before serving.
This is a great cake to make ahead because the mousse needs plenty of time to set. You can bake the chocolate cake up to 2 days in advance; once completely cool, wrap it tightly and keep it at room temperature. Add the cheesecake and mousse layers the day before serving, then leave the assembled cake in its pan to chill overnight. For the glossiest finish, add the ganache and decorations on the day you plan to serve it.
More Chocolate Showstoppers
Some more chocolate dessert recipes you might enjoy...
Show Me Your Bakes!
If you tried this recipe, I'd love to know how it turned out in the comments!
Want to share a photo? You can send me a pic or tag @bonni_bakery on Instagram - I love seeing all your creations.

Black Tie Mousse Cake Recipe
Ingredients
- 120 g (1 cup) All-purpose Flour (Plain Flour)
- 200 g (1 cup) Granulated Sugar (Caster Sugar)
- 30 g (⅓ cup) Cocoa Powder Dutch-processed
- 1 teaspoon Baking Powder
- ½ teaspoon Salt
- 2 Large Eggs
- 60 ml (¼ cup) Vegetable Oil
- 60 ml (¼ cup) Whole Milk
- 1 teaspoon Vanilla Extract
- 60 ml (¼ cup) Hot Water
- 225 g (8 oz) Cream Cheese (room temperature)
- 125 g (4½ oz) Dark Chocolate
- 120 ml (½ cup) Heavy Cream
- 40 g (⅓ cup) Powdered Sugar
- 1 teaspoon Vanilla Extract
- 150 g (5½ oz) White Chocolate
- 240 ml (1 cup) Whipping Cream
- 2 tablespoon Powdered Sugar
- 1 teaspoon Vanilla Extract
- 420 ml (1¾ cups) Heavy Cream
- 210 g (7½ oz) Dark Chocolate
- 210 g (7½ oz) Milk Chocolate
- 30 g (1 oz) White Chocolate
- 180 g (1 cup) Mini Chocolate Chips Or chocolate flakes
Equipment
- Loose-bottomed pan See notes
- Electric Whisk Stand mixer or handheld
Instructions
- Preheat oven to 350°F / 180°C (160°C fan-assisted) and prepare an 8-inch cake pan.
- Sift the dry ingredients for the cake together into a large mixing bowl and stir to combine.120 g (1 cup) All-purpose Flour, 200 g (1 cup) Granulated Sugar, 30 g (⅓ cup) Cocoa Powder, 1 tsp Baking Powder, ½ tsp Salt
- In a separate bowl, beat the eggs and mix with all the wet ingredients (except the hot water). Whisk until smooth and combined.2 Large Eggs, 60 ml (¼ cup) Vegetable Oil, 60 ml (¼ cup) Whole Milk, 1 tsp Vanilla Extract
- Pour the wet ingredients into the dry ingredients and whisk just until everything is incorporated.
- Add the hot water into the batter and stir until combined.60 ml (¼ cup) Hot Water
- Pour into prepared cake pan and bake for 30-35 minutes or until a skewer comes out clean.
- Let cool completely, remove from the cake pan, then slice off the rounded top so you are left with one thin cake base layer.
- Clean and dry the cake pan, then place the cake base layer on the bottom and set aside while you prepare the other layers.
- Melt the dark chocolate in the microwave in 30-second increments until totally melted. Set aside to cool slightly.125 g (4½ oz) Dark Chocolate
- Cream the cream cheese, powdered sugar and vanilla together until completely smooth and free from lumps.225 g (8 oz) Cream Cheese, 40 g (⅓ cup) Powdered Sugar, 1 tsp Vanilla Extract
- Pour melted chocolate into the cream cheese mix and beat until combined.
- In a separate bowl, whip up the whipping cream until stiff peaks form.120 ml (½ cup) Heavy Cream
- Take a small amount of the whipped cream and mix it into the chocolate cream cheese mixture to loosen it up a little. Then fold in the remaining cream.
- Pour the chocolate cheesecake into the cake pan, on top of the cake layer, then put it in the fridge to chill for 20 minutes, while you prepare the white chocolate mousse layer.
- Melt the white chocolate in the microwave in 20-second bursts, stirring in between until completely melted. Set aside to cool.150 g (5½ oz) White Chocolate
- Whip the heavy cream, vanilla, and powdered sugar to medium-stiff peaks.240 ml (1 cup) Whipping Cream, 1 tsp Vanilla Extract, 2 tbsp Powdered Sugar
- Once the melted white chocolate has cooled to lukewarm, pour it into the whipped cream and fold gently until completely combined.
- Pour into the cake pan on top of the chocolate cheesecake layer and put in the fridge to set for at least 3 hours.
- Once the mousse cake has set, break up your milk and dark chocolate and put them into a bowl.*210 g (7½ oz) Milk Chocolate, 210 g (7½ oz) Dark Chocolate
- Pour the cream into a saucepan and heat on medium-low until it starts to steam and tiny bubbles begin appearing on the surface.420 ml (1¾ cups) Heavy Cream
- Remove the cream from the heat and pour it over the chocolate. Let it sit for a minute and then gently start to stir. Keep going until the chocolate is totally melted and it turns into a smooth, glossy mixture.
- Let the ganache cool slightly, the perfect pouring temperature is about 89°F / 32°C. If you don't have a thermometer, just look for the ganache to thicken slightly so it leaves a slight trace in itself when you drizzle it back into the bowl.
- Once the mousse cake is set and the ganache is at the right temperature, carefully remove the cake from the cake pan.
- Reserve about a quarter of the ganache and set it aside to cool further for piping later.
- Place the cake on a wire rack and pour the chocolate ganache all over the cake.
- If you want to add the design on top, melt a small amount of white chocolate and pipe a design on top of the ganache immediately after pouring.30 g (1 oz) White Chocolate
- While the ganache is still wet, use your hands to press mini chocolate chips or chocolate flakes into the sides of the cake.180 g (1 cup) Mini Chocolate Chips
- Once the leftover ganache has cooled to piping consistency, put it in a piping bag and pipe around the outside of the mousse cake.
Nutrition
Notes
Chocolate - for the cheesecake, mousse, and ganache, make sure you use real chocolate, not chocolate chips or candy bars. Heavy Cream - It must be heavy cream, heavy whipping cream, or double cream - at least 36% fat, otherwise the layers may not set properly.

Gina says
I am wondering, can this be made without the cheesecake part? I don’t like cheesecake or any type of cheese.
This sounds delicious and I would like to make it. Thank you
Jules Grasekamp says
Hi Gina,
You could definitely swap the cream cheese layer for something else.
You might actually prefer my Tuxedo cake - it's similar but with no cheesecake!
Jules
Gina says
Thank you for getting back to me quickly!!
Eliz says
Hi) Can you tell me if I can use mastic on top of this recipe? To decorate the cake and put figures on it?
Rich says
Bonnie, I made this recipe
And I’m a pretty good baker, but this was a tough one
First, I should know better
you need to bring the eggs and the milk to room temperature
Second, the cake came out good though, and the cream cheese mousse frosting came out good
However, I probably needed to Temper the whitechocolate
Even though I called the white chocolate slightly when I slowly mixed it with the whipped cream It split
Also The ganache was the wrong ratio too much cream
I used exactly the dark chocolate and the milk chocolate you indicated
Took forever to get to a pouring consistency 89° was no good
And hours to get to a piping consistency
Jules Grasekamp says
Hi Rich,
Thank you for trying my recipe and for leaving your feedback. Yes as a general rule you always want eggs and dairy to be at room temperature before using them in a recipe for baking - unless otherwise specified. I will however add this into the recipe notes in case anyone is unaware, thank you.
You definitely shouldn't temper the white chocolate, you want to get it just melted so it doesn't get too hot, which is why you just do it in 30 second bursts in the microwave. The recipe does state to let it cool while you whip the cream, so unless it was overheated in the first place, it should be pretty cool by the time the cream is ready and shouldn't cause it to split.
The ganache is exactly a 1:1 ratio of cream to chocolate by weight, which is the correct ratio for a standard medium thickness ganache. If it was too runny for you it could be from using a cream that didn't have a high enough fat content, or from using chocolate chips or chocolate candy bar instead of real chocolate. It does take a while to cool, yes. You can put it in the fridge if you want to speed up the process but I prefer to just let it sit.
I hope this helps! Let me know if I can help you troubleshoot any more 🙂
Jules
Donna says
This looks amazing! I want to make it on the wknd for at least 12 people (celebrating 3 birthdays together) Could I double the recipe & put it in a 9x13 baking pan? I will use my own chocolate mud cake recipe as my daughter has anaphylactic egg allergy & we are gluten free. I think it will all go deliciously together.
Jules Grasekamp says
Hi Donna,
Thank you, I'm so glad you like it!
Yes you can definitely do this, quite a few readers have told me they doubled it and made it in various sized pans (and even as a double layer cake).
I hope you and your daughter love it - let me know how it turns out! 🙂
Jules
Shilpa says
Hi! This cake looks so good! Long recipe but so doable. I wanted to make this over the weekend, but wanted to include Nutella in the cake. Any suggestions, in what proportions I could add in to the cheesecake layer?
Shilp says
For anyone looking to make a nutella addition, I added about 200 gms of nutella to the cheesecake layer, and did not add the melted dark chocolate. I also mixed in finely chopped hazelnuts to the top ganache layer. It was lovely. The recipe is great! My only suggestion would be to halve the cake quantity as, i had to slice away about half of the cake to make it fit in an 8" ring. I also had some cheesecake mousse left over, but it was so good, no complaints there 🙂
Jules Grasekamp says
A Nutella version sounds delicious! Thanks for trying my recipe 🙂
Jules Grasekamp says
Sorry I didn't get to this comment fast enough! But sounds like you made it and it turned out delicious!
Dawn says
Two questions, I'm planning on making this for Christmas dessert, but in 4" pans. Any idea how many little ones this would make (6?) Not worried about the base, I used a chocolate cake recipe, baked in a jelly roll pan for thinner layers, and cut out circles and froze them, but just curious how far the filling will stretch, or if I need to add another 1/2 or double to get 8-12 minis.
Also, can the whole thing be frozen for a couple days maybe even a couple weeks. Just looking for a way to minimize my kitchen time so I can visit more and cook less on the actual gathering day.
I've make the full-size one and it was fabulous, but never tried to freeze it.
Angie T says
I made this recipe today for the first time and I had a question. Is the chocolate cheesecake suppose to be tangy or did I do something wrong? I've never tasted the Olive Garden version but a friend of mine loves it and I'm making it for her. I just want to make sure before I serve it to her. TIA
Jules says
Hi Angie, Sorry for the delayed reply. Chocolate cheesecake is typically tangy because of the cream cheese in there. Sometimes manufactured cheesecakes won't be tangy because they aren't using fresh cream cheese, and it has a flavor more like mousse, but real cheesecake will always have a bit of a tang (that's what I love about it!) I hope you both enjoyed the dessert! Thanks for trying my recipe 🙂
Angelia Tirado says
thank you so much for responding. The tangy flavor of the cheesecake mellowed out the next day, and the cake was amazing. I received so many compliments. The only thing that did not work out for me was the mousse but I’m sure I have to just work on my technique. It came out really gritty.
Jules says
Ah I'm so glad you enjoyed it!
That's strange about the mousse, the only thing I can think of is either the cream may have been overwhipped or the white chocolate might have burned. Either way I'm glad it was delicious 🙂
April says
This cake was amazing. It got rave reviews from all that enjoyed it. Only change I made was using a fudge cake mix. Highly recommend for the WOW's you will get. Lots of steps but overall very easy.
Amanda Killian says
The mousse did not turnout for me either. I had to throw the 1st batch out and remade it by melting the chips in the microwave with heavy cream, then once mixed i added in the whipping cream, worked so much better this way.
Jules Grasekamp says
Hi Amanda,
That might be what the problem is - chocolate chips have stabilisers and additives in them to stop them from melting easily (so they can stay in the shape of a chip in cookies etc), so they won't melt the same way that real chocolate will.
With real chocolate I definitely recommend using the original method, but I'm glad it worked out for you in the end 🙂
Hope you loved the cake!
Jules
Aarushi Grover says
Hello!
This is a beautiful recipe!!! And thank you for breaking it down so well!!!
I want to make this for a friend's birthday but her party is on a Friday , which means I will have to bake Wednesday/ Thursday evenings after office. Can you help break it down for me- as in what would be a good stopping point if I wanted to make this in shifts?
Also, for this particular cake, How many people will this be good for? I am asking because this does look heavy!!
And lastly- would you say this cake is too much on the sweeter side? At least with Olive garden cheesecakes, I have found them to be a little too sweet for my liking.
Thank you so much in advance:)
Jules says
Hi Aarushi,
Thank you for your comment and lovely words. I'm so sorry I didn't reply in time for your friend's party. I hope everything turned out great!
For future reference, I would bake the cake first because that can be wrapped up and kept for a few days and still be lovely and fresh, so that would be my first step. The chocolate cheesecake and white chocolate mousse layers are both fairly quick and easy, so you could probably do both of those in one go. Then you could keep the 3 layers in the fridge until you're ready for the next step which would be the ganache and decorating. That's how I would break it down, personally.
It is a very rich cake, but I wouldn't see it's too sickly sweet. I feel like the cake balances out the sweetness of the other layers. And if you want to have a less sweet taste, opt for dark chocolate in the ganache. You could serve 10-16 people with the cake, depending on how big you cut your slices! I definitely recommend nice thin slices if you are worried about it being too rich!
I hope it went great, I'd love to hear about it!
Aarushi Grover says
Thank you!! it went great!! I actually ended up breaking down in the exact way you suggested.
The cake was really really yummy and was gobbled down pretty fast by 14 people! It was not very sweet and was amazingly rich in chocolate. The layers really go well together!
The only difficulty I faced was the white chocolate mousse layer. It kept getting crumbly and giving a cottage cheese like consistency I tried thrice but failed. Any tips on making a mousse for the future would be great!
Thank you
Tanya says
Hi, this is my second time making this cake. It is out of this world! I'm just curious, since the cake layer puffs up a lot and I have to slice off a good amount of cake to make a thin 1 inch layer on the bottom, I would suggest maybe next time cutting the cake recipe in half this way you're not wasting too much cake crumbs. Also the ganache layer made a ton of ganache so I would also scale back a bit. Lastly, would you suggest whipping up the extra ganache with a mixer in order to pipe on top or is it not necessary? I'm in the process of making it again at the moment and the last time I first made it was a year ago so I can't remember if the ganache needed to be whipped prior to decorating. Thanks in advance!
Jules Grasekamp says
Hi Tanya, thanks for trying my recipe - I'm so glad you like it! You could definitely cut the cake recipe in half if you like - you might also like to try a half recipe of the cake from my Tuxedo Cake as that rises a lot less and makes a flatter cake - so less waste. Or sometimes I like to keep any cake cut off and use it to make cake pops!
As for the ganache there is no need to whip it, just let it cool for a while and it will thicken as it cools and will eventually be piping consistency.
Thanks again and happy baking!
Jules
Nini says
I love how you put the directions! You listed what we needed to do & listed what ingredients go with each step! Can't WAIT to try this! Looks easy, yet oh-so ELEGANT!
Andrea says
Absolutely love all the process shots! (I like to make sure mine actually looks like it's supposed to)
Jules says
I'm so glad you find them useful! 🙂
K.J. says
Would this work as individual portions? Also how long will it last in the fridge?
Jules says
HI K.J. It will absolutely work as individual portions! you could use mini cake rings or something to build them in. In this case I would recommend baking the chocolate cake as a sheet cake and then using your rings to cut the cake out like a cookie cutter - so they are the exact right size. Or you could build them in a glass or jar as well - that would be super pretty!
It will be at its best in the fridge if eaten within 3 days, but you could keep it in there for 5 days. Just make sure it's in an airtight container so that it doesn't absorb the smells of the fridge.
Enjoy!
Donald says
You've broken down the steps and shown how easy it really is. It shows how something that looks so impossible is really doable!
Jules says
Thank you so much Donald! I'm so happy you like the recipe 🙂
Mrs Magoo says
Thanks for posting, Jules. I love the way you don’t just say what the ingredients are, but what they do and why they work. Really thoughtful touch!
Donald says
Did you really mean to write "1/4 tablespoon" of hot water for the chocolate cake recipe ingredients? That's a very odd (and tiny) amount. Is it supposed to be 1/4 cup?
Thanks!
Jules says
Oops! You are absolutely right, it should be 1/4 cup - I updated it right away. Thank you for noticing!
Linda kraner says
Can u use a sugar substitute?
Jules says
Hi Linda,
Yes, absolutely. You can use your preferred sugar substitute for this recipe. Just follow the instructions on the packet of whatever you are using for whether it would be a 1:1 replacement ratio or whatever they recommend. Happy baking!
Bethanne Donovan says
Omgosh! What's not to love?! All 3 elements- cake, cheesecake, mousse in a stunning dessert that anyone could make thanks to your easy, step-by-step recipe! I can't wait to make this for the 3 of us- me & myself and I! Ha! I suppose I can share it with my husband and son too!
Jules says
Thank you so much for your kind words Bethanne! I'm so glad you like the recipe! It's a lot of steps but the steps are all easy - and it's sooo worth the time. I hope you, yourself and you enjoy the cake! ( and your husband and son too if they get any 😀 ) Happy baking!
Jan hess says
I have not made this yet but will be for Thansgiving. I will make 1 small addition I am also going to add some hazelnut crumbs to out side, ( my daughter loves hazel nut). But also have question if you could use a cake mix for cake part.
Jules says
Hi Jan,
So pleased to hear you'll be making this recipe for Thanksgiving - you are going to love it! Yes you can definitely use a cake mix for the cake part - it will make the process a lot quicker and easier. I love the idea of hazelnut crumbs on the outside! Enjoy!
Donna Sharp says
Oh my! I can't wait to try this. I just wanted to say that I truly appreciate how you put the ingredients under each step of the instructions. I have a short memory and this saves a lot of time scrolling up and down.
I can't make this until I get a proper pan, but I saved it to my cake recipe folder. Thank you for sharing it!
Jules says
Thank you Donna, I'm glad to hear somebody appreciates the ingredient layout! I know I always get frustrated with the endless scrolling.
I hope you love the recipe when you do make it! Happy baking!
Chris Radwanski says
This cake is FLURPING DELICIOUS! It was every layer of chocolatey goodness and textured mouth pleasure you can imagine. Just looking at this is making my mouth salivate again. Perfect for those wanting to impress!