
This French Cruller recipe will show you exactly how to make the best homemade crullers using a choux pastry adapted specifically for frying to create crisp ridges and a soft honeycomb interior.
French Cruller Recipe Snapshot
What it is: Fried French pastry donuts with a super soft texture and unique flavor.
Why you'll love it: Unreal texture and an adapted recipe to make it foolproof.
How to make it: Make the choux pastry, then pipe into rings, deep fry, and coat in glaze.
You haven't really had French crullers until you've had them homemade! The first time I took a bite of one of these, I couldn't believe how soft and delicate they are. The choux pastry puffs up to give an incredible, almost croissant-like texture that just melts in your mouth.
Most recipes just use standard choux pastry, but I've tweaked the dough slightly, specifically for crullers, to make a more forgiving dough with the best texture. They might look intimidating, but if you know what to look out for, these French crullers are surprisingly easy to master.
Jump to:
What Is A French Cruller?
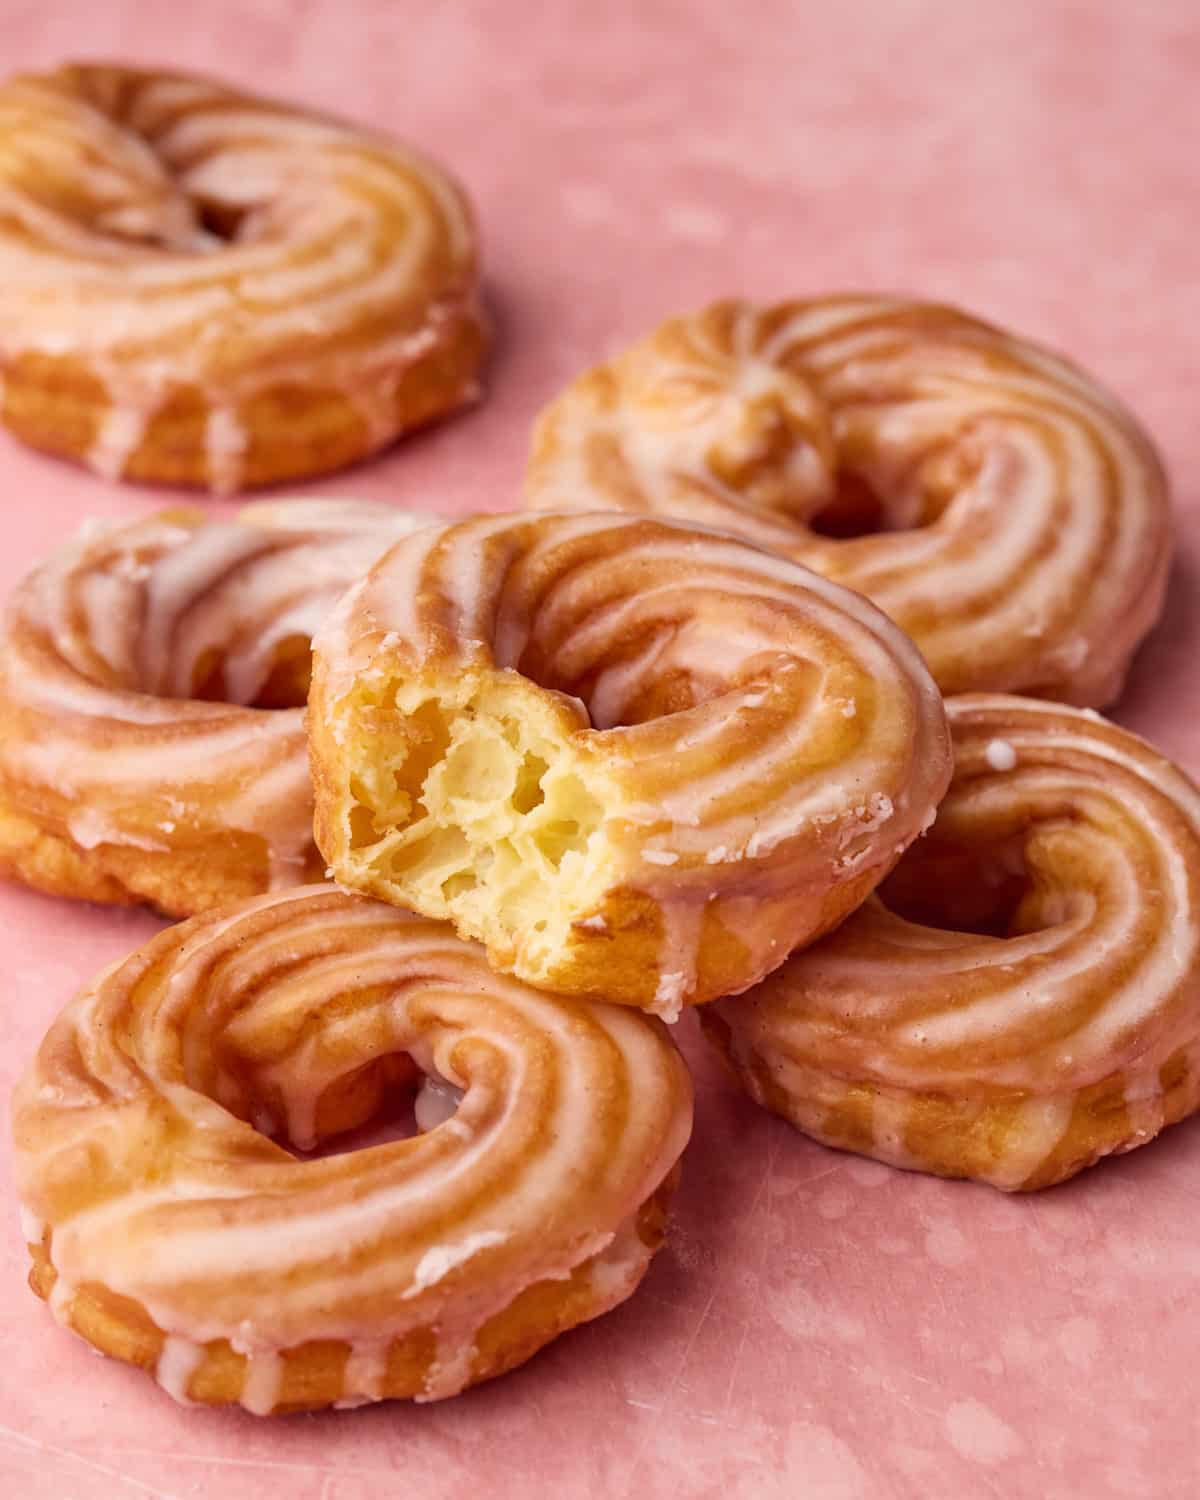
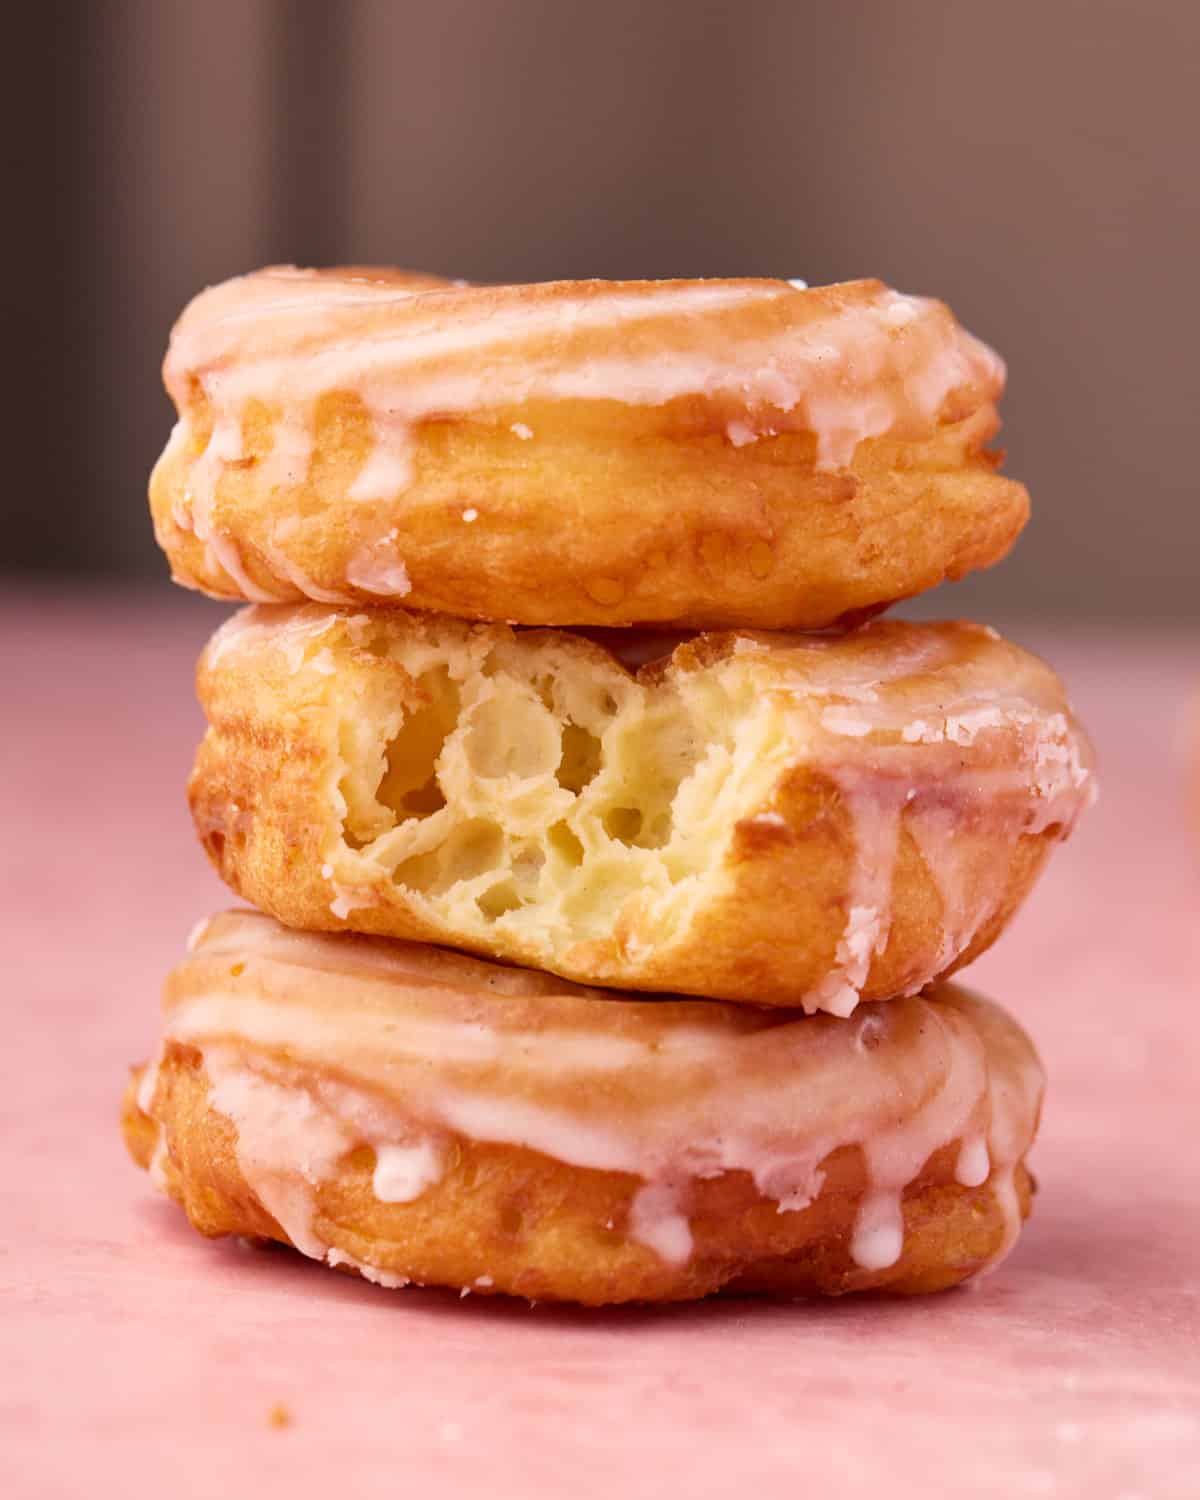
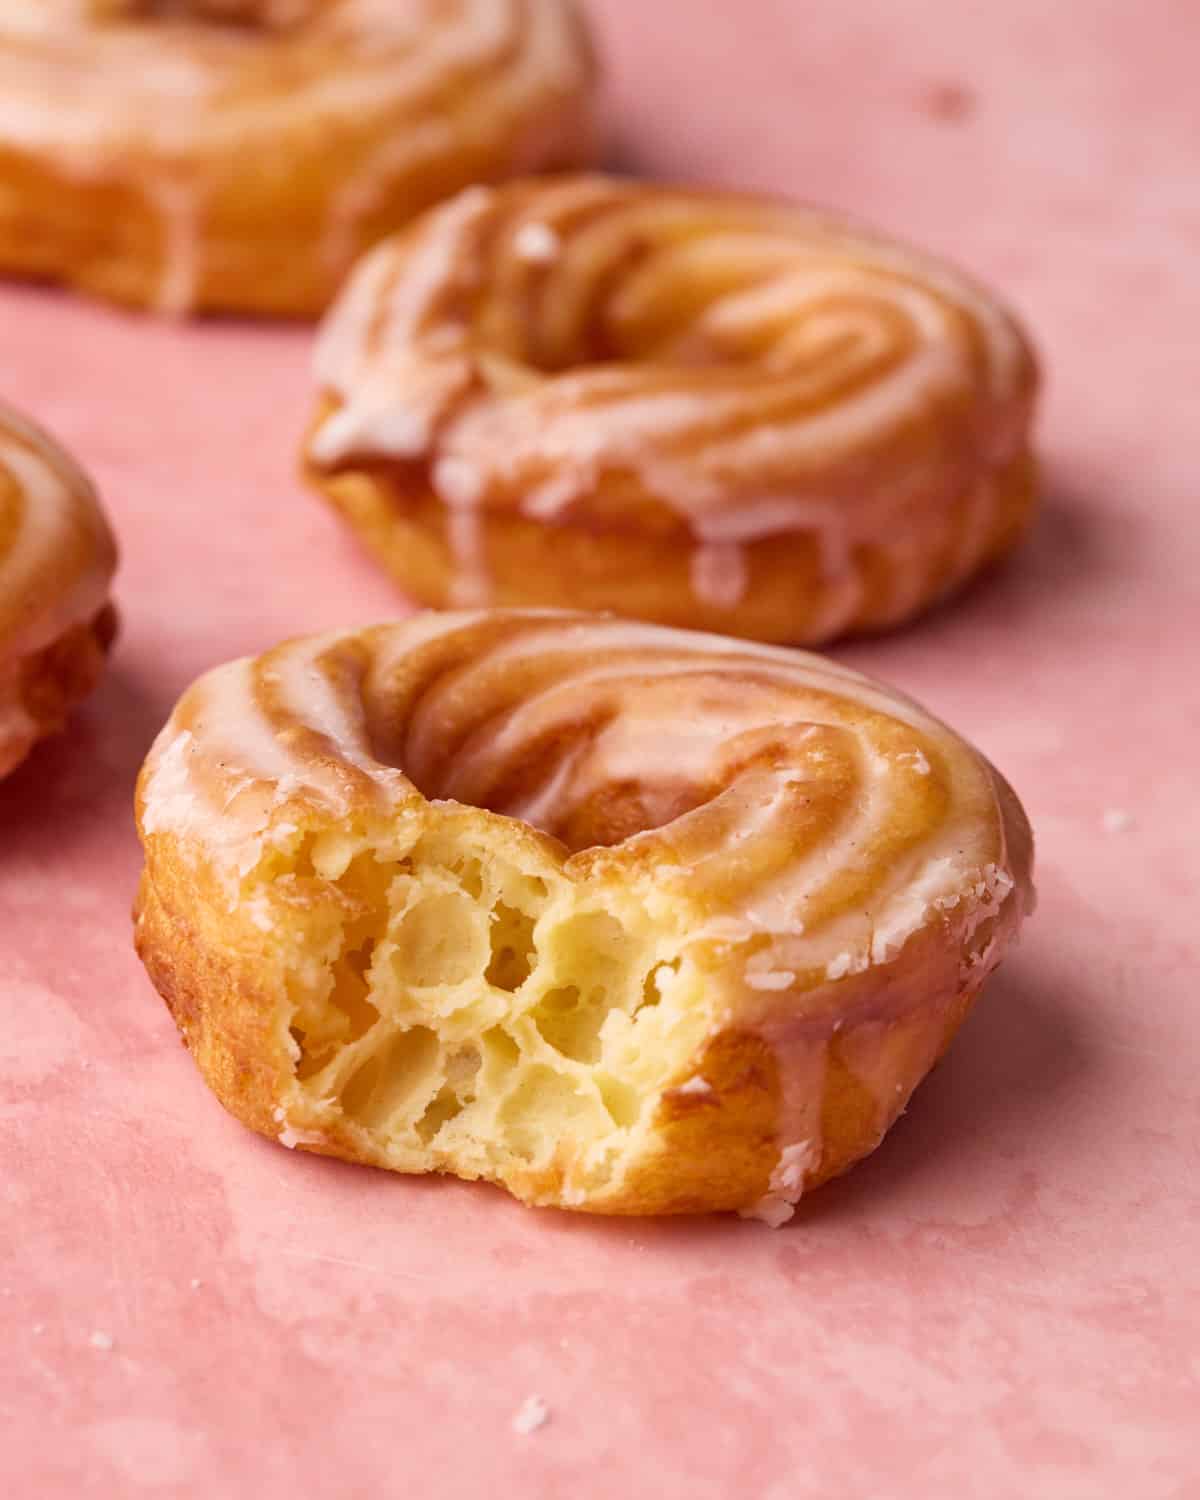
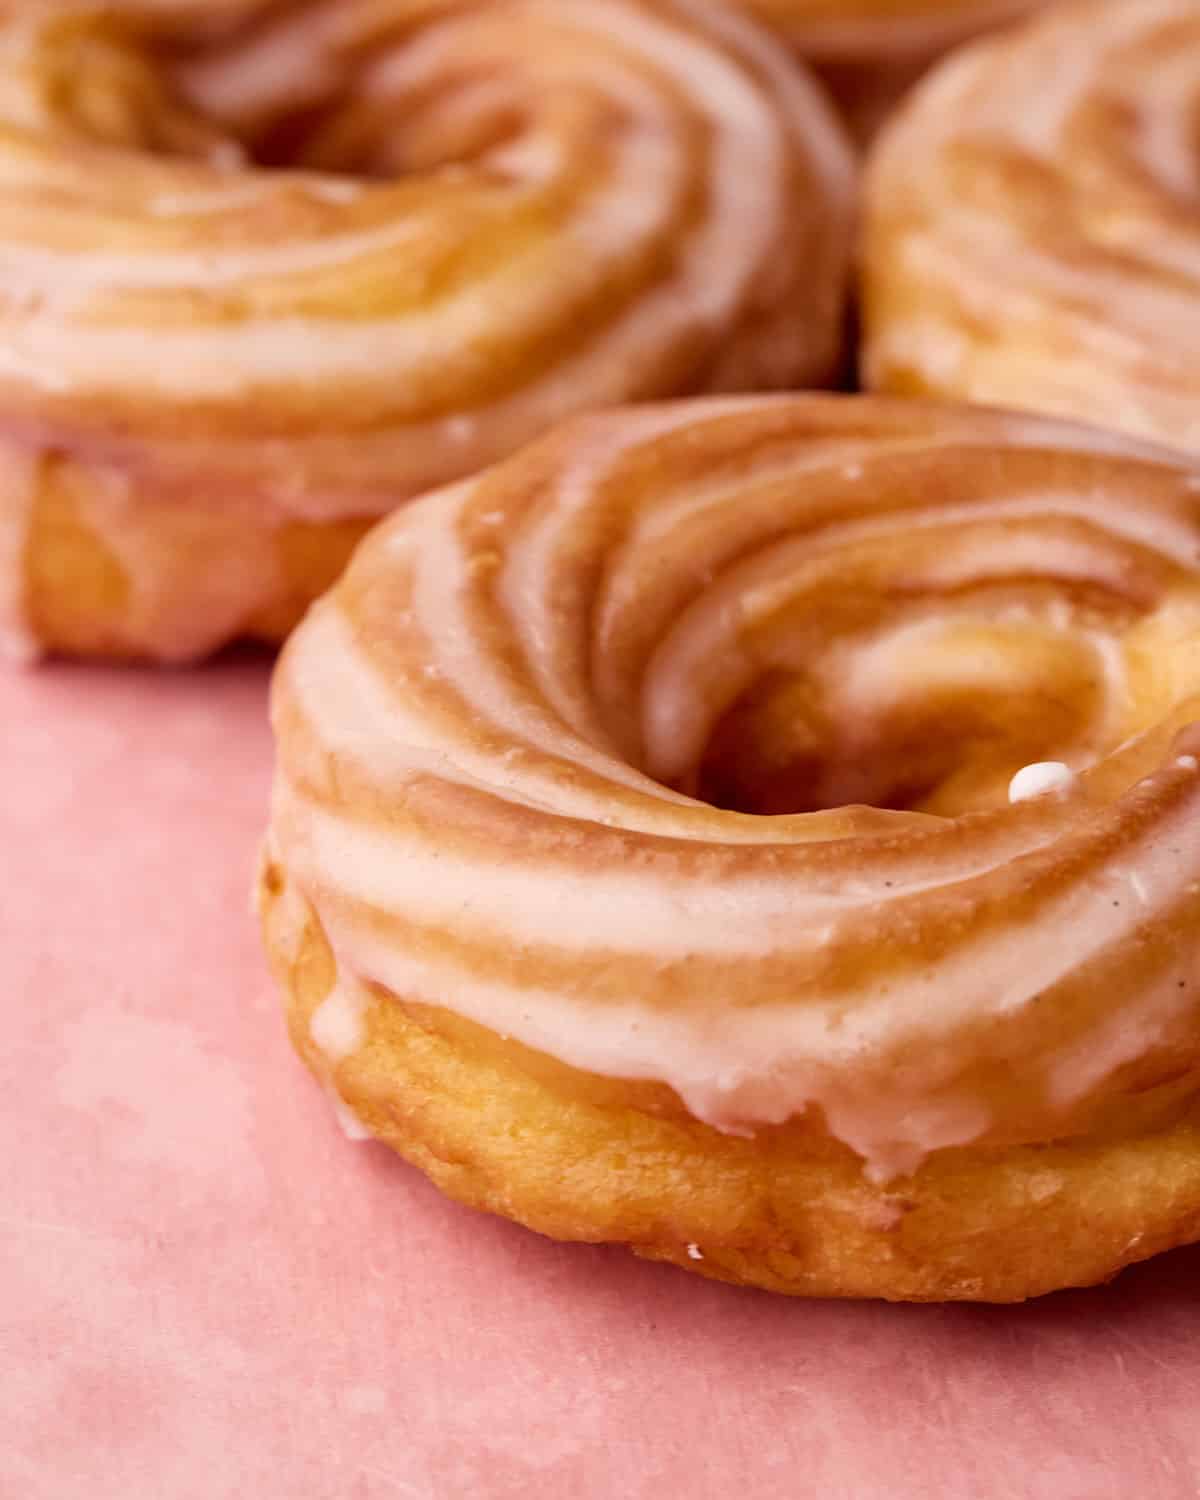
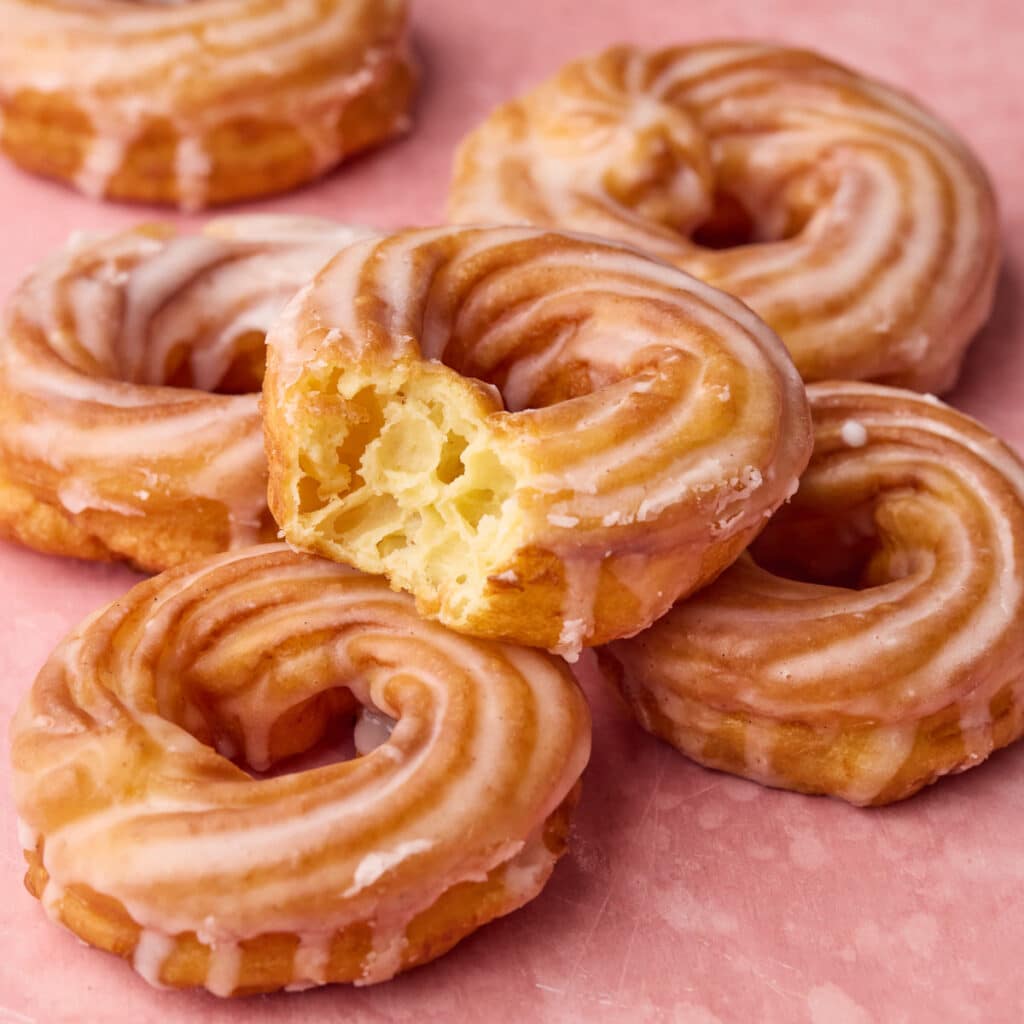
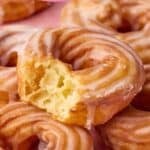
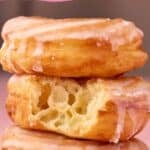
French crullers are delicate, airy donuts made from choux pastry (the same pastry used to make cream puffs and eclairs). Unlike regular donuts, the choux puffs up to create an airy, honeycomb structure that's light and pillowy-soft. They typically have ridged edges and are coated in a simple, sweet glaze.
Different Types of Donuts
French crullers are a pretty unique kind of donut. You may be more familiar with:
Yeast donuts - Made with yeasted dough. Airy and bready, these are best if you want to add a filling, like my Boston cream donuts.
Cake donuts - Baked donuts are basically just cake batter in a donut shape - they are crumbly and soft. See pumpkin spice donuts.
Because crullers rely on steam rather than yeast or chemical leavening, small technical details matter far more - which is exactly where most recipes fall short.
Ingredients
This French cruller recipe is an adaptation of classic pâte à choux, but the basic ingredients are the same.
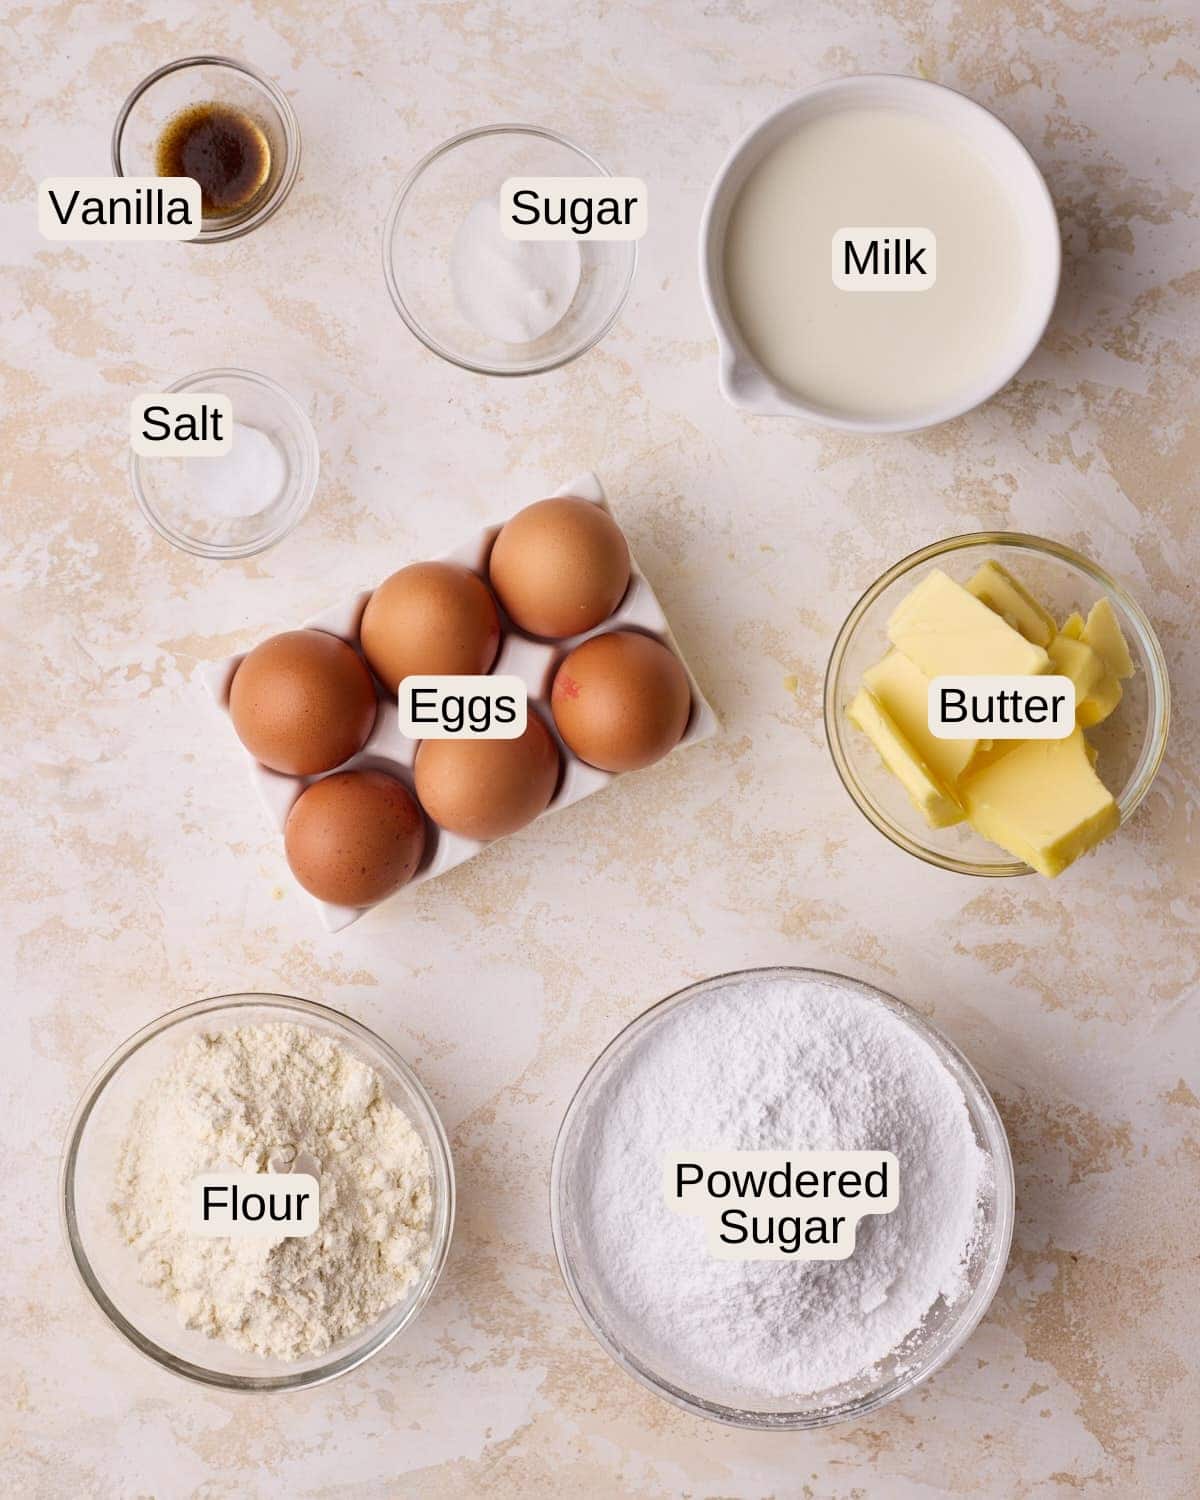
- Milk - Use whole milk - this gives a rich flavor, a soft texture, and helps the donuts to brown.
- Sugar - Granulated sugar (caster sugar in the UK)
- Salt - Don't skip the salt! It is especially important in fried choux pastry as it helps keep the eggy flavor at bay.
- Flour - All-purpose flour (plain flour) will give the best structure.
- Eggs - Room temperature. Use large US eggs or medium UK eggs.
- Powdered Sugar - (Icing sugar) For the glaze.
- Vanilla - To make a vanilla glaze, or you can substitute with honey for a honey glaze.
- Oil - for frying. I use canola oil/vegetable oil.
I always recommend weighing your ingredients with a kitchen scale for accuracy, but it's particularly important for choux pastry as it's all about ratios!
See the recipe card for quantities and the full recipe.
Crueller Specific Choux Pastry Adjustments
When testing this French cruller recipe, I decided to make a few small tweaks to my classic choux pastry to make it a bit more forgiving and more suited for frying. You can absolutely make these with standard choux, but here is what I changed if you'd like to adapt your own recipe:
- All Milk - I used just milk in this cruller recipe, rather than a mixture of milk and water as I have in my cream puffs. The dough doesn't need as much steam, and the milk provides better texture and flavor.
- Looser Dough: Cruller dough can be a little bit softer than for choux buns or eclairs, so I don't cook the panade quite as long, and can add a touch more egg.
- Egg White: I swapped the last egg for an egg white to loosen the dough without adding extra fat. This helps the crullers expand evenly, prevents splitting, and keeps the ridges sharp during frying.
What You'll Need
- Stand mixer - with paddle attachment.
- Piping bag
- Open star tip
- Parchment paper
- Large saucepan - you don't need a deep fryer, a deep saucepan works perfectly.
- Metal slotted spoon
- Metal tongs
- Sheet pan
- Thermometer - either an instant-read thermometer or a candy thermometer that clips to the side of your pot
- Wire racks
- Mixing bowls
How To Make French Crullers
There are three stages to making homemade crullers:
- Making choux pastry
- Piping the donuts
- Frying and glazing
I have given a step-by-step guide for each stage, but if you've made these before, you can skip to the tips section for a refresher on the most important points.
Make the Choux Pastry Dough
If this is your first time making choux pastry, you can find more in-depth instructions about this process in my choux pastry recipe.
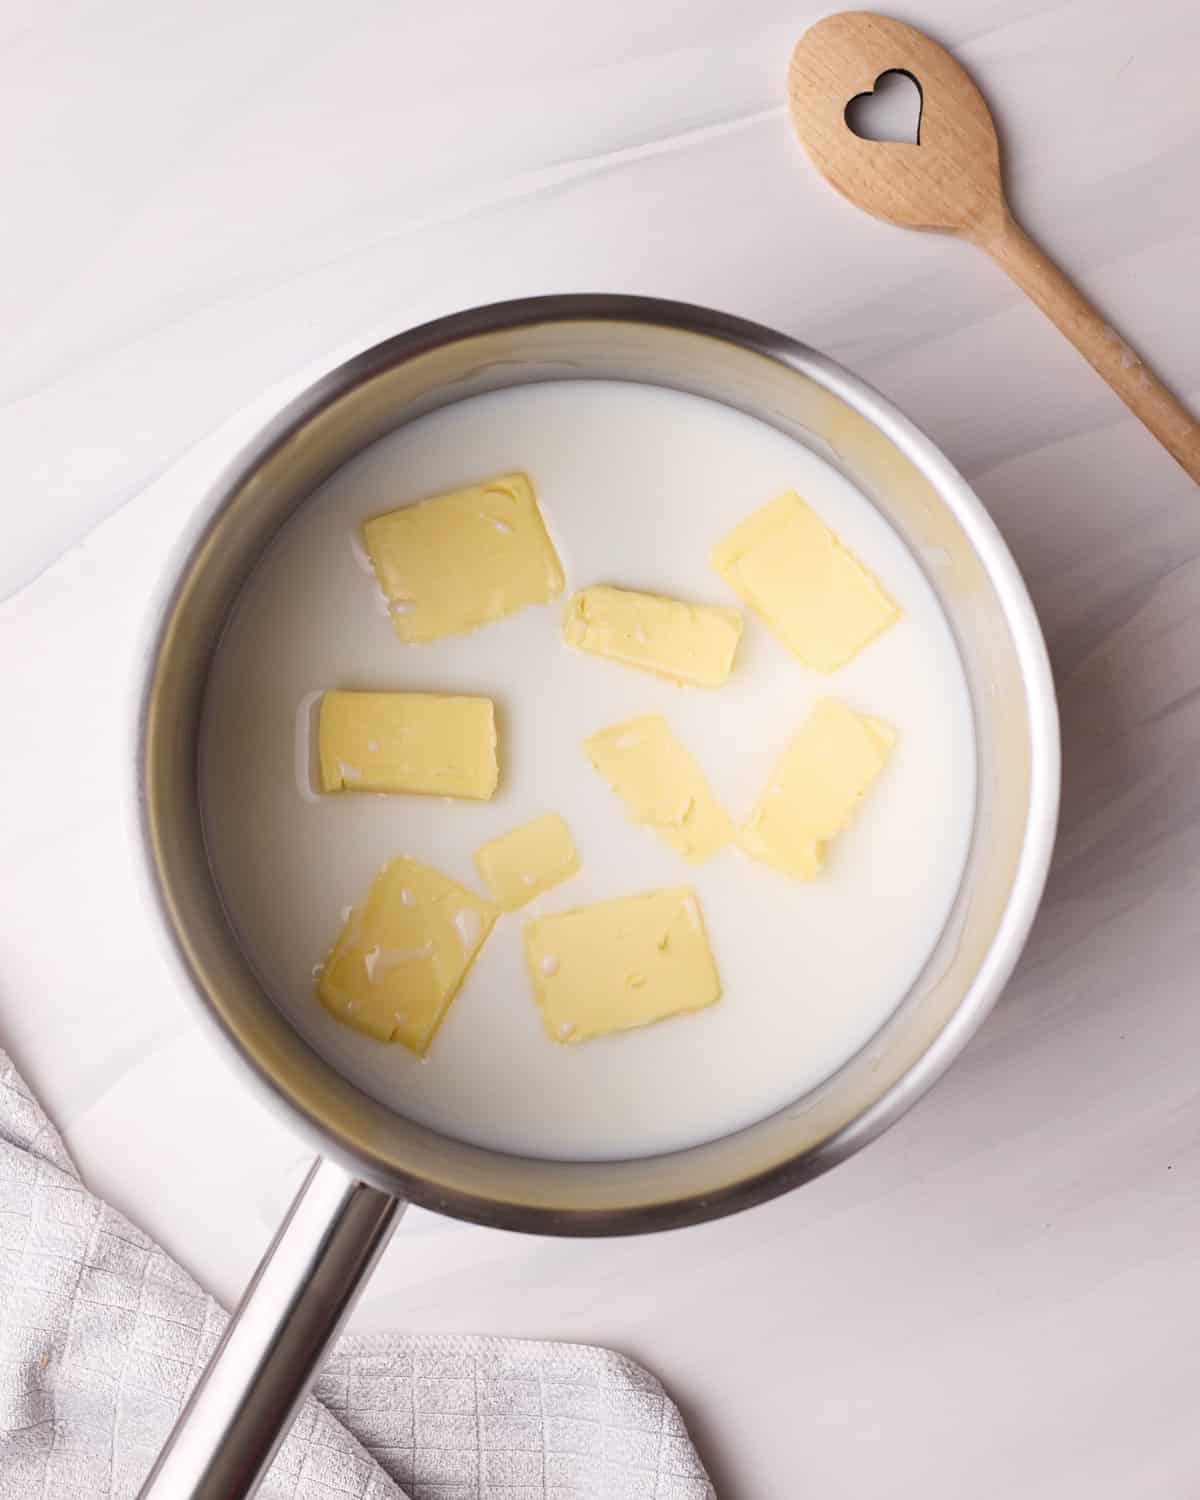
- Add the milk, butter, sugar, and salt to a saucepan and stir over medium heat until the butter has melted and the liquid reaches a rolling boil.
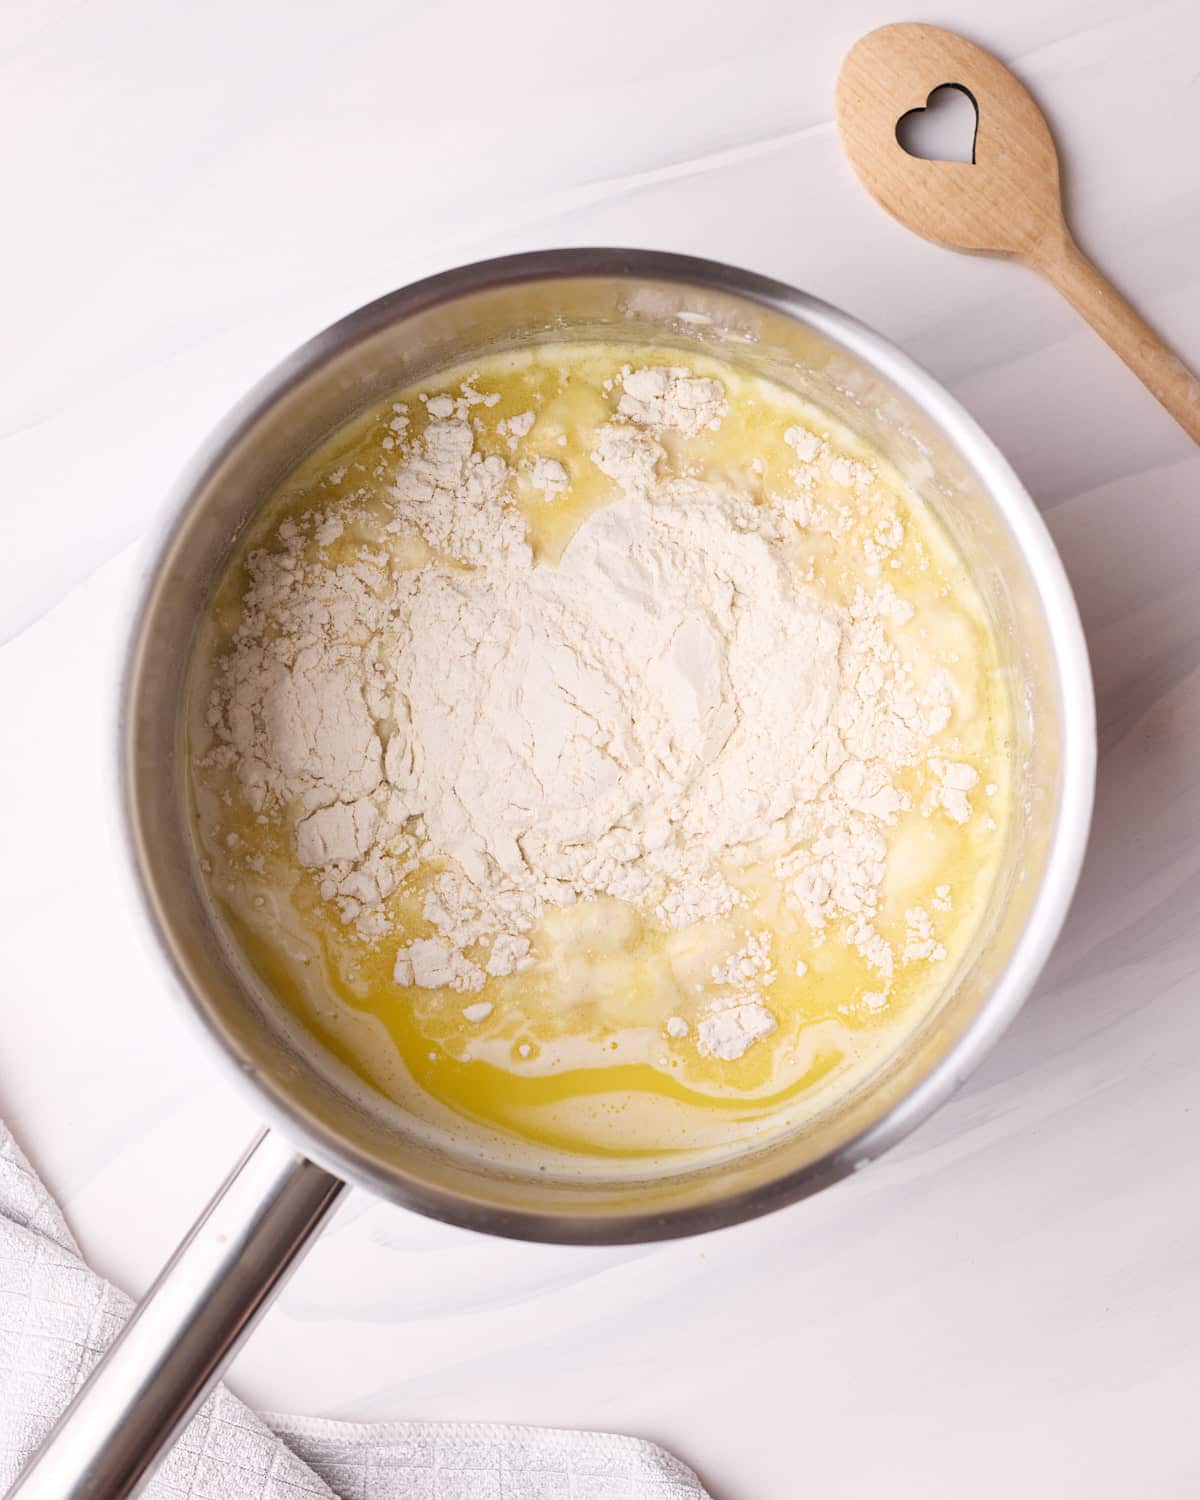
- Remove from the heat and tip in the sifted flour, stir with a wooden spoon until incorporated, then return to the heat.

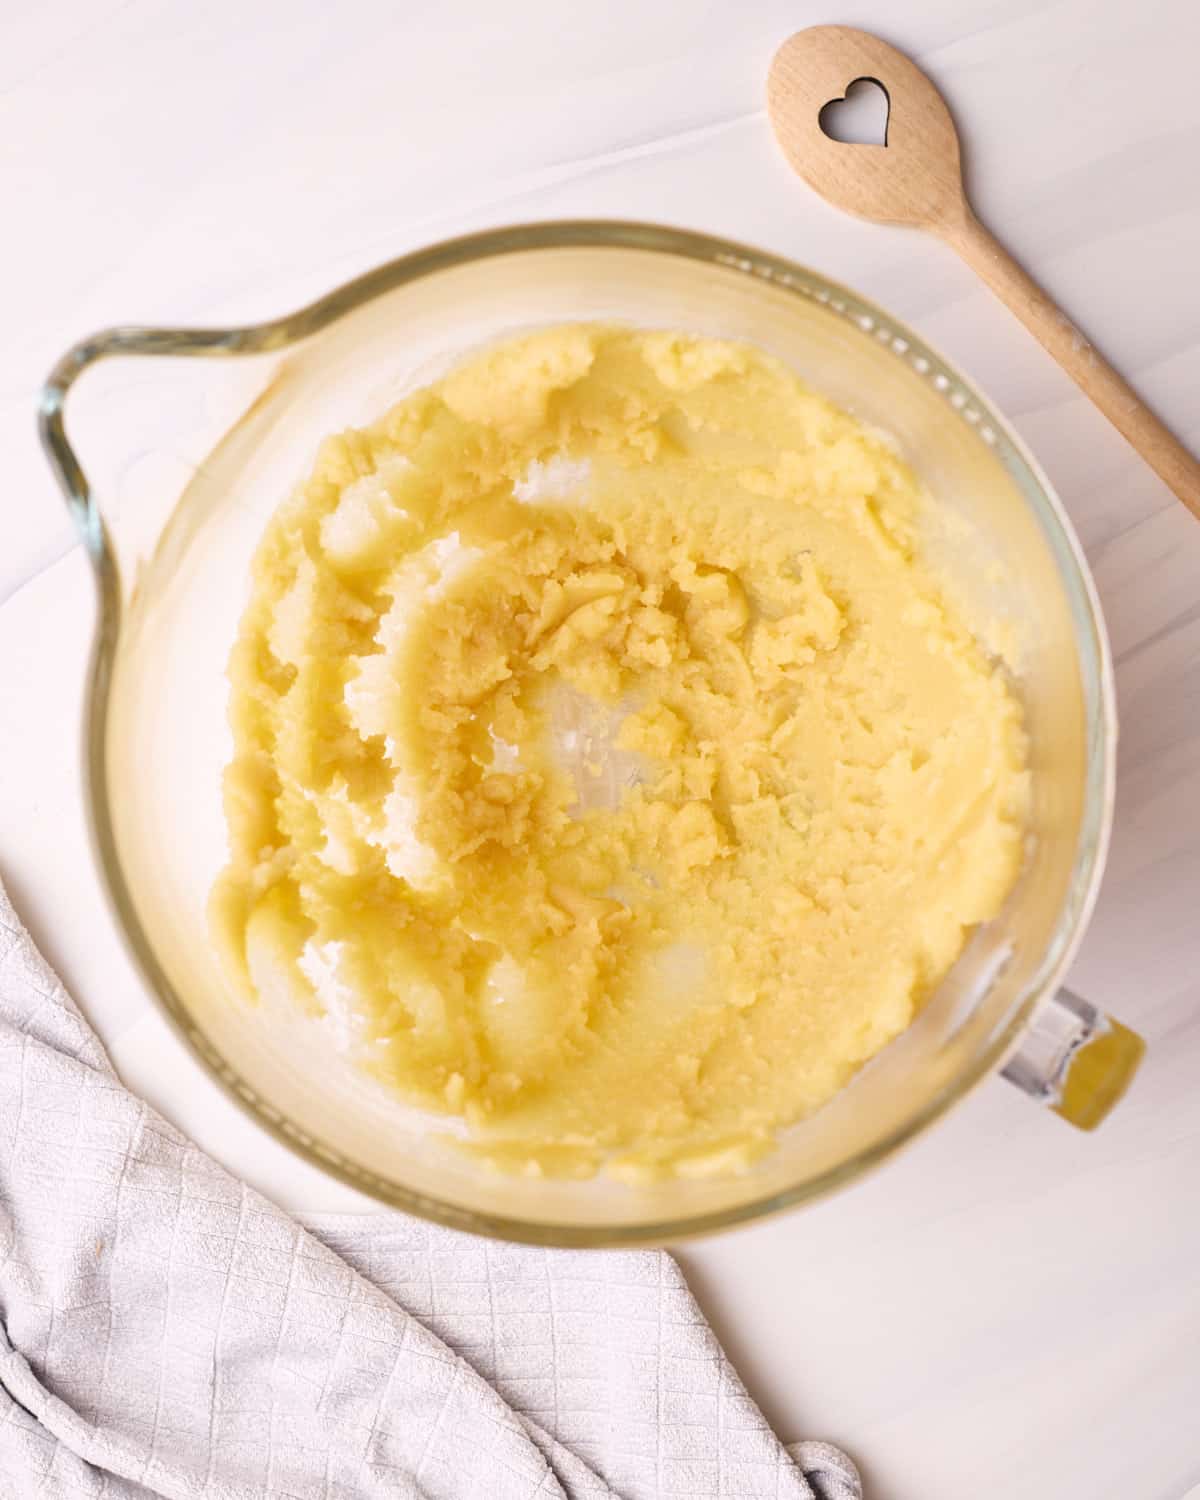
- Beat the panade vigorously for 2-3 minutes until it comes together into a smooth ball, and you can see a thin film on the bottom of the pan.
- Transfer the panade to the bowl of a stand mixer and use your spoon to spread it up the sides of the bowl to help it cool faster. Let it cool for 10 minutes or until it's no longer hot to the touch.
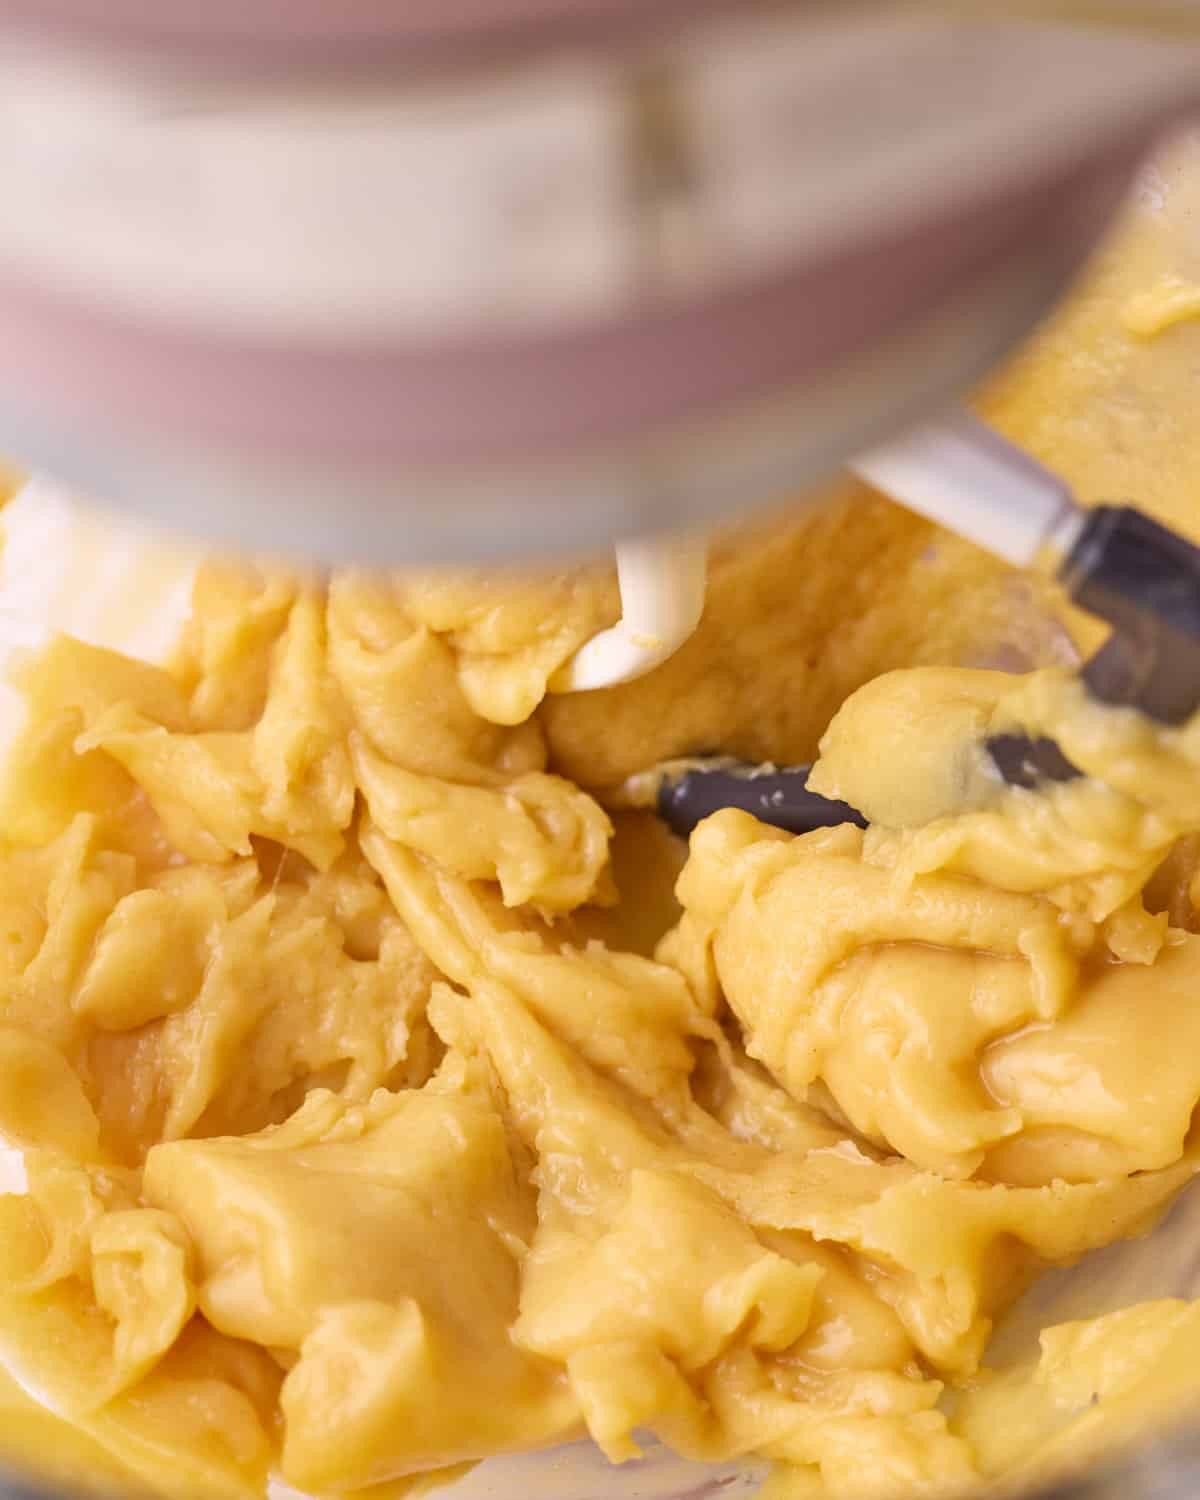
- Once cooled, turn the mixer on low speed with a paddle attachment fitted and start adding the eggs, one at a time, mixing in between each addition until fully incorporated. It should be glossy and smooth.

- Once all the whole eggs are in, beat the egg white lightly with a fork, then add it to the dough gradually as it mixes. Once the choux dough reaches a consistency where it falls off your spatula or paddle in a soft 'V' shape, don't add any more egg white.
Pipe The Crullers
Piping French cruller doughnuts is a lot easier and more forgiving than piping choux buns!
Pipe Rings
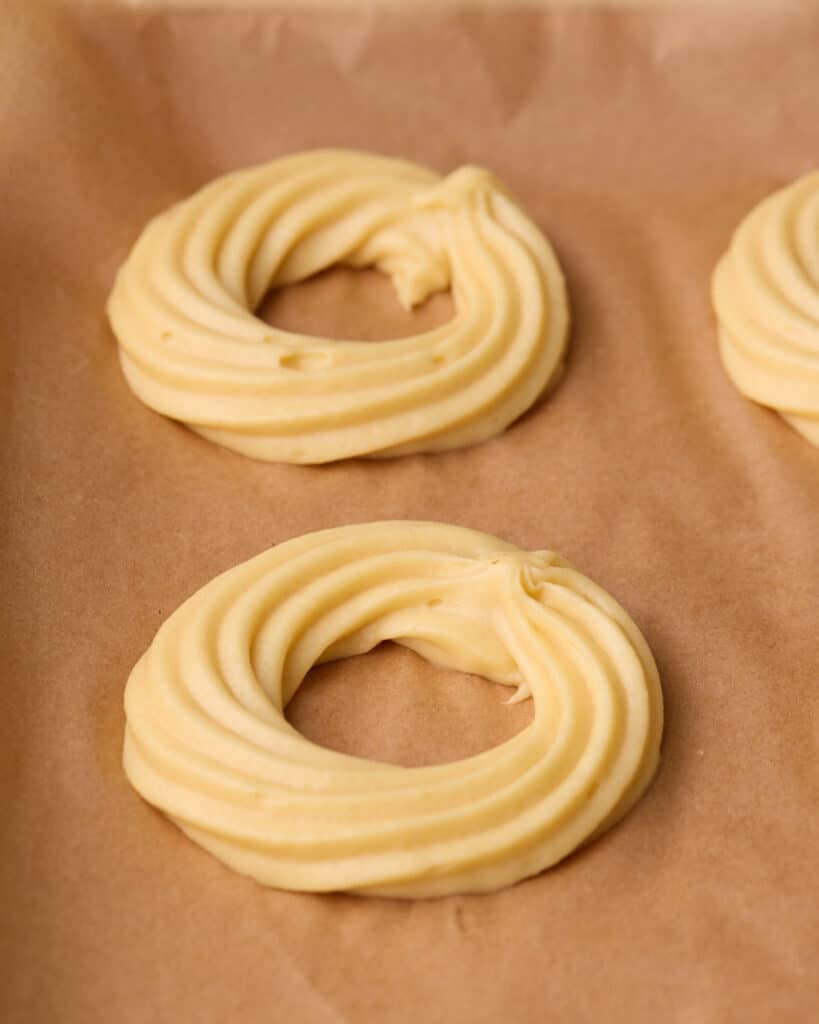
Transfer the pastry to a piping bag with a large star tip and squeeze out any air bubbles.
Pipe a ring shape onto a baking sheet lined with parchment paper, then flick your wrist to break the flow of pastry. Do this with all of the dough.

Cut Squares
Cut up the parchment paper under the crullers so they are sitting on their own little parchment squares.
Put in the fridge to chill for 1 hour.
Frying and Glazing
Before you start the frying process, it's a good idea to set up a little frying station with everything you need so you're not running around with hot oil on the go. I do this every time I make homemade donuts, and it makes it far less stressful.
Alongside your saucepan, thermometer, slotted spoon, and tongs, you'll also want to set up:
- Wire rack with paper towels underneath (not on it)
- A plate or something to rest your tools on when not in use
- A second wire rack for your glazed crullers.
- Glaze - Crullers should be dipped in glaze while they are still warm, so you want to have your glaze ready to go so you can dip and fry at the same time.
Pre-heat the oil: Pour the oil into your pot until it is at least 2-3 inches deep. Turn it on medium heat until the oil temperature reaches 340°-355°F / 170°-180°C. You may need to keep turning the heat up and down to maintain it at this temperature.
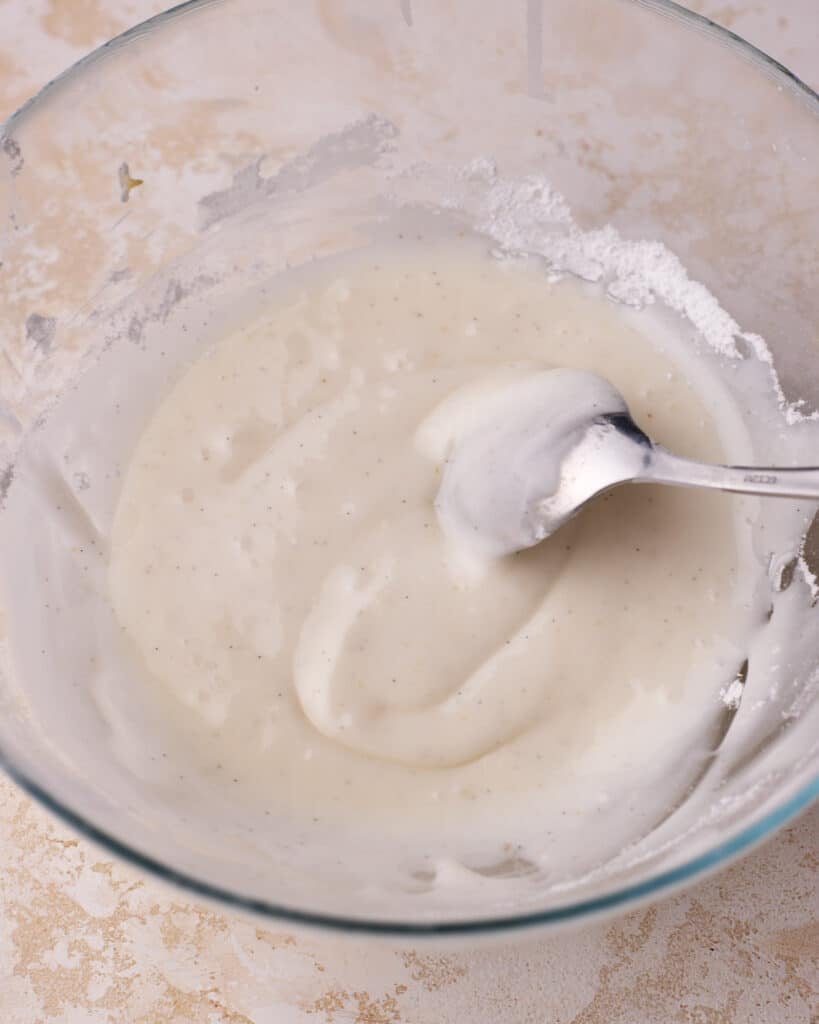
Make The Glaze
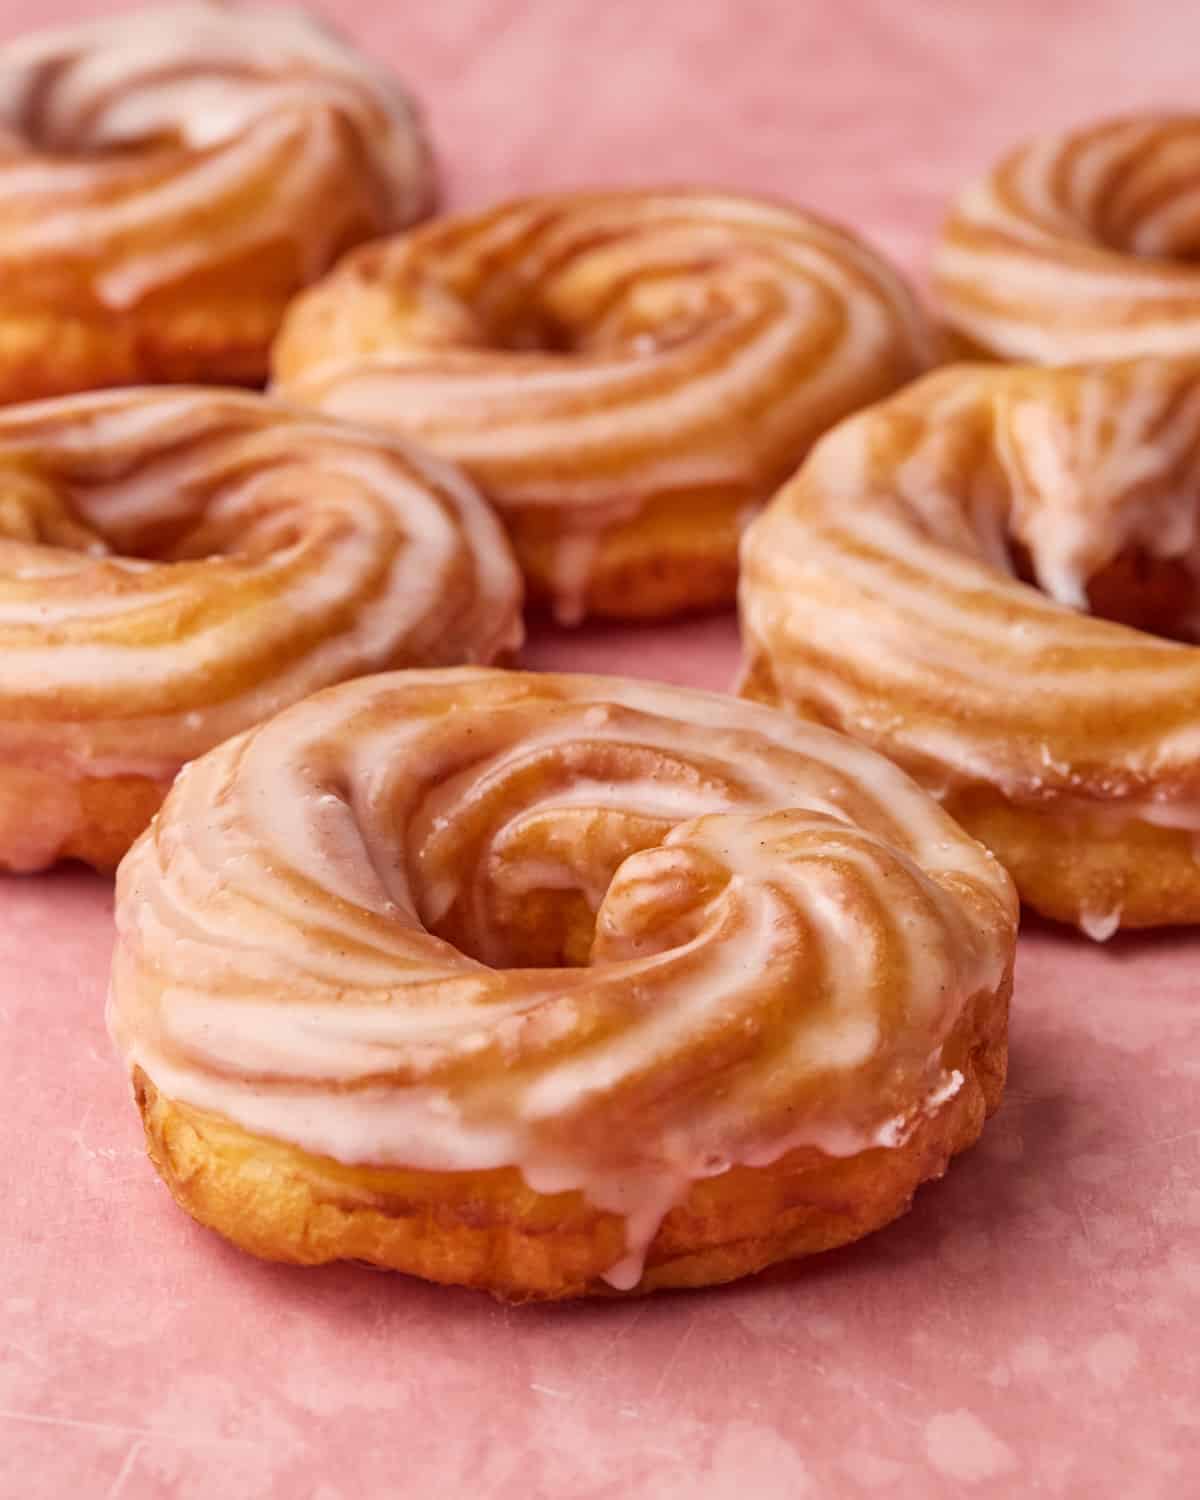
Sift the powdered sugar into a bowl, then add the vanilla and half of the milk. Stir until smooth, then add more milk, a little at a time, until it is runny but still thick.
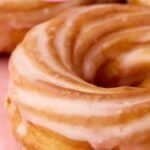
This will set a little transparent (like the photos). For a thicker glaze, you can add less milk or add more powdered sugar.
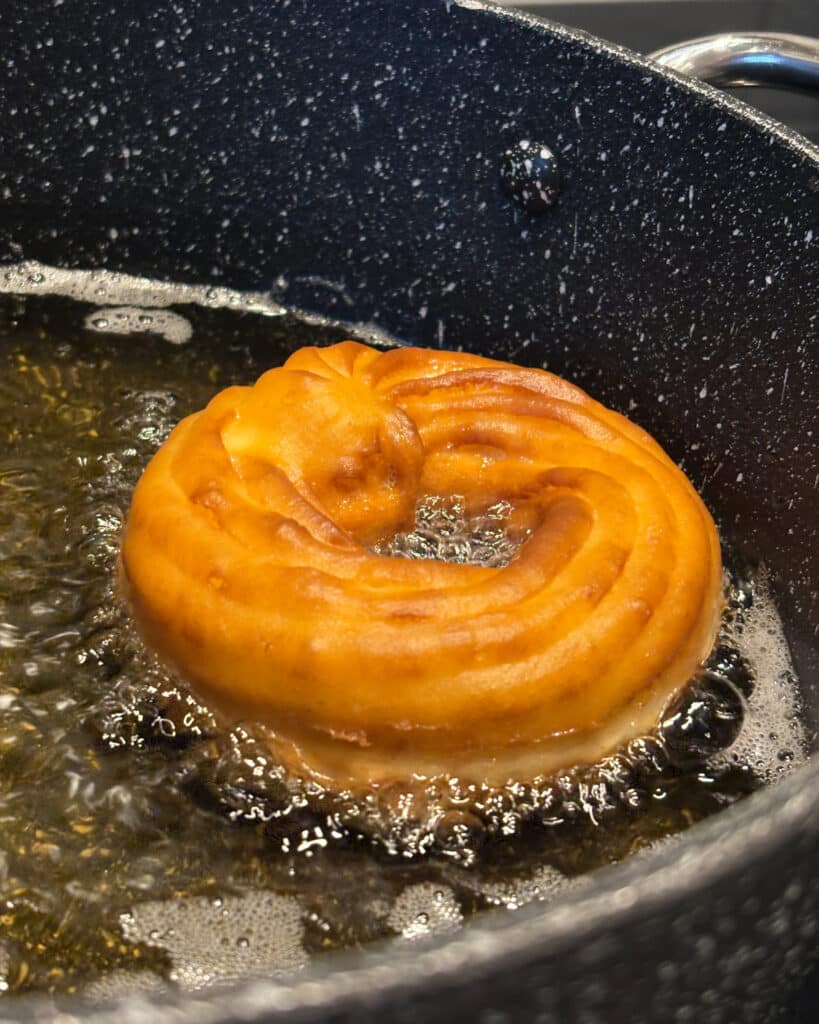
Fry Upside Down
Use the parchment square to carefully drop one of the crullers into the oil, upside down. It should start to bubble immediately and will sink to the bottom for a few seconds.
After a few seconds, you can pull the paper out with tongs.
Fry for 2-3 minutes until golden brown, then flip and fry the other side.
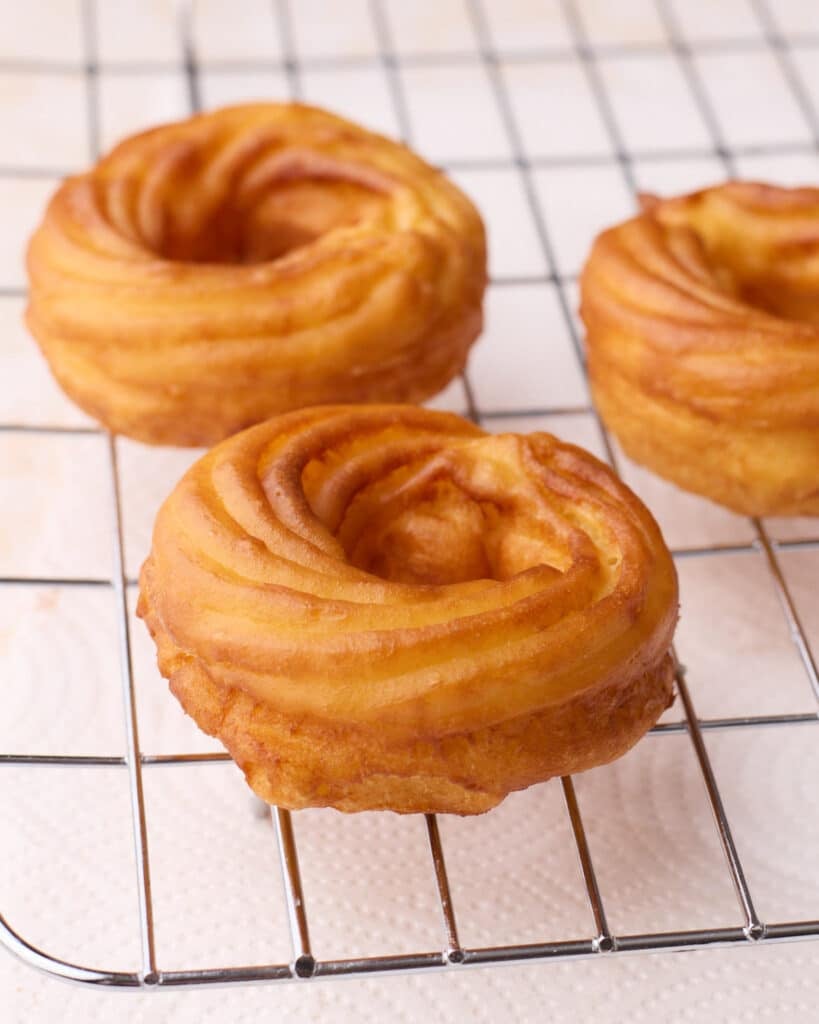
Scoop Out
Scoop the cruller out with the slotted spoon and lay it on the wire rack to rest
It should be puffed up and deep golden brown.
Repeat with the remaining crullers in small batches, re-heating the oil to the correct temperature in between.
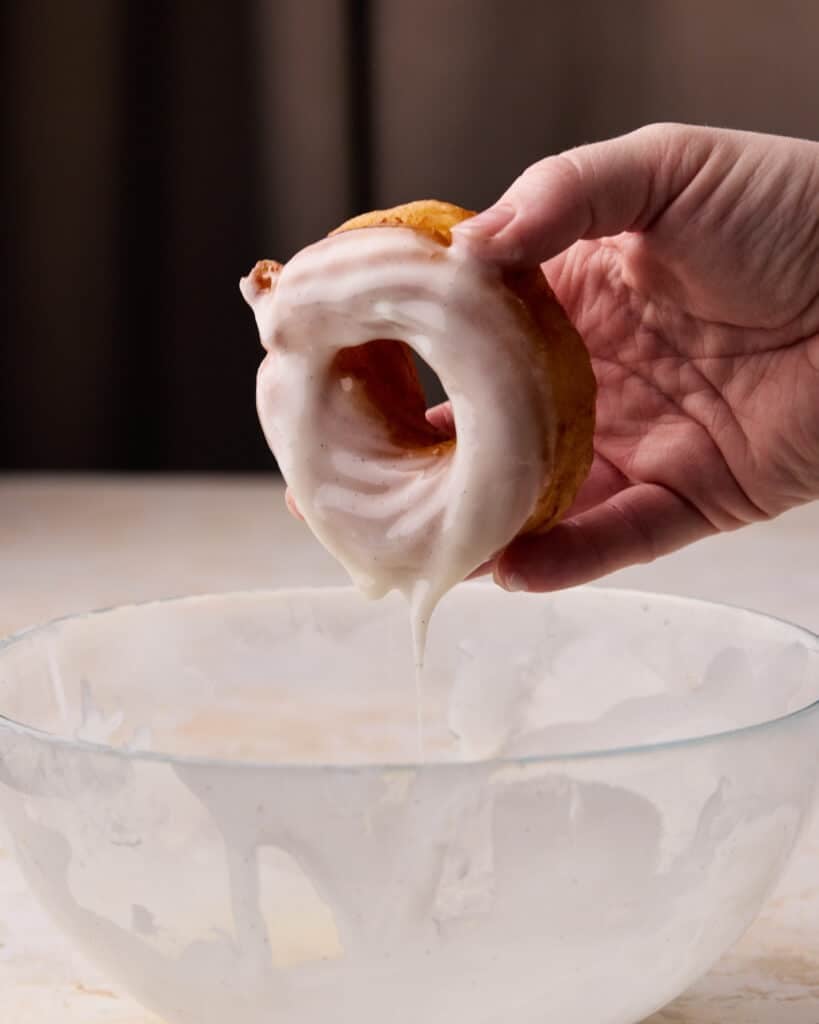
Glaze
It's best to dip the crullers while they are still warm, so you'll have to juggle dipping and frying at the same time.
Dip the top half of the doughnut into the glaze, then shake off the excess and lay it on the other wire rack to set.
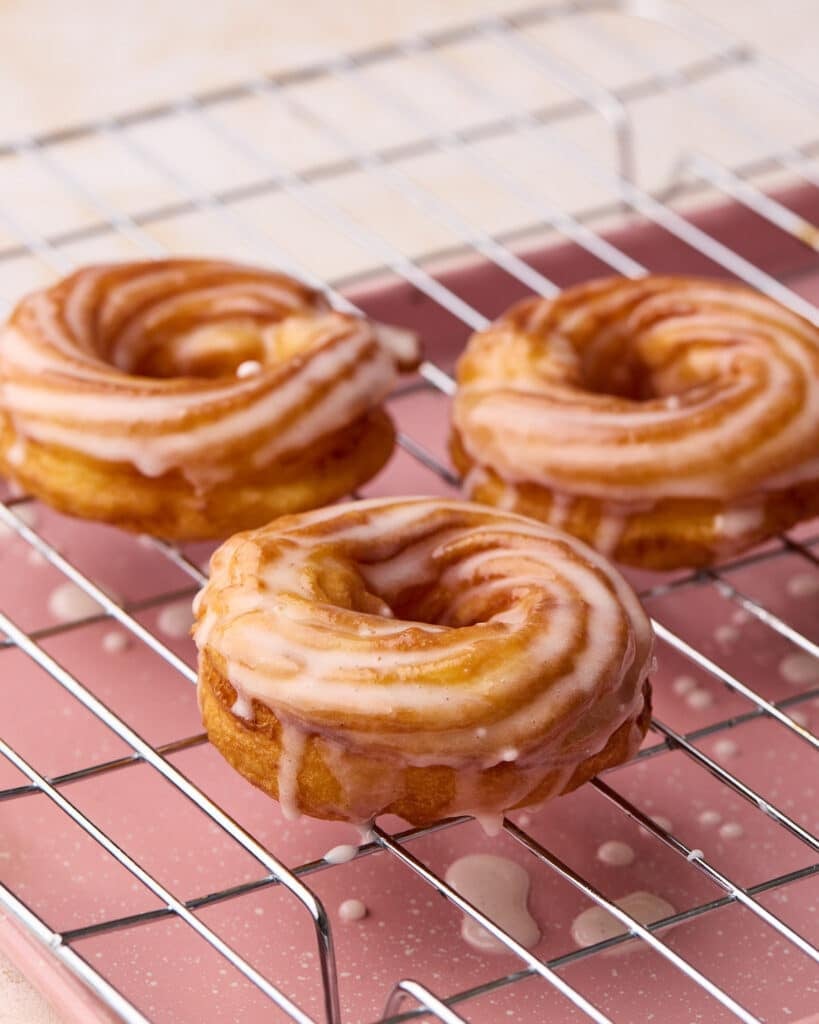
Cool
Let your homemade French crullers cool completely before eating.
The Most Important Cruller Tips
If you only read one section of this post, make it this one. These are the crucial techniques to make sure your crullers turn out perfectly.
- Pay attention to the dough consistency
The pastry texture needs to be right. It should be glossy and pipeable, but still thick enough to hold its shape. If the dough is too loose, the crullers won't keep their ridges; too stiff and they won't puff properly. Stop adding egg as soon as it falls off in a V shape.
- Use an open star piping tip
The ridges aren't just pretty; they help the crullers cook evenly and puff up properly.
- Keep the oil temperature steady
Let your oil temperature regulate between every batch. If it's too hot, the crullers will burn before the middle is cooked; if it's too cool, it can make them absorb too much oil or lose their ridges. It also helps to fry the crullers in small batches of 2 or 3, to avoid cooling the oil too much.
- Fry upside down
Put your cruller donuts into the oil face down (parchment on top). This lets the ridges set as soon as they hit the hot oil.
- Fry them long enough
Crullers should be a deep golden brown color before removing from the oil. If they aren't cooked enough, they may collapse.
Common French Cruller Problems
These are some of the most common mistakes I see people make with crullers. Use this section to troubleshoot if you experience one of these:
- Cruller ridges disappeared: Usually because the dough is too loose, or the oil temperature is too low, causing the ridges to 'melt' away before they can set.
- Crullers splitting: Either the oil is too hot, or the dough is too stiff.
- They're greasy: As with classic donuts, if they're greasy, then the oil is not hot enough, causing them to absorb too much oil before they are fully cooked.
- Collapsed after cooling: The same process as when choux buns collapse - they weren't cooked long enough. Choux pastry needs to be completely set to avoid collapse.
- Crullers didn't puff: There is not enough egg in the dough. You can put it back in the mixer and add more egg (just a little at a time, it goes a long way).
Storage
Just as with all fresh donuts, French crullers are best eaten on the same day they are made. If you have any leftovers, you can store them for a day or so at room temperature, but don't put them in an airtight container, as they will go soft and soggy.
I don't advise freezing your crullers, as they don't hold up well in the freezer.
You can make the choux pastry ahead of time. Store it, covered, in the fridge for up to 2 days and bring it back to room temperature before piping.
FAQ
If you have a question about this recipe that isn't answered here, please write it in the comment section, and I will get back to you as soon as I can.
A lot of donuts are fine without a glaze, but French crullers are not one of them. Choux pastry is not sweet, by design, so the glaze is an essential part of the flavor profile.
French crullers are made with choux pastry (the same thing used to make cream puffs and eclairs). When they are fried in hot oil, the pastry releases steam, which makes the inside puff up into a honeycomb structure to make super soft donuts with an almost croissant-like texture.
French crullers are made with choux pastry, which is the same pastry used for cream puffs, profiteroles, and eclairs.
Show Me Your Bakes!
If you make this recipe, please tag @bonni_bakery on Instagram or send me a photo - I love seeing all your creations.
Want your bake featured on the blog? You can also upload a photo here.
Watch How To Make Them
Make this French cruller recipe with me in this video to see how they get their gorgeous texture!
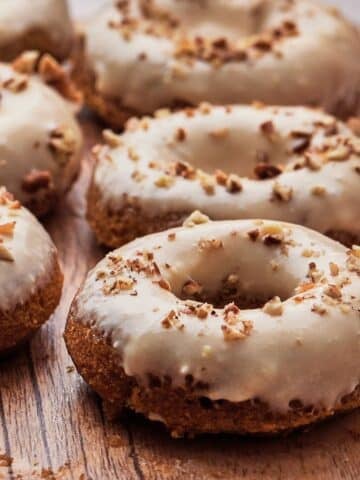
More Donut Recipes
If you loved this French cruller donut recipe, try one of these donut recipes next!
Recipe
French Cruller Recipe
Ingredients
- 113 g (1 stick) Unsalted Butter
- 240 ml (1 cup) Milk
- 2 teaspoon Granulated Sugar (caster sugar)
- ¼ teaspoon Salt
- 130 g (1 cup + 1 tbsp) All-purpose Flour (plain flour) sifted
- 5 Large Eggs (room temperature) *Use medium eggs if in the UK
- 1 Egg White
- Vegetable Oil for frying
- 240 g (2 cups) Powdered Sugar (icing sugar)
- 1 teaspoon Vanilla bean paste
- 80 ml (⅓ cup) Whole Milk
Equipment
- Wooden Spoon or Spatula
- Stand Mixer with Paddle Attachment
Instructions
- Add the milk, sugar, butter, and salt to a saucepan over medium heat. Stir together until the butter has melted and the mixture starts to boil.113 g (1 stick) Unsalted Butter, 240 ml (1 cup) Milk, 2 tsp Granulated Sugar, ¼ tsp Salt
- As soon as the mixture is boiling, remove it from the heat and quickly add all of the sifted flour. Stir with a wooden spoon until the flour is totally incorporated.130 g (1 cup + 1 tbsp) All-purpose Flour
- Return the pan to the heat and continue to beat it vigorously for 2-4 minutes until it comes together into a smooth, shiny ball, and you can see a thin film on the bottom of the pan.
- Transfer the dough to the bowl of a stand mixer and use your spoon to spread it up the sides of the bowl to help it cool faster. Leave to cool for at least 10 minutes until it is no longer hot to touch.
- Turn the stand mixer on low speed with a paddle attachment fitted. Add the eggs one at a time, letting them mix until completely incorporated.5 Large Eggs
- Beat the egg white lightly in a small bowl. Add it to the mixer a little at a time, testing the pastry in between to see if is ready. You are aiming for a paste-like dough that is smooth, glossy, and pipeable. You can test if it is ready by putting a spatula into the bowl and lifting it out - if the dough is the right consistency, it will fall off the spatula in a V-shape. Once the right consistency is reached, do not add any more egg.1 Egg White
- Transfer the choux pastry to a piping bag with a large open star tip. Squeeze any air bubbles out of the bag.
- Pipe rings of pastry onto a piece of parchment paper. Chill for 1 hour.
- Before you start the frying process, it's a good idea to set up everything you'll need. Alongside your saucepan, thermometer, slotted spoon, and tongs, you'll also want to set up:Wire rack with paper towels underneath (not on it)A plate or something to rest your tools on when not in useA second wire rack for your glazed crullers. Glaze - Crullers should be dipped in glaze while they are still warm, so you want to have your glaze ready to go so you can dip and fry at the same time.
- To make the glaze, sift the powdered sugar into a bowl, then add the vanilla and half of the milk. Stir until smooth and add more milk, a little at a time, until it is runny but still thick.240 g (2 cups) Powdered Sugar, 1 tsp Vanilla bean paste, 80 ml (⅓ cup) Whole Milk
- Fill a large pot with vegetable oil, so it is at least 2 or 3 inches deep, and heat it over medium heat until it reaches between 170°-180°C / 340°F-355°F. You may need to keep turning the heat up and down to maintain it at this temperature. Make sure you check the temp in between every batch of crullers as it will fluctuate.Vegetable Oil
- Cut up the parchment paper that the crullers are sitting on so each one is on its own little square of parchment.
- Use the parchment square to drop a cruller into the hot oil upside down. It should start bubbling up immediately. After a few seconds, you can use some metal tongs to carefully pull out the parchment paper square.
- Fry for 2-3 minutes on each side until deep golden brown. Let the first side cook fully before flipping. You can use your spoon to gently lift up the side to check if it is brown enough.
- Once the crullers are brown all over, use a metal slotted spoon to scoop them out and lay them on a wire to get rid of any excess oil. It's best to fry just 2 or 3 at a time, depending on the size of your pot. Any more than this and it may lower the oil temperature too much. Make sure you check the temperature between each batch.
- Dip the crullers in vanilla glaze while they are still warm, but not hot, then lay them back on the cooling rack to set.
- Let them cool completely before enjoying.


Chris Radwanski
As a Canadian who has loved Tim Hortons donuts since I was a kid, these blow the Timmy’s crullers out of the water! You get everything great about the Timmy’s donut and so much more flavour, without that odd aftertaste/film it leaves in your mouth (at least I do). This recipe and the incredible donuts it produces, makes me so freakin happy! Thank youuu!!!