
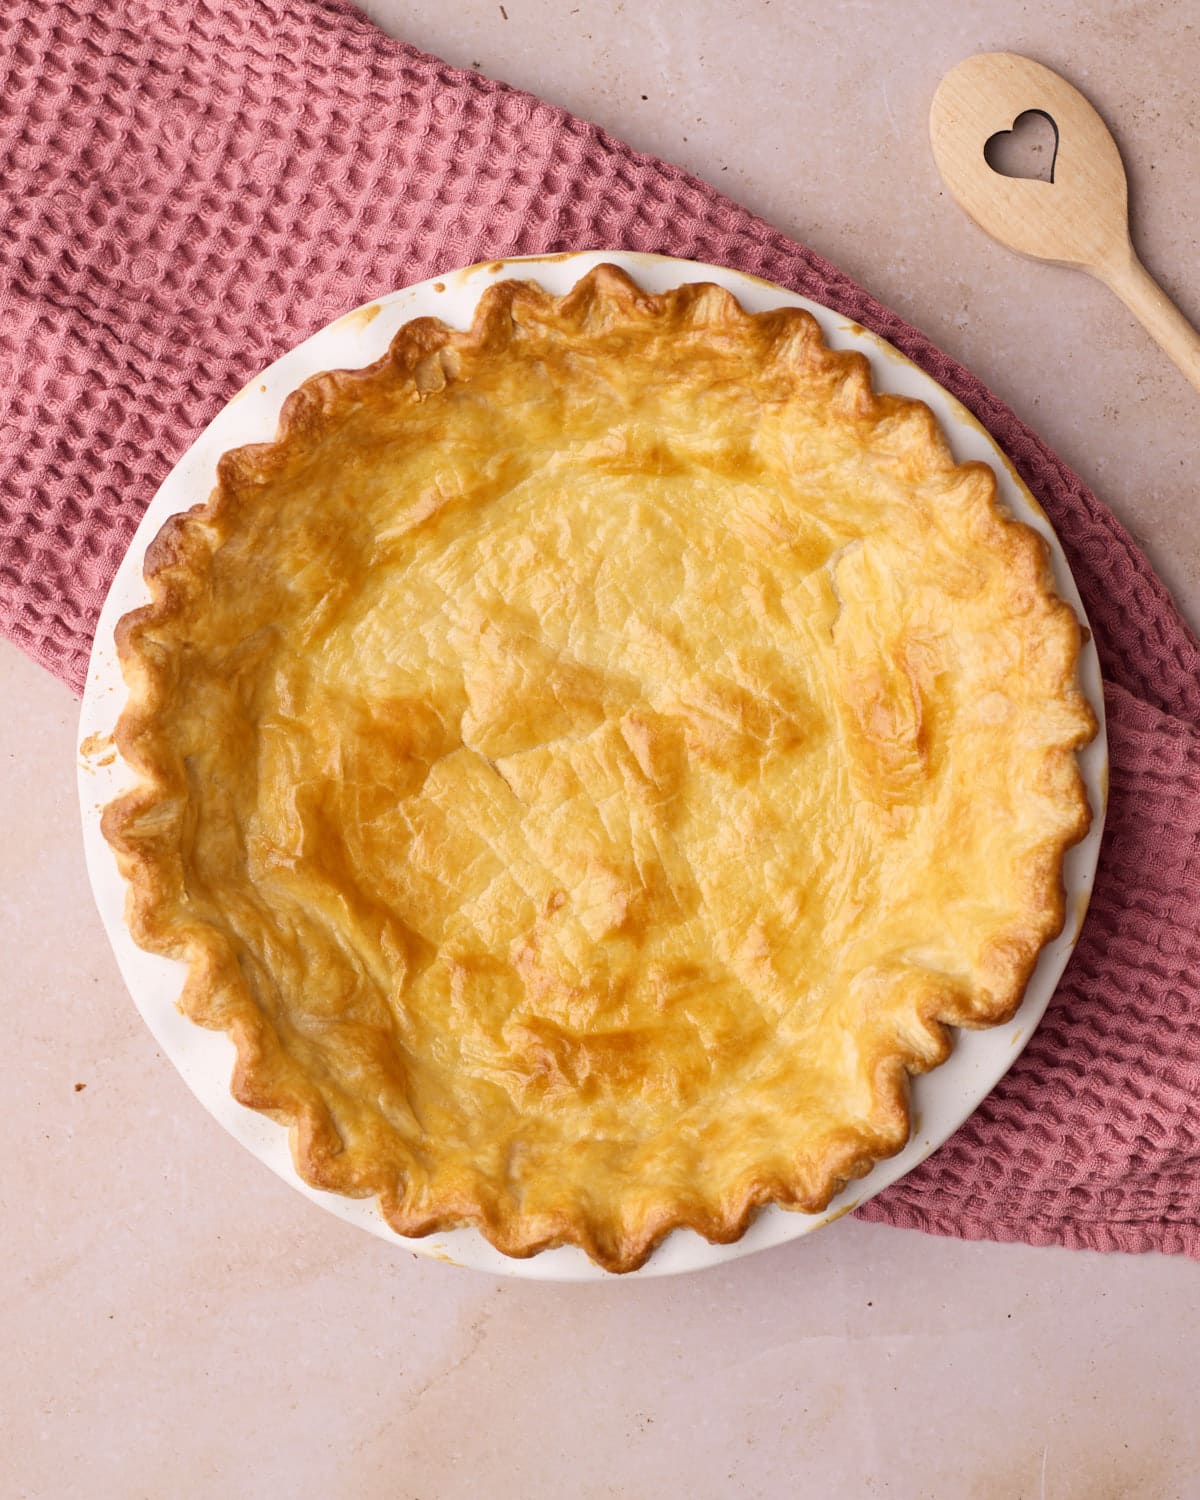
Flaky homemade pie crust recipe with expert tips for making pie dough, lining a pie dish, and blind baking pie crust.
I'll be honest. Even though I have been a professional baker for 15 years, making a really great pie crust seemed like a mysterious skill that had somehow escaped me for the longest time. But I love homemade pies and was determined to master them.
So this year I dove deep into researching the science of pastry and tested all the best tips and tricks to make the most wonderfully flaky pie crust with buttery flavor, that holds its shape and won't shrink in the oven.
Even if you often struggle with pie dough, I am confident this easy pie crust recipe will help you make and bake the perfect crust!
Jump to:
- Why You'll Love This Homemade Pie Crust Recipe
- All Butter Pie Crust Ingredients
- How to Make This All Butter Pie Crust
- Par-Baking vs Fully Baking All Butter Pie Crust
- All Butter Pie Crust Recipe Tips
- Troubleshooting Your Butter Pie Crust
- How to Store All Butter Pie Crust
- Homemade Pie Crust Recipe FAQs
- Pie Recipes
- Recipe
Why You'll Love This Homemade Pie Crust Recipe
- Perfect pie crust recipe full of tips for success
- All-butter pie dough for flavor and flaky texture
- Doesn't shrink in the oven or lose its shape
All Butter Pie Crust Ingredients
It takes just a few simple ingredients to make a really good pie crust.

- Flour - All-purpose flour (plain flour) is best.
- Butter - As it's an all-butter crust, try to use high-quality butter. The higher fat content will create a flaky texture.
- Vinegar - Apple cider vinegar or white wine vinegar. You can also leave this out if you want to, see the FAQ section for info on why I use it in my pie dough.
- Cold Water -The water needs to be very cold. Either fill a bowl with ice cubes or place your water in the freezer for 10 minutes before using it.
- Sugar - This is totally optional. I add a little sugar for sweet pie recipes and leave it out for savory pies.
See the recipe card for quantities.
For best results, weigh ingredients with a kitchen scale, not a measuring cup.
Recommended Equipment
- 9-inch pie plate
- Food Processor (or pastry cutter)
- Rolling Pin
- Pie Weights - ceramic baking beans (or rice)
- Pastry Brush
How to Make This All Butter Pie Crust
I like to make my pie crust dough in the food processor because it is easier on my hands and helps to keep the pastry cool, but you can also make this simple recipe by hand with a pastry cutter.
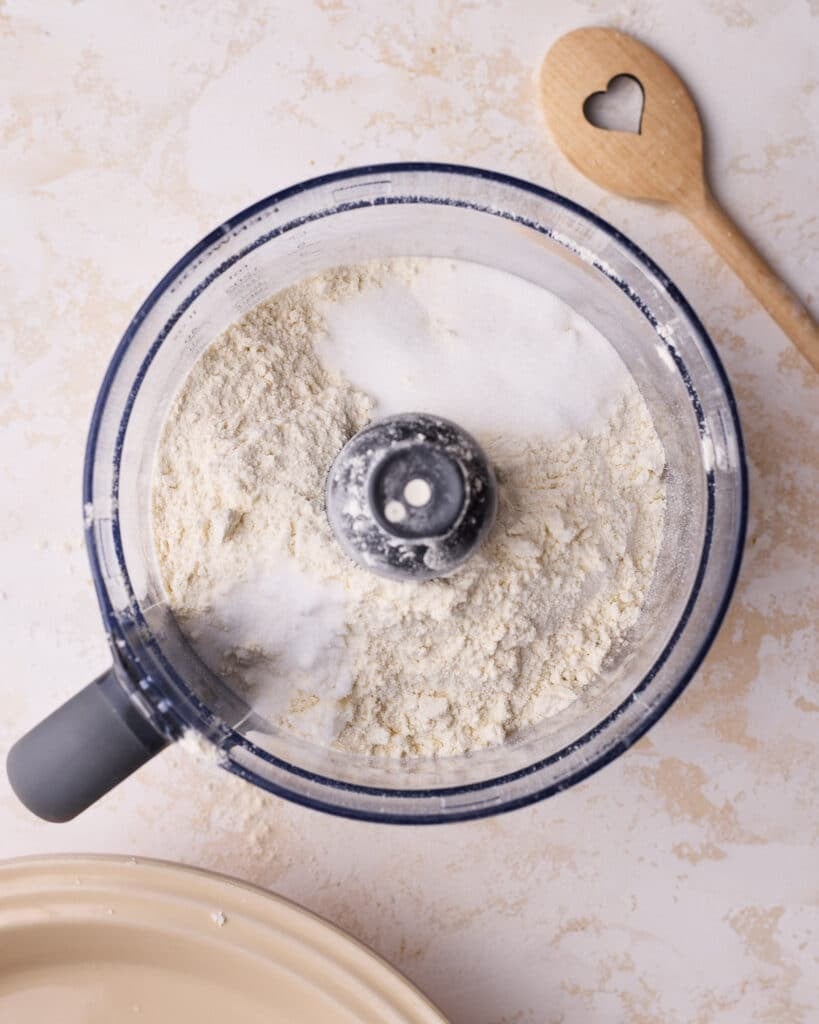
Flour Mixture
Add the flour, salt, and sugar (if using) into the bowl of a food processor and pulse a few times to combine.
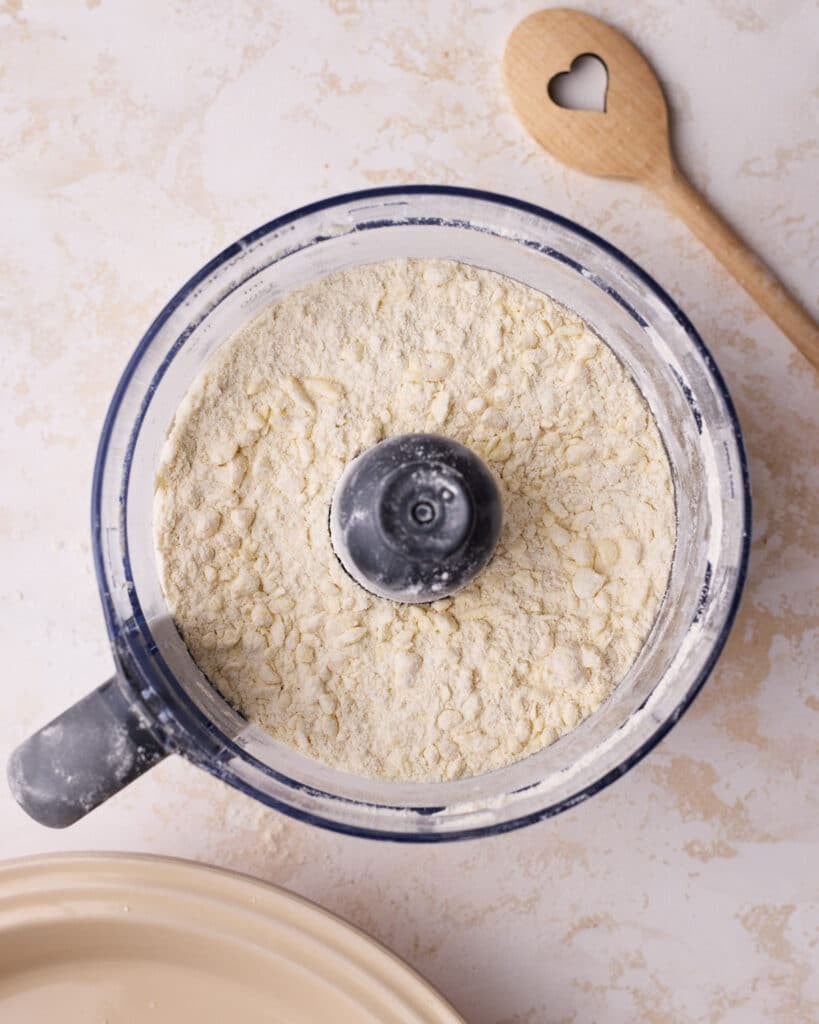
Add Butter
Put all of the cold butter chunks into the food processor and pulse until the butter is in pea-sized pieces.
Add Liquid
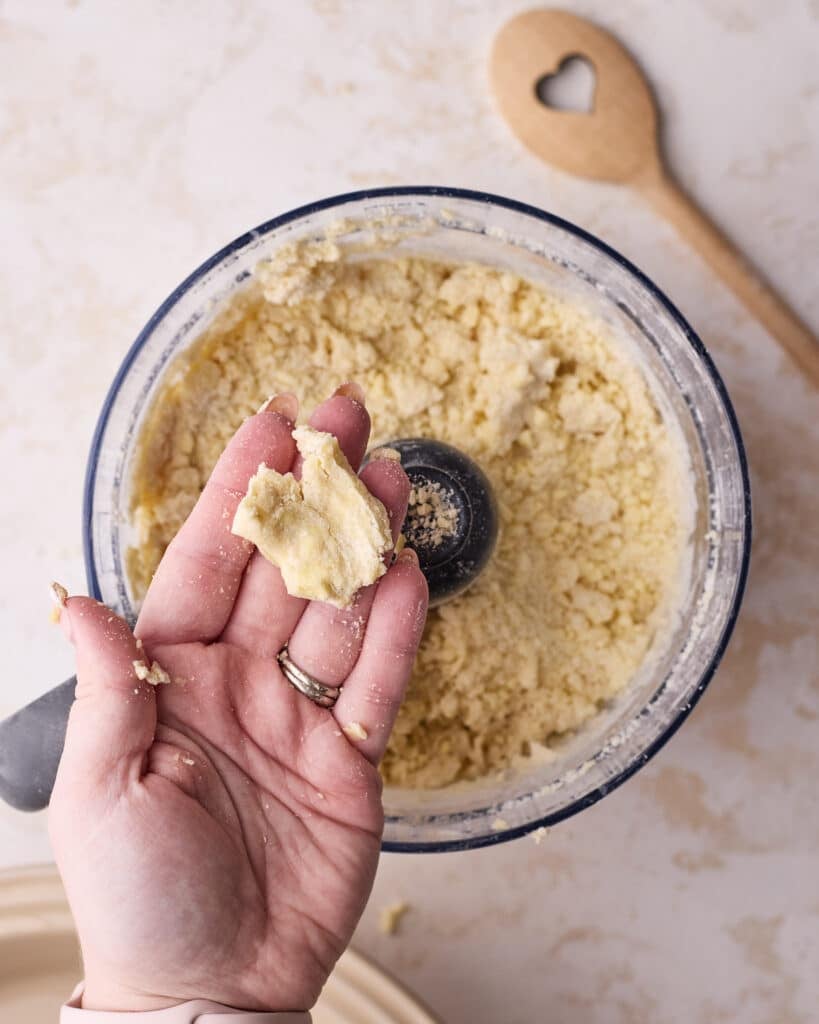
Pour half of the ice water and vinegar mixture into the dry ingredients and pulse a few times. Check to see how hydrated the dough is and add a tablespoon of water at a time until it holds together when you squeeze it in your hand. You may not need all of the liquid.
It is important not to add too much water as overhydrated dough is one of the biggest causes of shrinking pie crusts.
Bring Together
Tip the dough out onto a clean work surface and use your hands to bring it together.
It will still be quite crumbly, but if it is too dry you can sprinkle a little more water on it until it comes together into a cohesive ball.
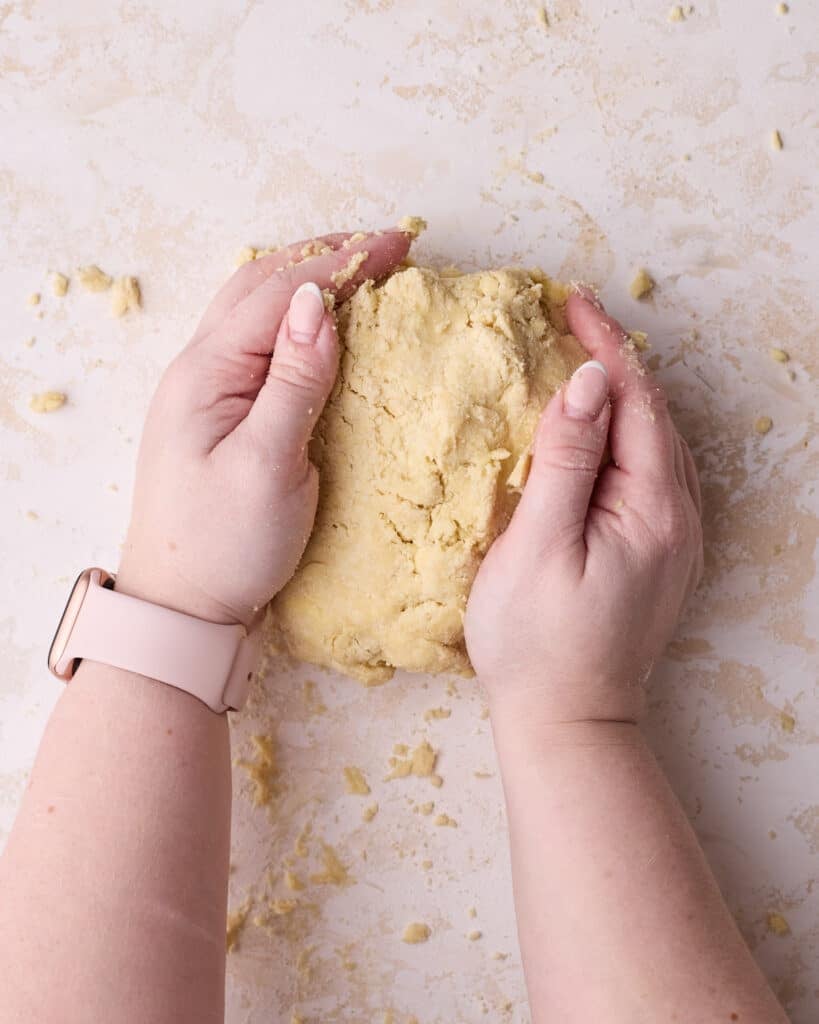
Knead
Press the dough down to flatten it a bit, then fold it in half, and half again, then flatten it again and repeat a few times, just until the dough is mostly smooth. You don't want to overwork the dough but kneading it a few times like this will help to create those flaky layers.
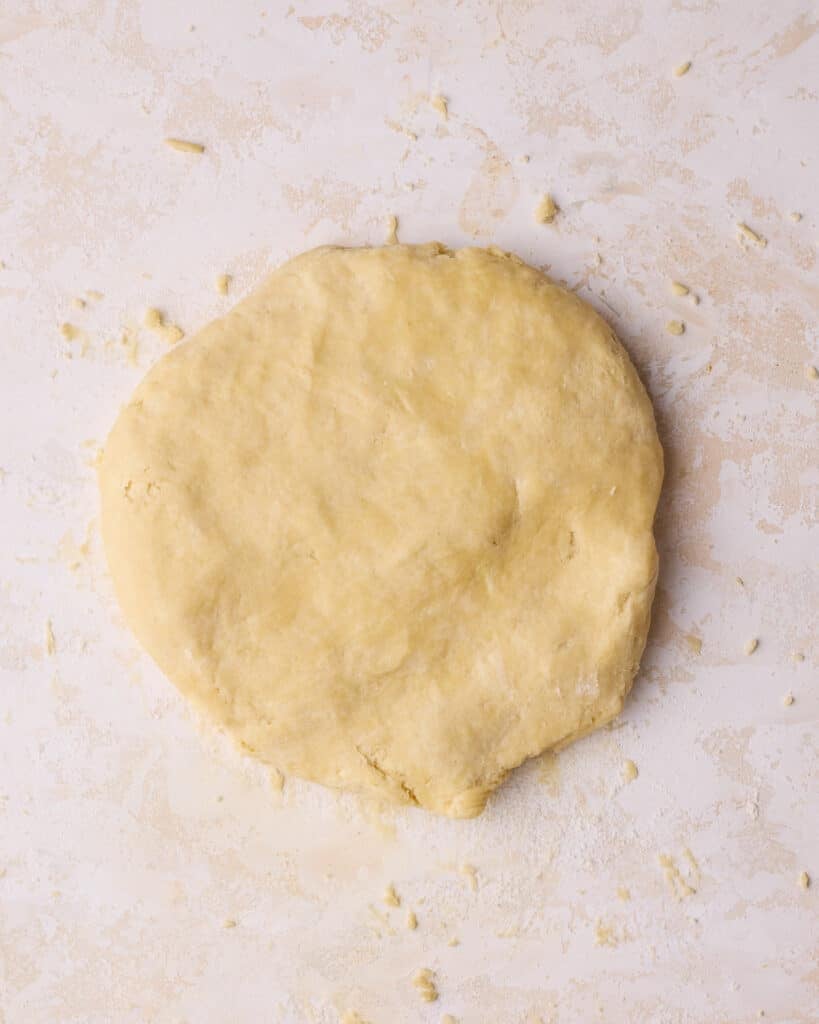
Divide the dough in half and shape into two round, flat disks. Wrap them in plastic wrap and put them in the refrigerator to rest for at least 2 hours, preferably overnight.
How much Pie Dough
This recipe makes enough dough for two 9-inch pie crusts or one double-crust pie (a top crust and a bottom crust). If you are making a single-crust pie, you can keep one of the dough disks in the fridge for 3 days or in the freezer for 3 months to use for your next pie.
Alternatively, you can use the excess dough to cut out shapes with cookie cutters to make a pretty border around the top of a single crust pie (leaves are always a pretty choice for this!)
How to Line a Pie Dish
Making the best pie crust recipe doesn't stop with the pie dough! There are lot of important details in the way you line and bake the pie crust that contribute to its success.
Roll the Dough
Let the pie dough sit at room temperature for 10 minutes to warm up a little so it's easier to work with.
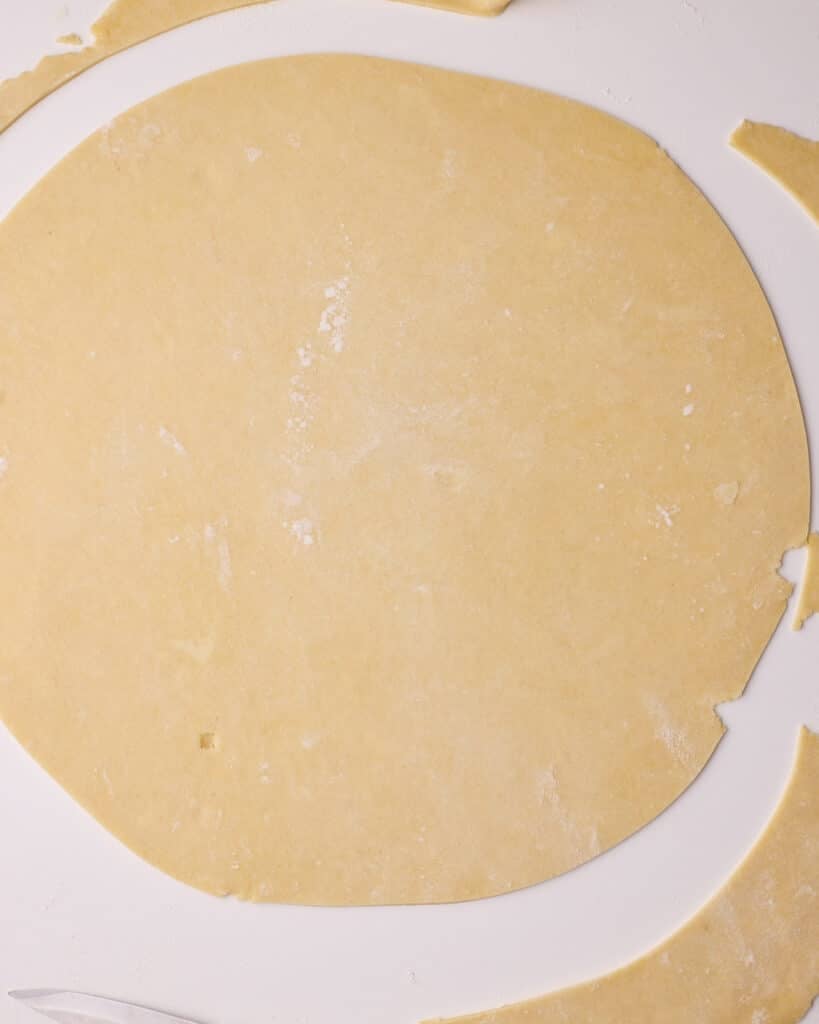
Roll it out on a lightly floured surface until it is ⅛ inch thick and larger than your pie tin by 1-2 inches in each direction.
Roughly cut a large circle with a sharp knife to get rid of scraggly edges. For a 9-inch deep dish pie pan, I would make a 12-inch circle.
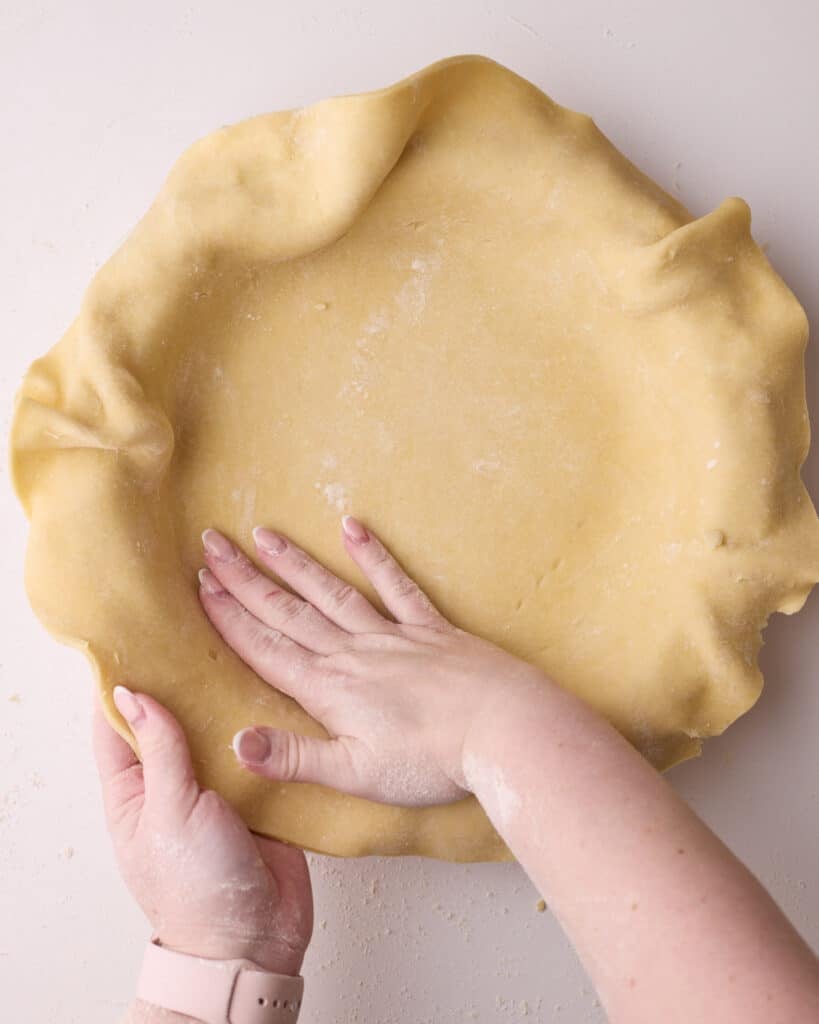
Line the Pie Dish
Lift the pie dough and carefully lay it into the pie dish, gently press it into all the edges. Do not stretch the dough.
If you have long nails you can use a little ball of scrap pastry to do this so you don't tear the dough.
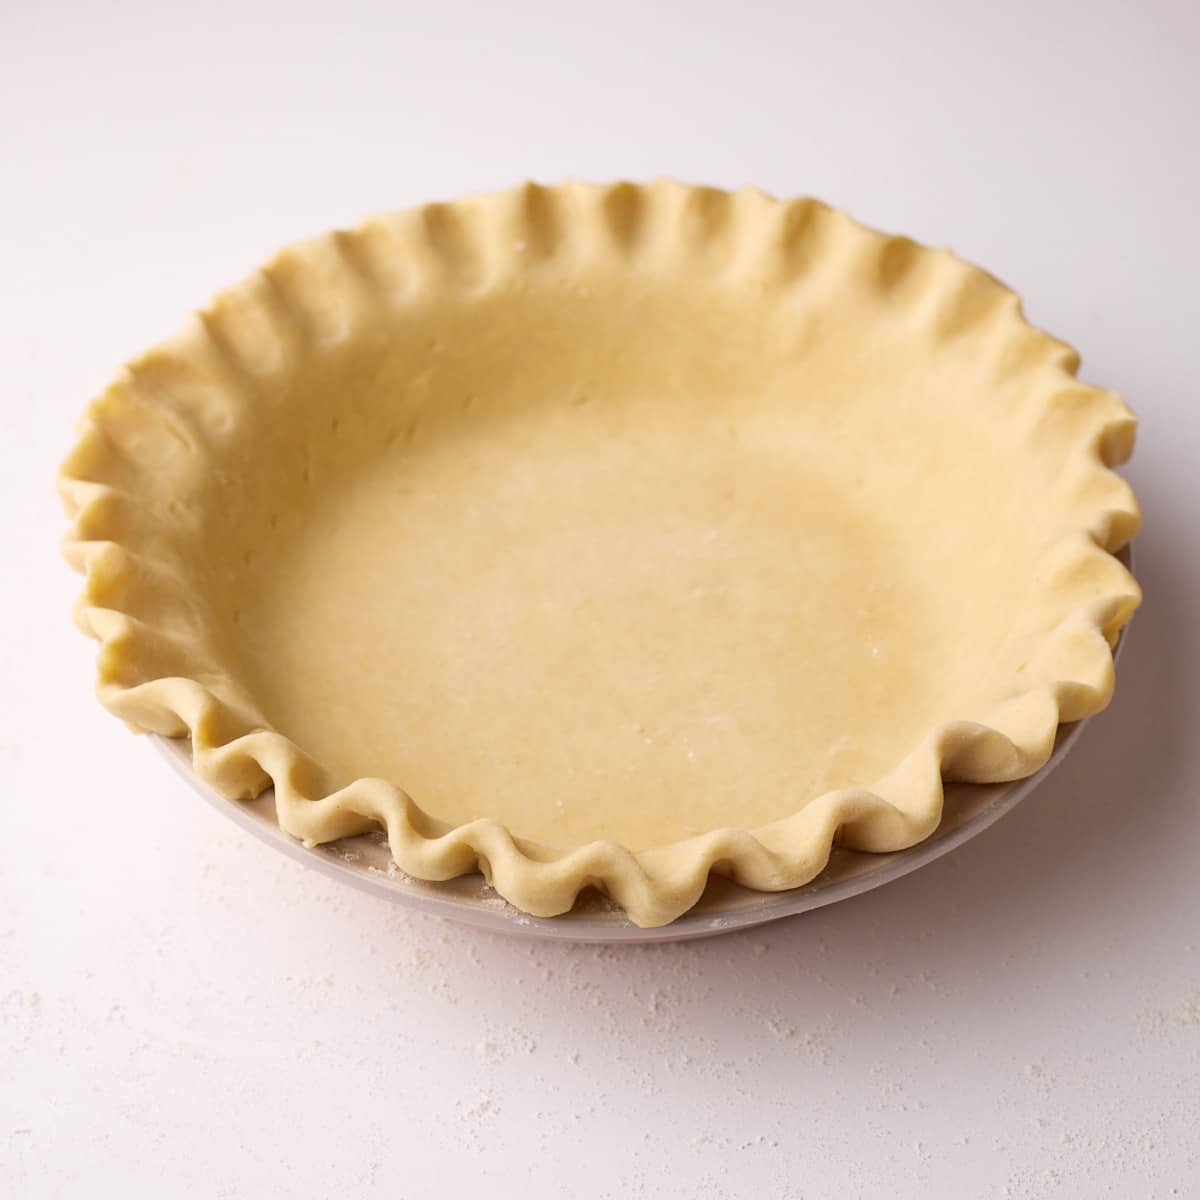
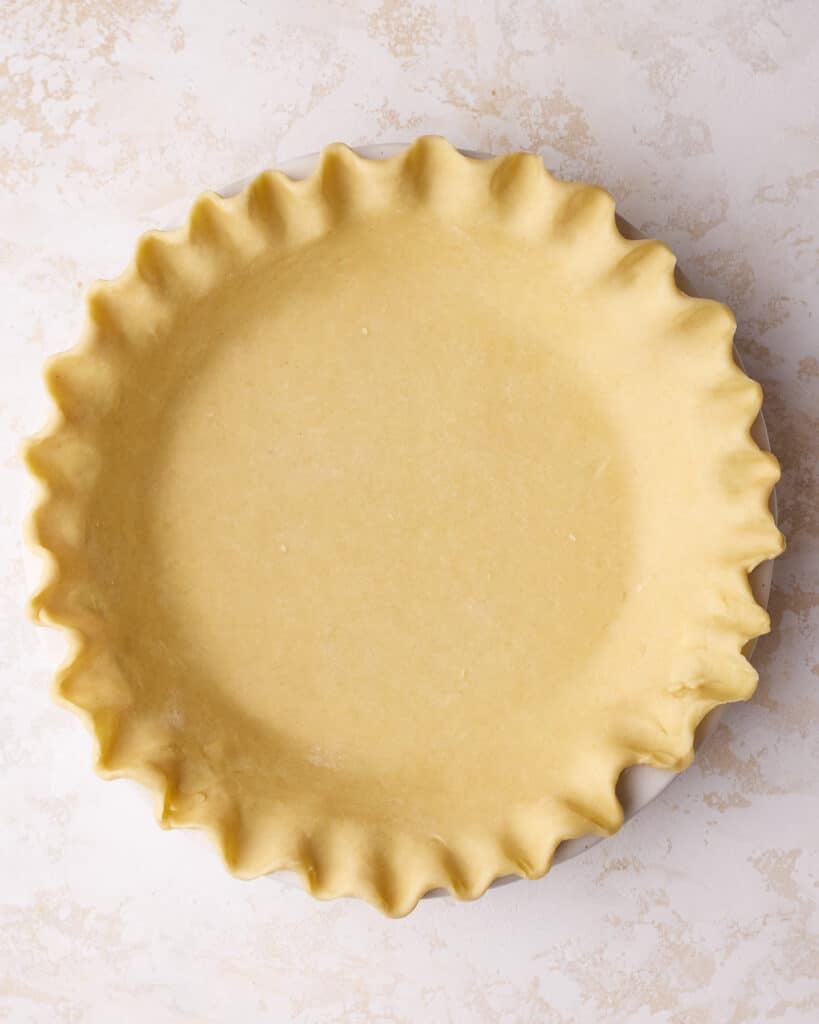
Crimp
Tuck the edges of the pie underneath itself so they aren't hanging over the side. I found this is better than cutting the overhang with kitchen scissors as it doesn't pull or stretch the dough, and it means you have thicker pastry edges for crimping.
Crimp the edges however you like and then dock the bottom of the crust a few times with a fork. This will stop the pastry from puffing up.
Chill
Put the pie crust back in the fridge for 30 minutes to rest and chill. Do not skip this step - it is crucial to creating a perfect flaky pie crust that doesn't shrink.
If you don't want to bake it right away, you can cover it with plastic wrap and keep in the fridge for up to 24 hours.
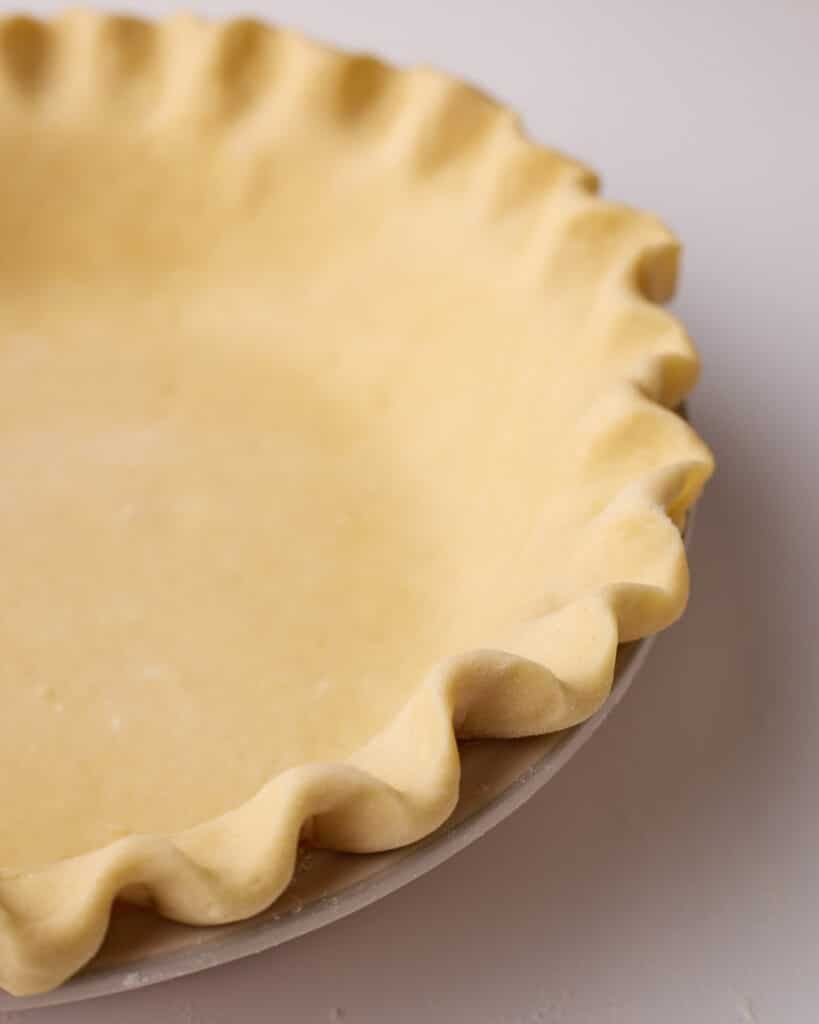
How to Crimp Pie Crust
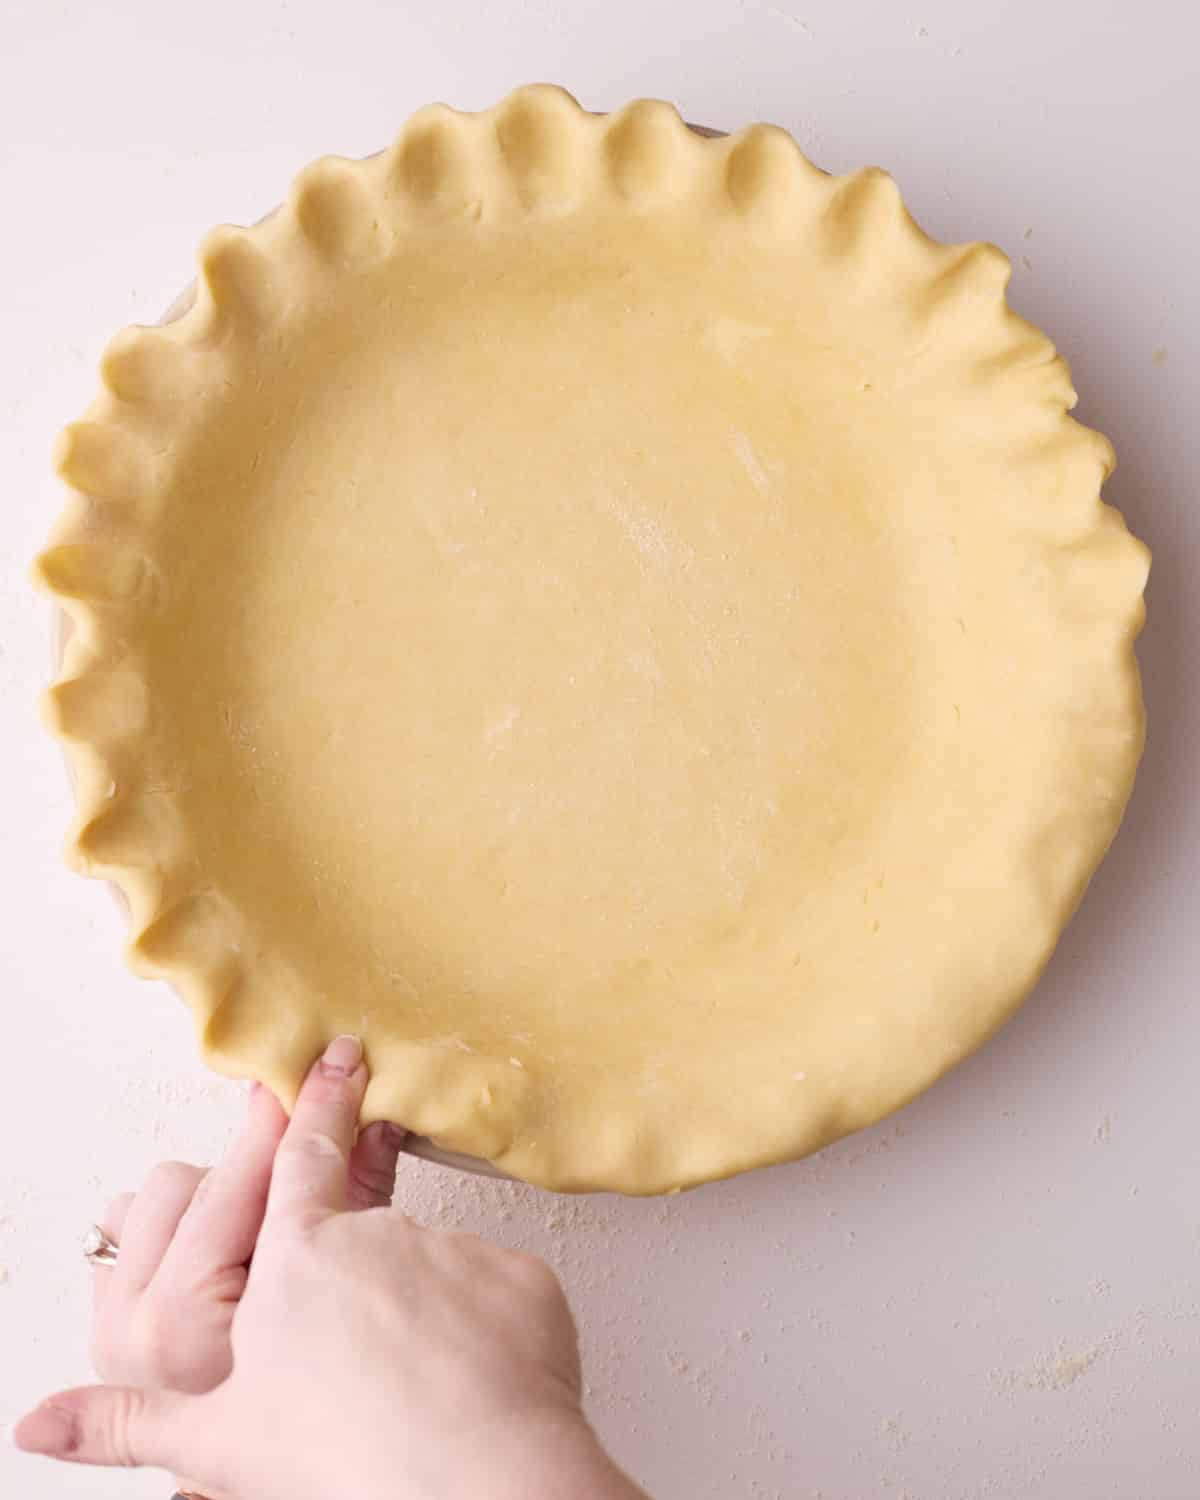
There are so many ways to crimp your pie crust, but my favorite way is to make a scalloped edge by pinching the pastry between your forefinger and thumb and pressing with a finger on the other hand.
I like to go round once to get the general shape and then go round again with my pinky finger to get a sharper crimp.
If the dough is too soft to do this, you can put the pie shell in the fridge for 5 minutes to firm up a little first.
How to Blind Bake a Pie Crust
If you are making a pie that doesn't require blind baking, you can just proceed with the rest of the recipe and follow its baking instructions.
Not sure if you need to blind bake? See the FAQ section.
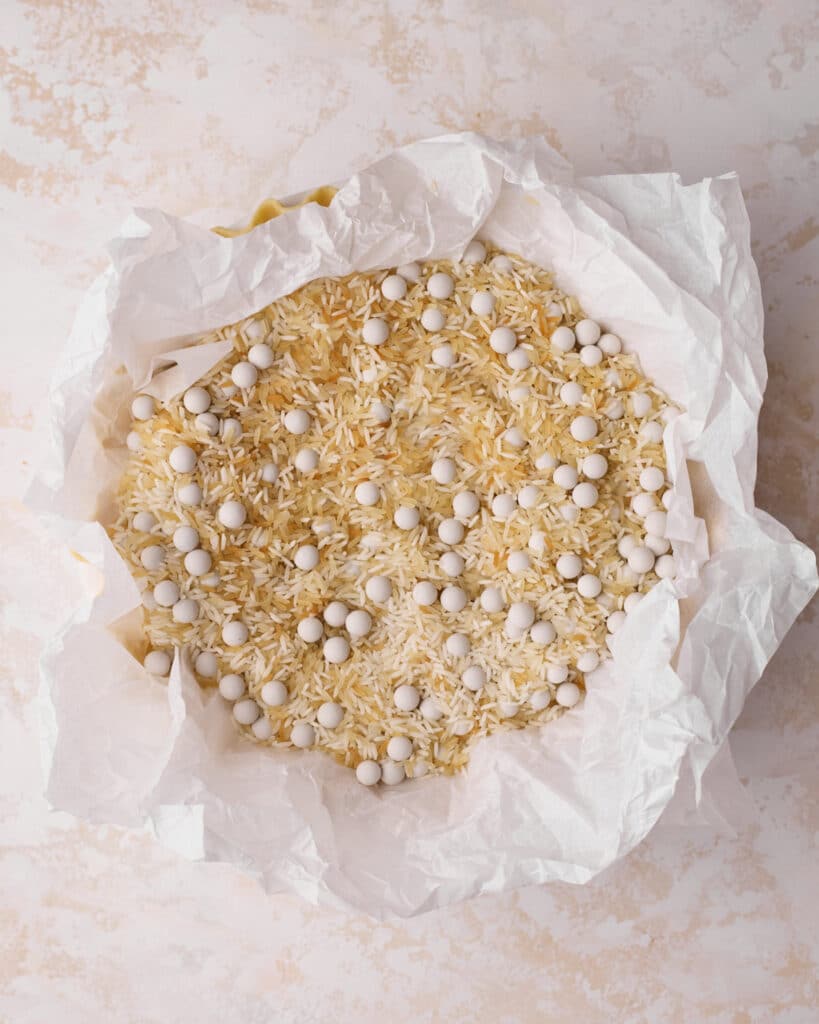
Pie Weights
Lay two long pieces of parchment paper crosswise into your pie shell. It's best to scrunch and un-scrunch them first so they can fit into the corners easily.
Fill the shell up with pie weights or rice (I use a combination of both), making sure it fills all the way up to the top of the dough. This will help to stop the edges from shrinking.
Put it back in the fridge,(or the freezer if you have room) for 10 minutes while you preheat the oven to 425°F / 220°C (200°C fan-assisted).
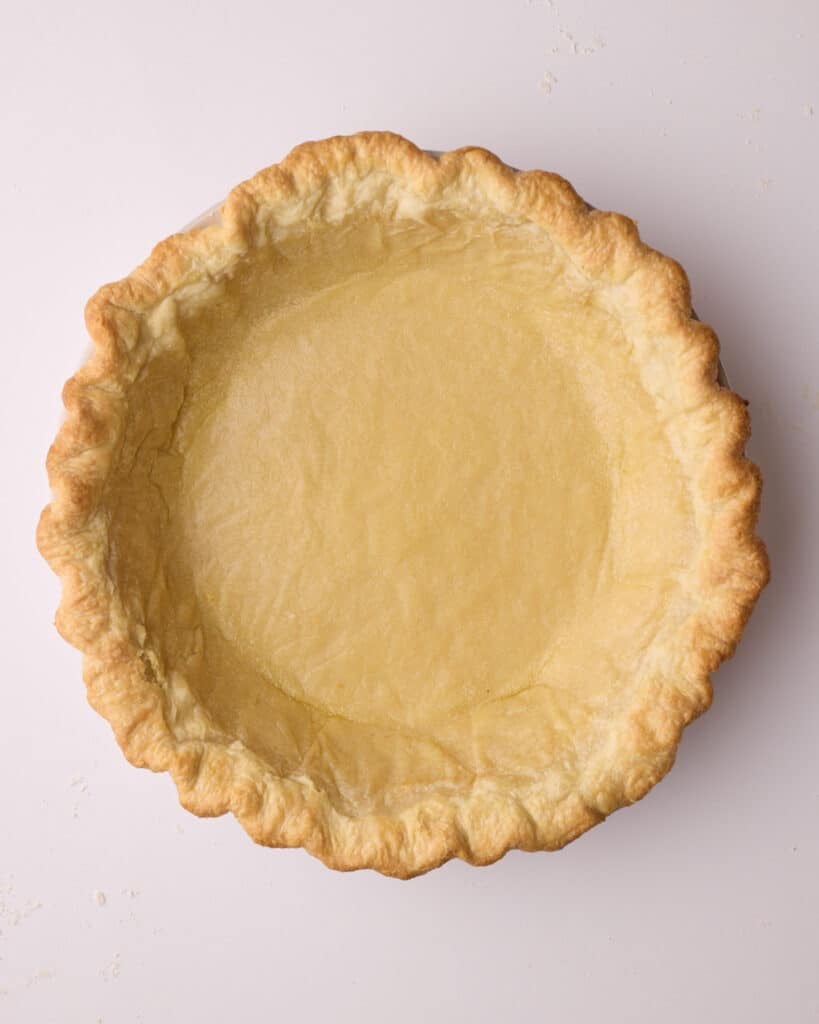
Blind Bake
Bake the pie crust for 15-18 minutes until the edges are just starting to turn lightly golden.
Remove from the oven and turn the temperature down to 375°F / 190°C (170°C fan assisted).
Carefully lift out the parchment paper and baking beans.
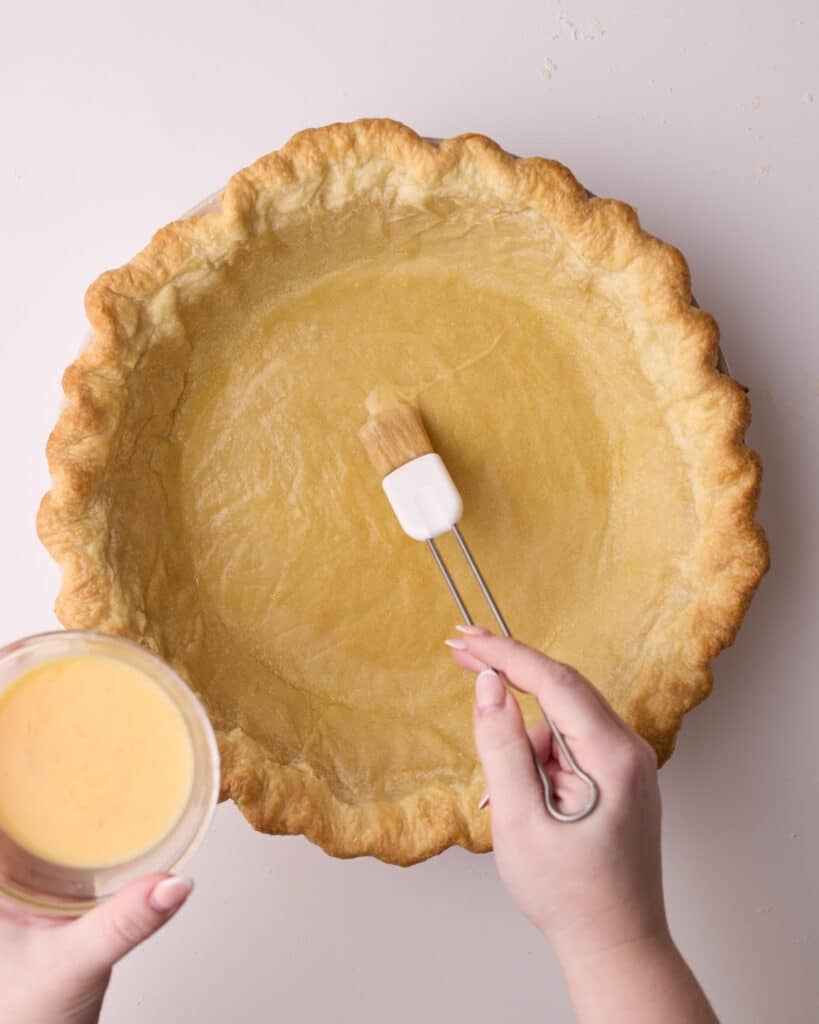
Egg Wash
Brush the crust with a layer of egg wash. It should be a thin layer, but thick enough to seal the docking holes.
This is especially important if you will be adding a liquid filling (like Custard Pies).
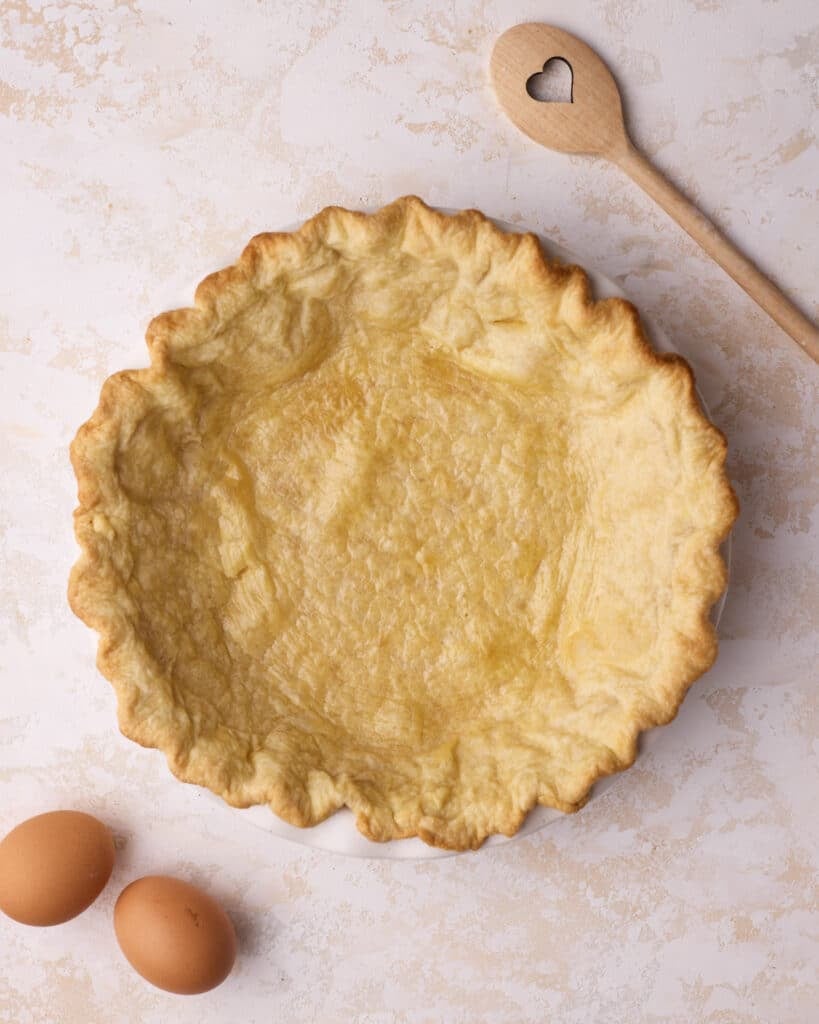
Bake More
Put the crust back in the oven:
To par-bake: bake for a further 5-7 minutes or until the inside of the pie looks dry and lightly golden brown.
To fully bake: bake for a further 10-12 minutes or until the entire pie is golden brown all over.
Par-Baking vs Fully Baking All Butter Pie Crust
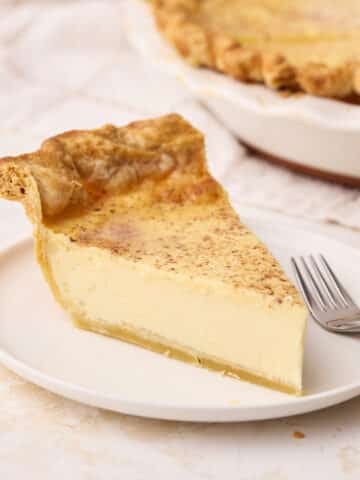
Par baking just means to partially bake the pie - this is done when you will be adding a filling that goes back into the oven to bake longer, like Pumpkin Pie.
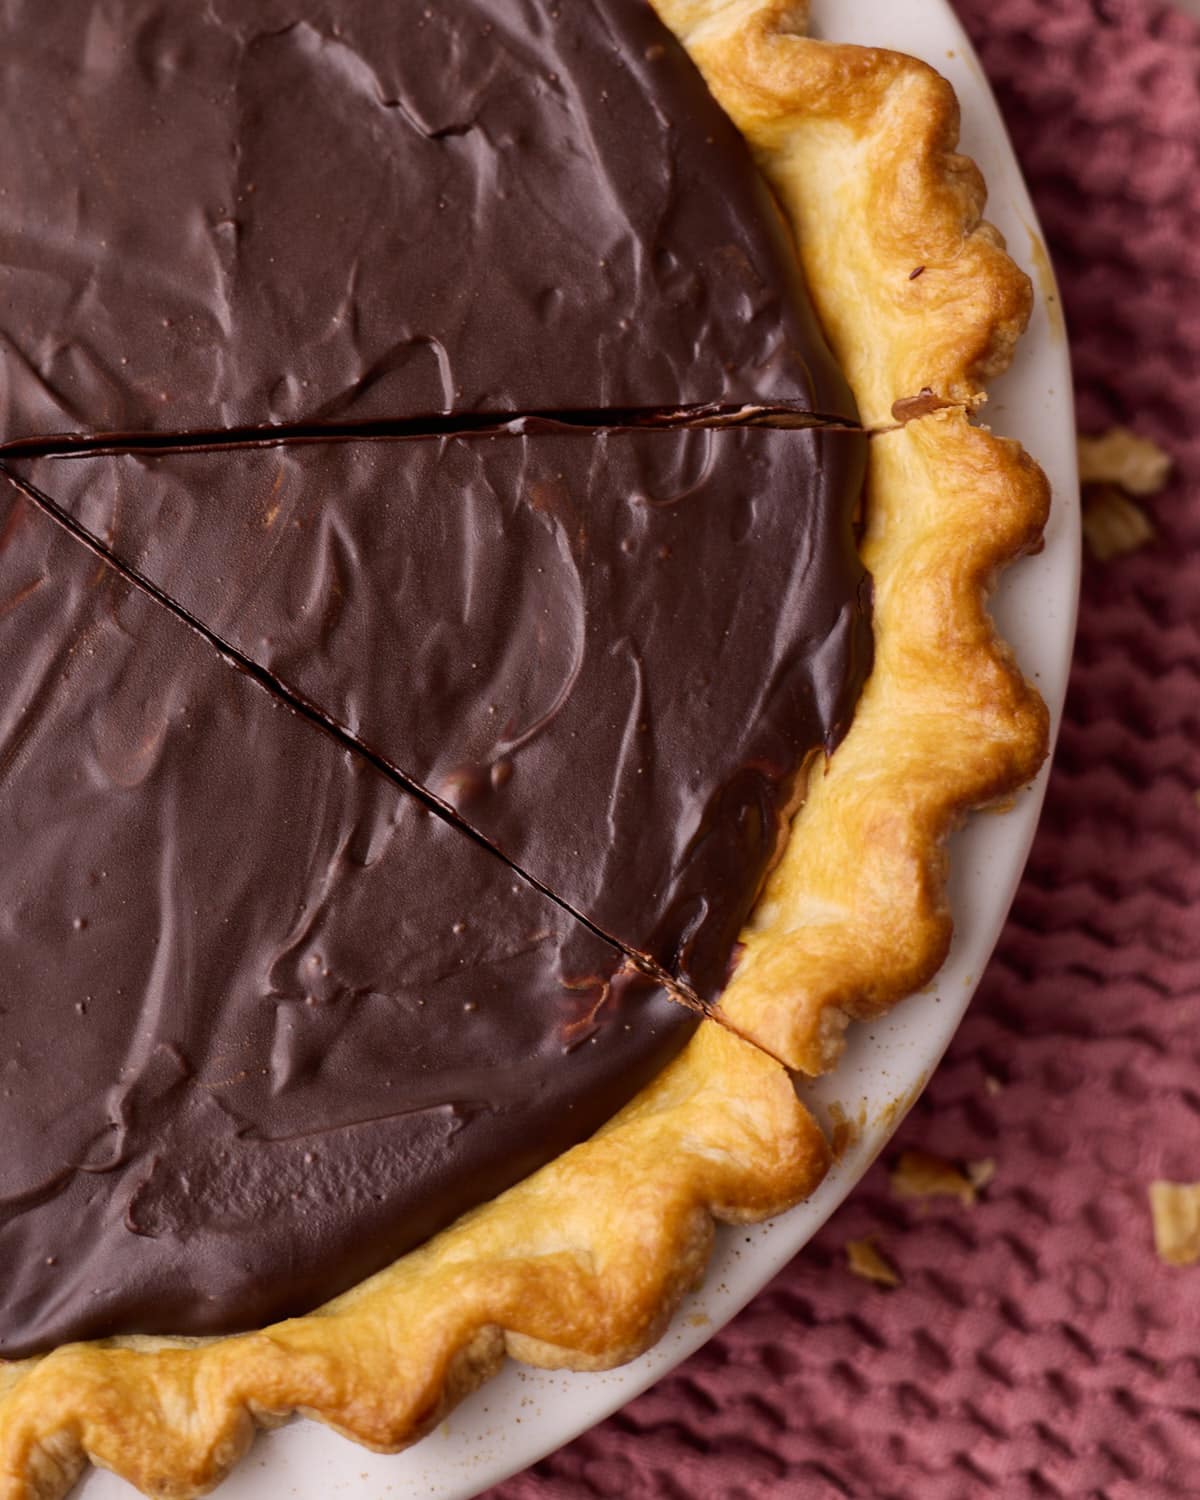
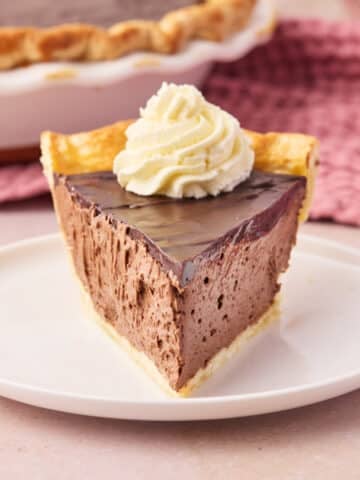
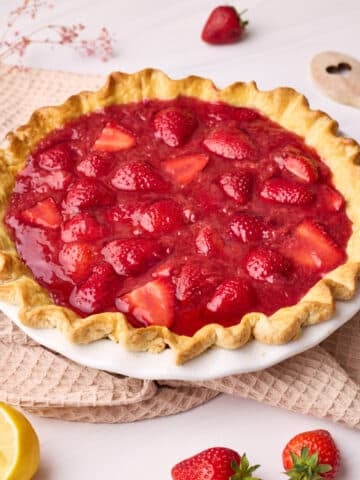
If you will be filling the pie with a chilled filling or something that doesn't require baking, like pastry cream, strawberry pie filling, or chocolate mousse pie, you should fully bake the pie crust.

All Butter Pie Crust Recipe Tips
There is a lot of information in this post, so here is a summary of all the most important tips to make the best homemade pie crust:
Don't add too much water - If you overhydrate the pie dough, the water will evaporate while baking and cause the crust to shrink.
Let the dough rest - Resting the dough allows the gluten to relax.
Fold while kneading - Folding the dough a few times instead of regular kneading laminates the dough to create lots of flaky layers of pastry.
Tuck the edges - Tucking the edges under themselves instead of trimming the excess pastry helps to avoid stretching the dough and it also gives a thicker edge for better crimping that holds its shape.
Chill before baking - Cold pie dough will hold its shape much better, and it also puffs up better when it hits the hot air in the oven.
Add enough pie weights - Fill your pie weights all the way up the sides of the crust. They don't just stop the bottom from puffing up, they also support the sides of the pie crust to stop them shrinking and slipping down.
Parchment paper overhang - Let the end of your parchment paper hang over the outer crust of the pie for an extra layer of protection from browning while blind baking.
Egg wash to fill holes - Adding an egg wash makes the pie shiny and pretty, but it is also practical. It seals any holes in the pastry (from docking or tearing) to stop the pastry from getting soggy when you fill it later.
Troubleshooting Your Butter Pie Crust
Shrinking: This is the most common issue when making your own homemade pie crust. There are several factors that can cause shrinking, including dough that is overhydrated, overworked, or not rested enough. It could also be from stretching the dough, not chilling before baking, or from the pie weights not being high enough. But if you follow all my recipe directions you should end up with a beautiful crust that doesn't shrink!
Soggy Bottom: If your finished pie has a soggy bottom when you cut into it, your filling has leaked some liquid into the crust. To avoid this, make sure that the crust is baked until dry when par-baking and that the egg wash seals any holes or tears in the pastry.
Browned Edges: If the edges of your pie are getting too brown, you can add a pie shield or make one out of aluminum foil to cover them while your pie bakes.
Pastry Puffing Up: If your pie crust is still puffing up after you have blind-baked it, just use a fork to poke a small hole in the bubble to let the steam out. If you do this, make sure you go back in with a little more egg wash at the end of the bake time and bake for another minute to set it and seal the hole.

How to Store All Butter Pie Crust
The unbaked pie dough can be covered in plastic wrap and kept in the fridge for up to 3 days until you are ready to use it. To freeze it, double wrap it and freeze for up to 3 months. Let it thaw in the fridge overnight before using.
Once you have lined your pie dish with dough, you can cover that with plastic wrap and store it in the fridge for up to 24 hours before baking.
Once the pie has been baked or par-baked, I recommend filling it on the same day. Storage instructions and times will then depend on what you are filling it with.
Homemade Pie Crust Recipe FAQs
If you have a question about this recipe that isn't answered below, feel free to leave it in the comment section and I will get back to you as soon as I can.
Vinegar does a few things in pastry. It slows down the gluten formation in the pie dough which makes it easier to roll out and helps to prevent overworking it. The vinegar also stops the dough from oxidizing which helps the pastry hold its shape and any designs on it while baking. It also makes the crust a little more tender and helps with the flakiness.
I know a lot of pie crust recipes recommend using vegetable shortening (like Crisco) instead of butter, or a combination of both. Some bakers find that it's easier to make a flaky crust that holds its shape when using shortening.
But I just feel the flavor of an all-butter pie crust recipe is far superior, and with the tips and tricks in this post, there should be no issues with texture and shape! Of course, do whatever you prefer though.
Blind baking is the process of lining a pie crust with pie weights for the first part of the baking time. This is to stop the pastry from puffing up in the oven and also to support the sides of the pie crust and stop them from shrinking.
It's called blind baking because you can't see how the pie is baking under the weights, so you are effectively baking it 'blind'.
It is necessary to blind-bake a pie crust if you are making a recipe that calls for a pre-baked pie crust or a par-baked pie crust. If you are baking a filling that bakes for a long time you may not need to blind bake your pie. Here is a guide for when you should blind bake:
No blind baking needed: Pies that bake for a long time such as a classic apple pie or cherry pie.
Partial baking needed: Pies that will go back into the oven once filled, like a custard pie.
Full baking needed: Pies that have an unbaked filling such as cream pies or chocolate mousse pie. Or fresh fruit pies that won't be baked - like Strawberry Pie.
Pie Recipes
Looking for some pie filling inspiration? Try some of these recipes:

Recipe

Homemade Pie Crust Recipe
Ingredients
- 3 cups (360 g) All-purpose Flour 360g
- ¼ teaspoon Salt
- 1 tablespoon Granulated Sugar (optional)
- 2 ¼ sticks (255 g) Unsalted Butter 255g (cold)
- 1 ½ tablespoon Apple Cider Vinegar (or white wine vinegar)
- ½ cup (120 ml) Cold Water 120ml
Equipment
- 1 Pie Dish 9-inches
- Food Processor (see notes for how to do this by hand)
- Pie Weights ceramic baking beans or rice
Instructions
- Note: I recommend letting the pie dough rest for at least 2 hours, preferably overnight, before lining your pie dish, so factor that into your timing.
- Cut the butter into small cubes. Combine the water and apple cider vinegar in a small bowl. Place the butter and the water/vinegar mixture into the freezer for 10 minutes while you measure out the dry ingredients.1 ½ tablespoon (1 ½ tbsp) Apple Cider Vinegar, ½ cup (120 ml) Cold Water, 2 ¼ sticks (255 g) Unsalted Butter
- Add the flour, sugar, and salt to a food processor and pulse a couple of times to combine.3 cups (360 g) All-purpose Flour, 1 tablespoon Granulated Sugar, ¼ teaspoon (¼ tsp) Salt
- Take the butter out of the freezer and add it to the food processor. Pulse until the butter is dispersed throughout the flour, but there are still some small, pea-sized chunks of butter visible.
- Pour in about half of the water/vinegar mixture and pulse the mixture. Do not overwork the dough, pulse it just enough to combine.
- Keep gradually adding water, a little at a time, until the mixture is hydrated enough that it clumps together when you squeeze it with your fingers. You may not need all of the water.
- Dump the mixture out onto a lightly floured work surface and bring it together with your hands. If it is too dry to stick together, you can splash a little more of the water mixture onto it.
- Knead the dough by flattening it and folding it in half a few times, just until it comes together smoothly.
- Divide the dough in half (this recipe makes enough for 2 pie crusts. Shape into two round, flat discs. Wrap them in plastic wrap and put them in the refrigerator for at least 2 hours, preferably overnight.If you don't need both pie crusts at once, you can keep one for later for up to 3 days in the fridge or 3 months in the freezer.
- When you are ready to make the pie crust, take the dough out of the fridge and leave it on the countertop for 10-15 minutes to warm up a little so it's easier to roll.
- Roll the dough out on a floured work surface to about ⅛ inch thickness. Make sure it is larger than your pie dish by 1-2 inches in each direction (depending on the depth of your pie dish). I like to cut a rough circle with a sharp knife just to get rid of any scraggly edges and make it a little neater.*
- Transfer the pastry to your ungreased pie dish and gently press it into the corners. Do not stretch the dough. If you have long nails, you can use a little ball of scrap pastry to do this, so you don't mark up the dough.
- Gently tuck the outer edges of the pastry underneath so the crust is neat all the way around. Crimp the edges if desired and dock the bottom of the pie shell a few times with a fork.
- Refrigerate for at least 30 minutes or until ready to bake.
- Cover the inside of the pie with parchment paper and fill with baking beans and/or rice. Make sure you fill it all the way up the sides of the pie crust to stop the edges from shrinking.
- Put the pie crust back in the fridge (or the freezer if you have room) for 10 minutes while you preheat the oven to 425°F / 220°C (200°C fan assisted).
- Put the pie crust into the oven on the middle rack and bake for 15-18 minutes or until the edges are starting to turn golden brown.
- Take the pie out of the oven and turn the temperature down to 375°F / 190°C (170°C fan assisted). Carefully lift out the parchment paper and baking beans.
- Brush the crust with a layer of egg wash It should be a thin layer, but thick enough to seal the docking holes. This can help to prevent soggy bottoms if you are adding a liquid filling.
- Return the pie crust to the oven:To par-bake the pie crust - bake for a further 5-7 minutes or until the inside of the pie looks dry and slightly golden brown. To fully bake the pie crust - bake for a further 10-12 minutes or until the entire pie is golden brown all over.
- Remove the pie from the oven and let it cool on the countertop until ready to use.

Sonjie
Is this pie crust good to for like fruit pies any tips?
Jules Grasekamp
Hi Sonje,
Yes you can definitely use it for a fruit pie! The post above is packed with every tip you could ever need to make the perfect pie crust, but if you have any specific questions I'm happy to answer them 🙂
Jules
Angie
Hi I would love to try this pie as a savory dish using meat or chicken. Can I use both pastry rounds for top and bottom? Shall I blind bake?
Jules Grasekamp
Hi Angie,
Yes you can definitely do that! The blind baking depends on the filling - I have a handy section on that in the post you can refer to depending on your filling. As a general rule though I always like to at least par-bake it to make sure that I have a nice crisp pastry base!
Jules
Alice
Can you please send me the recipe? It’s way too many commercials and other stuff coming through. When I get near the middle it jumps back to the top. So annoying
Jules Grasekamp
Hi Alice,
The jumping thing is so frustrating, I know! Unfortunately that is an IOS feature on your phone browser so there is nothing I can do to control that I'm afraid.
As for the ads, that is how recipe developers like myself are able to provide recipes for people to use for free, I know it's annoying to look at ads, but the alternative would be that we all had to start charging for recipes so most people don't mind scrolling past them. There is however a big 'jump to recipe' button at the top of every page so you can skip right past them to get to the recipe card.
Hope this helps,
Jules
Bobbie
Does the AC vinegar alter the taste in any way?
Jules Grasekamp
Hi Bobbie,
No you don't taste the vinegar in the pie crust at all - but if you are worried about it you can definitely leave it out.
Jules
Bobbie
Thank you Jules…I’ll give it a try…I appreciate you posting this pie crust recipe!
Carmen
As a baker, I like using pastry flour for my pie shells. Since your recipe calls for AP flour, will this change the outcome if I used it?
I have a stand mixer that I’ve used for mixing some doughs but tend to use my hands for pie and tart doughs. Is a stand mixer alright to use here?
Thank you!
Jules Grasekamp
Hi Carmen,
Yes pastry flour would work great in this recipe. I just list all purpose flour as it's what most people have easy access to, but you can definitely sub for pastry flour and it shouldn't negatively impact the pie crust.
As for the stand mixer, I usually use a food processor as a stand mixer can run the risk of overworking the dough, but I'd say if you have your own tried and tested method with a mixer that you have success with then definitely try it for this recipe. As long as the dough has plenty of time to rest after.
Thanks
Jules
Jasson
Very nice recipe chef ,and excellent tutorial . Thank you for your effort
Jules Grasekamp
Thank you for your kind words! I'm glad you like it 🙂
Jules
PETRO THEUNISSEN
We call this exact recipe and crust (that you did'nt think of for sometime) MELKTERT in AFRIKAANS / Milktart(English) in South Africa.
It has been in our families for generations.
We serve it with Cinnamon on top of the finished product
Jules Grasekamp
Hi Petro,
Thanks again for your comment. As I said on the other one, I wasn't claiming to have invented pie crust, I was just saying that it took me a long time to master it so I spent a lot of time researching it and practicing to try and get it just right. This post is sharing my experience and the tips and tricks I learned to get the best results.
Cinnamon on the pastry sounds delicious! 🙂