
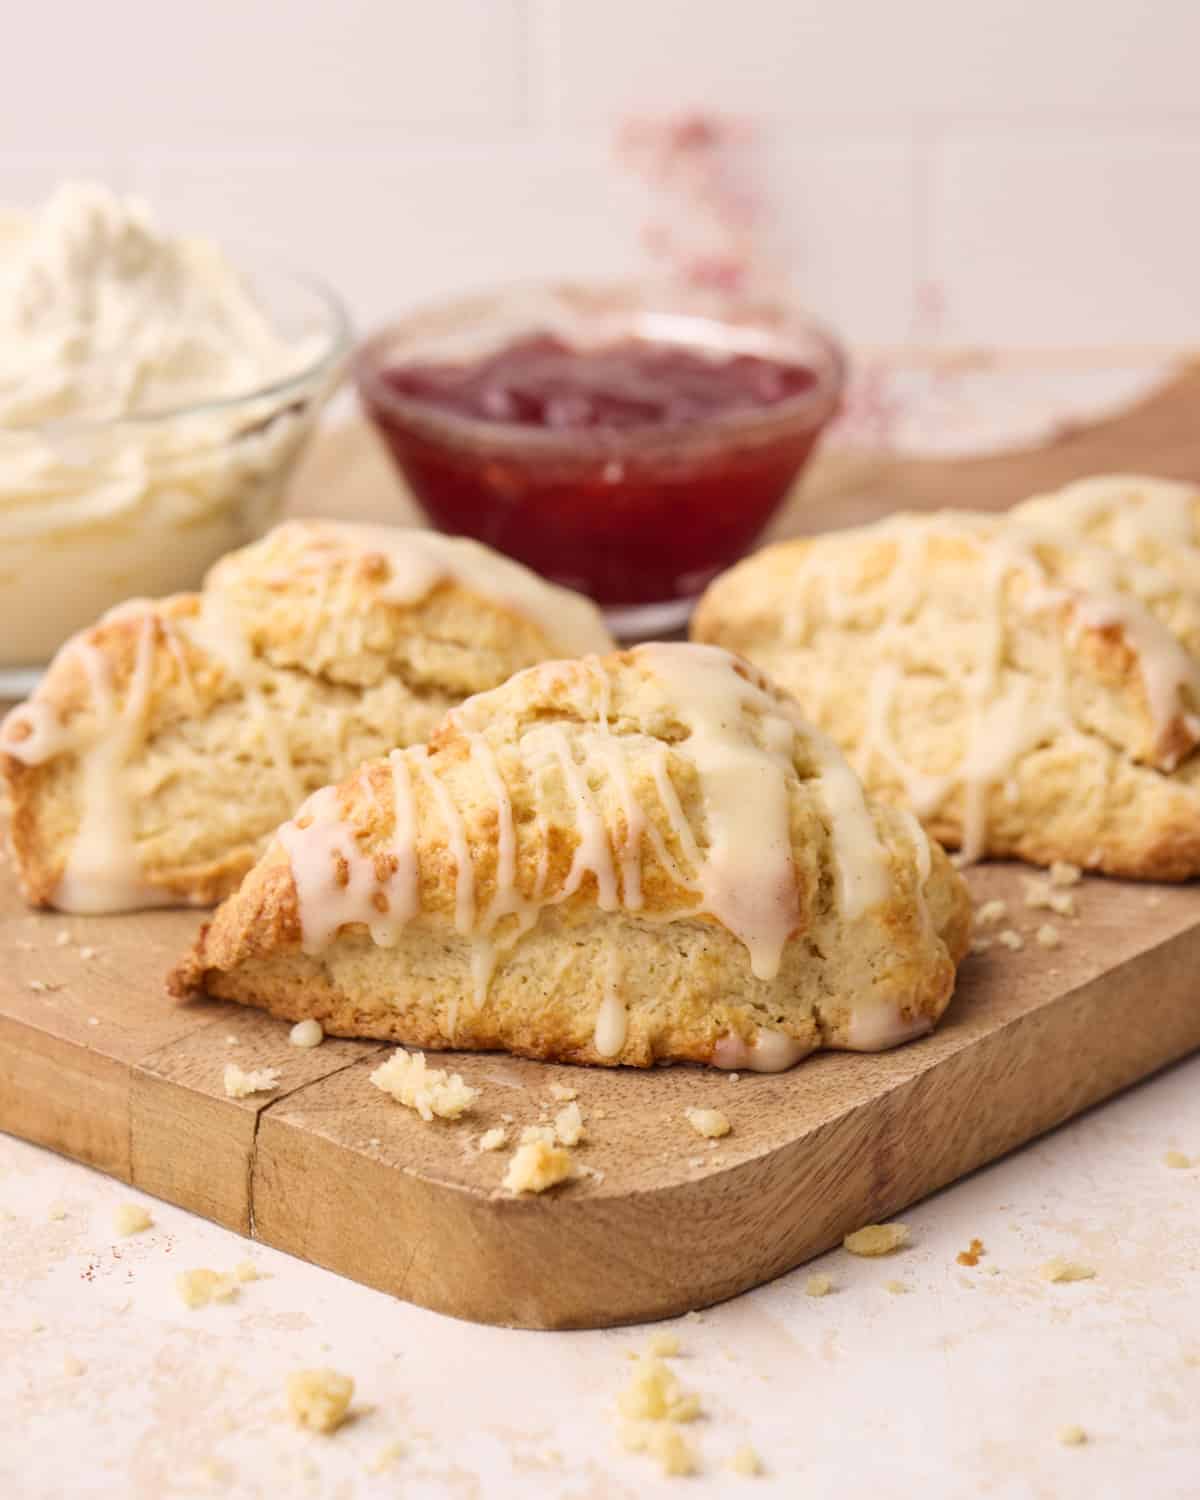
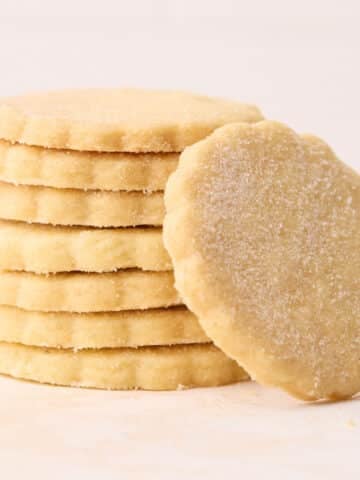
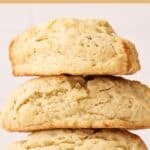
Scones - buttery, tender mounds of goodness that can be enjoyed plain or with a variety of mix-ins and toppings.
Growing up in Scotland, we were literally taught how to make scones at school (alongside shortbread!)
I've tested countless variations over the years of running my bakery to build on that experience and perfect the very best recipe, with the technique and key tips to help you bake soft, buttery scones every time.
Jump to:
Why Use THIS Scone Recipe
- Authentically Scottish - the way I was taught in school in Scotland!
- Uses a foolproof lamination method that creates the flakiest scones ever.
- Easy to master with step-by-step process pictures and pro tips.
What Are Scones?
Scones are a traditional Scottish treat, classically known for being a staple component of afternoon tea. Not quite a cake, biscuit, bread, or pastry - scones have a unique texture and flavor all of their own. The dough can be mixed with so many different add-ins to make the perfect breakfast, snack, or dessert.
Ingredients
These are the simple ingredients for a master scone recipe. You can add any kind of mix-ins you like to customize them!
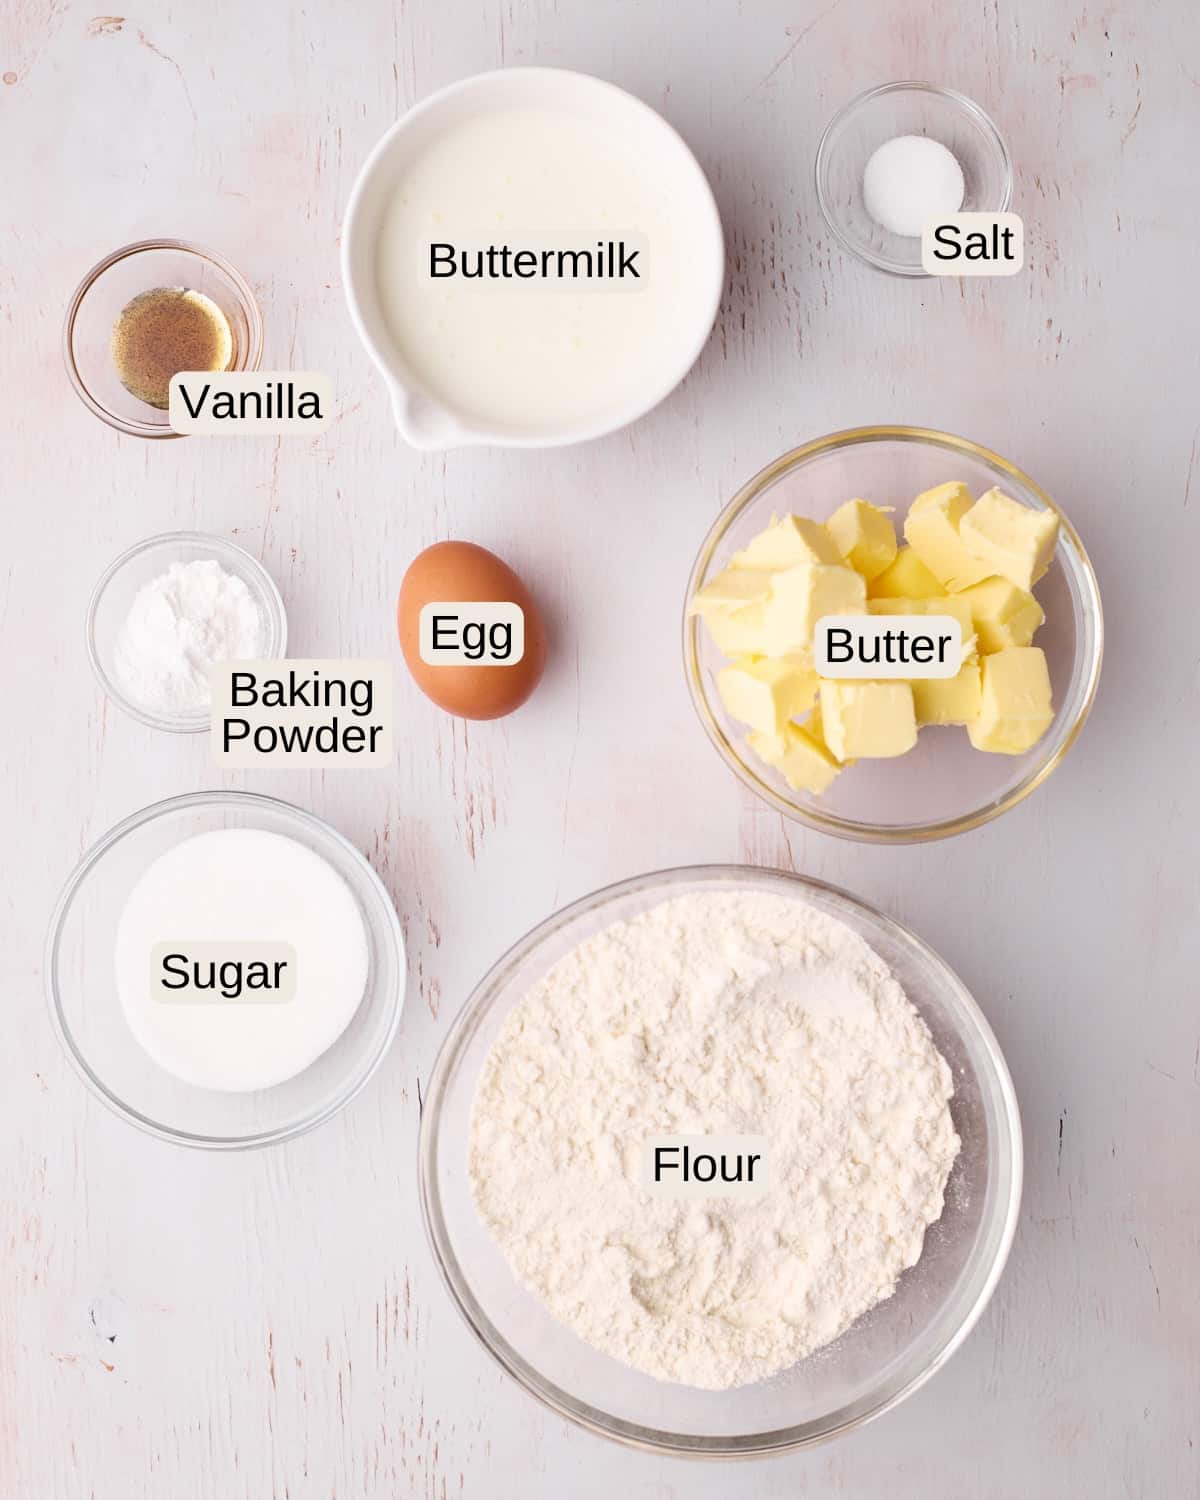
- Flour - All-purpose flour will give the scones a sturdy structure.
- Sugar - White granulated sugar will bring a subtle sweetness.
- Butter - I like to use unsalted butter to control the salt content in the dough - most importantly, the butter must be cold. The cold butter won't melt as quickly in the oven, meaning the steam pockets have time to form and create a beautifully flaky texture.
- Buttermilk - This will make the dough lovely and soft, and bring a delightful tang that deepens the flavor.
- Egg - Use a large egg, and free-range where possible. Make sure the egg is cold.
Make sure all refrigerated ingredients are cold.
See the recipe card for quantities and the full recipe.
Measuring Ingredients: I always recommend weighing your ingredients with a kitchen scale, rather than using measuring cups. It's very difficult to measure accurately with cups and this can mess up your bakes.
How to Make Scones
Check out the step-by-step photos to clearly see how the dough should look at each stage of the process.
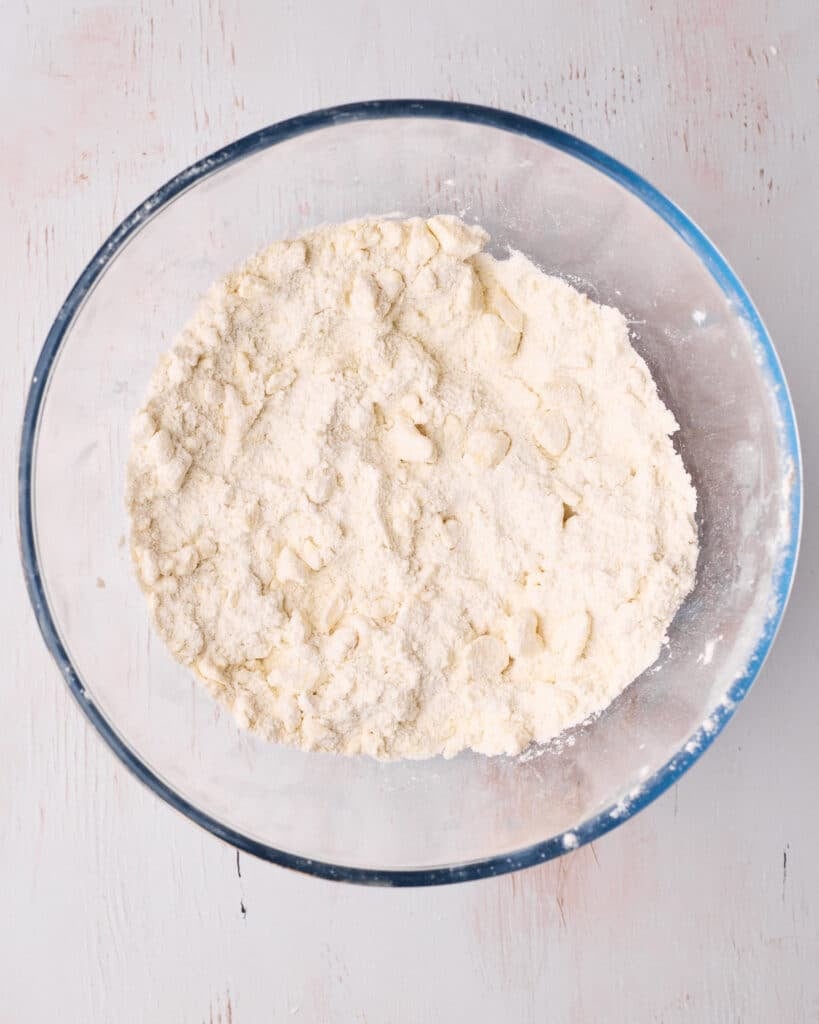
Cut Butter Into Flour
Place the flour, sugar, salt, and baking powder in a large bowl, and mix together until combined.
Add in the cold cubed butter, and incorporate it by rubbing it into the flour mixture with your hands until pea-sized lumps have formed, just like you would for a pie crust. You can alternatively use a food processor or a pastry cutter to do this, but using our hands is how I was taught at school!
Gently flatten some of the butter between your fingers to create thin flakes throughout the mixture.
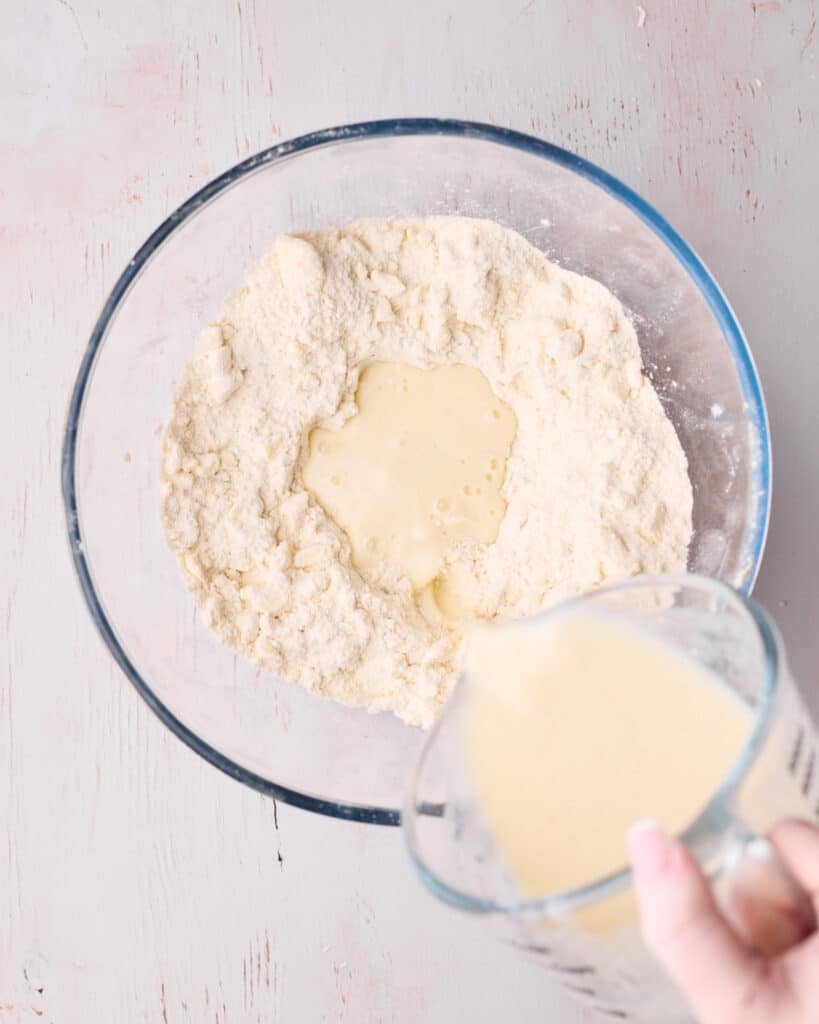
Wet Ingredients
In a separate bowl, whisk the egg, buttermilk, and vanilla together with a fork. Once fully combined, pour the wet ingredients into the flour mixture.
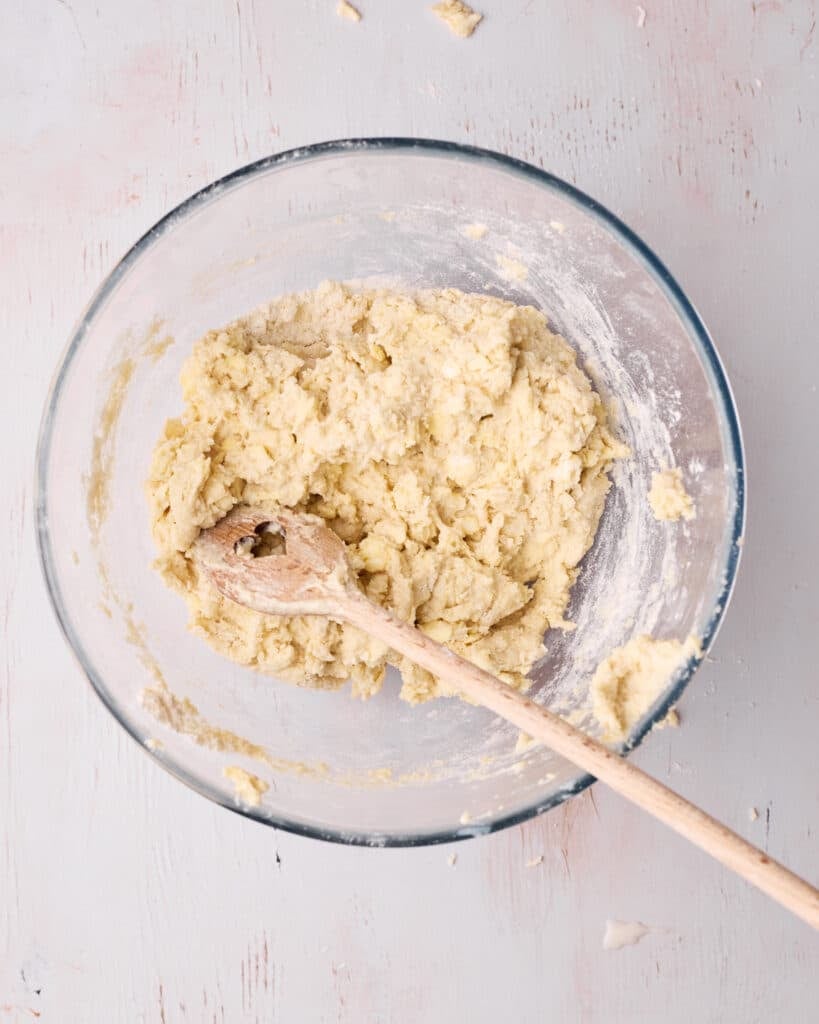
Mix
Mix the wet ingredients in just until you have a shaggy dough.
If you are adding any extra mix-ins (like chocolate chips or fruit) to your scones, add them now and mix until evenly distributed throughout the dough.
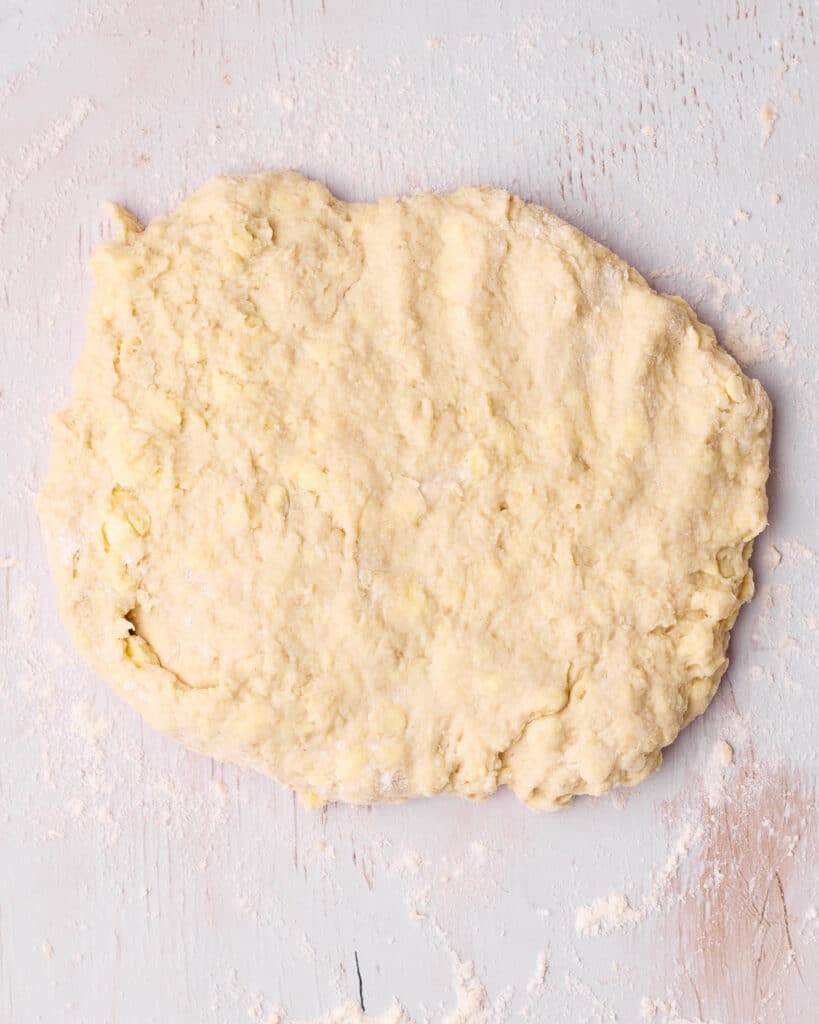
Make Scone Dough
Tip the mixture onto a floured work surface and use your hands to gently bring it together into one piece, then flatten it out into a rough rectangle shape.
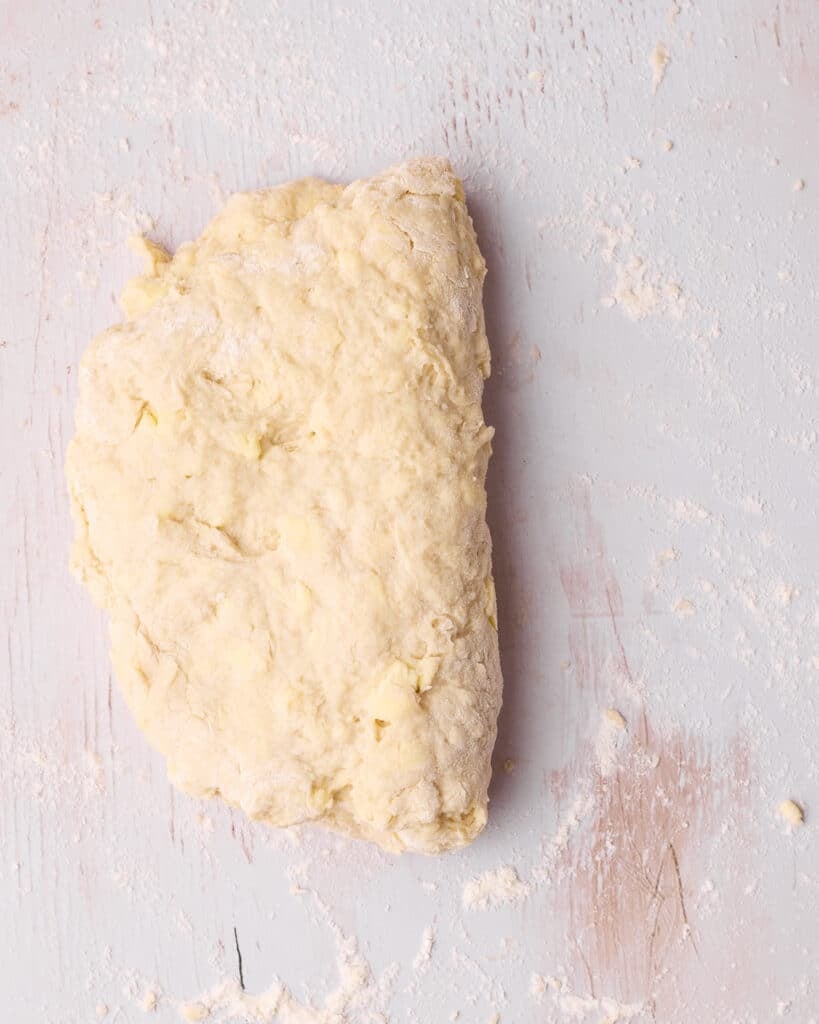
Laminate Dough
Fold the scone dough in half, and press down. Fold it in half again, and again, repeating this process 3 or 4 times to laminate the dough.
Be careful not to overwork the dough, as this can develop too much gluten and make the scones tough.
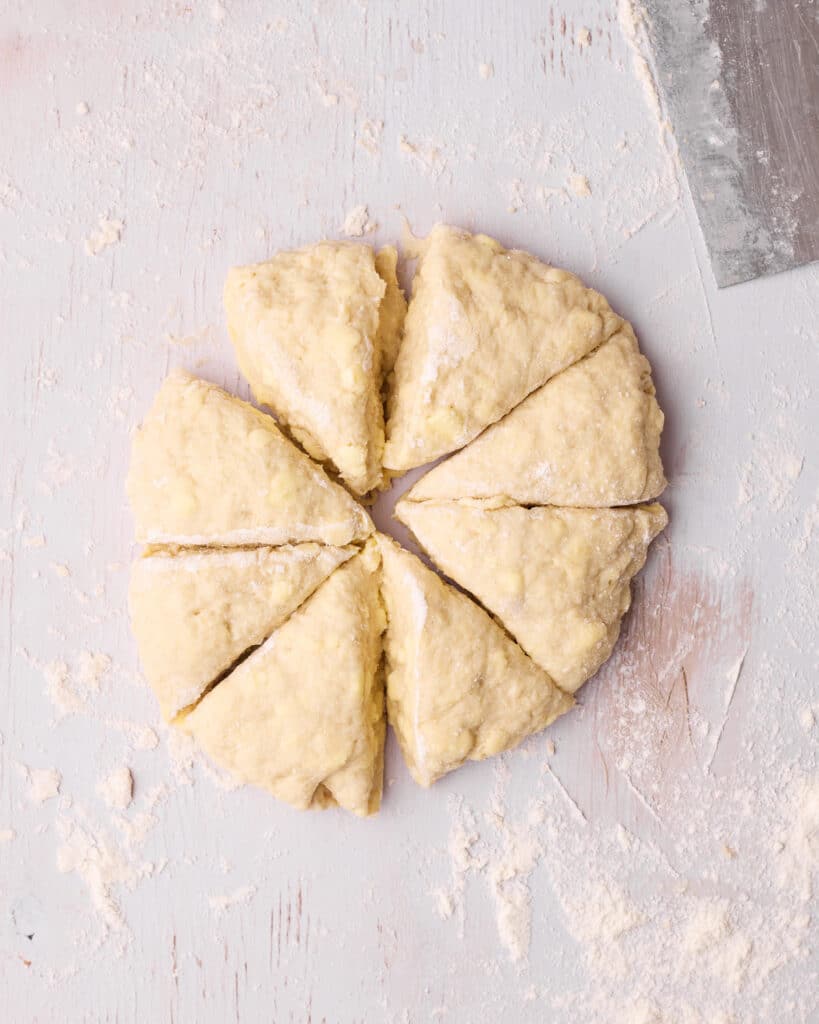
Shape the Scones
Using your hands, shape the dough into one big circle, measuring roughly 8 inches in diameter.
Cut the dough into 8 slices with a bench scraper or a knife, and lay the wedges on a baking sheet lined with parchment paper.
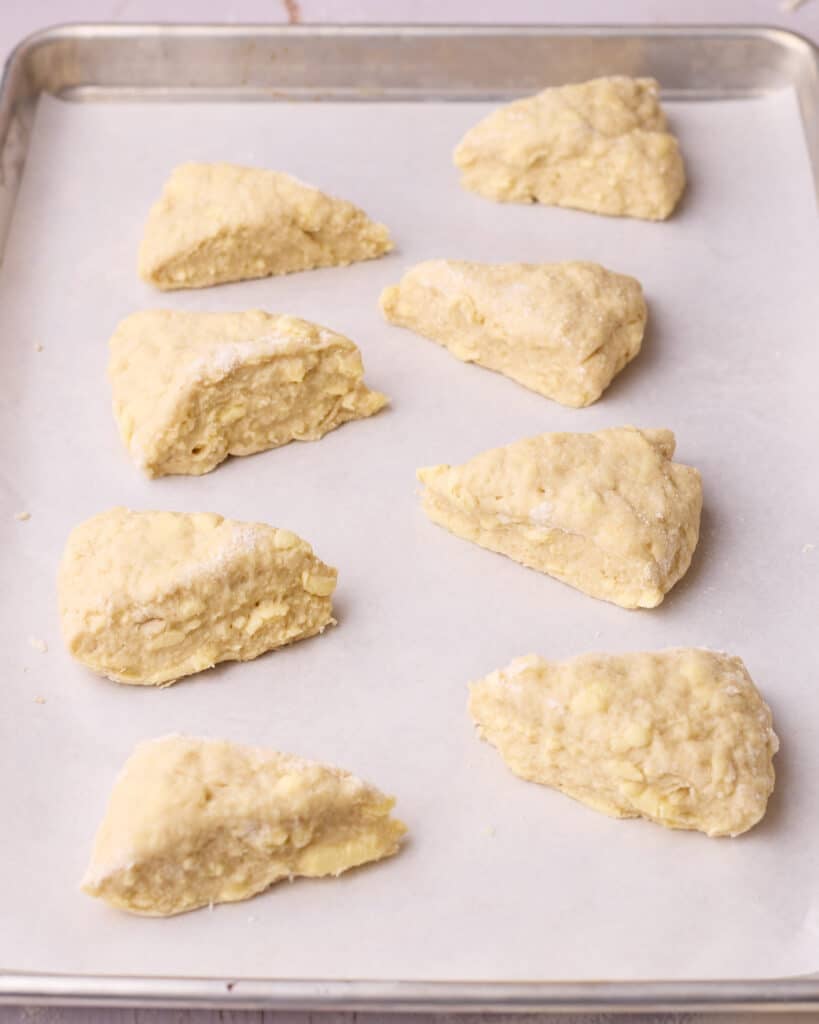
Chill
Put the scones in the fridge to chill for 30 minutes to let the butter become nice and cold before baking.
In the meantime, preheat the oven to 400°F / 200°C (180° fan-assisted).
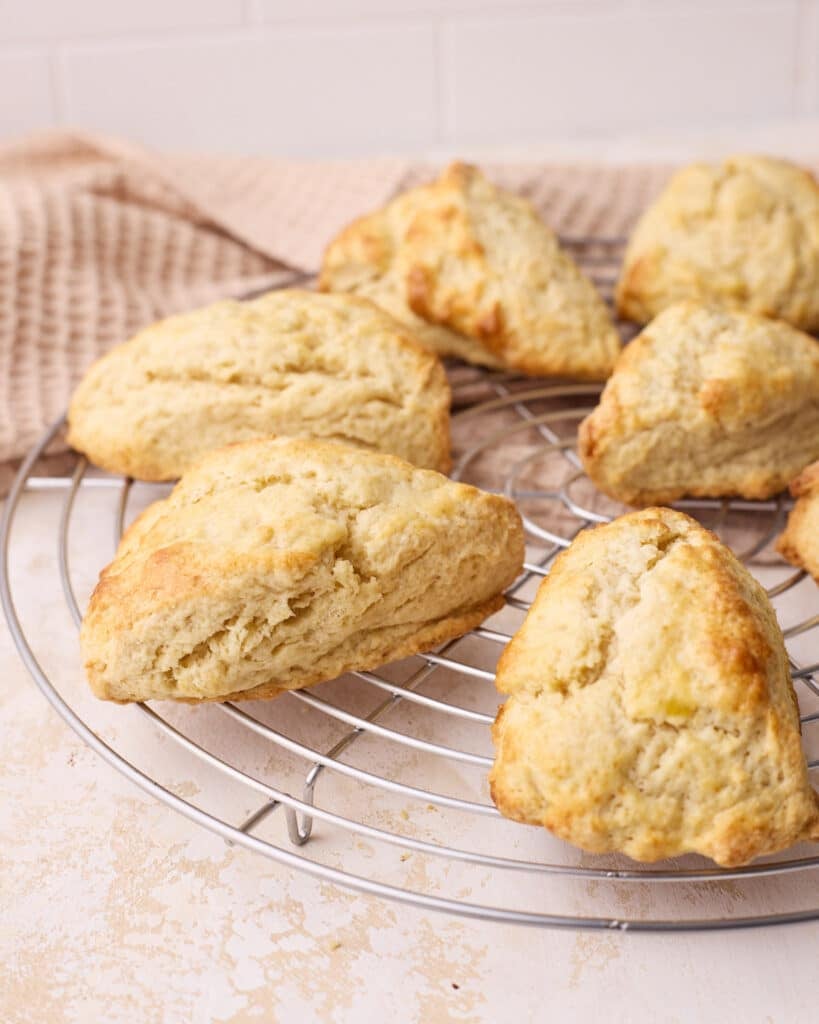
Bake Scones
Just before baking, brush the top of the scones with egg wash, milk, or leftover buttermilk, avoiding any drips going down the sides. Optionally, you can also sprinkle the tops with some coarse sugar.
Bake for 15-18 minutes, or until they are nicely risen and a gorgeous golden brown color.
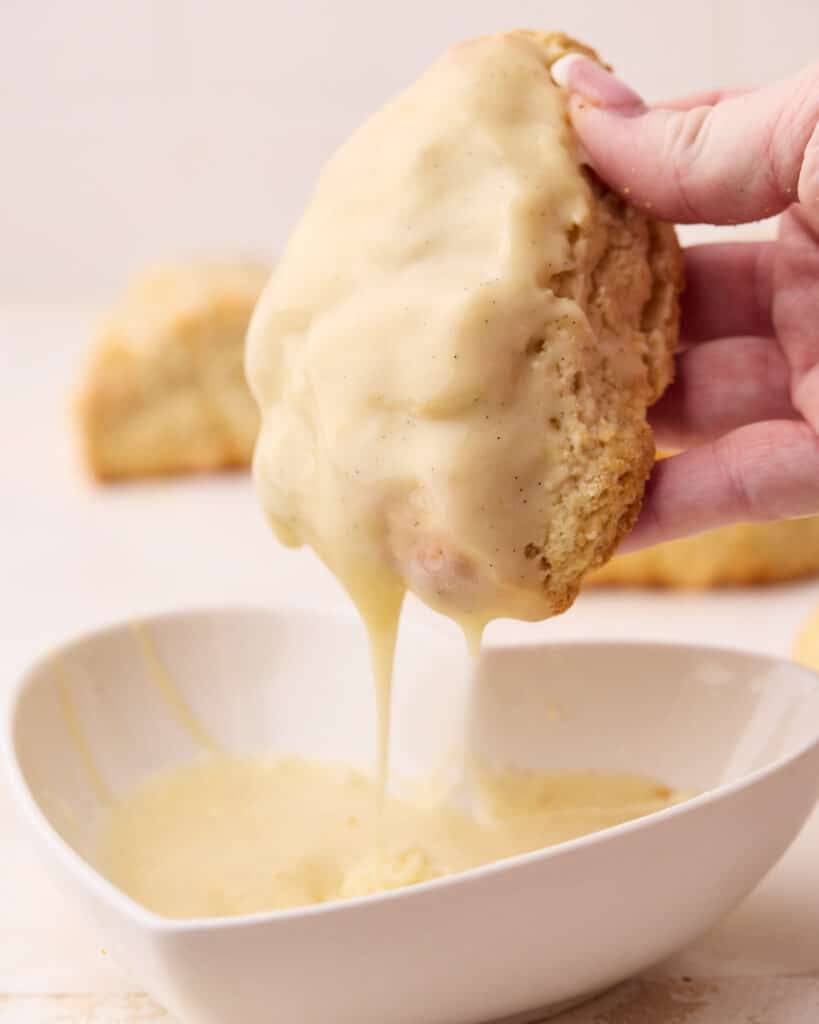
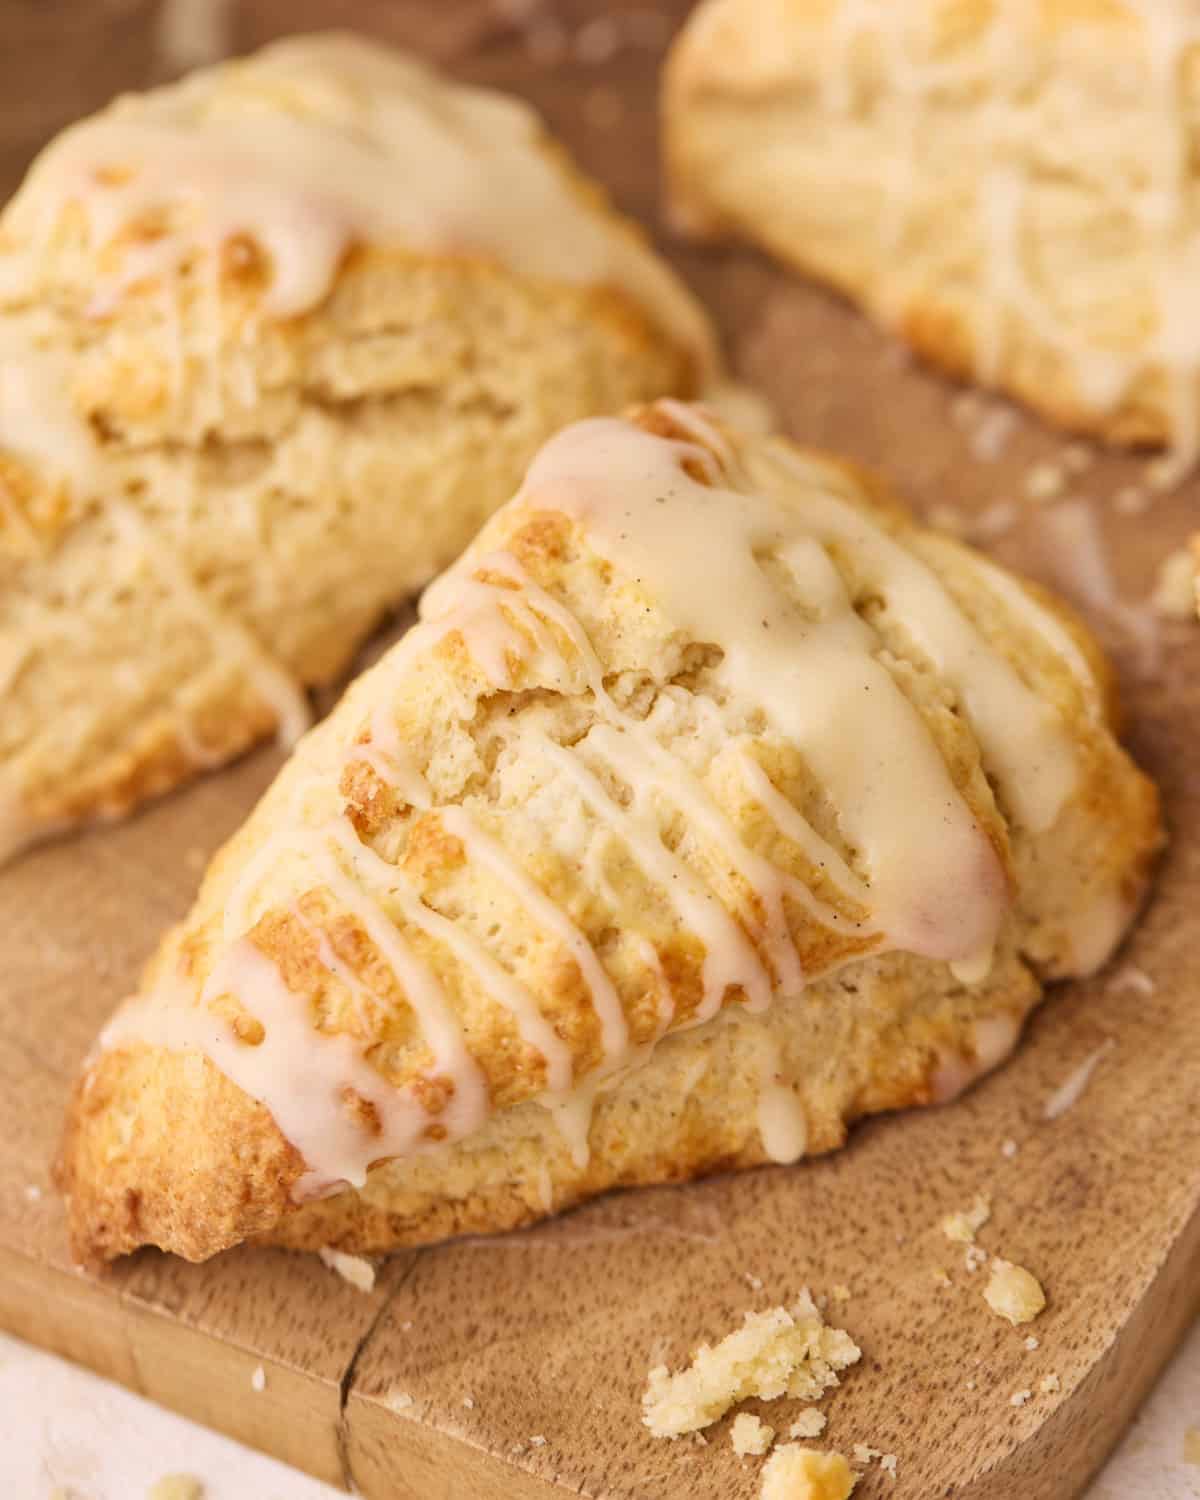
Glaze
For an optional sweet topping, dip or drizzle your scones in a delicious glaze. Try my Cream Cheese Glaze or my Vanilla Glaze.
How to Make English Scones (Round Scones)
If you'd like to make classic round scones, like you'd have with afternoon tea, roll the dough out to about 1 - 1 ½-inch thickness, instead of forming it into a circle. Use a metal round cookie cutter, about 2 ½ - 3 inches in diameter, to cut straight down into the dough and make little rounds. Then continue with the recipe as normal.
Tip: Don't twist the cutter like you would with cookies, just press directly down into the dough - this will help them to rise tall and straight in the oven.
Disclaimer - the title here says 'English scones' because that's what this version is commonly known as, but I feel the need to point out again, these babies are Scottish!
Scone Recipe Tips
- Keep everything cold - Cold ingredients, particularly the butter, are essential. As the scones bake, the cold butter creates steam pockets that form those lovely flaky layers. If it is too warm, the butter melts too quickly and leaks out, leaving the scones flat and dry. Some recipes recommend using grated frozen butter. You can definitely do this if you prefer, but I find that having slightly larger chunks of butter helps to create those flaky layers.
- Laminate the dough - Folding and pressing down the dough several times is a process called 'laminating', commonly used in puff pastry and croissant recipes. Lamination creates lots of lovely layers in the dough, making the scones extra flaky.
- Don't overwork the dough - I know it's satisfying, but the more the dough is handled, the more gluten will develop, leading to tough and flat scones instead of tall and tender. Mix just until the dough comes together and fold it only a few times when laminating.
- Chill before baking - Chilling the shaped dough before baking has two benefits. Firstly, it makes the butter as cold as possible when going into the oven, giving the scones nice flaky layers. Secondly, it helps them to hold their shape and rise up tall instead of flattening out.
- Brush with egg wash - Adding egg wash to the top gives a beautiful golden finish. Egg wash is typically an egg lightly beaten with a splash of milk, but you can also use leftover buttermilk or regular milk if that's what you have to hand. Make sure to brush only the tops of the scones, not the sides, as this will help them to rise tall.
- Bake in a hot oven - A high temperature allows the scones to rise quickly before they are set. If the oven is not hot enough, they may lack height, or the butter could melt before the steam pockets are made.
Flavor Variations and Mix-in Ideas
Buttermilk scones are wonderfully simple, so there are no limits to making them your own! Try these flavor variations:
- Blueberry Scones - or even lemon blueberry scones.
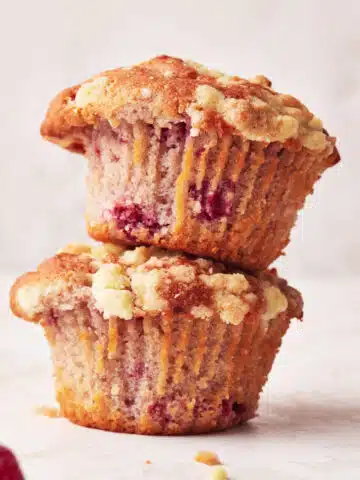
- Raspberry Scones
- Dried Fruit- such as raisins, cranberries and/or sultanas.
- Chocolate Chip Scones (my personal favorite).
- Nuts - Pecans and walnuts are both delicious, especially mixed with fruit.
- Glazed Scones - Dip or drizzle your scones in a delicious glaze for extra sweetness. Try my Vanilla Glaze or Cream Cheese Glaze.
- Mini Scones - Cut smaller rounds for bite-sized scones, perfect for sharing and afternoon tea.
What to Serve With Scones
Here are some of the best ways to serve this classic treat. P.S. Don't forget the cup of tea!
- Butter - Scones are so tasty as they are, especially if they're filled with your favorite add-ins, so a spread of butter is sometimes all you need. This is extra tasty if they have been warmed in the oven slightly!
- Glaze - A sweet glaze can completely transform your scones. Try my cream cheese glaze or vanilla glaze.
- Jam and Cream - In their traditional form, scones are served with strawberry or raspberry jam and clotted cream - in that order! This is a perfect combination that is a classic for a reason. You could also try homemade whipped cream.
- Strawberry Shortcake - Try replacing the biscuits in my Strawberry Shortcake recipe with this delicious scone recipe instead for a sweet twist on the classic.
- Afternoon Tea - Of course, we all know scones go wonderfully alongside some fresh sandwiches, mini sweet and savory treats, and copious amounts of tea!
Storage
Store your delicious scones at room temperature in an airtight container, and eat within 1-2 days to enjoy them at their freshest. If enjoying the next day, try rewarming them in the oven for 5 minutes to bring back that gorgeous texture.
For longer storage, freeze the unbaked scones on the day of making for up to 3 months. When ready to enjoy, bake straight from frozen and just add a few minutes to the baking time.
FAQ
If you have a question about this recipe that isn't answered here, feel free to write it in the comment section, and I will get back to you as soon as I can.
Yes, you can freeze scones! They are ideal for freezing due to their low moisture content, which means the dough won't really change when it thaws and defrosts. They're a great treat to bake on a quiet day, and serve on a busy day! It's best to freeze unbaked scones - flash freeze them on the baking tray and then transfer to a freezer bag and freeze for 2-3 months. When ready to enjoy, bake straight from frozen and just add a few minutes onto the baking time.
It is best to eat scones when they are fresh, within 1-2 days of being baked. Due to the lack of moisture and the high fat to flour ratio, exposure to air dries them out pretty quickly. To avoid this from happening, store your scones in an airtight container at room temperature. They can also be frozen for up to 3 months. If they are a day or two old, try warming them for 5 minutes in the oven to bring the texture back to life.
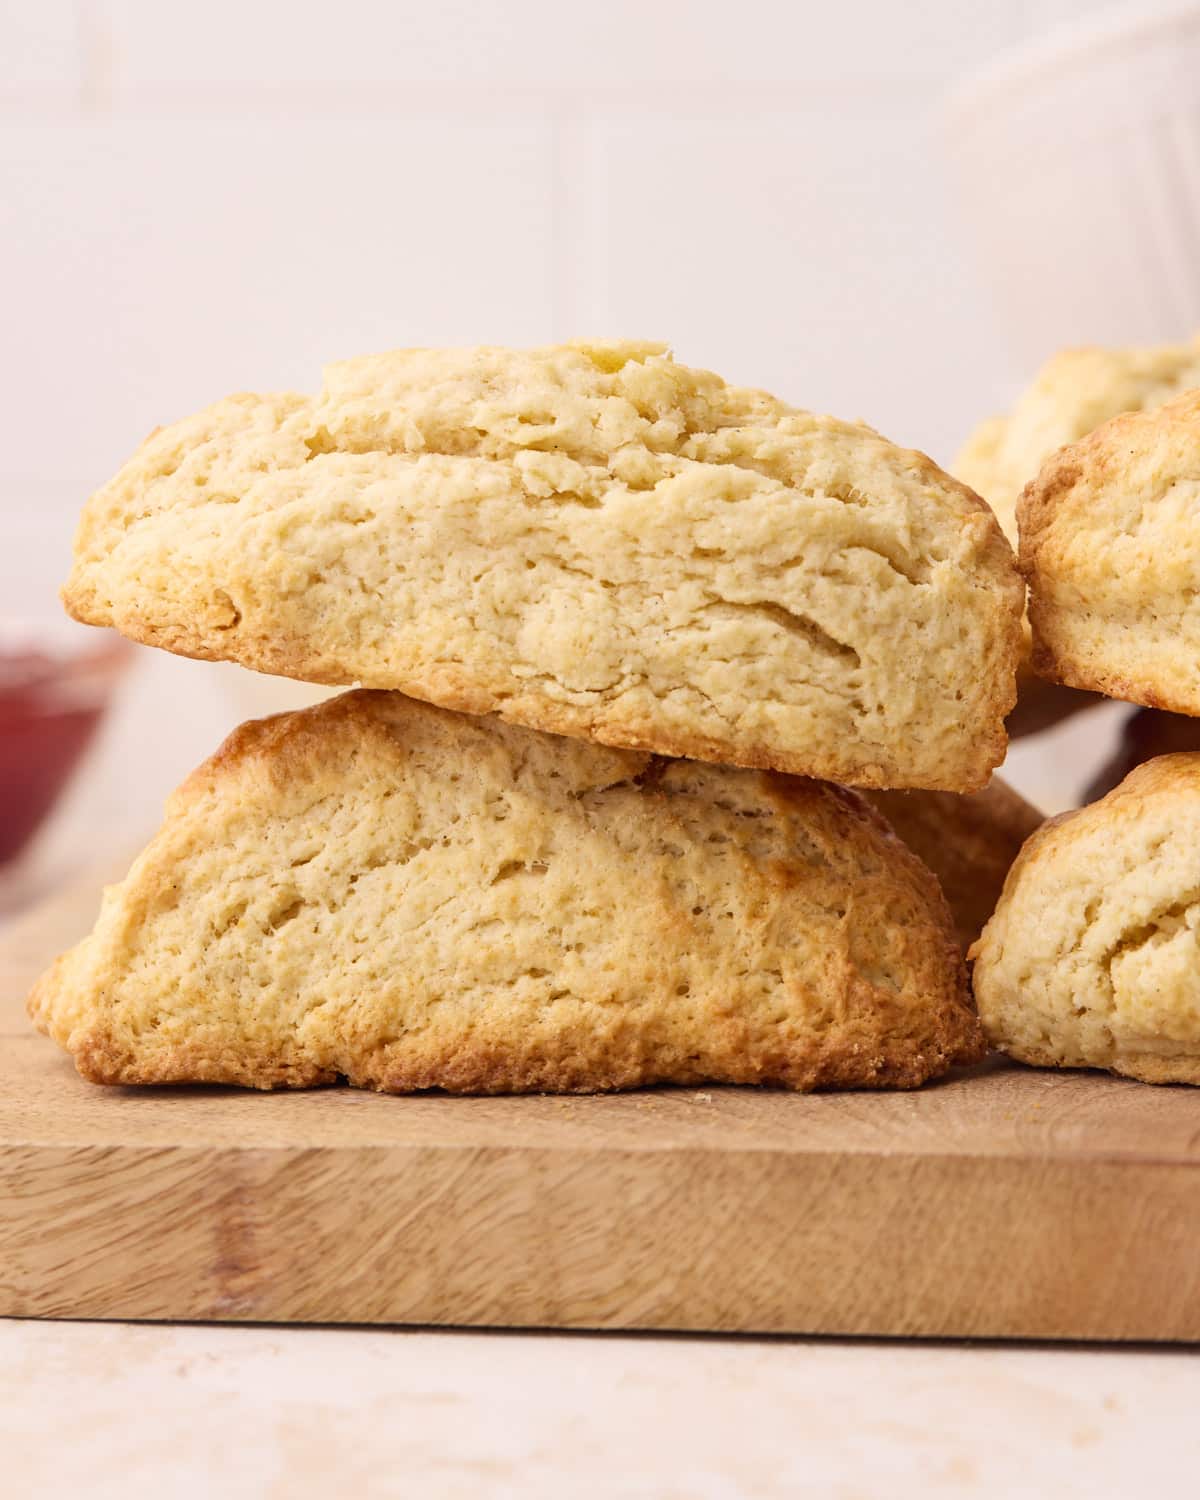
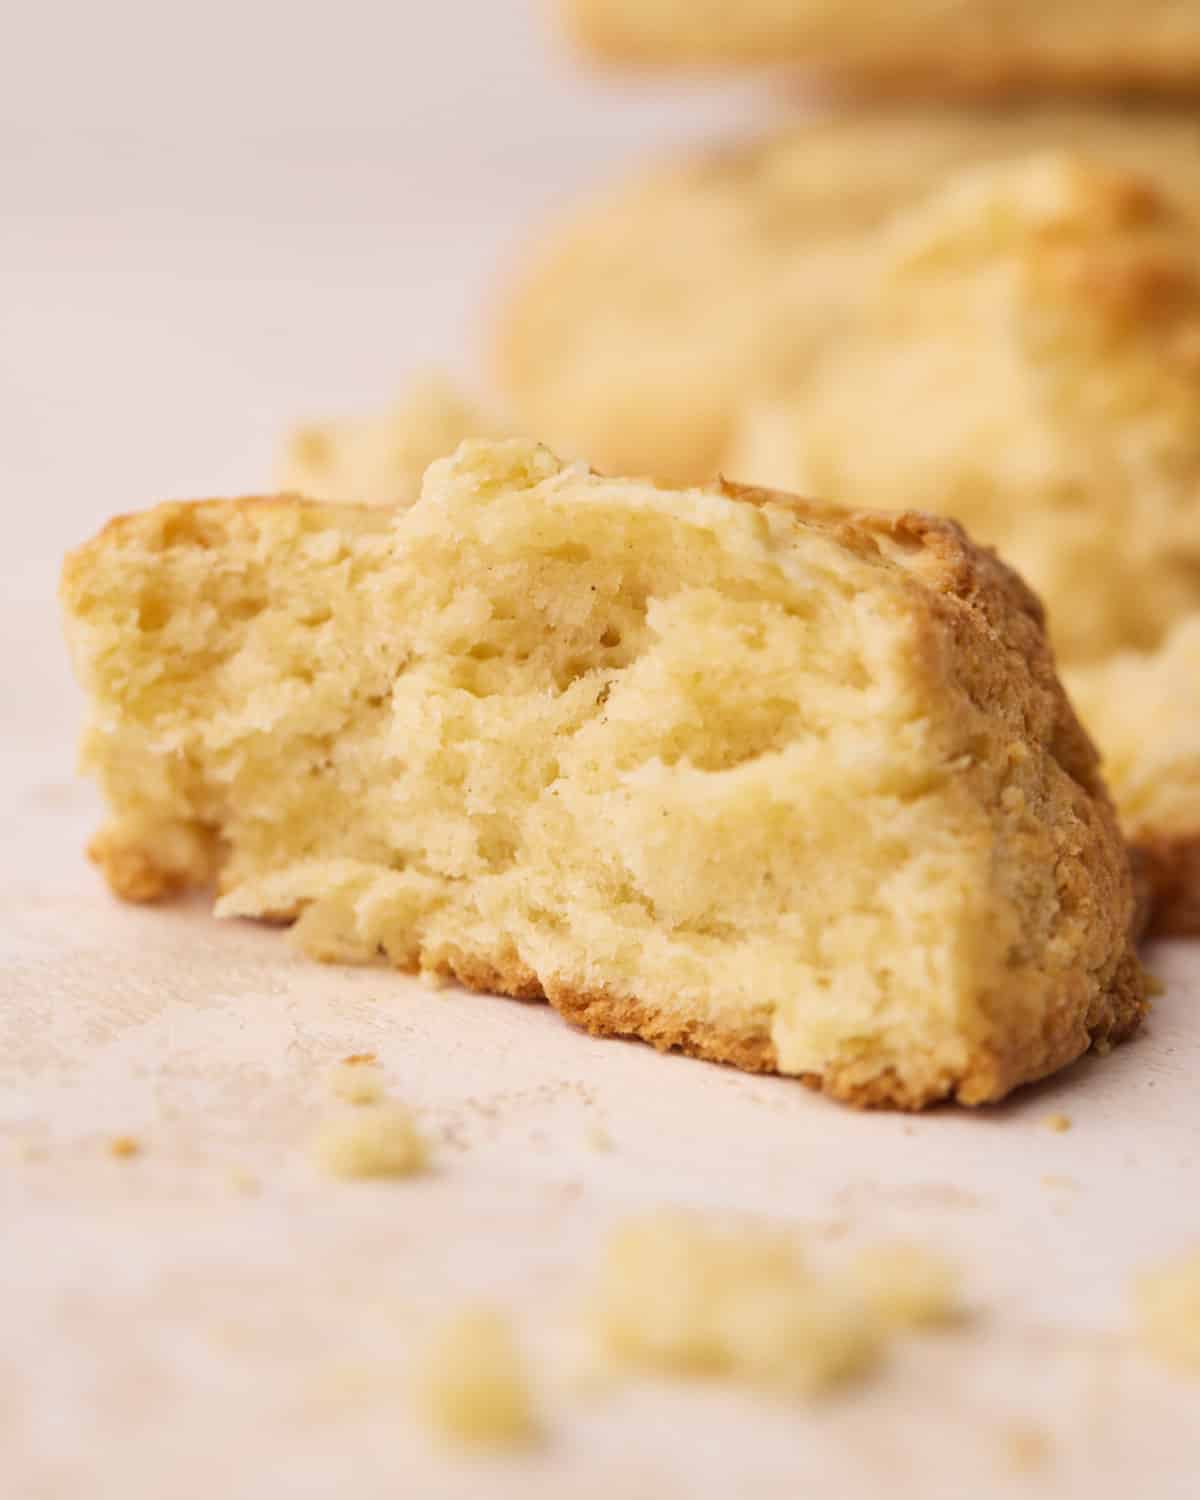
When made properly, no, scones should not be dry. Whilst they are slightly crumbly and bread-like, scones should have a buttery, moist, melt-in-your-mouth texture. If your scones are dry, it could mean that the dough has been overworked, making the gluten develop too much, or the they have been overbaked. It could also be that the butter was not cold enough and leaked out during baking.
There are a few different reasons why scones have such a soft and fluffy texture. Firstly, using cold butter creates little steam pockets in the dough as they are baking, giving them a light and airy texture. Secondly, using a light hand to mix and laminate the dough keeps it nice and tender. Overworking the dough can develop gluten, resulting in a tough texture.
Whilst scones and biscuits are made with similar ingredients, they are quite different. Biscuits are flakier and less sweet, usually served alongside a savory dish, or occasionally a dessert like Strawberry Shortcake. Unlike scones, biscuits do not contain eggs and tend to contain more liquid. Scones, on the other hand, are sweet, dense, and crumbly bakes, mostly enjoyed as a sweet treat with a hot beverage. Both are delicious in their own way, but suited to very different occasions!
Traditional scones are round and are typically served with butter, jam, and clotted cream. American scones are often cut into wedges, and the dough is a little sweeter. They often have all kinds of mix-ins and may be topped with a sweet glaze. This scone recipe includes instructions on how to make both versions.
More Easy Desserts
Looking for some more simple bakes to make at home? Try these easy dessert recipes:

Recipe

Buttermilk Scones Recipe
Ingredients
- 312 g (2½ cups) All-purpose Flour (plain flour)
- 66 g (⅓ cup) Granulated Sugar (caster sugar in the UK)
- ½ teaspoon Salt
- 1 tablespoon Baking Powder
- 140 g (1¼ sticks) Unsalted Butter (cold)
- 120 ml (½ cup) Buttermilk (cold)
- 1 Large Egg (cold)
- 1 teaspoon Vanilla Extract
Equipment
- Bench Scraper or sharp knife
Instructions
- Sift the flour, sugar, salt, and baking powder into a large bowl, and mix together until combined.312 g (2½ cups) All-purpose Flour, 66 g (⅓ cup) Granulated Sugar, ½ teaspoon Salt, 1 tablespoon Baking Powder
- Cut the butter into the flour mixture - you can either do this by rubbing it into the flour between your fingers, or by using a food processor or pastry cutter. Keep going until the butter is in pea-sized lumps.140 g (1¼ sticks) Unsalted Butter
- Use your fingers to gently flatten the butter chunks into flat butter flakes.
- In a separate bowl, whisk the buttermilk, egg, and vanilla together with a fork.120 ml (½ cup) Buttermilk, 1 Large Egg, 1 teaspoon Vanilla Extract
- Pour the wet ingredients into the dry ingredients and stir together just until it starts to come together into a shaggy mixture.
- Tip the mixture out onto a floured work surface and use your hands to bring it together into one piece.
- Flatten the dough out into a rough rectangle shape, then fold it in half one way and flatten down. Fold it in half the opposite way and flatten again. Repeat 3 or 4 times to carefully laminate the dough for extra flaky layers in the scones.
- Shape the dough into a circle, roughly 8-inches in diameter.
- Use a bench scraper or sharp knife to cut the dough circle into 8 slices, like you're slicing a cake. Transfer the wedges to a baking sheet lined with parchment paper, with plenty of space between them.
- Chill the scones in the fridge for 30 minutes to allow the butter to firm up again. Meanwhile, preheat the oven to 400°F / 200°C (180° fan-assisted).
- Right before baking, brush the top of the scones with egg wash, milk, or leftover buttermilk to help give them a golden, shiny top. Don't brush the sides of the scones. If you like, you can also sprinkle the top of the scones with some coarse sugar.
- Bake for 15-18 minutes until they are risen and golden brown on top.


Nancy
These look wonderful. Before I bake them, I wondered if I could use granulated maple sugar instead of the regular granulated sugar. Thanks!
Linda Ebel
Can I double this recipe or is it better to make it twice?
Ina Spradling
How do I flavor these without changing the texture.
Savannah
Do you need to use buttermilk? Can you use another milk?
Jules Grasekamp
Hi Savannah,
I do highly recommend buttermilk for these scones as it really adds to the soft texture and flavor of them. You can make your own buttermilk substitute by adding a splash of vinegar or lemon juice to whole milk and letting it sit for 5 minutes. This is good in a pinch, though it won't have quite the same results as the real deal.
Hope this helps!
Jules
Janet
I would leave in longer than 12 minutes next time
Janet
quite delicious though
Jules Grasekamp
Hi Janet,
So glad you liked the scones!
The bake time is 15-18 minutes so you definitely want to bake longer than 12 minutes.
I also always advise looking for the visual cues that things are baked rather than relying on a specific bake time.
Hope this helps,
Jules
Sandra Bone
Hi Jules…love your site and recipes! My daughter is needing to make a large batch of scones …around 30. Is it better to make multiple recipes or can you triple the recipe?
Thanks,
Sandra Bone
Wendy
Laminate= ???
Jules Grasekamp
Hi Wendy,
My apologies, I could have explained this better! Laminating is a process taken from making puff pastry (like croissants) where you fold the dough multiple times to help create layers. We do this very briefly with the scones to help make some flaky layers in the dough.
I will add this information into the post to make it more clear.
Thank you,
Jules
Chris Radwanski
I used to think I didn't like scones, but after eating these, I can't get enough! The glaze paired so well, and I found myself almost doing a whole dunk to coat them. Deeeeeelicious