
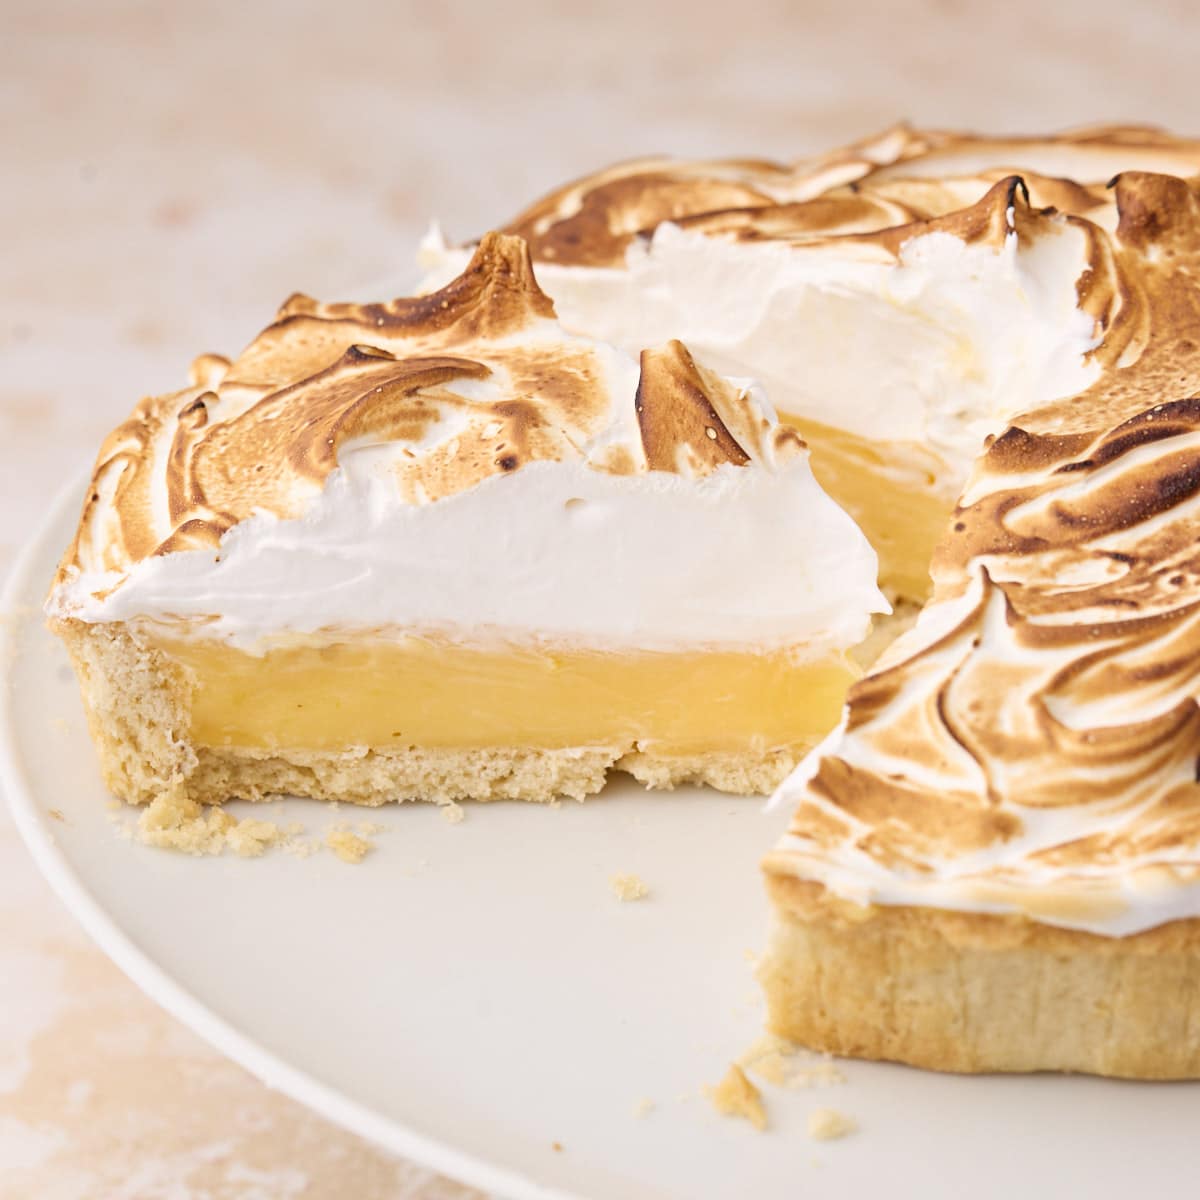
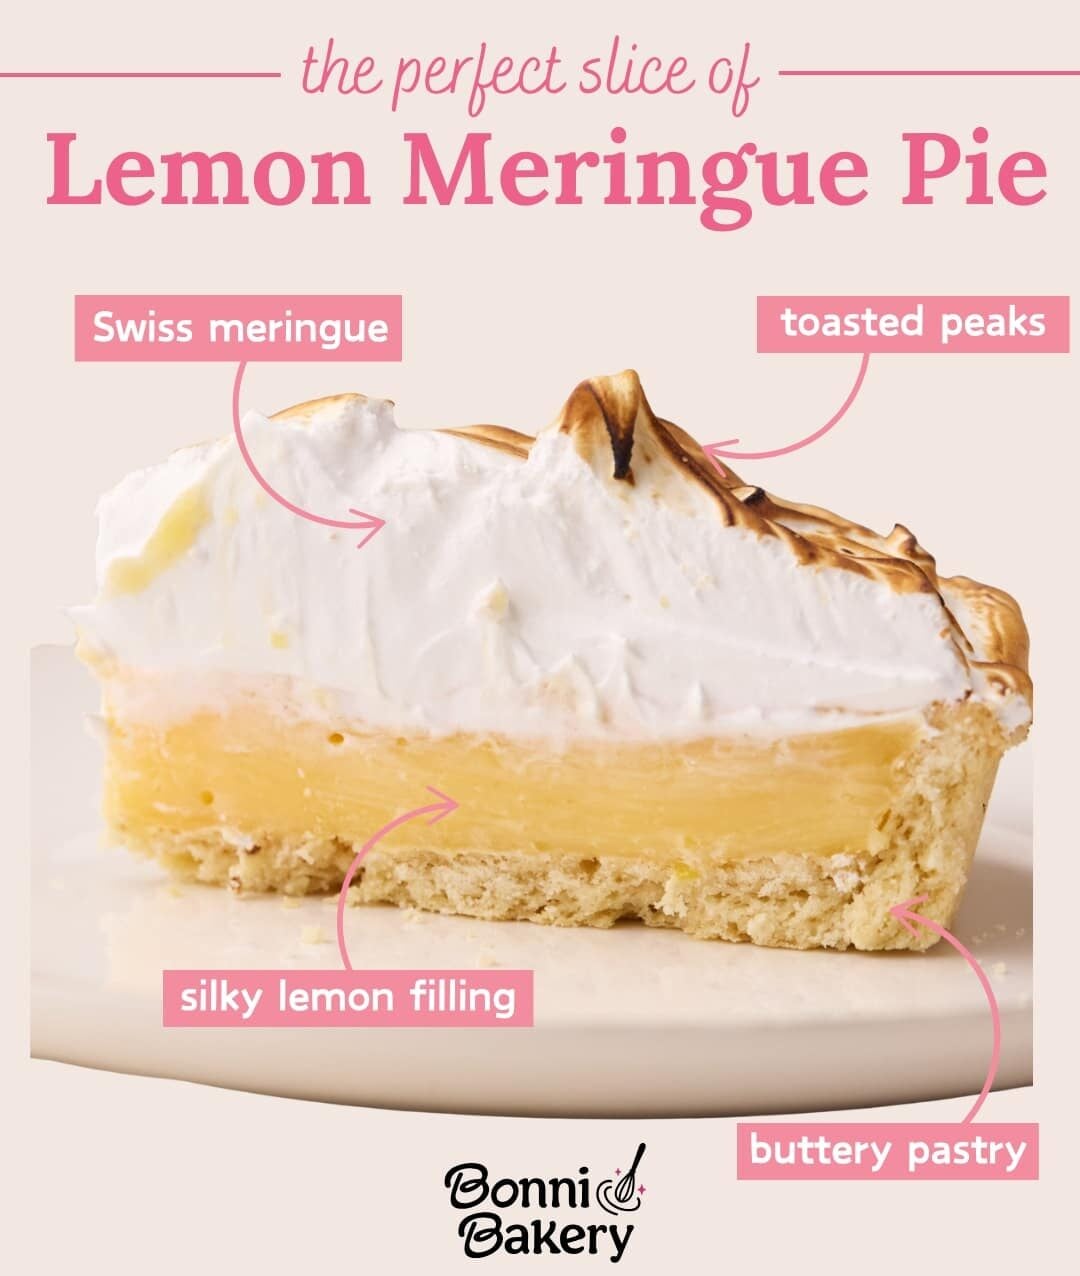
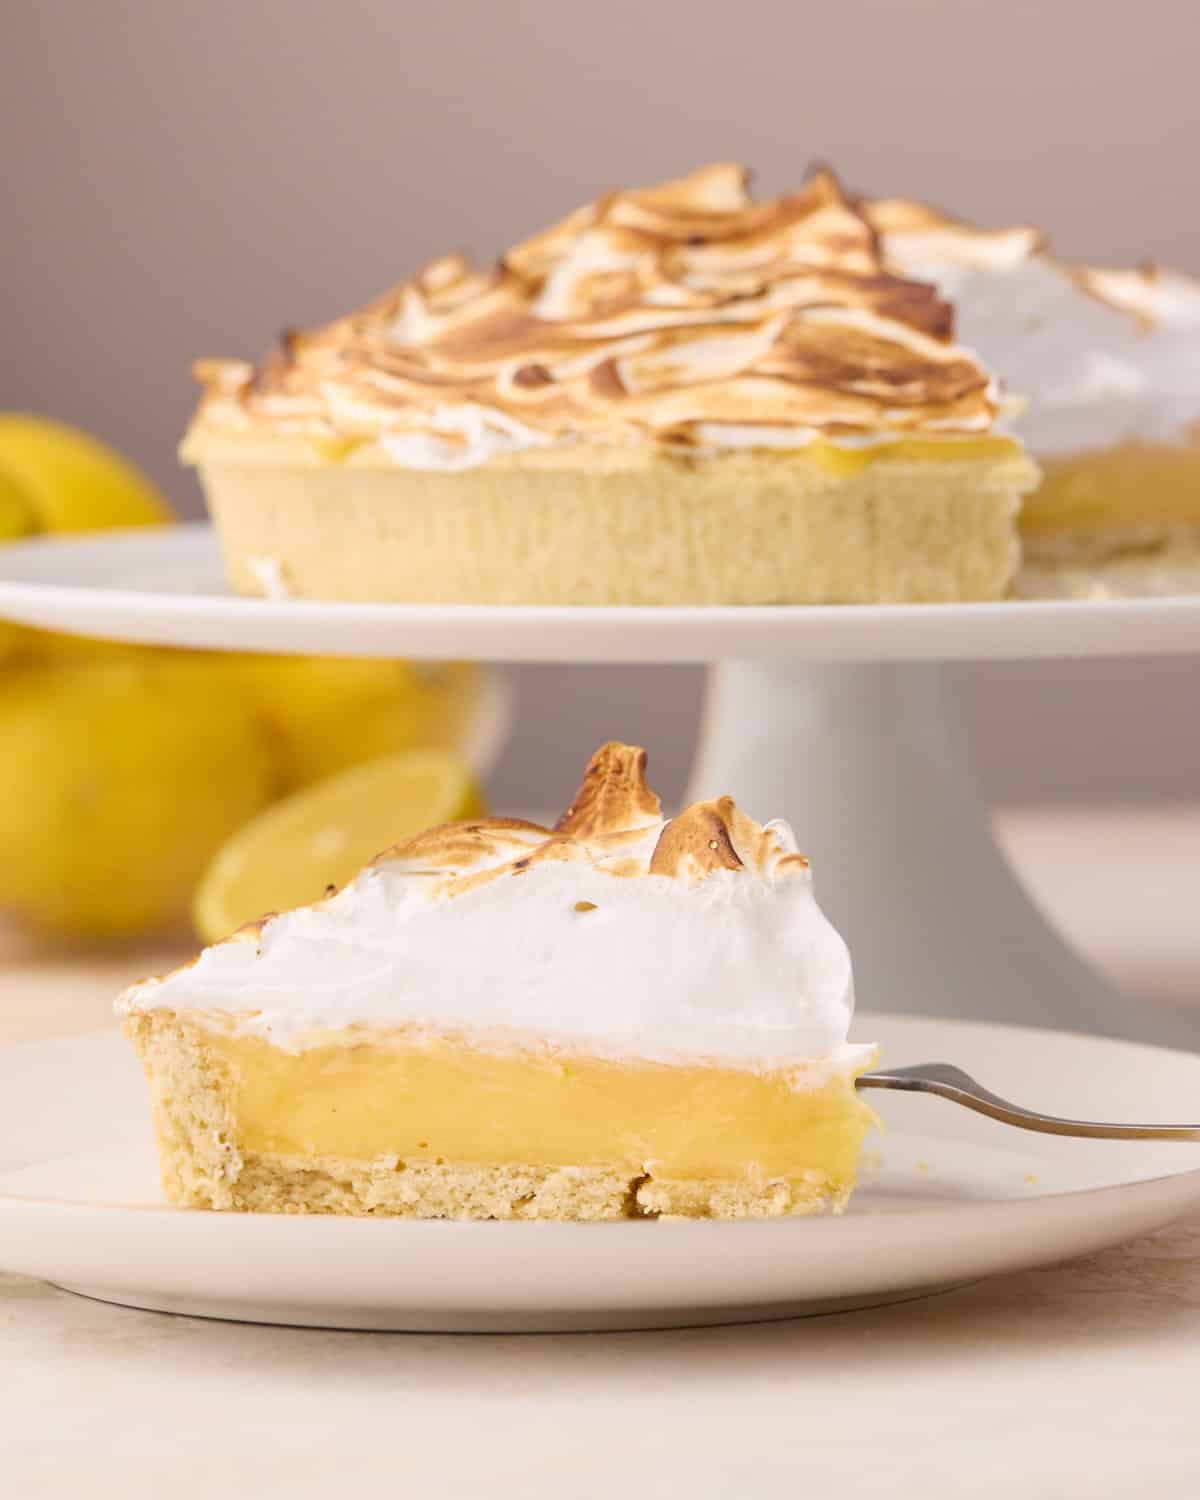
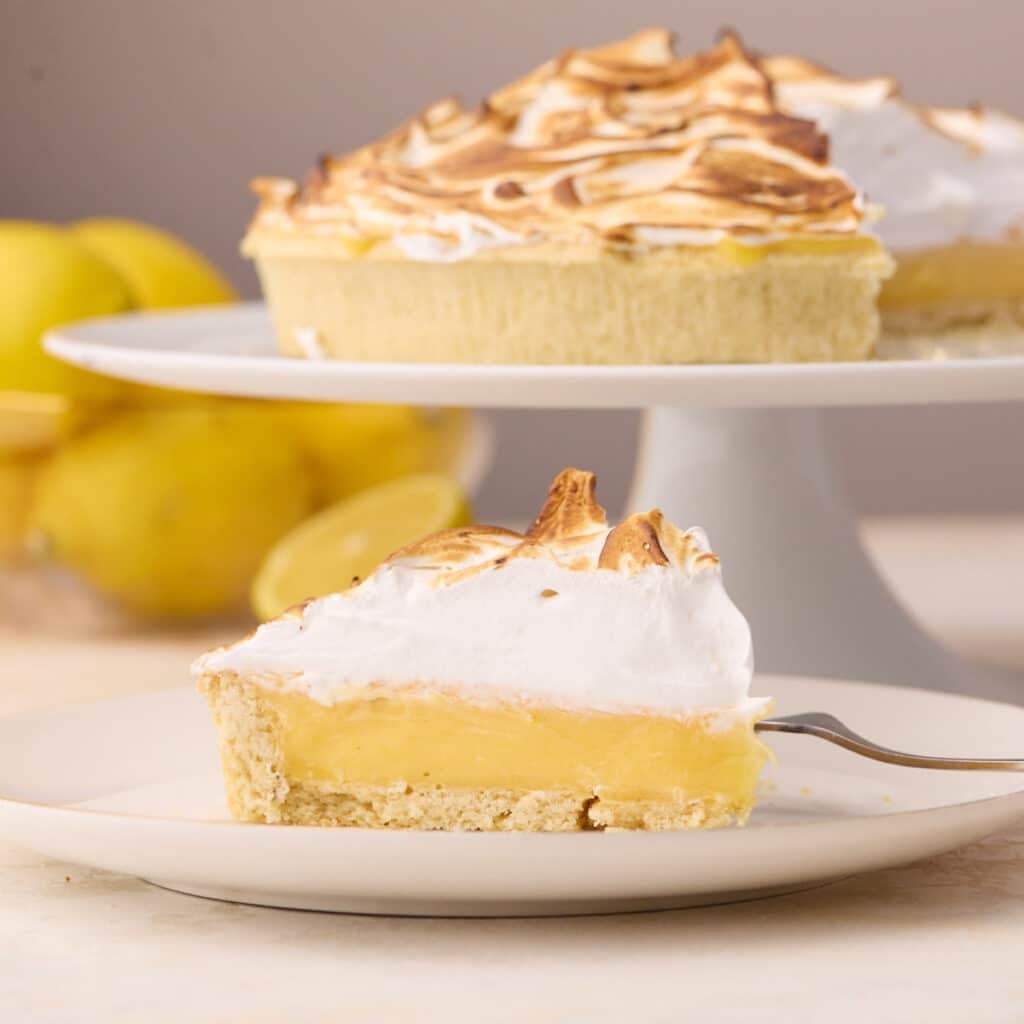
This lemon meringue pie has a silky, tangy filling that slices cleanly, topped with toasted Swiss meringue that's light, marshmallowy, and not overly sweet.
Lemon Meringue Pie Recipe Snapshot
Why it's different: The filling is silky like a lemon curd, but firm enough to slice neatly.
Meringue style: Toasted Swiss meringue rather than a baked French meringue, for a lighter, marshmallowy texture.
Don't skip this: Once the filling thickens, let it bubble for another 1-2 minutes to fully activate the cornstarch.
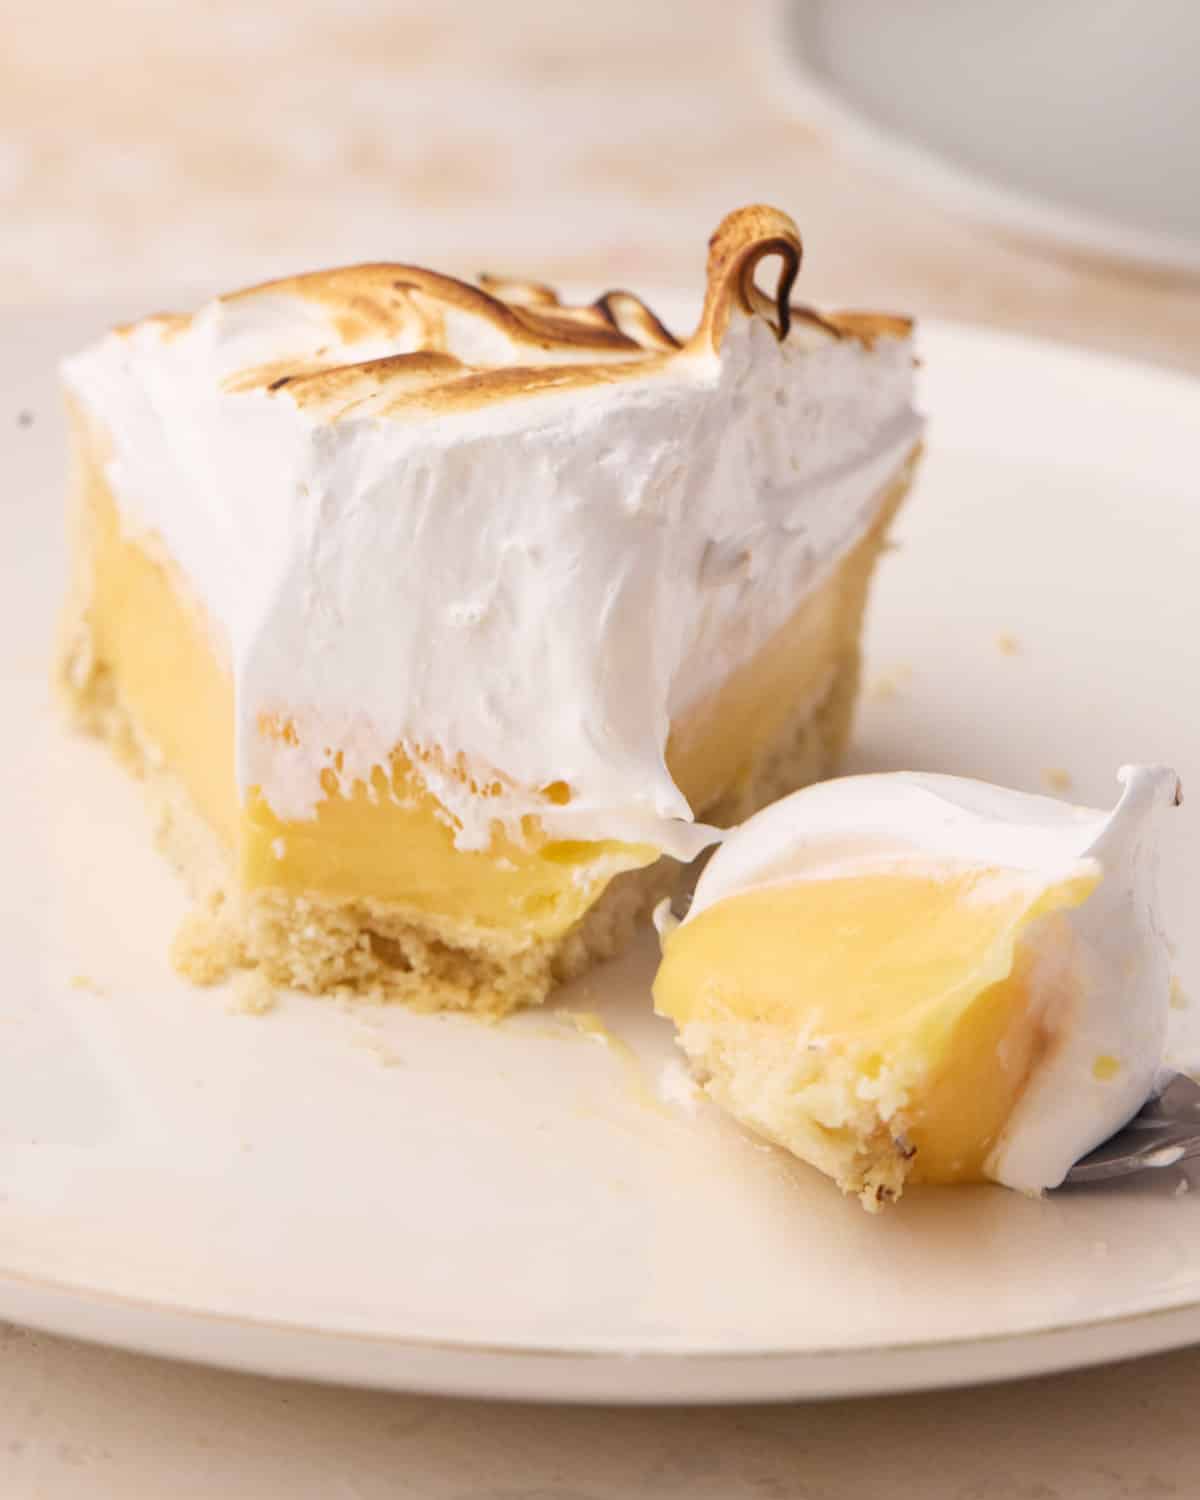
The first time I tested this lemon meringue pie, I thought I'd nailed it. The filling tasted incredible, the Swiss meringue toasted beautifully, and it looked exactly how I'd imagined.
Then I cut the first slice - only to watch the filling slowly gloop across the plate into a lemony puddle - womp womp.
I knew it was close, but I couldn't figure out why it hadn't worked. After years of baking professionally and developing recipes, genuine "lightbulb moments" are pretty rare - but this recipe gave me one. It was a simple change in the method that most lemon meringue pie recipes fail to mention that turned this from a sad, sloppy mess into a silky, sliceable lemon meringue pie.
Jump to:
Why This Recipe Works
- Swiss meringue: Less prone to weeping than baked French meringue and doesn't require baking the filling and risking it curdling.
- Lemon-curd-inspired filling: Egg yolks and butter give it a silky, custardy texture, with just enough cornstarch to slice cleanly without becoming gelatinous.
- Technique over ingredients: Rather than adding extra cornstarch, I refined the cooking method to fully activate the starch for a firm, but smooth set.
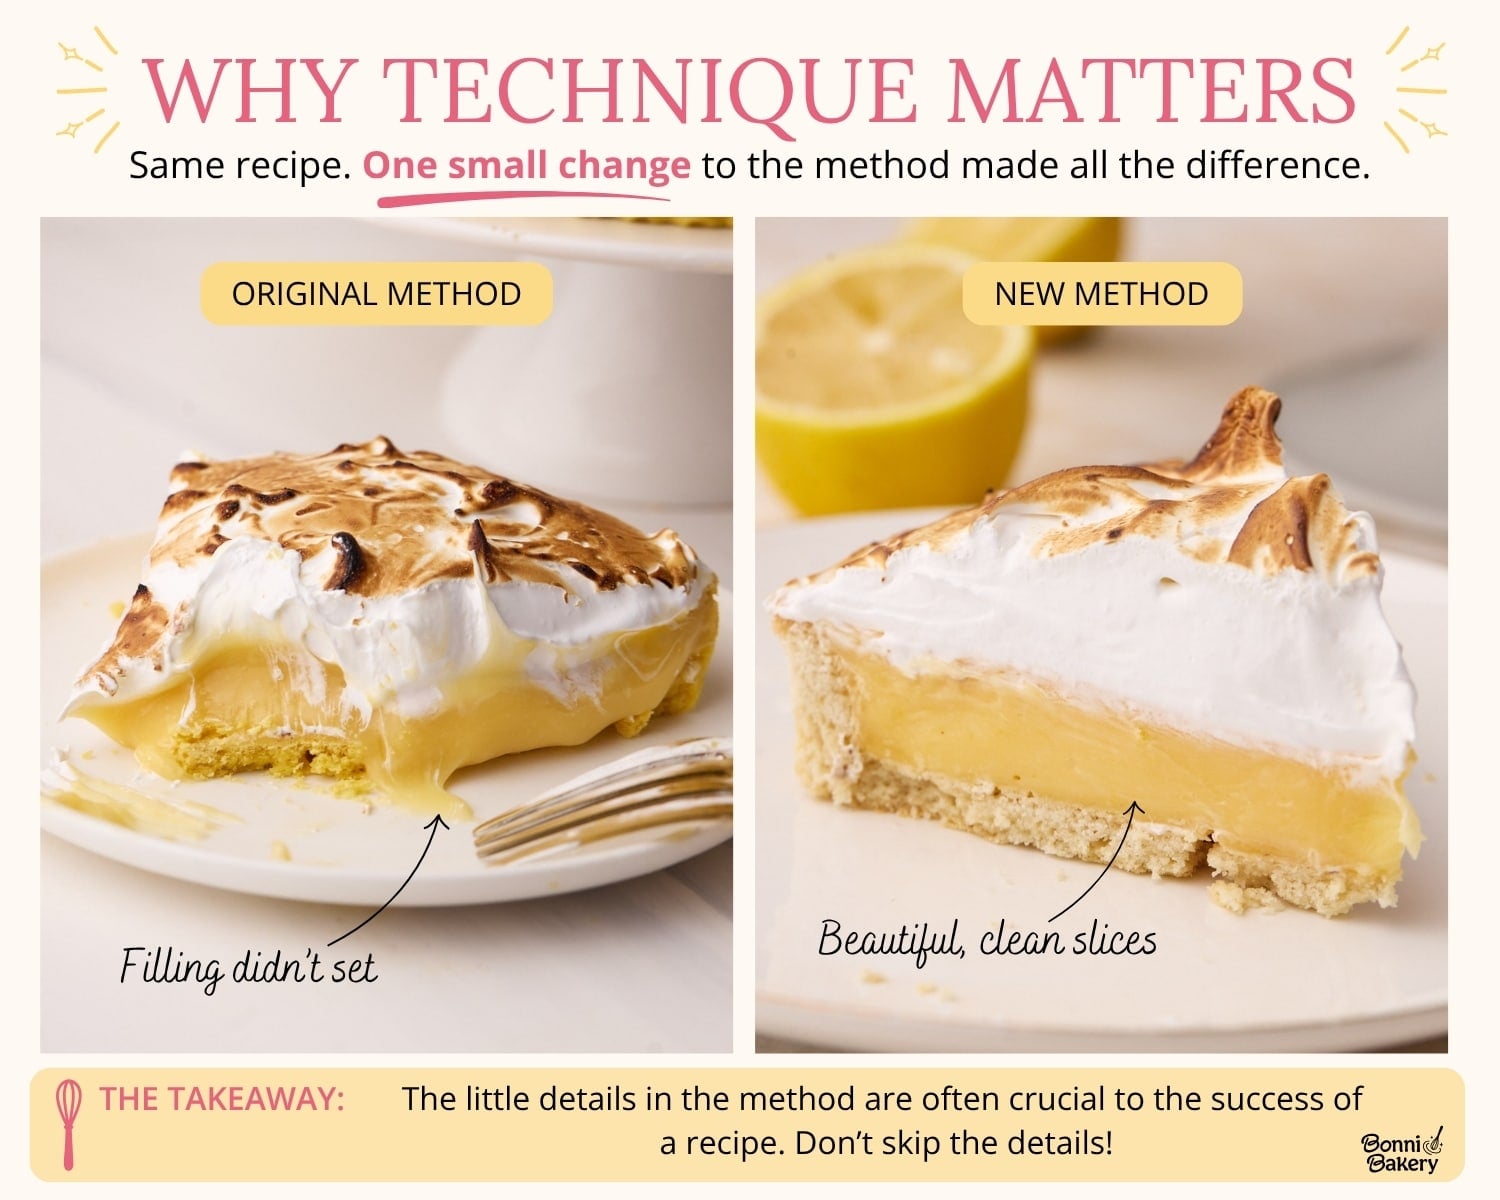
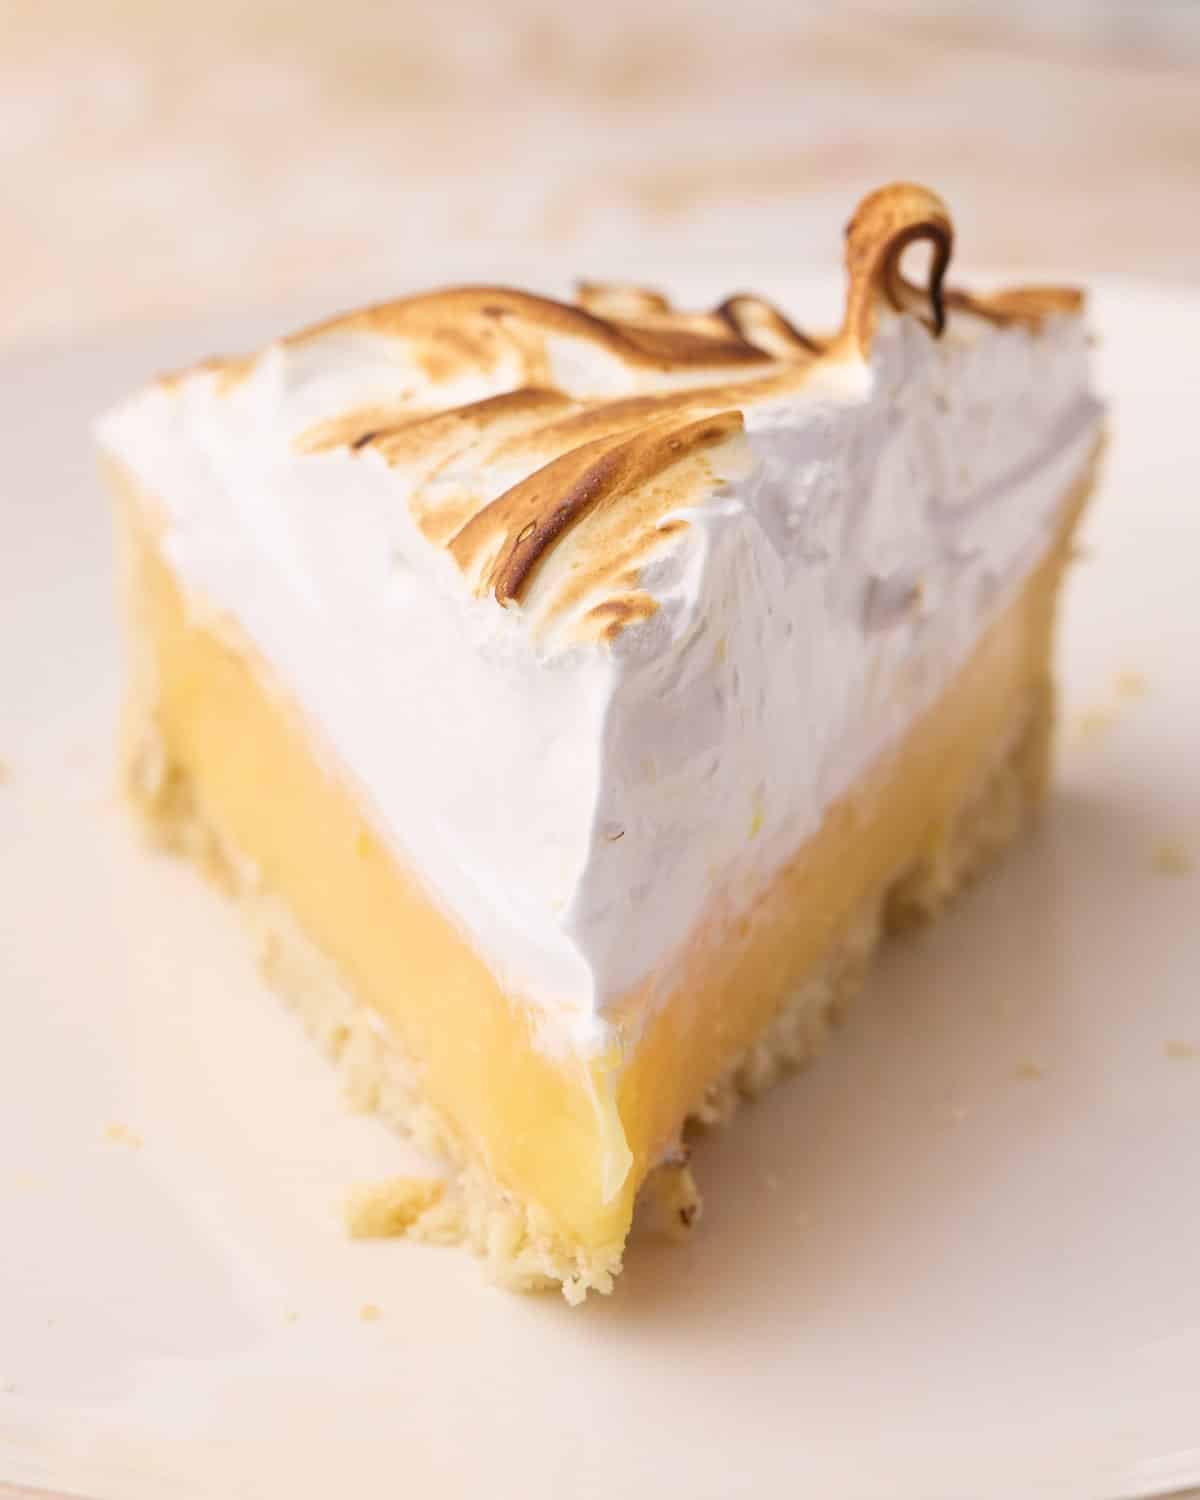
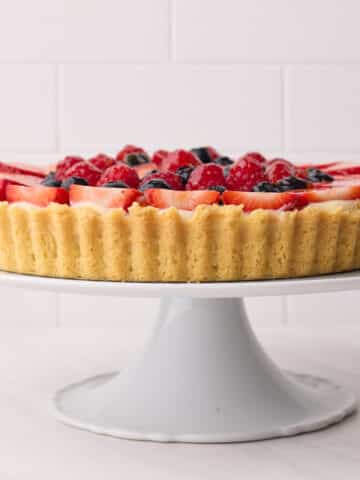
This recipe is the perfect example of why the little details in a recipe method are so important. The two lemon meringue pie slices in the image below were both made with the exact same recipe, but with just one tiny tweak to the method. Keep reading to see what changed!
Ingredients
Most lemon meringue pie recipes use very similar ingredients. The magic is in the ingredient ratios and the technique used to bring them all together.
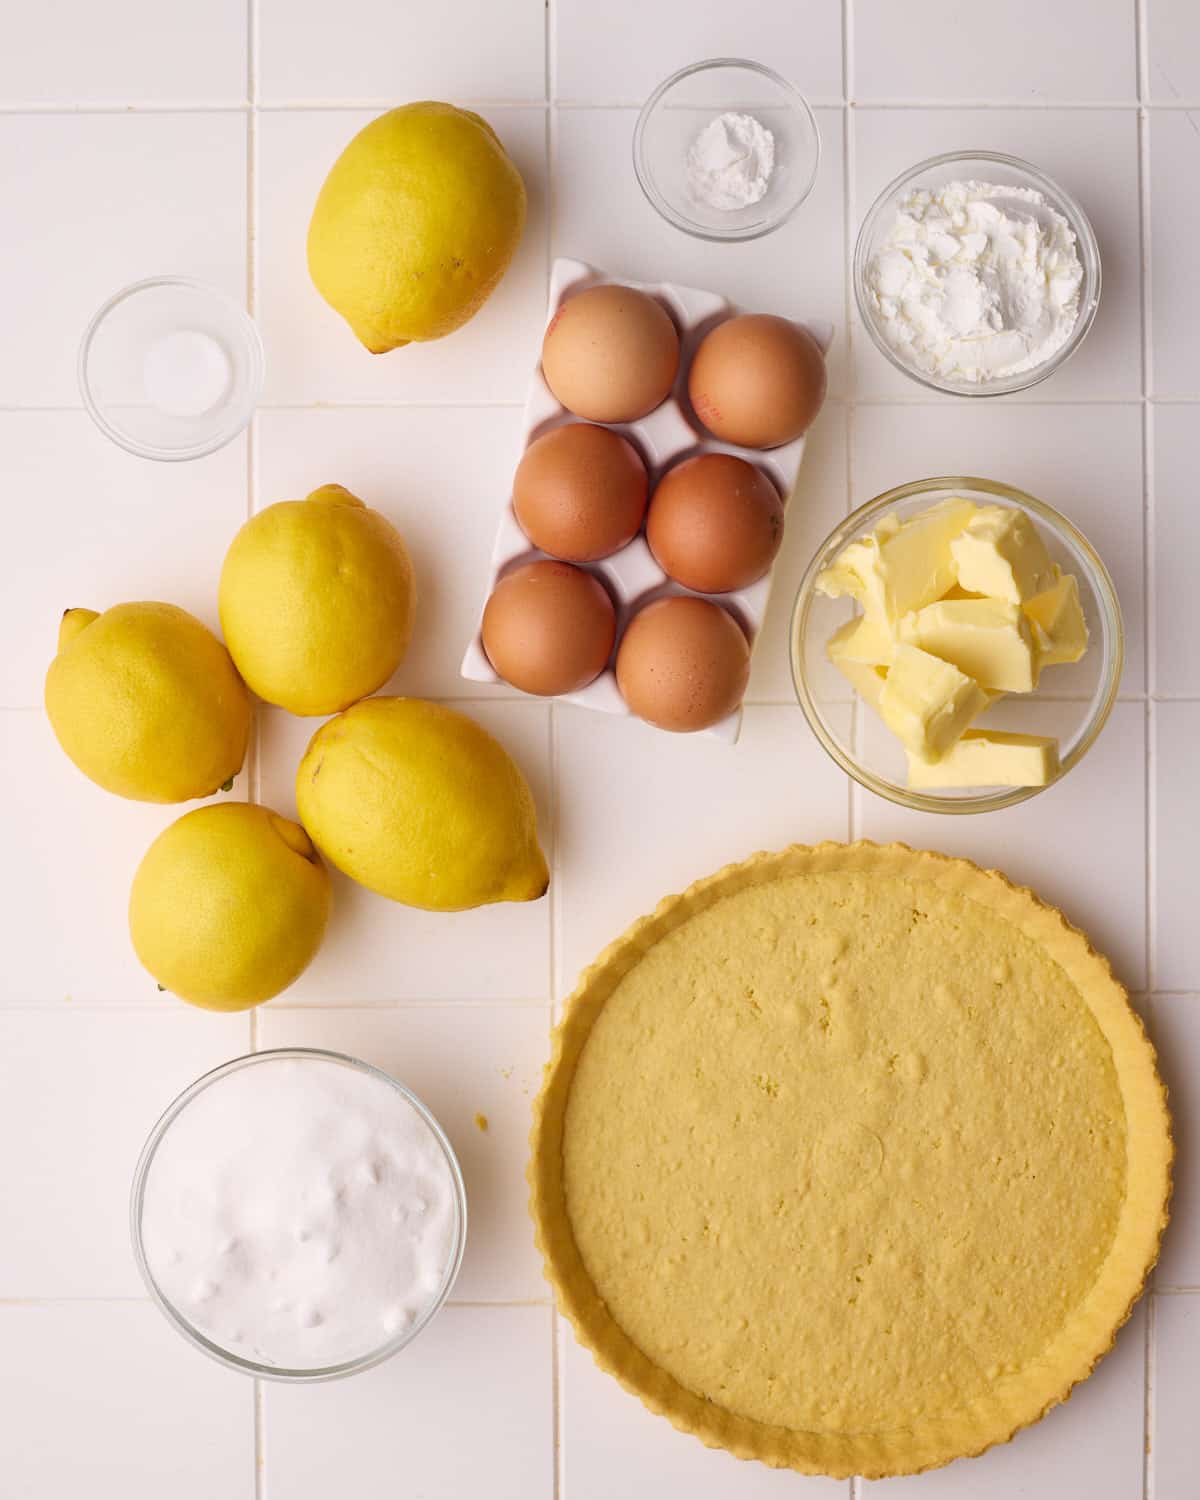
- Pie Crust - You can make your own pie crust or buy a store-bought one. Lemon meringue goes best with either a flaky pie crust, or a shortcrust pastry case.
- Lemons - Use fresh, unwaxed lemons. We'll use both the lemon zest and juice in the filling. Lemon zest actually brings a lot of the lovely lemon flavor without adding the extra acidity of the juice.
- Fresh Eggs - We'll use the egg yolks in the lemon filling and the egg whites for the meringue.
- Sugar - White granulated sugar (caster sugar in the UK) will give the cleanest flavor and dissolve easily into the meringue.
- Cornstarch - The cornstarch plays a vital role in getting the right texture. Pay close attention to how to handle it.
- Butter - Adding butter to the filling after cooking gives it a luxurious, creamy texture and flavor.
See the recipe card for measurements in both cups and grams (though I always recommend using a kitchen scale).
Things You'll Need
How To Make Lemon Meringue Pie
There are four main stages to this recipe: blind baking the crust, making the lemon filling, whipping the Swiss meringue, and assembling the pie. I'll point out the key visual cues as we go so you know exactly what to look for.
Before You Begin...
- Fully bake the pie crust - If you are making a homemade pie crust, make sure you fully blind bake it before adding the filling, as this pie isn't baked after it's assembled.
- Plan ahead - The lemon filling needs to chill completely before topping with the Swiss meringue, so it's best to make it several hours ahead or even the day before.
Make The Lemon Filling
This lemon filling is a little bit special - it is inspired by lemon curd, so it has a luxurious, silky texture and creamy flavor, but the cooking technique allows it to set properly so you can get beautiful, clean slices, without the gelatinous feeling.
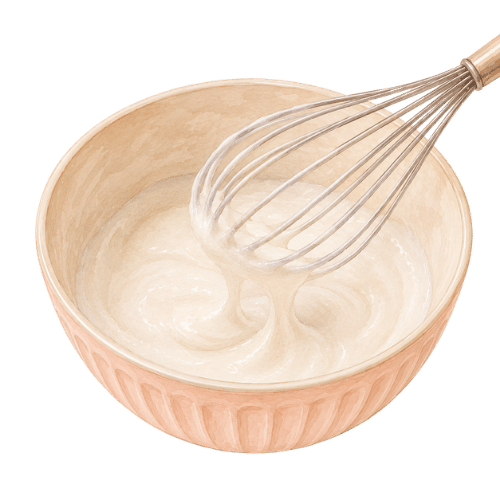
Whisk Together the Ingredients
In a medium saucepan, mix together the sugar, cornstarch, and salt.
Then add in the lemon juice, water, and lemon zest and whisk everything together until smooth.
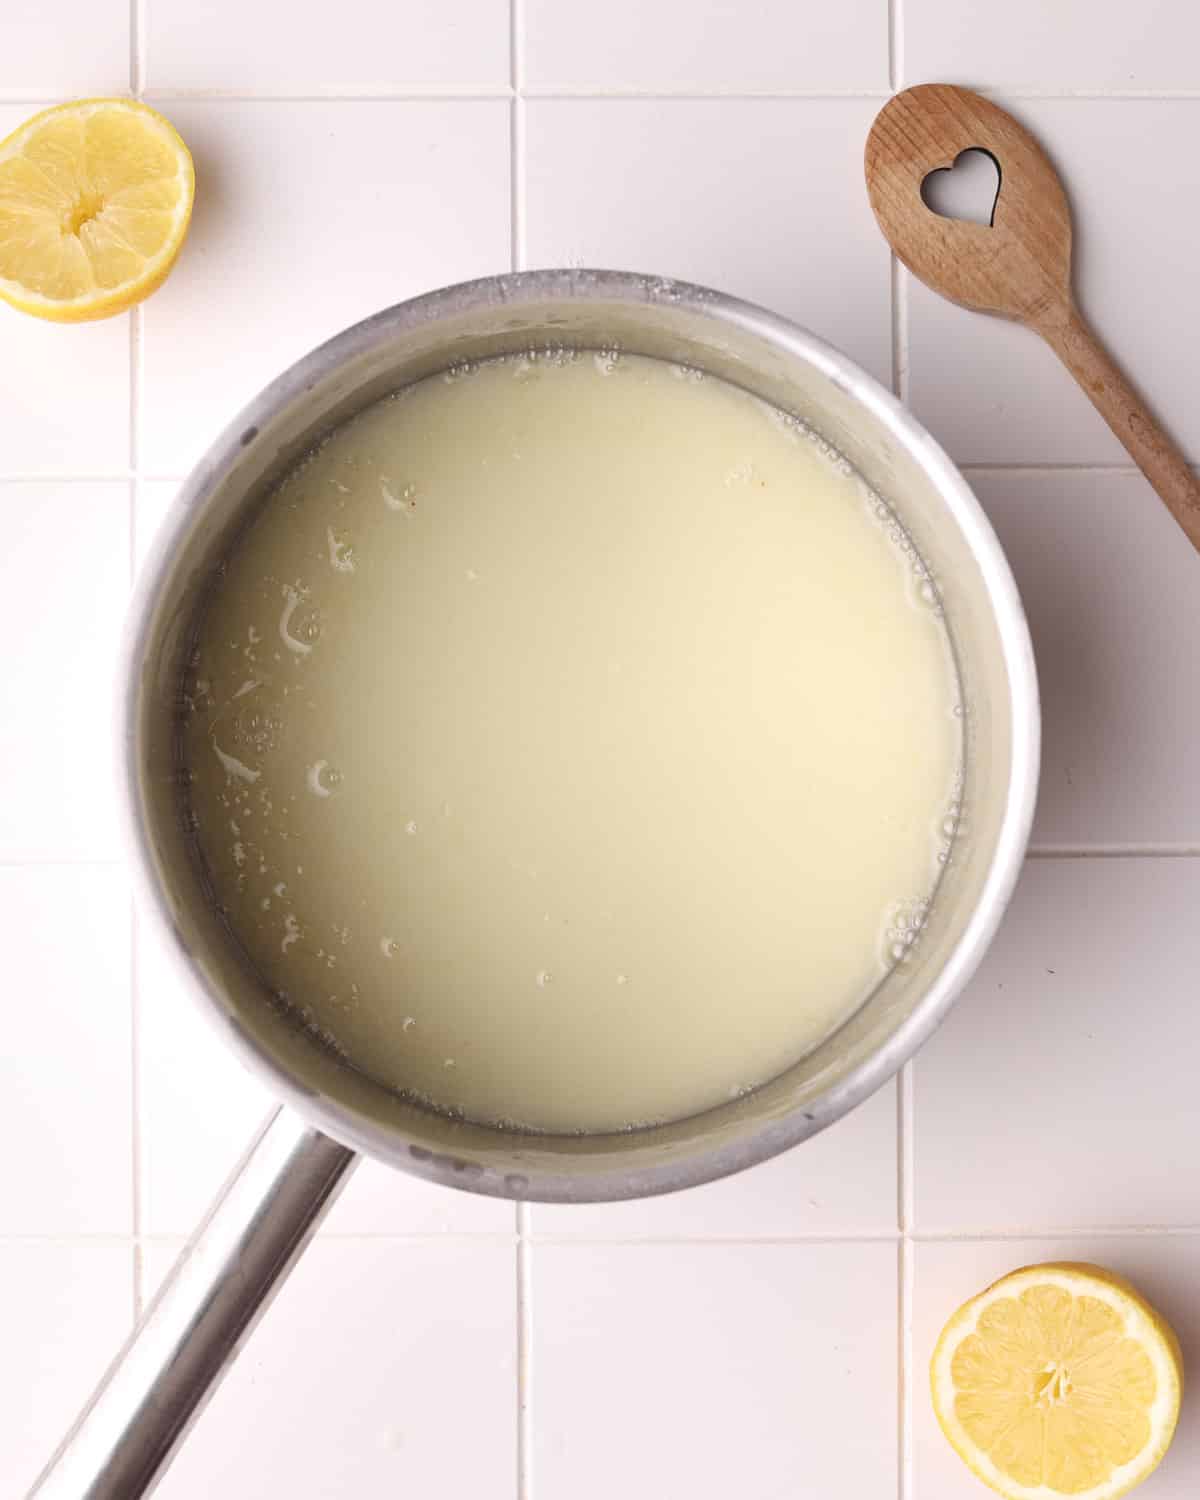
Cook Until Thick and Bubbling
Put the saucepan over medium heat while whisking slowly until the mixture is no longer cloudy and it begins to thicken.
Once the lemon filling starts to boil with thick bubbles bursting on the surface, let it boil for 1-2 minutes to activate the cornstarch.
It should be glossy and very thick.
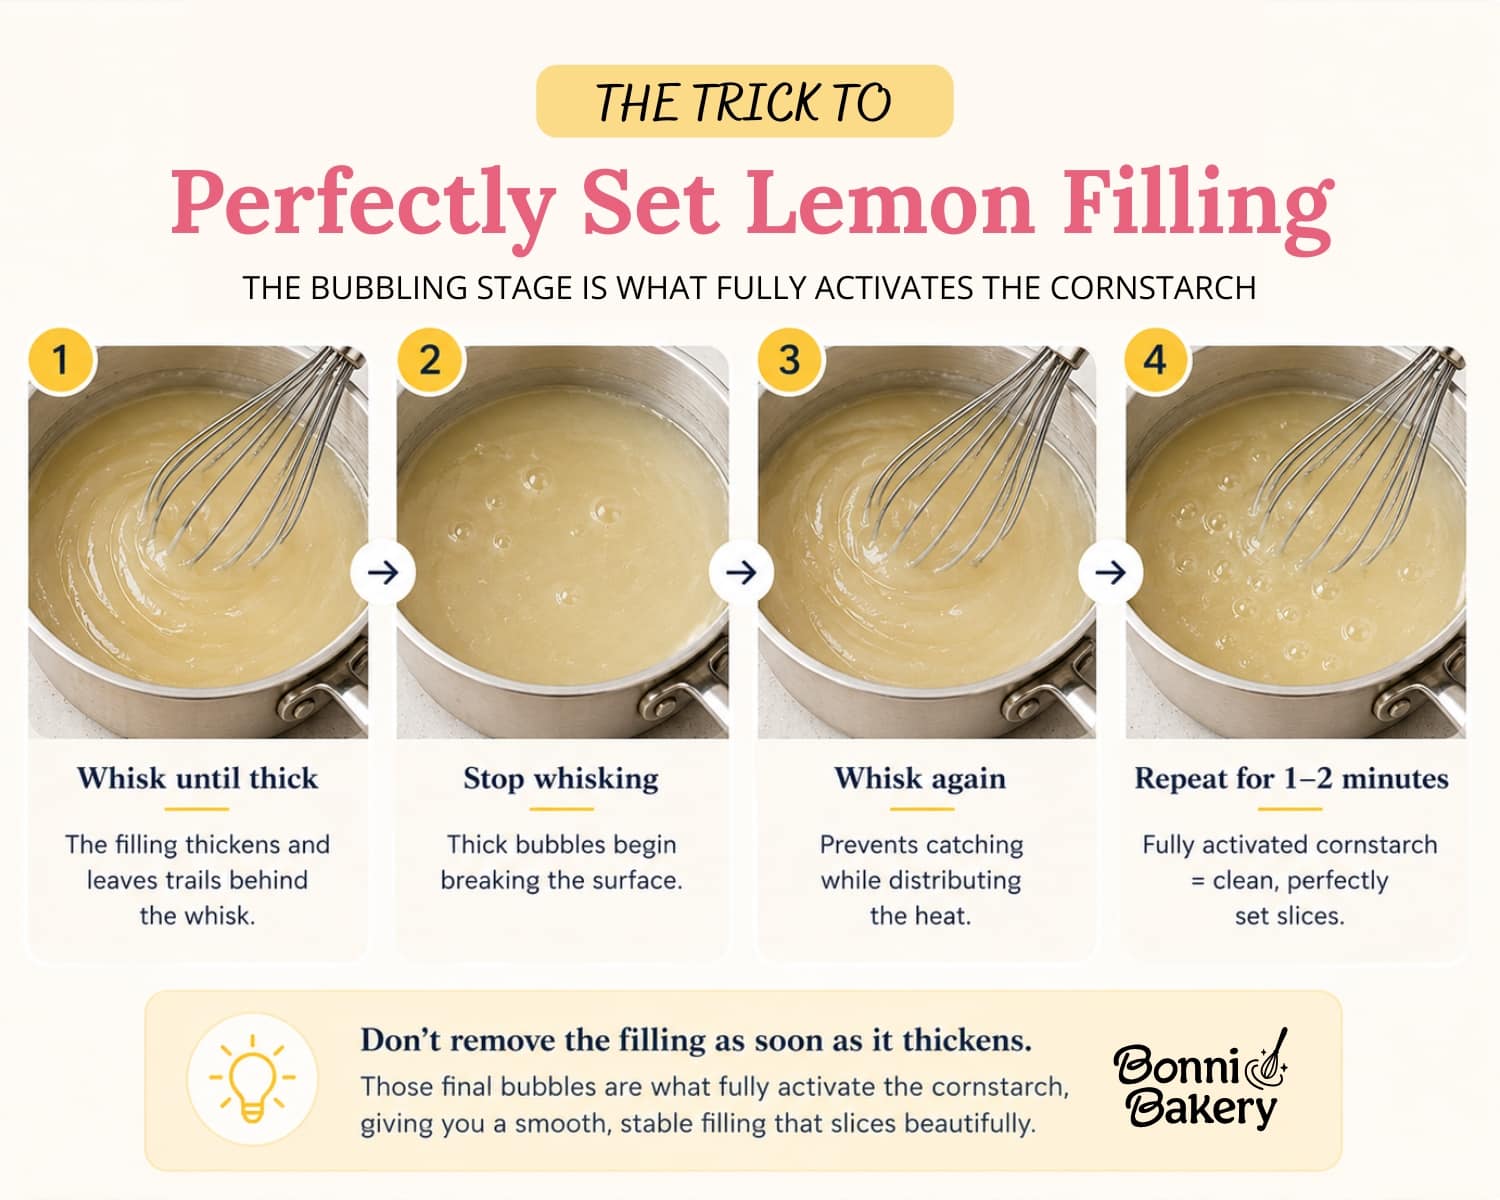
testing tip
Pause Between Whisking
While testing this recipe, I couldn't understand why my filling wasn't setting properly. It turns out that by whisking the mixture constantly, I was preventing it from getting to a full boil.
In order for the cornstarch to activate fully, it needs to be actively bubbling for 1-2 minutes. I figured out that to do this, you have to whisk-pause-whisk every few seconds to make sure there is enough active bubbling time - that is the key to perfectly set slices!
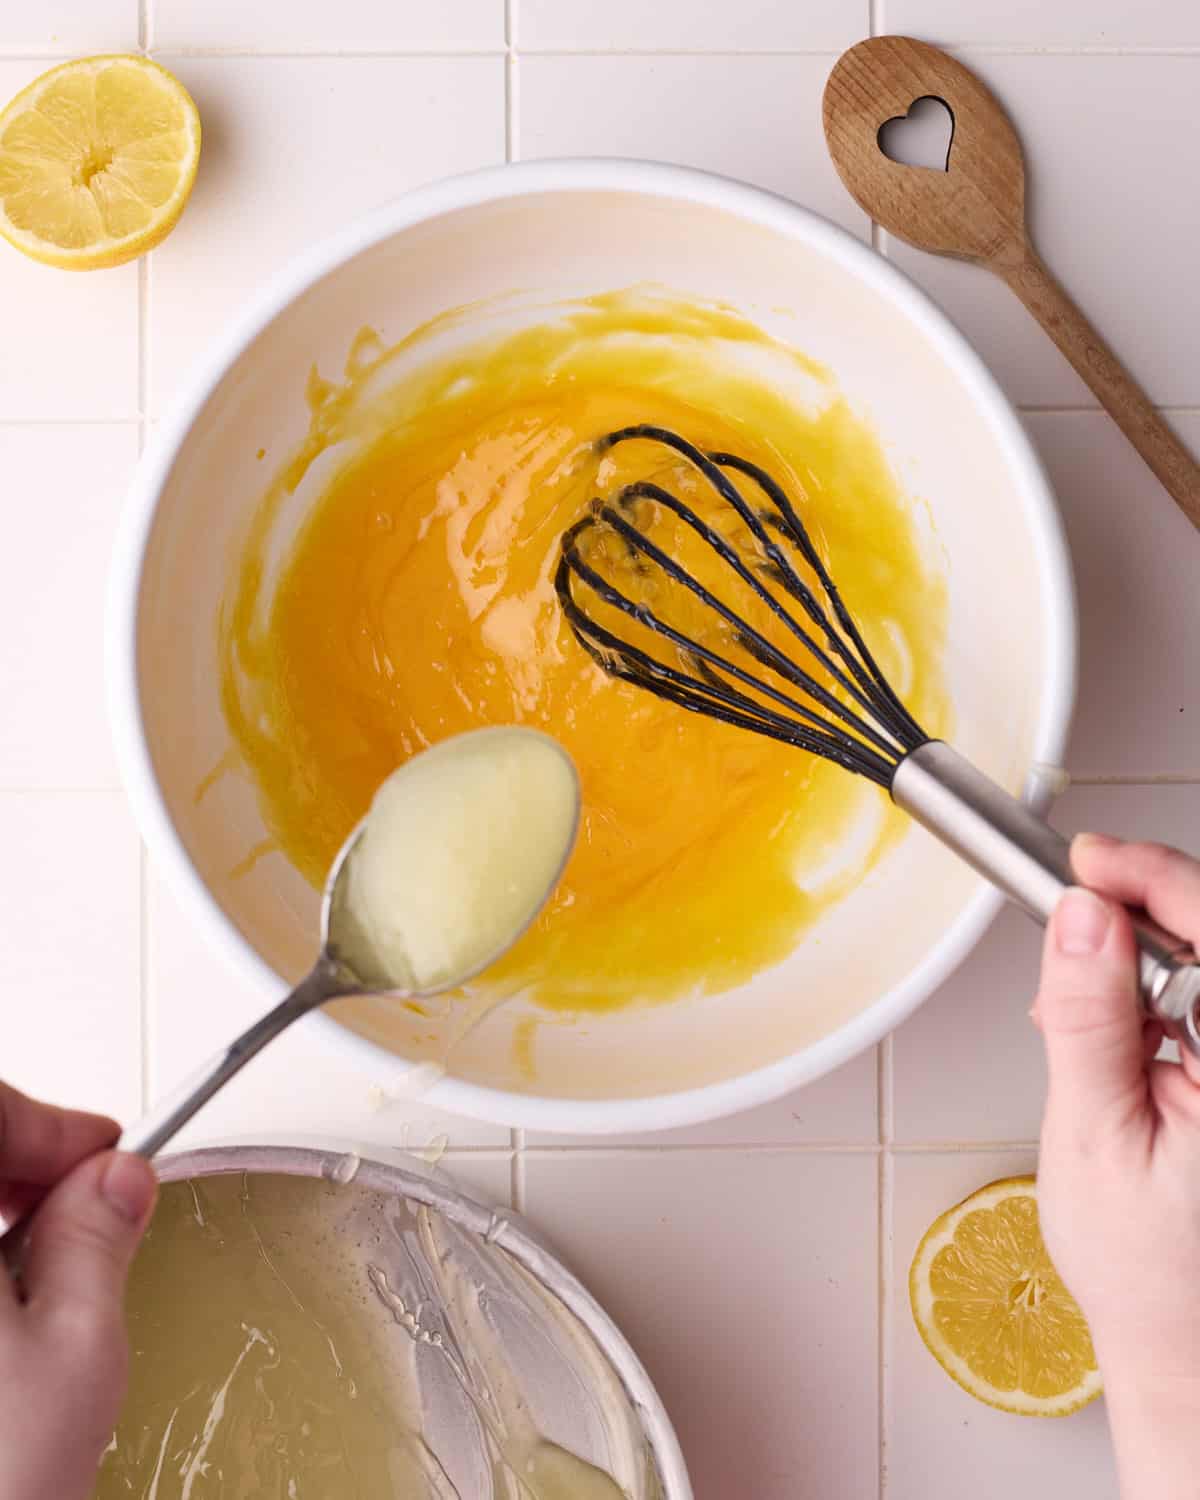
Temper the Egg Yolks
In a separate bowl, lightly whisk the egg yolks.
Take a large spoonful of the hot lemon mixture and gradually whisk it into the yolks.
Repeat with 3-4 more spoonfuls, then add the rest of the lemon mixture in and whisk to combine.
This brings the temperature of the eggs up slowly so they don't scramble when hitting the heat.
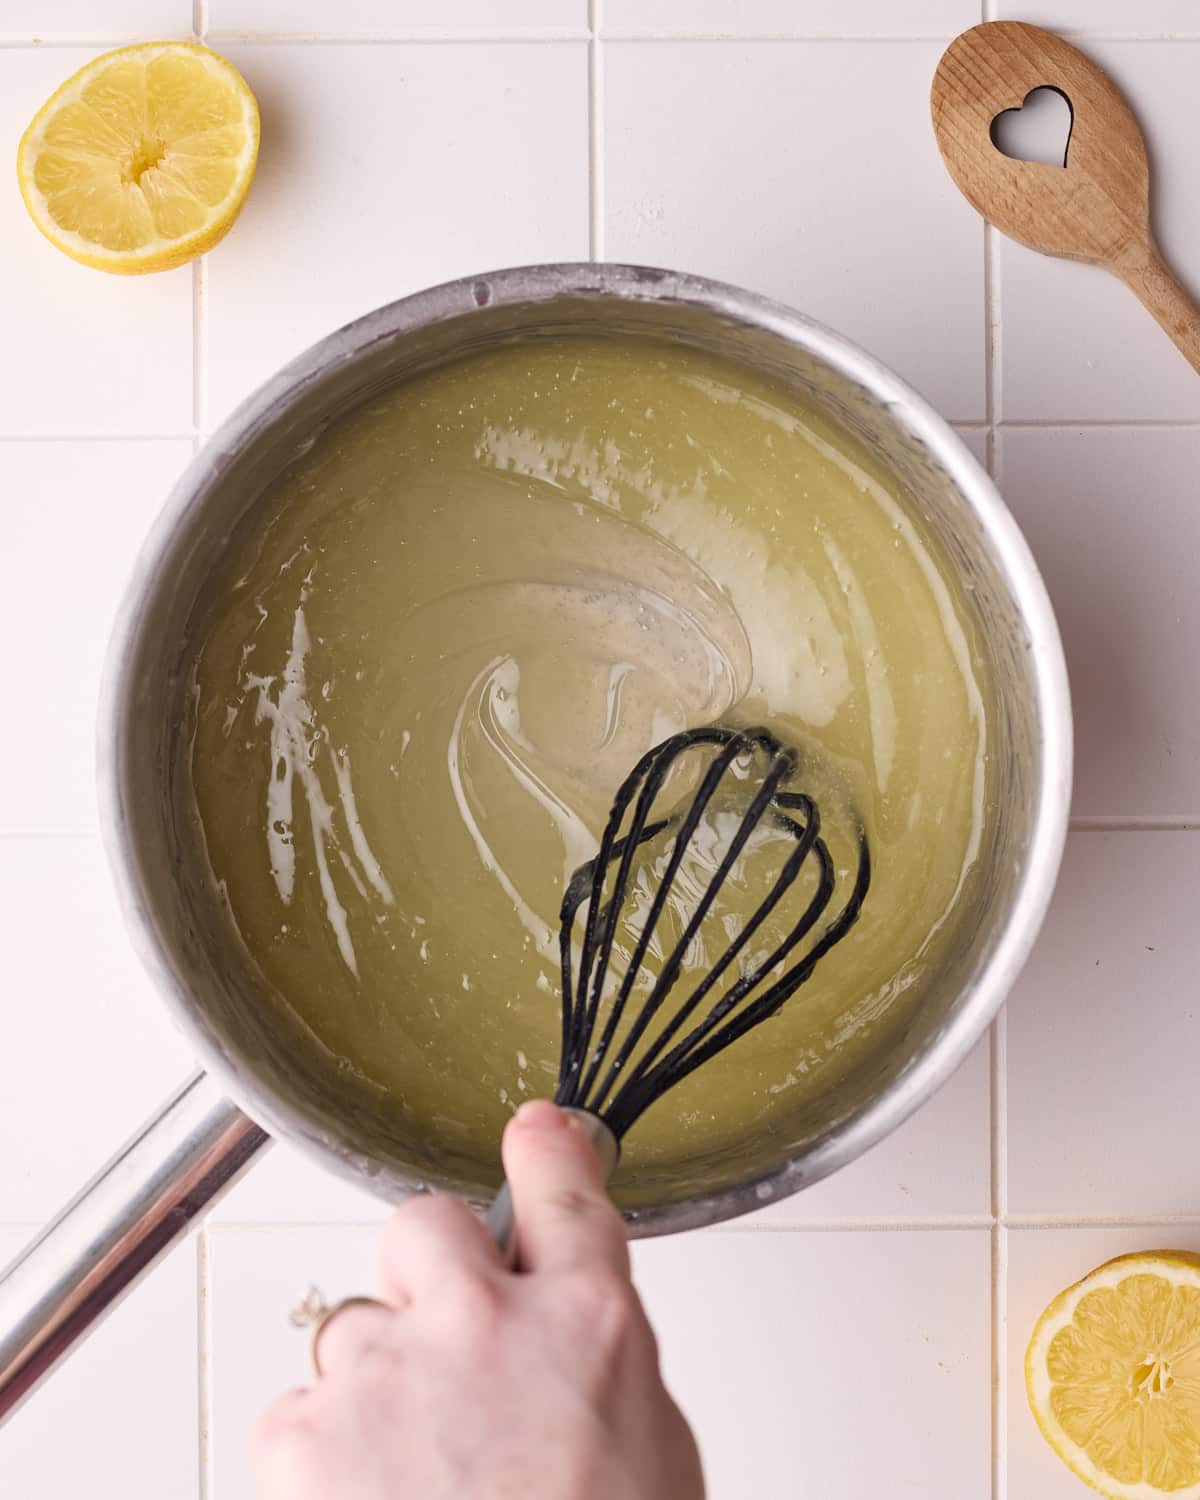
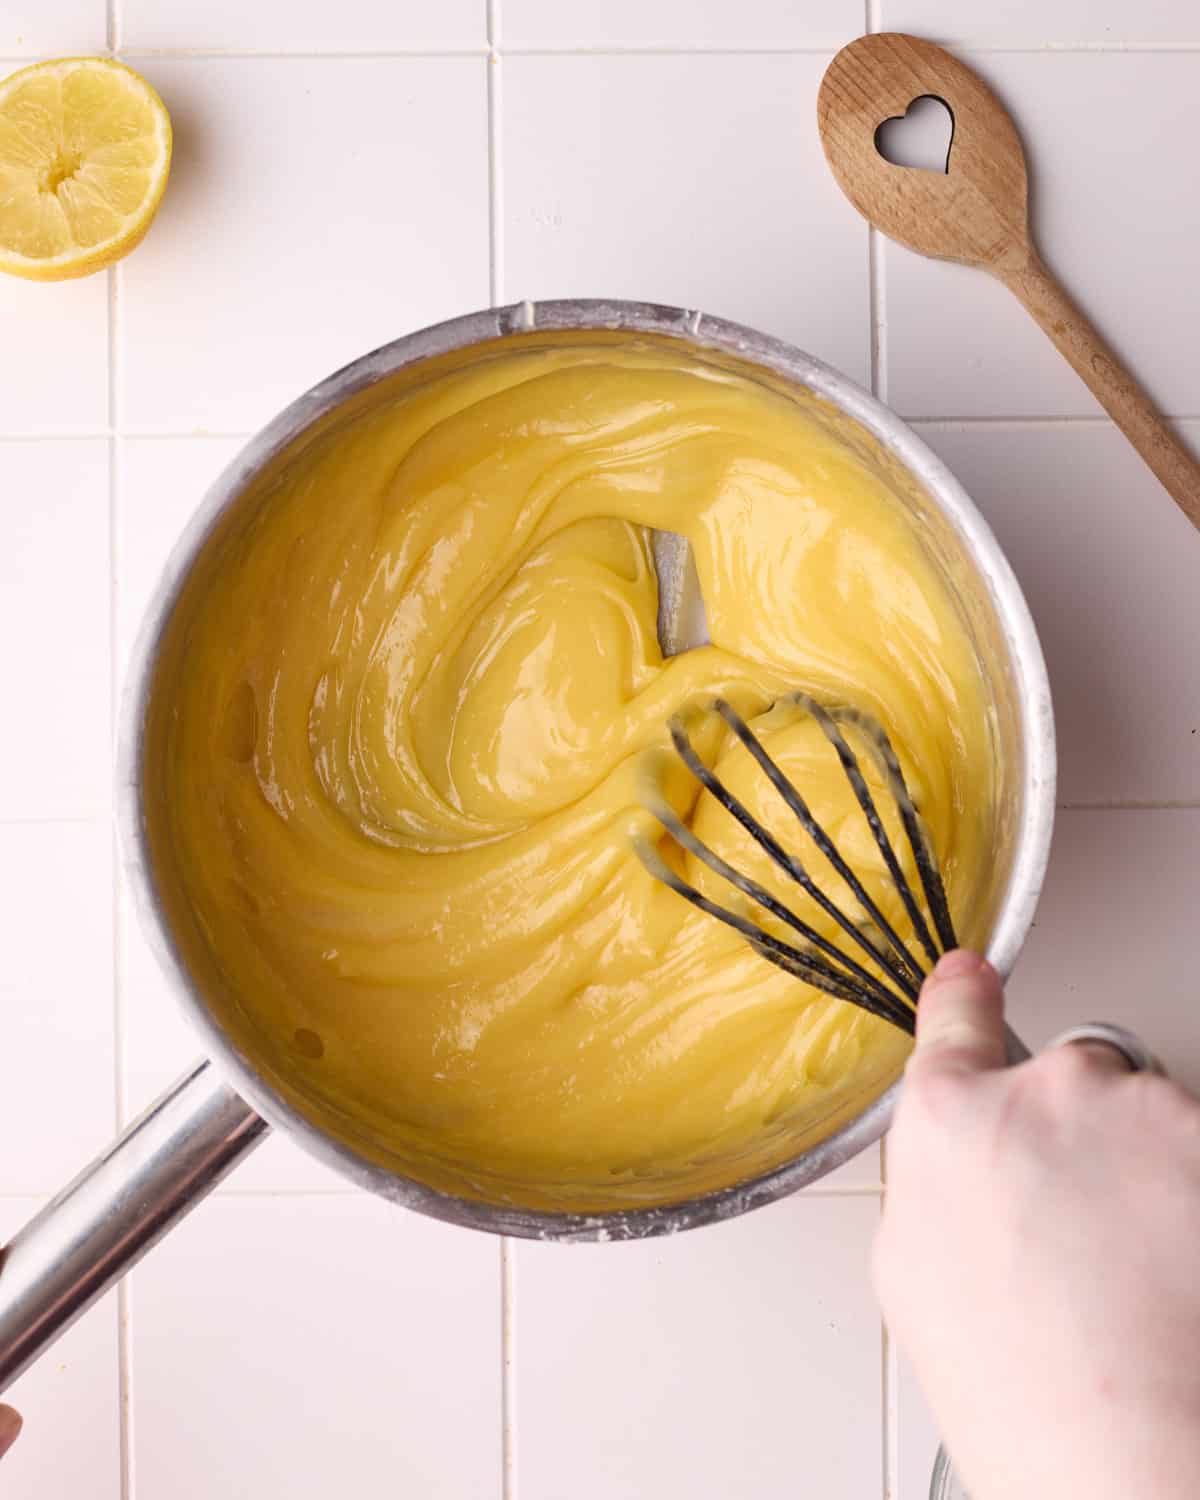
Cook the Filling Again
Pour the whole filling back into the saucepan and cook, whisking constantly, for 1-2 minutes until it looks silky, smooth, and totally combined.
Don't let it boil, as you risk overcooking the egg yolks.
The filling should be thick enough that it falls from the whisk in thick ribbons.
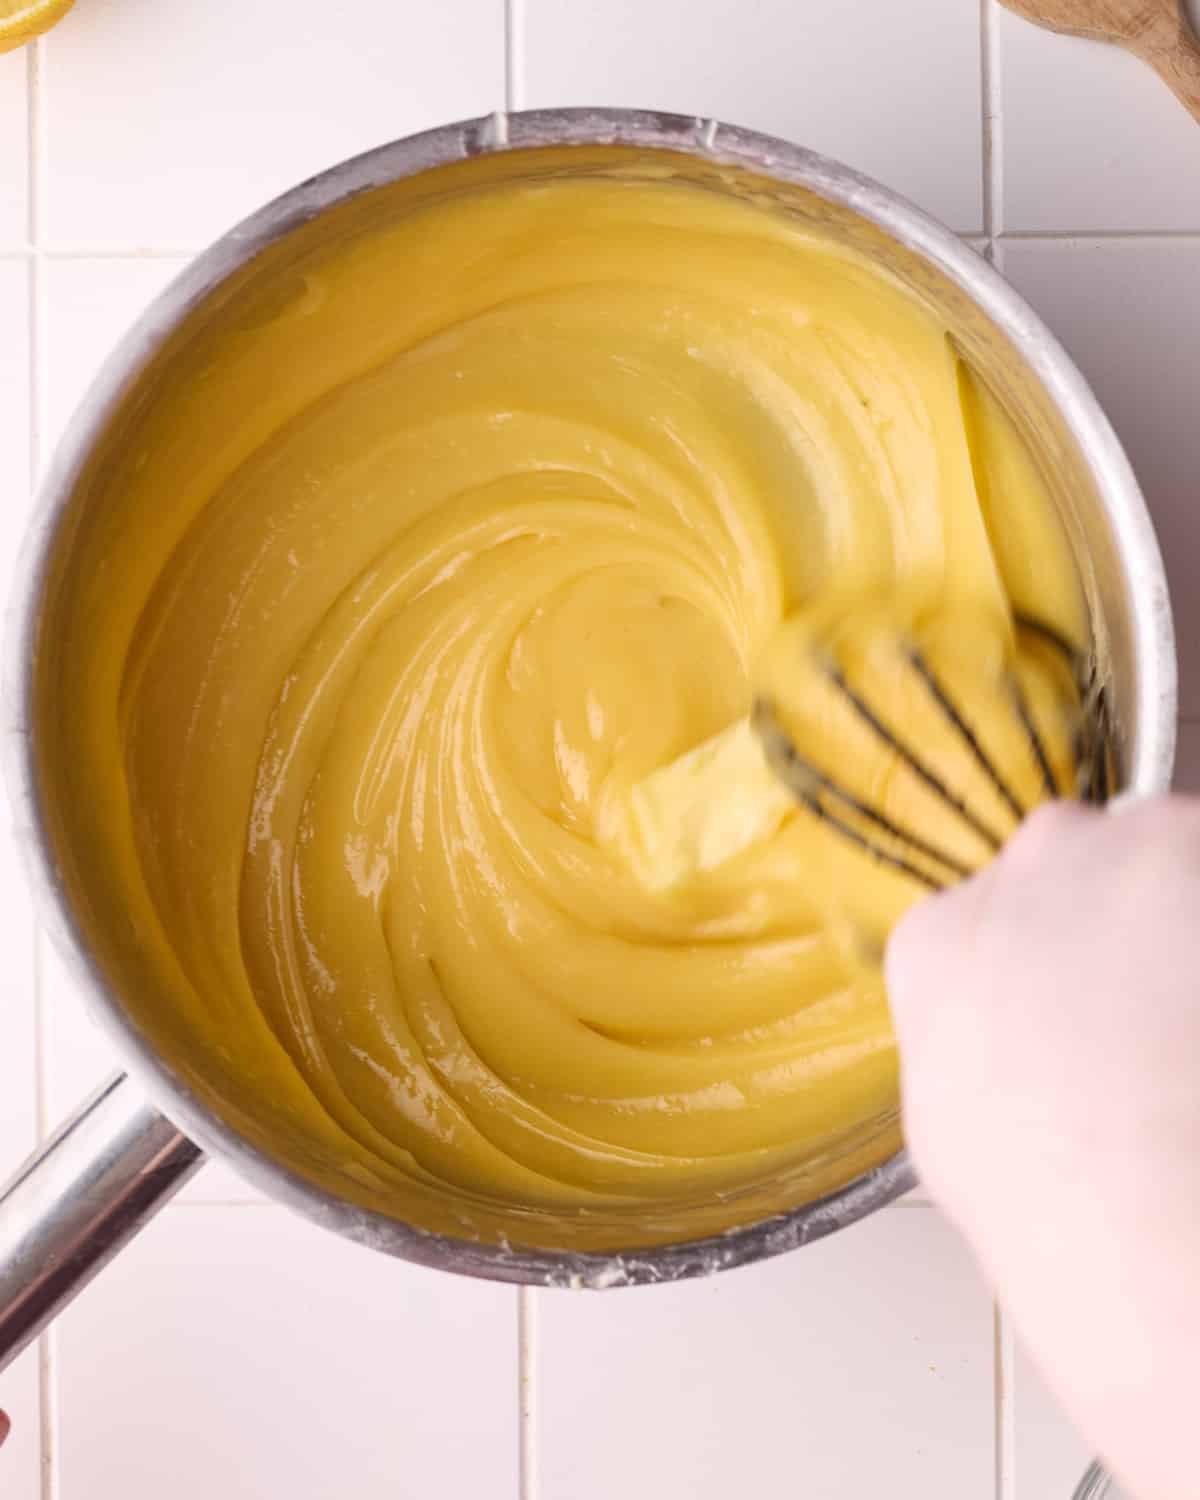
Whisk in the Butter
Remove the lemon filling from the heat and add the butter a few cubes at a time, whisking until each addition has melted completely before adding the next.
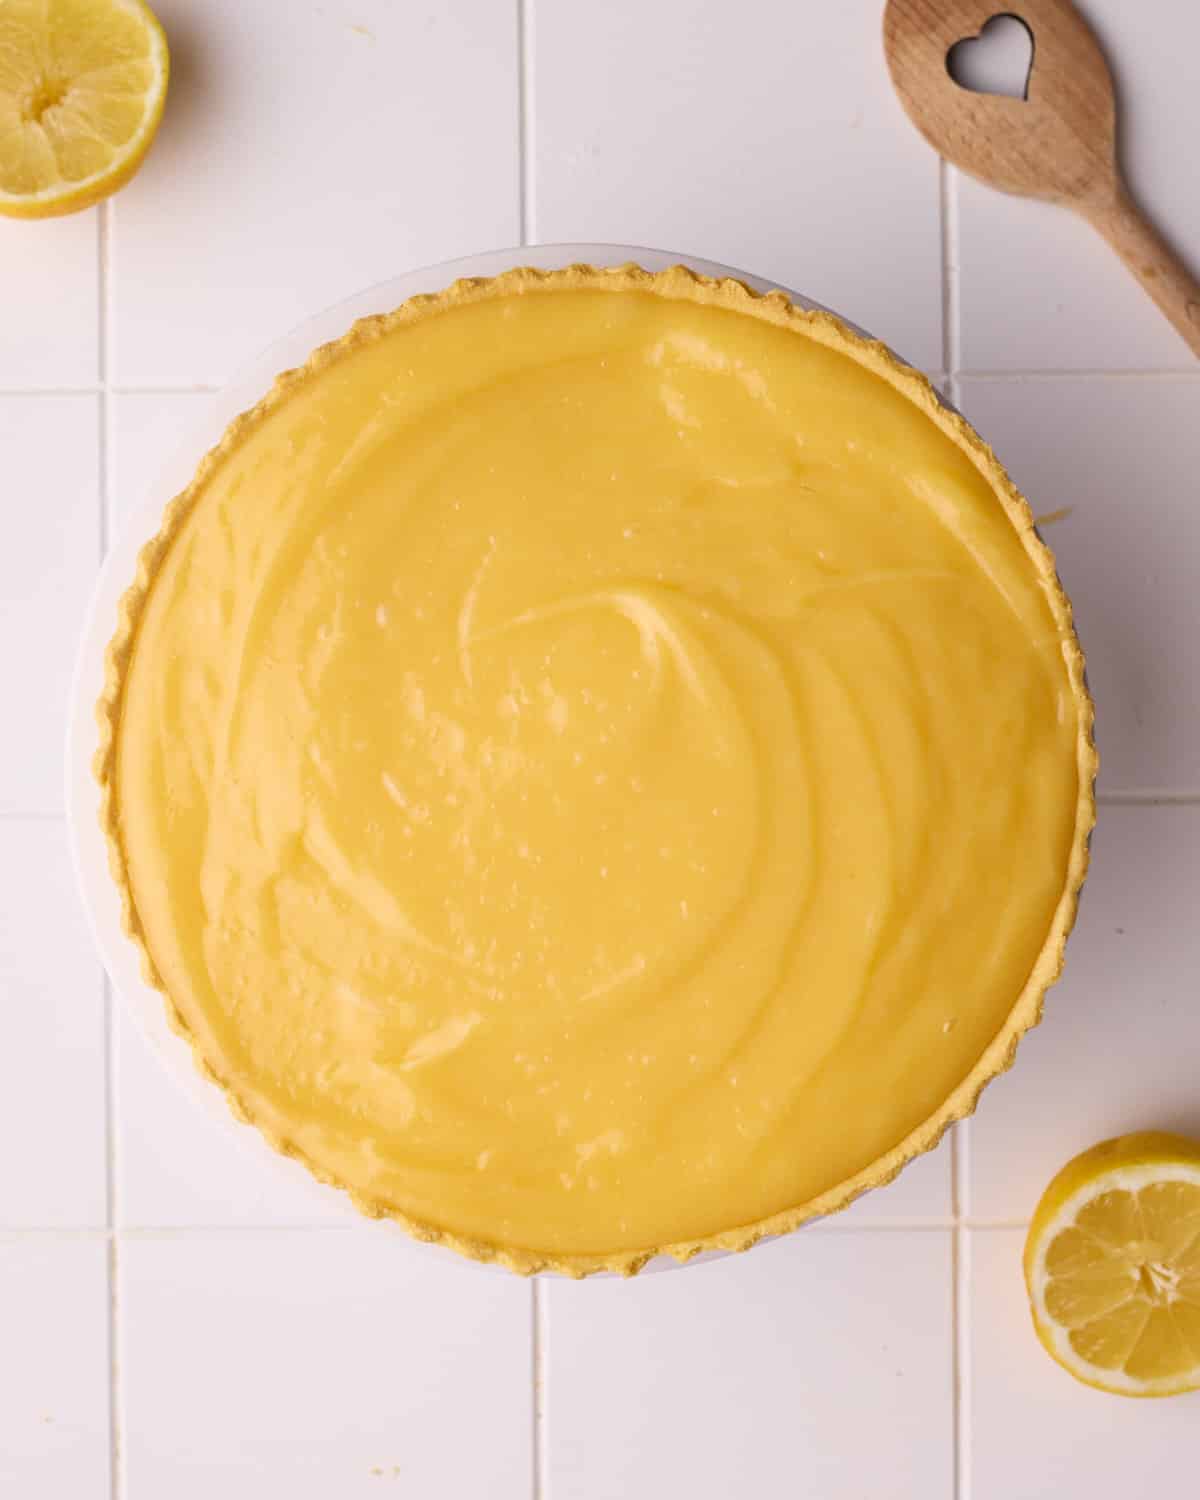
Fill the Pie
Pour the filling into the cooled pie crust and smooth the top with an offset spatula.
Cover the surface directly with plastic wrap to prevent a skin from forming and refrigerate until completely cold and set - at least 4 hours, preferably overnight.
Make the Swiss Meringue Topping
Once the lemon filling has completely chilled, you can make the meringue. It's best to make the meringue shortly before serving for the best texture.
This recipe uses a Swiss meringue for an easy, fully cooked meringue with marshmallow texture. You can also use Italian meringue if you prefer.
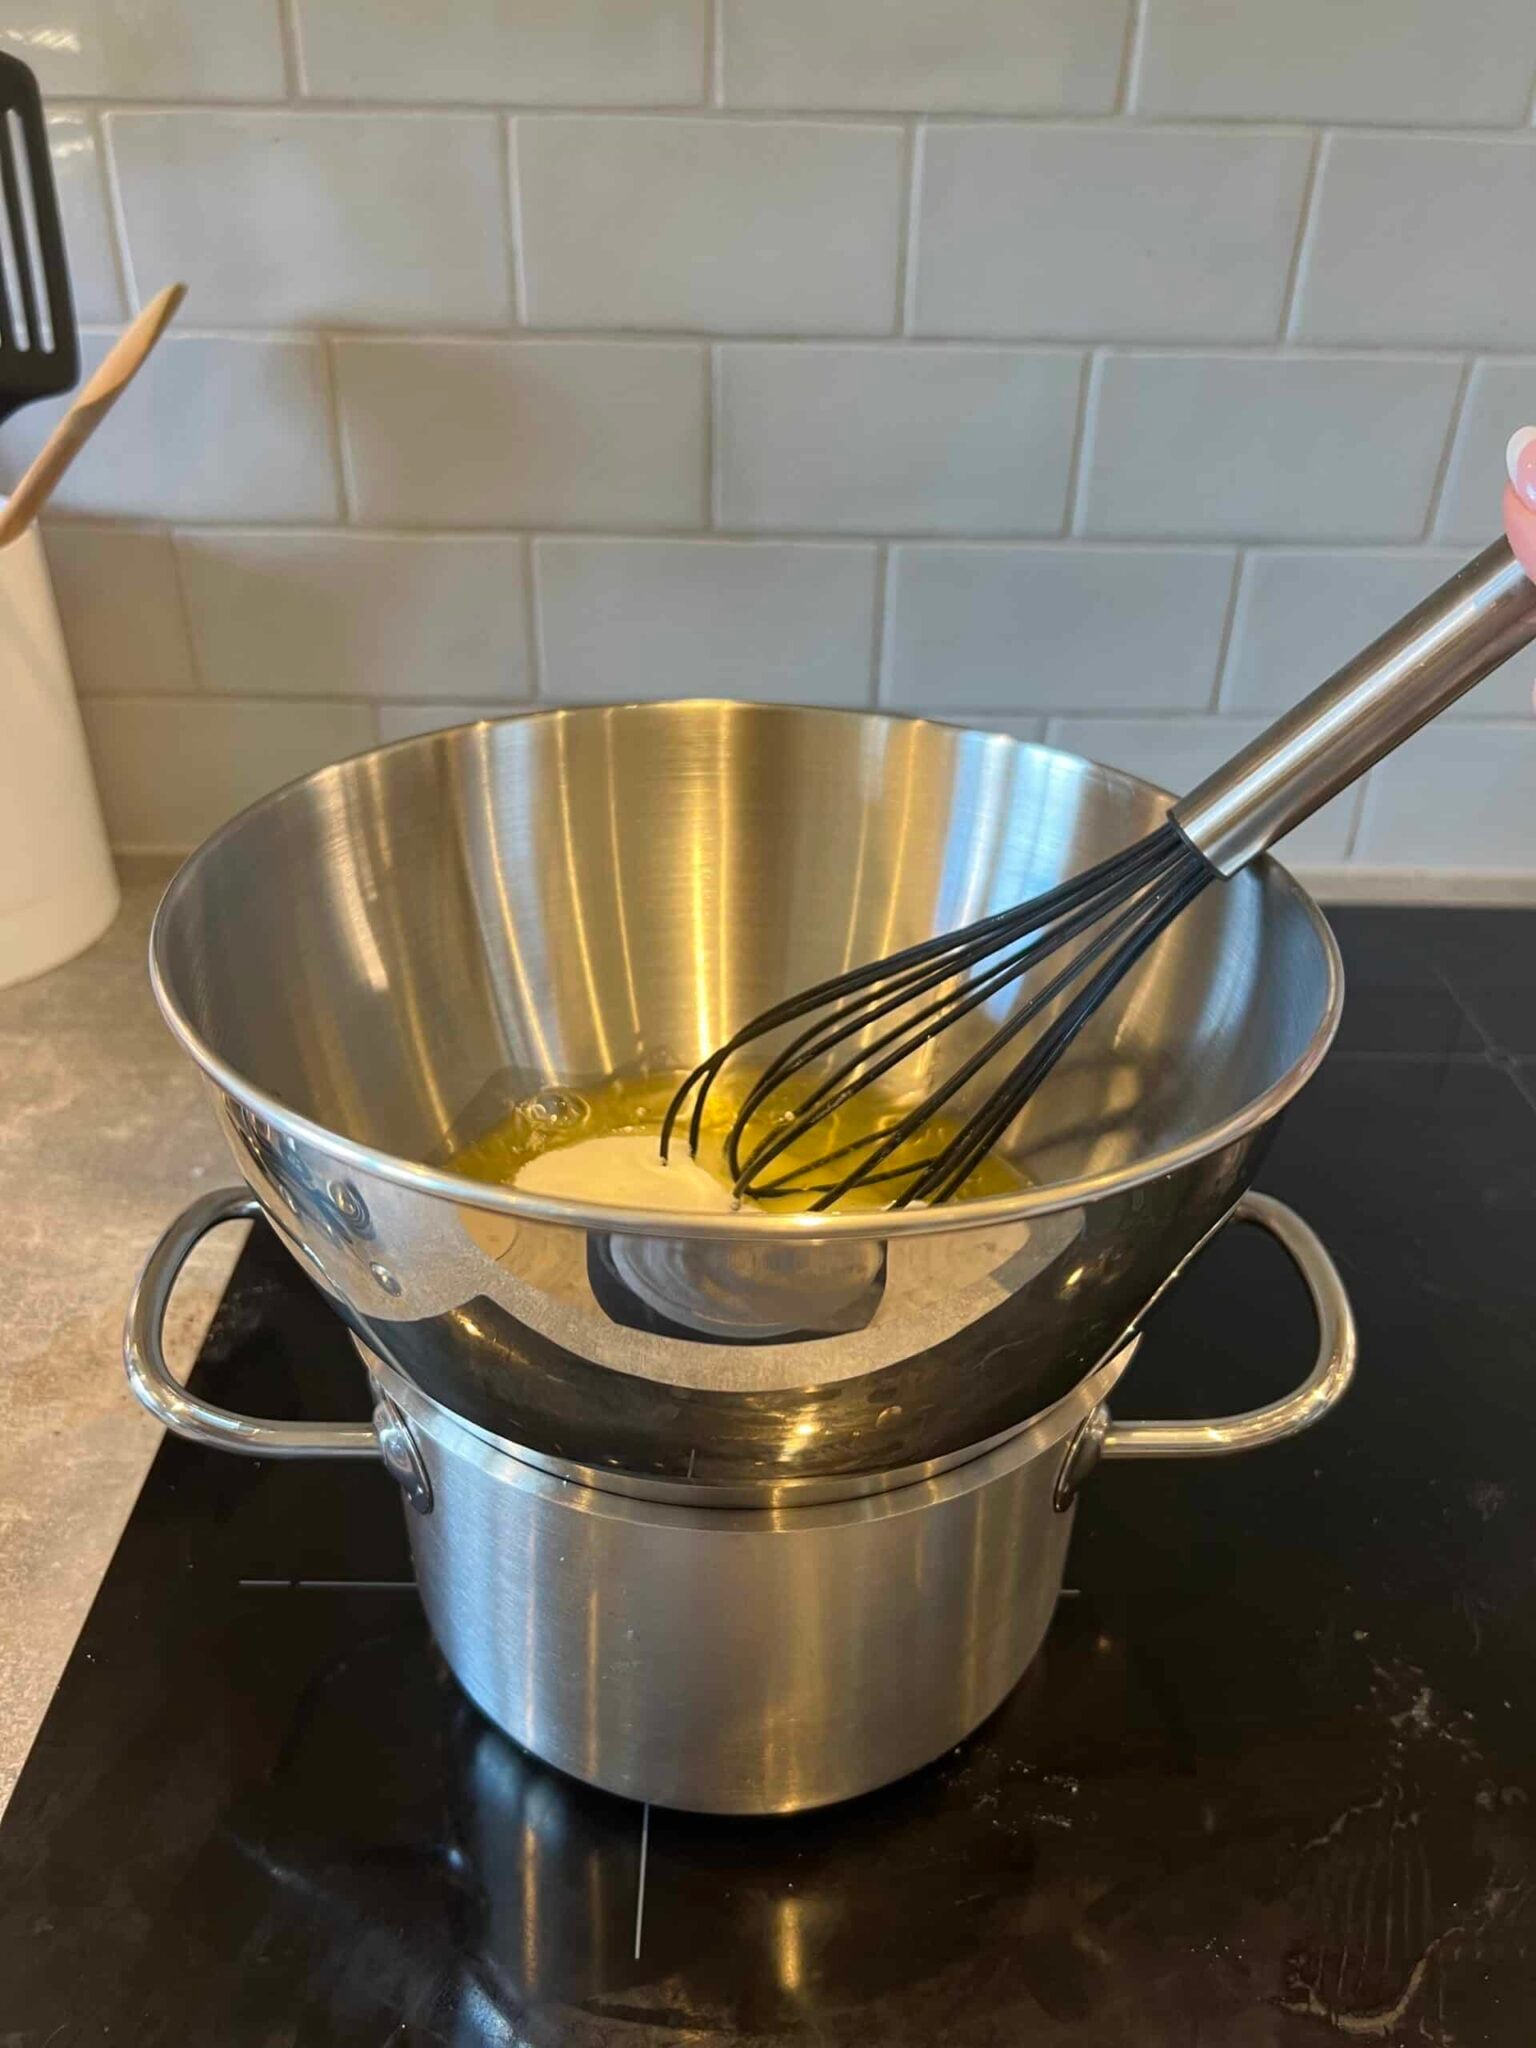
Dissolve the Sugar
Add the egg whites and sugar to a heatproof bowl and place it over a saucepan of shallow, simmering water to make a bain-marie (double boiler).
Whisk constantly until the sugar has completely dissolved. To check, rub a little of the mixture between your fingers - it should feel warm and completely smooth with no trace of sugar crystals. If it still feels gritty, continue heating and whisking.
A thermometer isn't essential for this step, but if you'd prefer to use one, the mixture should reach 160°F (71°C).
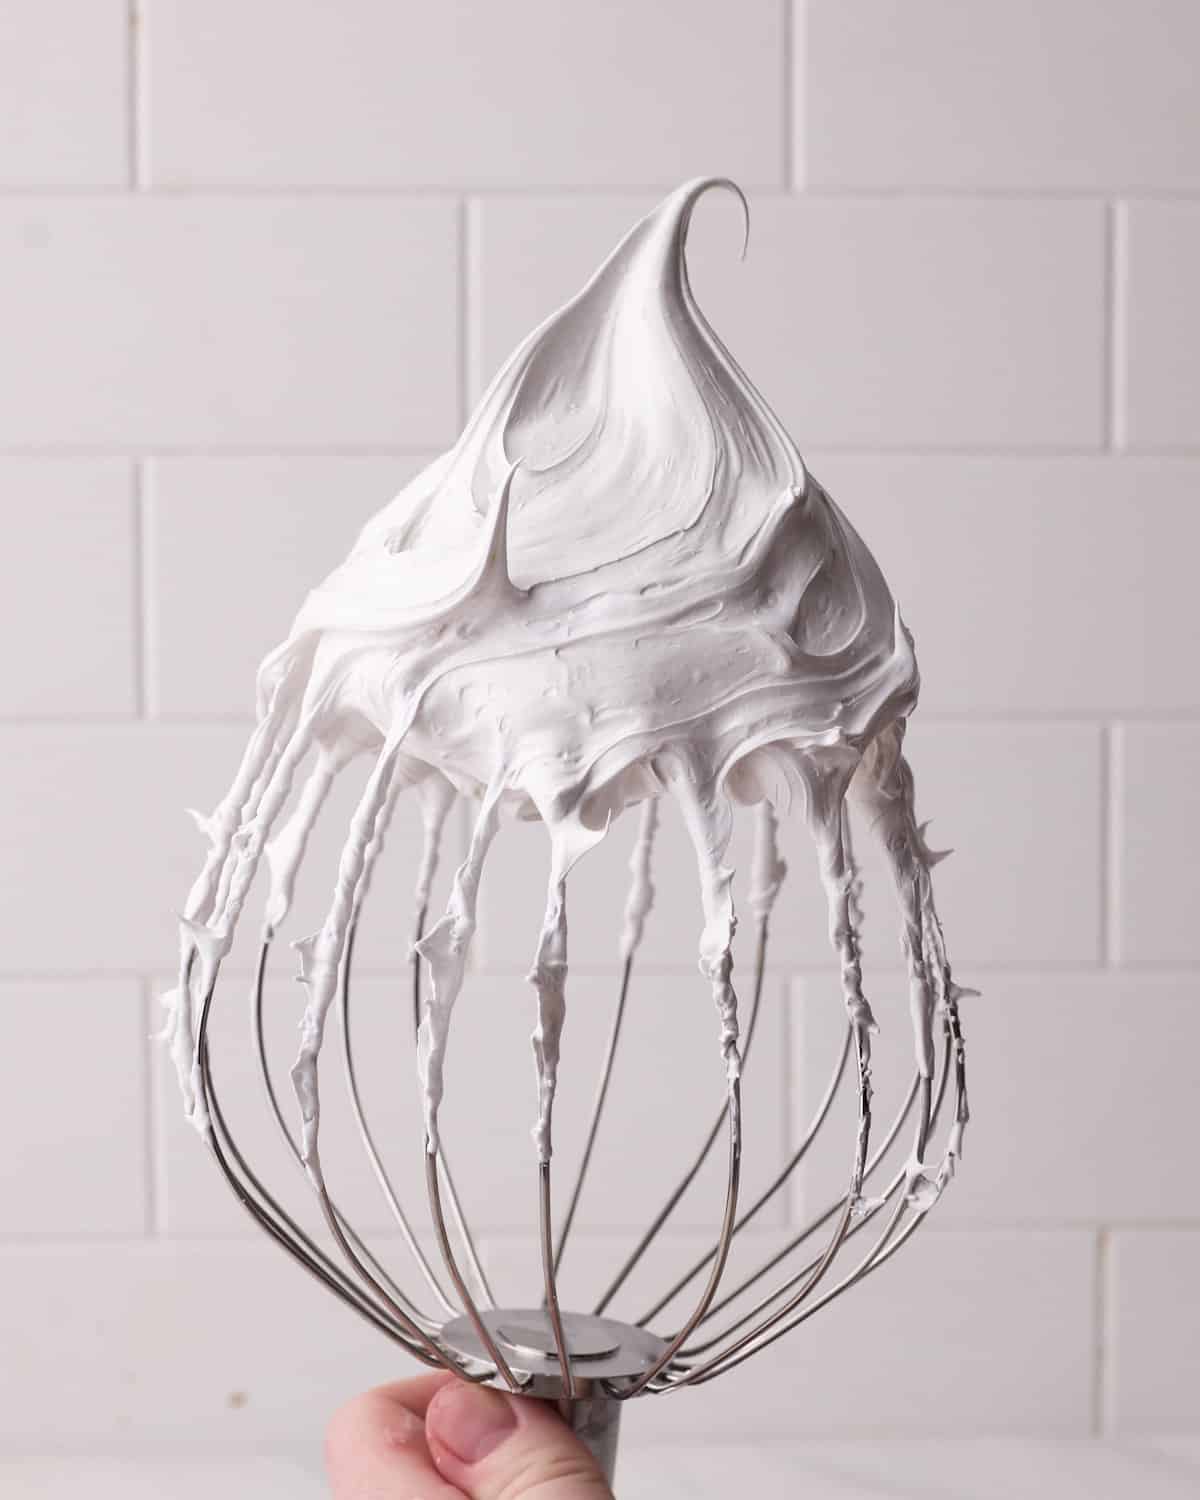
Whip the Meringue
Transfer the mixture to the bowl of a stand mixer with the whisk attachment. Whip on medium speed for about 30 seconds, then increase to medium-high or high speed.
Continue whipping until the meringue thickens and the bowl feels cool to the touch. Depending on your mixer, this can take anywhere from 5 to 10 minutes.
To check if it's ready, lift out the whisk. The meringue should hold stiff peaks that stand upright with just a slight curl at the tip. If the peaks droop or slide off the whisk, continue whipping for another minute or two before checking again.
If the meringue looks ready but the bowl is still warm, don't stop whipping - it will continue to strengthen as it cools, making a much more stable topping. You can turn the speed down slightly if you are concerned about overwhipping.
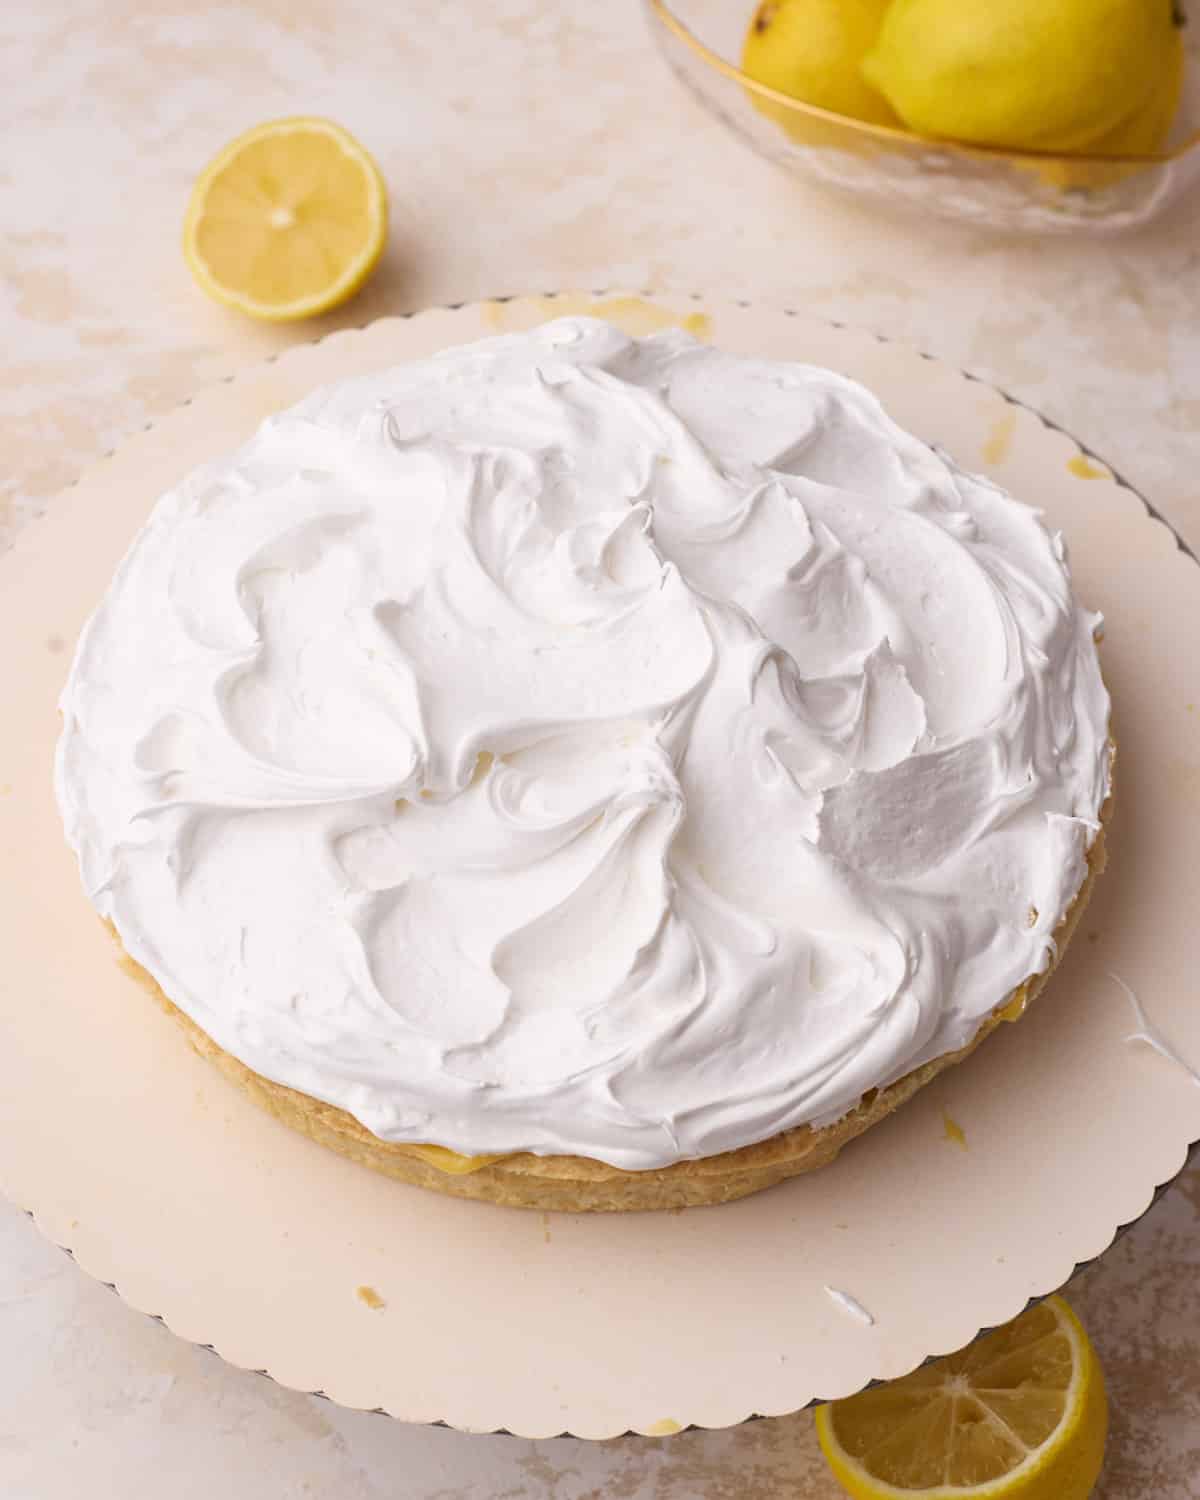
Decorate the Pie
Dollop a few scoops of Swiss meringue on top of the lemon pie and spread it all the way to the edges of the crust to completely seal in the filling.
Then pile the rest of the meringue into the middle and use an offset spatula or the back of a spoon to spread it out and make large swoops and peaks. Don't spread it out too flat, a big generous pile of meringue in the. middle gives that classic lemon meringue pie look.
I like to lift straight up as I pull away to make tall peaks that toast beautifully. There is no right or wrong way to do this - toasted meringue looks gorgeous no matter how neat or messy it is.

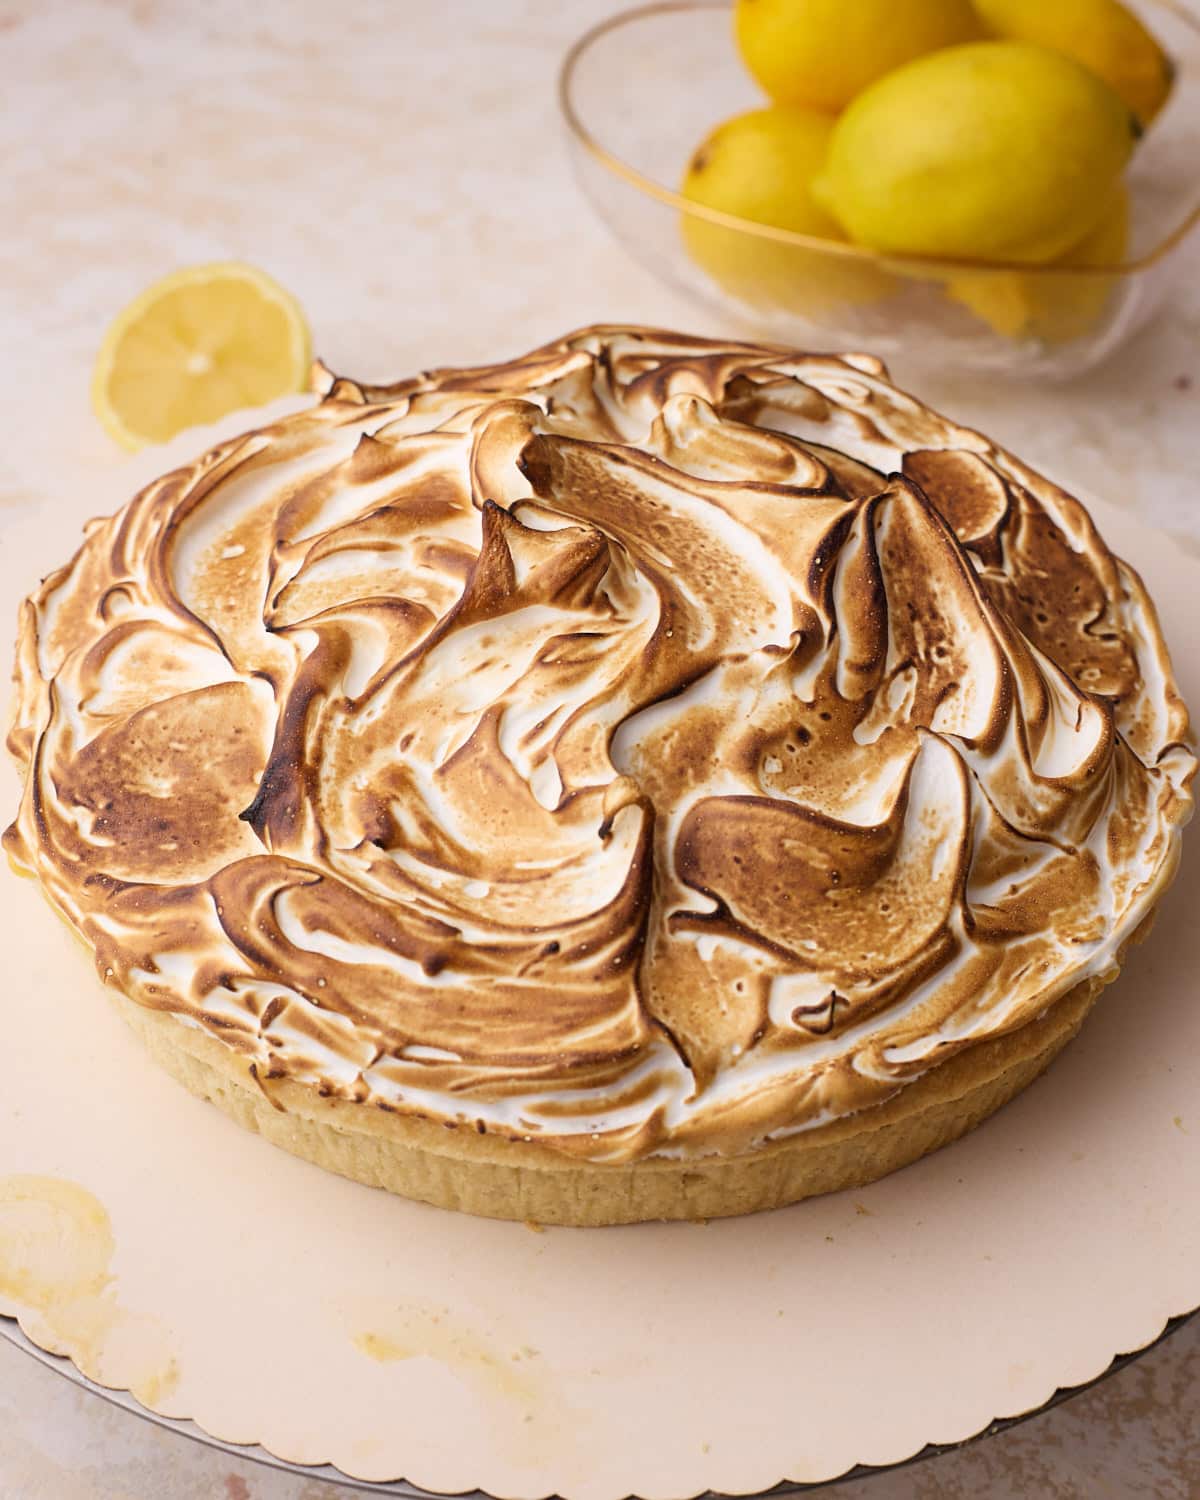
Toast the Meringue
Use a kitchen torch to toast the meringue until golden brown. Hold the tip of the flame a few inches away from the meringue and keep it moving in small circles rather than holding it in one spot. The peaks will brown first, followed by the valleys, creating lots of beautiful contrast and toasted flavour.
Don't be scared to go a little darker than you think - let the meringue develop some deep golden brown patches for the best toasted marshmallow flavour and professional look.
No Kitchen Torch?
If you don't have a kitchen torch, you can toast the pie under a very hot grill (broiler). Keep a close eye on it, as the meringue can brown in under a minute and the colour develops very quickly.
A kitchen torch gives much more control over the color and means you don't expose the lemon filling to another blast of heat, but the grill trick will work in a pinch. Just make sure the pie is thoroughly chilled before putting it in the oven, and don't take your eyes off of it once it's in.
serving tip
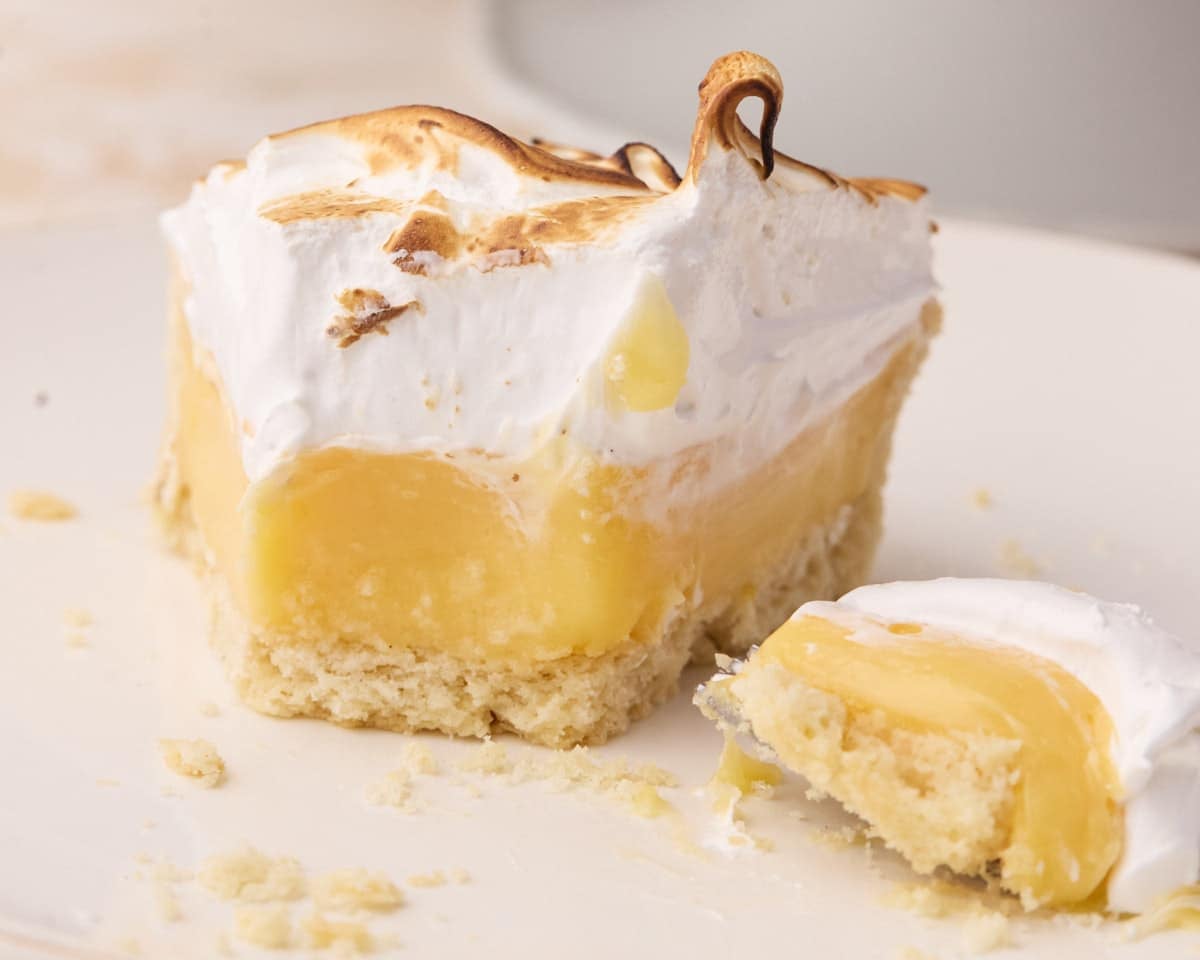
How To Get Clean Slices
This pie slices best straight from the fridge. Warm a sharp knife in hot water, wipe it dry, then clean the blade between each slice. Make sure you push all the way through the bottom of the crust.
Troubleshooting
Lemon Meringue Pie has a few elements that could go wrong. If something doesn't seem right, here are the most common issues I see and how to avoid them:

Filling Didn't Set
Likely cause:
The filling wasn't cooked long enough for the starches to fully activate.
Fix:
Once thickened, let the filling bubble for 1-2 minutes with thick, bursting bubbles.
Meringue Won't Whip
Likely cause:
Yolk or fat in the egg whites, or sugar not fully dissolved.
Fix:
Make sure there is no trace of yolk in your whites, and heat until totally smooth.

Gritty Meringue
Likely cause:
Sugar has not fully dissolved into the egg whites.
Fix:
Heat and whisk the egg whites until completely smooth with no sign of grittiness. (160°F / 71°C).

Lumpy Filling
Likely cause:
The egg yolks got too hot, too fast, and curdled. (Scrambled egg).
Fix:
Temper the yolks slowly and whisk constantly once back on the heat. You can also strain some lumps out.
Storage
Lemon Meringue Pie is a great make-ahead dessert as the filling needs time to chill anyway. For the absolute best results, I like to make the meringue on the same day as serving, but the whole pie can be assembled and stored up to 24 hours in advance. Store it in the refrigerator in an airtight container lined with paper towels to absorb any moisture.
Make Ahead Instructions:
Fully Assembled Pie - Up to 24 hours in advance. Though meringue may soften a little overnight, so it's best made on the same day.
Lemon Filling - The filling can be made up to 2 days in advance. Pour it straight into the pie crust while warm, then cover with plastic wrap and refrigerate until ready to use.
Swiss Meringue - Best made right before decorating, though 2-4 hours in advance can also work. I don't recommend making this the night before as it won't spread as smoothly.
Can you freeze it?
Meringue pies are one of those desserts I don't really recommend freezing. Meringue does not like big temperature changes, and it can weep and lose its texture when frozen and defrosted.
Leftovers:
Leftover slices of lemon meringue pie can be stored in the fridge for up to 3 days. The meringue may soften a little, but it will still be delicious.
FAQ
If you have a question about this recipe that isn't answered here, please write it in the comment section, and I will get back to you as soon as I can.
This is an unbaked lemon meringue pie. The lemon filling is fully cooked on the stovetop before being poured into the baked pie crust, then chilled until set.
Instead of baking the meringue, it's topped with Swiss meringue and toasted with a kitchen torch. I developed it this way to create a silky filling and a more reliable meringue, without baking the finished pie again.
I don't recommend it. The pie would technically work, but the flavor would not be the same. A lot of the lemon flavor comes from lemon zest, and bottled lemon juice just never tastes as good as fresh lemon juice.
Yes, your pie crust should be fully baked before you make the filling. This is an unbaked pie filling, which means the crust will not be going back into the oven at any point and needs to be totally baked first.
If you don't want to blind bake a pie crust, you can just buy a ready-made pie crust or tart shell that is already fully baked.
Absolutely! Italian meringue would work beautifully with this pie. I just chose Swiss meringue because the process is a little bit simpler and doesn't require handling hot sugar syrup.
It is possible to toast the meringue under a very hot grill (broiler), but make sure the pie is fully chilled first, and don't take your eyes off it as the meringue can brown in 30-60 seconds.
A kitchen torch gives you much more control and doesn't risk curdling the filling - but the grill method will work in a pinch.
Show Me Your Bakes!
If you make this recipe, please tag @bonni_bakery on Instagram or send me a photo - I love seeing all your creations.
Want your bake featured on the blog? You can also upload a photo here.
More Pies and Tarts
If pie is your jam, check out some of my other delicious pie recipes:


Lemon Meringue Pie Recipe
Ingredients
- 1 Pie Crust (fully baked) try my shortcrust pastry or flaky pie crust
- 200 g (1 cup) Granulated Sugar (Caster Sugar)
- 40 g (4 tablespoon) Cornstarch
- ¼ teaspoon Salt
- 180 ml (¾ cup) Lemon Juice juice from about 4 lemons
- 60 ml (¼ cup) Water
- 2 tablespoon Lemon Zest
- 6 Egg Yolks
- 113 g (1 stick) Unsalted Butter cubed
- 6 Large Egg Whites (approx 180g) room temperature
- 300 g (1½ cup) Granulated Sugar (Caster Sugar)
Equipment
- 9-inch Tart Pan or Pie Dish
- Stand Mixer with Whisk attachment
Instructions
- If using homemade pastry, fully blind bake the pie crust or tart shell before beginning. This recipe works really nicely in a shortcrust pastry case, or a flaky pie crust.1 Pie Crust (fully baked)
- The lemon filling needs time to chill and set before adding the meringue on top, so plan ahead. It's best to make the lemon filling the day before and make the meringue on the day you plan to serve the pie.
- Add the dry ingredients to the saucepan, including the sugar, cornstarch, and salt. Mix together.200 g (1 cup) Granulated Sugar, 40 g (4 tablespoon) Cornstarch, ¼ tsp Salt
- Add the lemon juice, water, and lemon zest and whisk everyting together until combined.180 ml (¾ cup) Lemon Juice, 60 ml (¼ cup) Water, 2 tbsp Lemon Zest
- Cook over medium heat, whisking constantly, until the filling becomes clear and starts to boil. Let it boil with thick bubbles bursting on the surface for 1-2 minutes. It should be glossy and very thick. Important Note: The filling must be actively boiling for 1-2 minutes in order to fully activate the cornstarch. If it stops bubbling when you whisk it, you can stop and start whisking every few seconds in order to let it boil.
- In a separate bowl, lightly whisk the egg yolks together. Gradually add a large spoonful of the hot lemon filling into the yolks and whisk it in, then repeat with 3-4 more spoonfuls of filling. It's important to do this gradually to temper the egg yolks, so they heat up gradually and don't scramble.6 Egg Yolks
- Add the remaining lemon filling into the yolks and whisk until smooth. Pour everything back into the saucepan over medium heat and cook for a further 1-2 minutes, whisking constantly until smooth and glossy. Don't let it boil this time.The filling should be thick enough that it falls from the whisk in ribbons.113 g (1 stick) Unsalted Butter
- Remove the filling from the heat and whisk in the butter, a few cubes at a time, letting it melt into the filling fully before adding the next cubes.
- Pour the lemon filling into the baked, cooled tart shell or pie crust and smooth it out into an even layer. Cover with plastic wrap touching the surface, and chill for at least 4 hours, preferably overnight.
- Place the egg whites and sugar in a heatproof bowl set over a saucepan of simmering water to make a double boiler (bain-marie). Make sure the bottom of the bowl doesn't touch the water. Whisk constantly until the sugar has completely dissolved. Rub a little between your fingers - it should feel completely smooth with no grittiness at all. A thermometer is not necessary, but if you'd like to use one, the mixture should reach 160°F (71°C).6 Large Egg Whites, 300 g (1½ cup) Granulated Sugar
- Transfer the mixture to a stand mixer with the whisk attachment fitted. Whip on medium speed for 30 seconds, then increase to medium-high. Continue whipping until the bowl feels cool to the touch and the meringue forms thick, glossy stiff peaks. This means that if you lift the whisk out, the peak should stand upright with just a slight curl at the tip.If the meringue reaches stiff peaks and the bowl is still warm - keep whipping until it is cool.
- Take the lemon pie out of the fridge and remove the plastic wrap. Add a little of the Swiss meringue on top of the filling and spread it out into a thin layer, making sure to go all the way to the edges to seal in the filling. This helps to prevent weeping.
- Put the rest of the meringue on top in the middle of the pie and use an offset spatula or the back of a spoon to spread it in a swooping motion to make swirls and peaks. There is no wrong way to decorate a meringue pie!
- Use a kitchen torch to toast the meringue. Hold it a few inches away so the tip of the flame is just dancing on the surface of the meringue, and keep it moving in circular motions, rather than holding it in one place. Don't be scared to go a little darker than you think for this, you want a variety of deep toasty golden brown colour on there.
- Serve right away and enjoy!
Hi, I'm Jules!
I'm a Scottish ex-bakery owner sharing my tried and true dessert recipes and expert tips to help you whip up impressive desserts at home.
Check out my baking blog and try a few recipes.
Or just lick the screen a little...
Happy Baking!