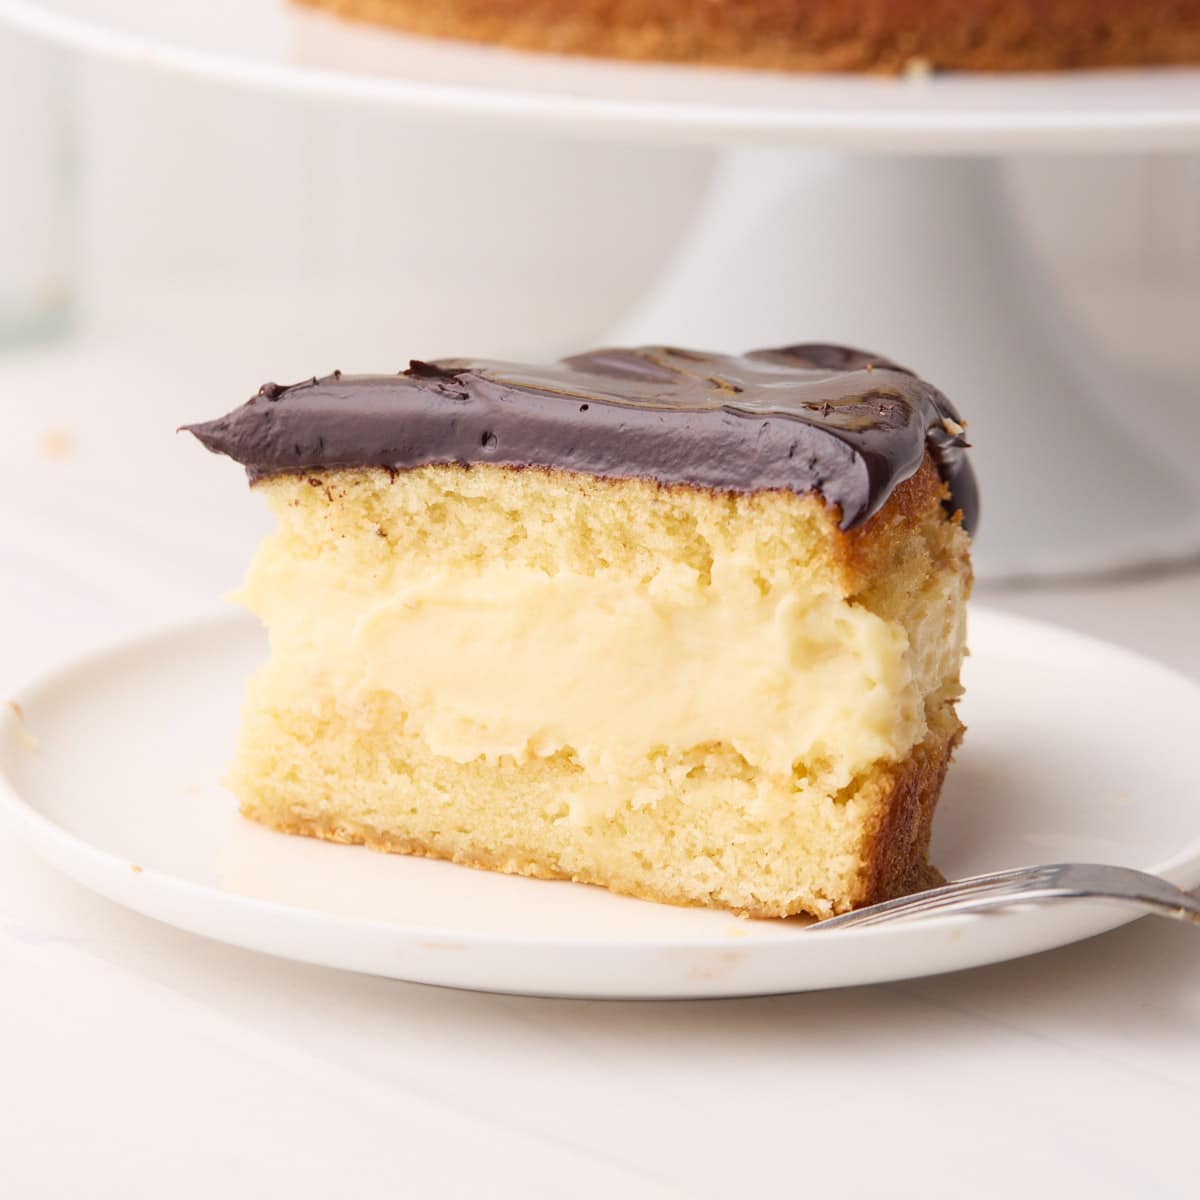

Boston Cream Pie Recipe
Two layers of fluffy vanilla sponge cake filled with homemade pastry cream filling and topped with a decadent chocolate ganache - an absolute classic!
Servings: 12 slices
Ingredients
For the Pastry Cream
- 5 (5) Large Egg Yolks, (medium if in the UK) room temperature
- 1 (1) Large Egg, room temperature
- 100 g (½ cup) Granulated Sugar, (caster sugar)
- 40 g (⅓ cup) Cornstarch, (cornflour)
- 480 ml (2 cups) Milk
- 2 teaspoon (2 teaspoon) Vanilla Extract
- 1 tablespoon (1 tablespoon) Butter, 14g
For the Sponge Cake
- 2 (2) Large Eggs, room temperature
- 200 g (1 cup) Granulated Sugar, (caster sugar)
- 120 ml (½ cup) Milk
- 57 g (½ stick) Butter
- 113 g (1 cup) Cake Flour
- 1 teaspoon (1 teaspoon) Baking Powder
- ½ teaspoon (½ teaspoon) Salt
- 1 teaspoon (1 teaspoon) Vanilla Extract
For the Chocolate Glaze
- 120 ml (½ cup) Heavy Cream, (double cream)
- 130 g (4.5 oz) Dark Chocolate, chopped
- 2 teaspoon (2 teaspoon) Corn Syrup, (optional)
Instructions
Make the Pastry Cream
- You need to make the pastry cream ahead of time so it has a chance to chill. I recommend making at least 2 hours in advance, but it's even better if you can leave it overnight. This is my classic crème pâtissière recipe made with a few small tweaks to help the custard layer to hold its shape and give nice, clean slices.
- Whisk the egg, egg yolks, sugar, and cornstarch together in a large bowl until they are pale and thick.
- Add the milk and vanilla to a saucepan over medium heat, stirring occasionally until the milk is scalding hot. This means that there is steam rising from it and you can see tiny bubbles appearing on the surface. Do not let it boil.
- Slowly drizzle the hot milk into the egg mixture a little at a time, whisking as you go. It's very important to do this gradually to temper the eggs - this means bringing the temperature up slowly so that the eggs don't scramble.
- Once all the milk has been added to the eggs, pour the whole mixture back into the saucepan and continue to heat, whisking gently but constantly until the custard begins to thicken and you can see thick, slow bubbles bursting on the surface.
- Let the pastry cream boil for 1-2 minutes, it should be noticeably thicker.
- Remove from the heat and pass the pastry cream through a sieve into a bowl, just in case there are any lumps.
- Add the butter and mix it in until combined.
- Cover the pastry cream with plastic wrap with the plastic touching the surface of the custard. Let cool, then put in the refrigerator for at least 2 hours.
Make the Sponge Cake
- Preheat the oven to 340°F / 170°C (150° fan-assisted) and grease an 8-inch cake pan.
- Sift the dry ingredients into a bowl, including the flour, baking powder, and salt. Mix together and set aside.
- In a stand mixer with the whisk attachment fitted, whip the eggs and sugar together on high speed for 5 full minutes until they are thick, pale, and doubled in volume. If you drizzle the batter on top of itself, it should leave a little trail.
- Meanwhile, warm the butter, milk, and vanilla either in a saucepan over medium heat or in the microwave in 15-second bursts. It should be just hot enough that the butter melts - do not let it boil.
- Add half of the flour mixture to the egg/sugar mixture and fold it in gently. You can either do this by hand with a rubber spatula or continue to use the whisk attachment on the stand mixer with the lowest speed setting.Then add the other half of the flour mixture and repeat. Be very careful not to knock too much air out of the batter.
- Gradually pour the hot milk mixture into the cake batter. If you are folding by hand, add a little milk at a time and fold gently. If you are using a stand mixer, keep it on the lowest speed setting while you slowly drizzle the milk in. Again, be very careful not to overmix or knock too much air out of the batter.
- Scrape down the bottom of the bowl to make sure everything is incorporated.
- Pour the sponge cake batter into the prepared cake pan and bake for 30-35 minutes or until a skewer inserted in the middle comes out clean.
- Let cool in the pan for 10 minutes, then invert onto a wire rack to cool completely.
Assemble the Boston Cream Pie
- Once your cakes have completely cooled, slice them in half so you have two thinner layers.
- There are a few ways to stack and fill your Boston Cream Pie. I find best way is with an adjustable cake ring, but there are other options if you don't have one. See the post above for alternatives to a cake ring and pros and cons of each option - including using a cake pan and acetate, and simply piping the pastry cream into the cake.
- Place one layer of your sponge cake inside the adjustable cake ring on top of a cake board or serving plate (see post above for alternatives if you don't ahve one).
- Take the pastry cream out of the fridge and whisk it gently to bring it back to a smooth consistency, then pour it on top of the cake and smooth it out into an even layer.
- Place the other half of the cake on top and press it down very gently, just so it adheres to the custard.
- Chill the cake for at least 2 hours to allow the pastry cream to set again. It's best to put some plastic wrap over the top of the cake to stop it from drying out in the fridge.
Make the Chocolate Glaze
- To make the glaze, heat the cream until scalding hot - either in a saucepan or in the microwave.
- Pour the hot cream over the chopped chocolate and stir together until the chocolate has completely melted and you have a glossy ganache.
- If you are adding the corn syrup, add it in now and stir into the glaze. This is optional, but it will make your glaze nice and shiny. Let the glaze sit for a few minutes to thicken up before pouring onto the cake.
Glaze the Boston Cream Pie
- If you want a neat layer of chocolate glaze that doesn't drip down the sides of the cake, you can pour the glaze on top while your cake is still in the cake ring/pan. However, I like the look of it dripping down the sides slightly, so I remove my cake from the ring first (once it has had time to completely set).
- Pour the chocolate glaze on top of the cake and smooth it out to the edges. If you want drips down the side, you can gently encourage it to go over the edge.
- Put the glazed Boston Cream Pie back into the fridge for at least 30 minutes so the glaze can set, or until you are ready to serve.
Notes
Make the custard filling ahead of time so it has a chance to chill.
Store your finished Boston Cream Pie in the fridge in an airtight container for up to 3 days. If you plan to make it ahead of time, you may also want to soak the sponge cakes with simple syrup to stop it from drying out in the fridge.